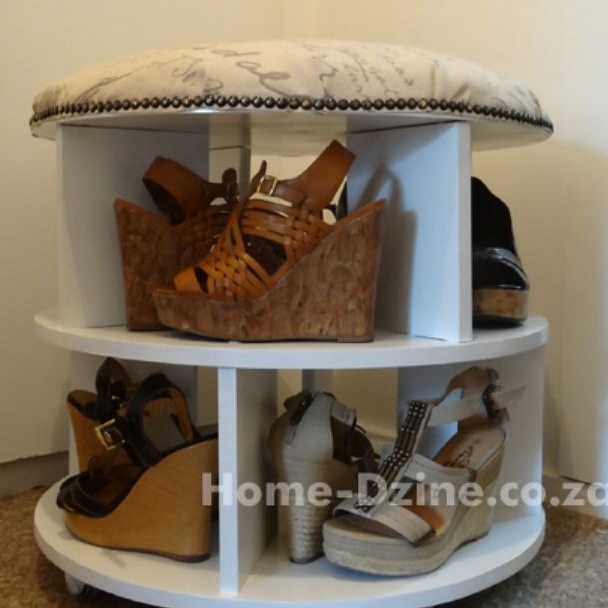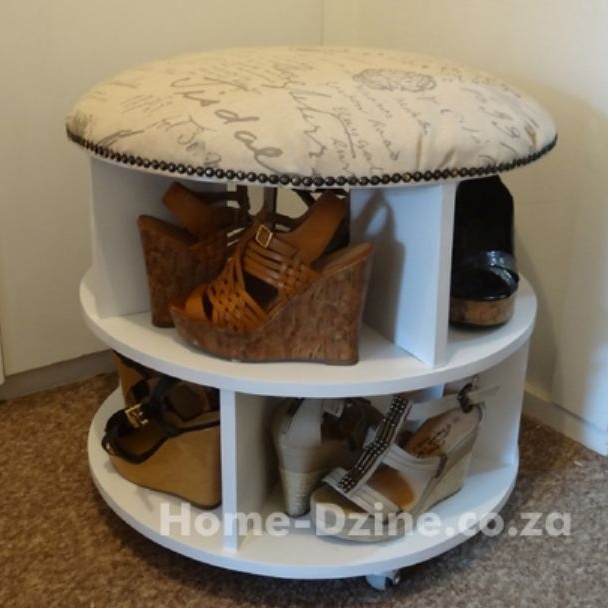
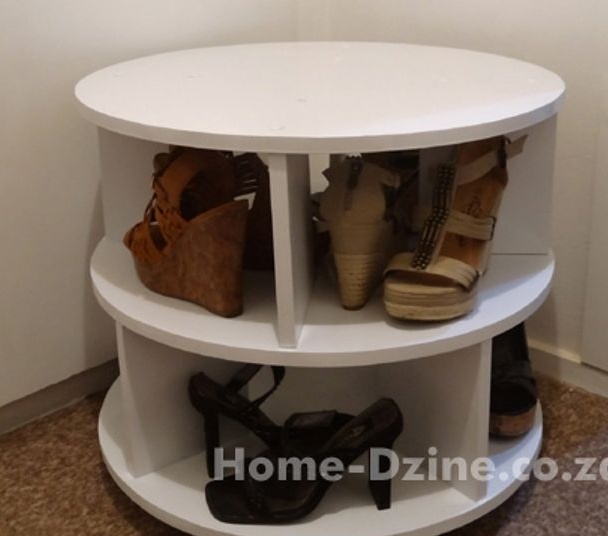
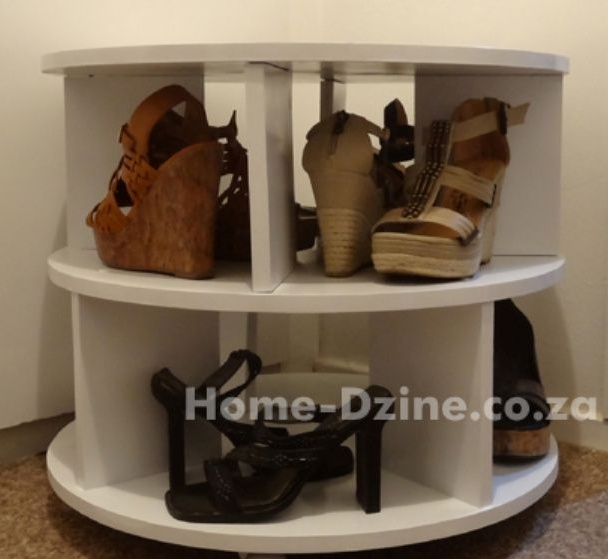
The author of this master class decided to make a cabinet for shoes and an ottoman in combination. If you have a lot of shoes, you can abandon the soft seat and arrange several tiers at once. Thus, you will receive an original rack that is convenient to use.
For the manufacture of cabinets, any solid sheet material, such as chipboard, is suitable. The author used sheets 12 mm thick. Below, instead of classic legs, wheels are provided so that the product can be turned and it is easy to find the right pair of shoes.
So, in order to make a cabinet for shoes on wheels do it yourselfyou will need:
1. Materials:
- three circles of durable sheet material such as chipboard with a diameter of 600 mm: for the base, shelf, and also for the base for soft sitting;
- eight dividers 160x200 mm .;
- wood screws or furniture screws (you can use decorative pads on the heads of screws or use putty);
- glue on wood;
- paint on wood white;
- varnish on wood;
- foam rubber;
- batting or thin soft foam rubber;
- upholstery fabric;
- four furniture wheels and screws for fastening;
- paint brushes for paint, varnish and glue.
2. Tools:
- electric drill with a drill on wood;
- electric screwdriver;
- jigsaw;
- a grinder or ordinary sandpaper;
- furniture stapler;
- construction tape measure;
- clamps;
- scissors;
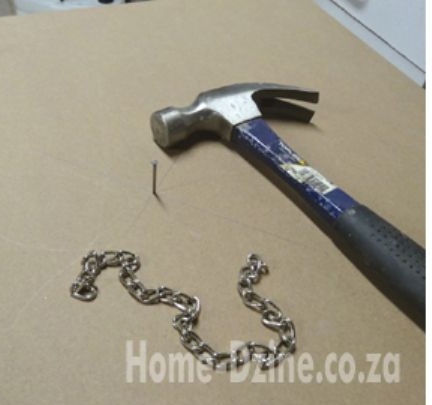
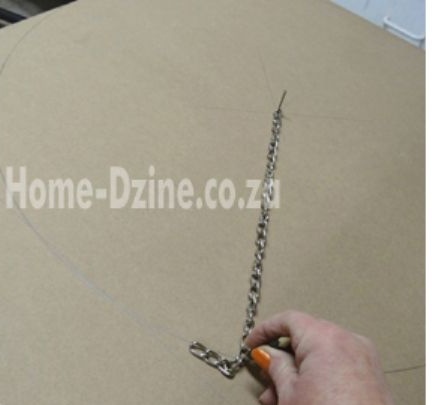
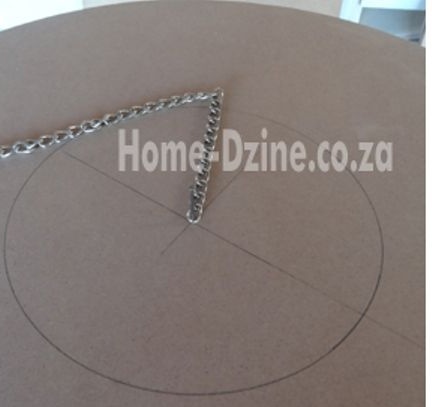
- a nail, a hammer and a piece of thin chain for an impromptu compass;
- marker or pencil.
Step 1: Parts Production
Start manufacturing load-bearing parts from sheet material.
First draw a circle with an impromptu compass. To do this, hammer in a small carnation in the center of the proposed circle, put on it a chain 300 mm long and pass a pencil or marker at the last link. This simple technique saves a lot of time.
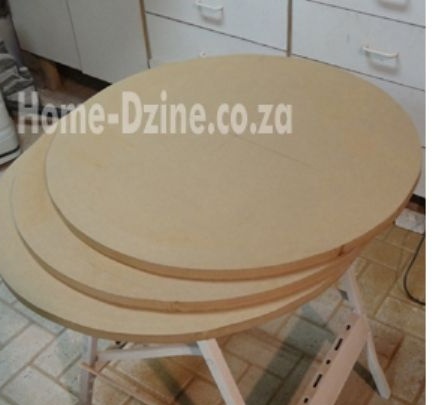
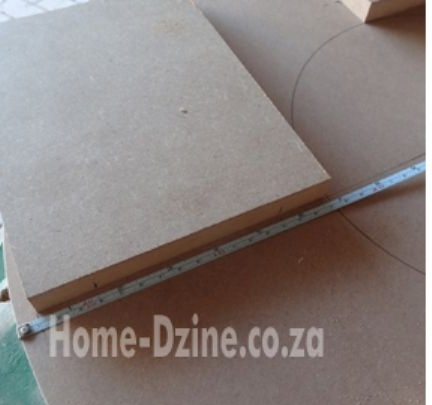
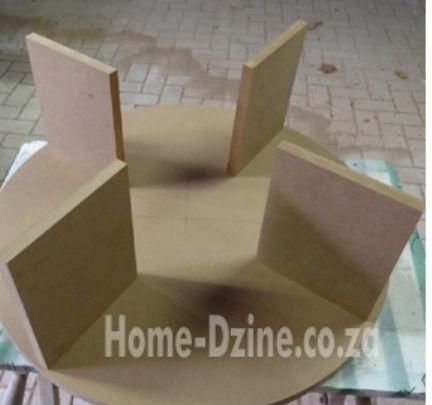
Draw three circles and cut along the contour with a jigsaw. The first circle will serve as the basis of the cabinet under the wheels, the second - the shelf, and the third - the base of the soft seat.
Mark on the chipboard sheet the dividing details of the cabinet 160 by 200 millimeters. In total there should be eight of them. Cut the dividers using a jigsaw.
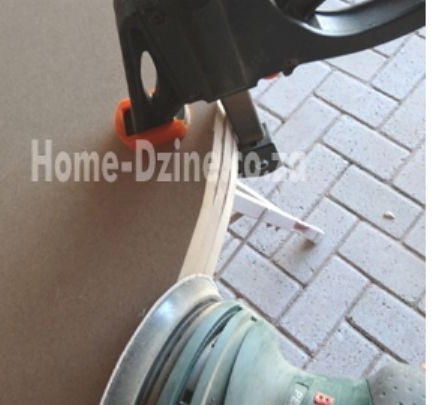
Step 2: Grinding
Despite the fact that the chipboard has a perfectly even surface, in places of sawing it requires careful grinding. Moreover, all the details of the cabinet have to be painted.
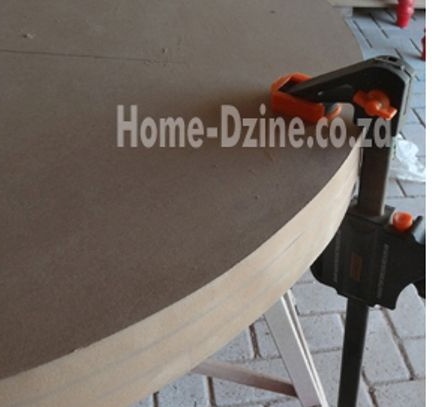
In order to ensure that all elements are the same and neat, as well as to facilitate the work process, use clamps as shown in the photo before proceeding with grinding.
Step 3: Assembly of the structure
So, all the details of the cabinet are prepared properly, and you can start assembling the structure.
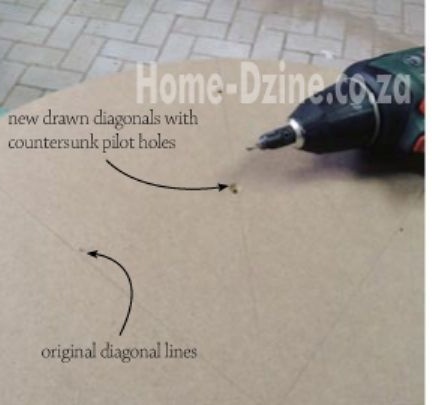
To do this, draw a smaller circle in the center of each circle — 130 mm in diameter. It should be located at a distance of about 17 cm from the edge of the circle of chipboard.
On the dividers, in the places of their attachment to the plane of the circle, drill two holes for the screws: at a distance of 4 and 14 cm (see photo).
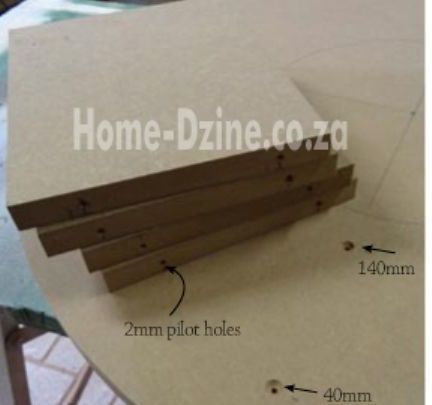
Mark on a circle the attachment points of the dividers and make the corresponding holes. You can also drill a hole for the screw cap so that later they can be puttied and thus hide the joints.
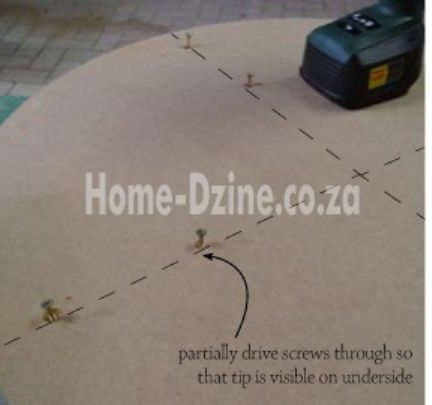
To screw the dividers to the circle, screw into the holes on the screw so that the tip of each screw is visible from the opposite side. Flip the circle. Install the dividers in a circle so that the tips of the screws go into the holes on the ends of the dividers. Tighten the screws fully. This is the top of your cabinet.
The author also advises to glue the ends of the separators with wood glue to make the joints even more reliable. Be sure to remove any glue residue with a damp cloth before it begins to harden.
Similarly, make the bottom of the shoe stand.
Connect both parts using the middle shelf. On the remaining third circle, indicate the attachment points of the upper and lower tier dividers. Drill holes for the screw caps and, for starters, screw in the screws to secure the lower tier. Screw the shelf and proceed to join the upper tier.

Please note that all dividers for a couple of centimeters are recessed into the structure.
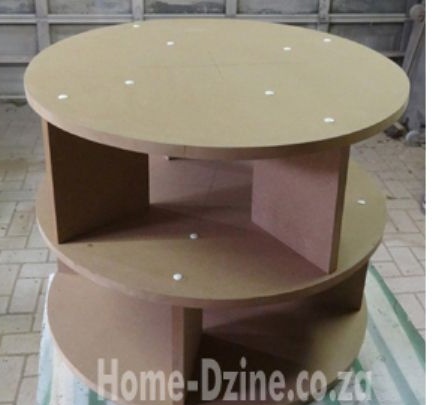
After painting, you can install decorative pads on the hats of the screws. Or process them with wood putty now. Wait until the putty is completely dry and sand the surface thoroughly with fine sandpaper.
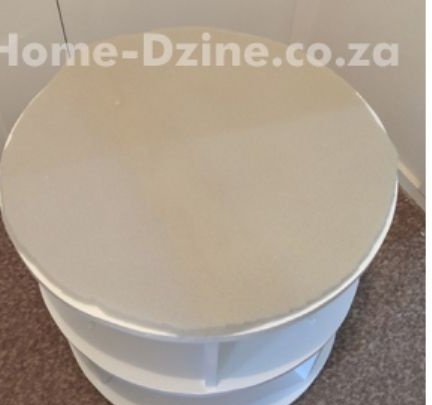
Step 4: Painting
The cabinet is almost ready. It remains to paint it and install furniture wheels.
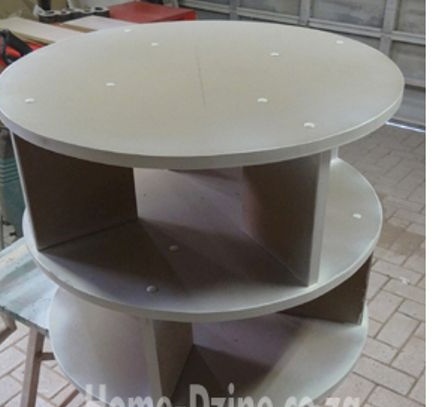
Start painting. The author used spray paint. You can follow his example or use a paint brush and roller.
Paint all parts thoroughly. Pay attention to the composition of the paint. If you carry out all painting work in a residential building, choose water-based paint. In any other case, you can use alkyd and combined compounds.
In order for the paint layer not to wear off and not to scratch, apply a couple of layers of varnish on top of it. To do this, apply the first coat, wait until it dries completely and lightly sand the surface with finely sandpaper. Then apply a top coat of varnish. So you get a coating that is very resistant to chemical and mechanical damage.
If you have not putty the places for fastening the parts of the cabinet with screws, then it’s time to fix decorative pads on the screw heads. It is better to do this before painting, since colorful substances may be incompatible with plastics and the paint will peel off very quickly.
The author, before attaching each of the linings, used a drop of glue for strength.
Step 5: Attaching the Wheels
The author used ordinary small furniture wheels. You can also use wheels in the color of gold or bronze, with additional decorative elements.
Turn the cabinet over and mark the points of attachment with a pencil. Use screws and a screwdriver to secure the wheels in place.

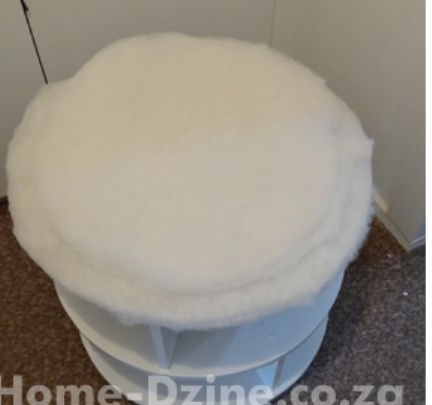
Step 6: Arrange a Soft Base
It's time to make the soft base of your cabinet. Cut the foam into the shape of the seat and try on.In this case, any foam rubber is suitable for work, including special - furniture. It features a longer service life and increased strength.
On top of the foam, put several layers of batting or thin soft foam, and your seat will become even softer.
Try on the upholstery fabric. Use any suitable fabric, including furniture or used fabric, which is at hand.
Cut the required round piece with an allowance and secure it to the seat with staples using a furniture stapler. In the process, evenly distribute the folds before attaching the next section of fabric. Pre-tuck the edges of the fabric, baste and iron so that you can work with it easily and simply.
[center]

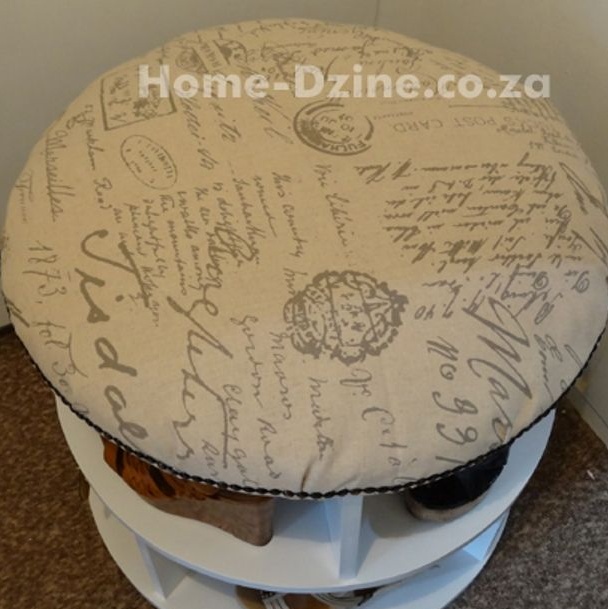
Use decorative nails or moldings, as the author did, to add a finishing touch.