Dear visitors of the site, from the material presented by the author, you will learn how to independently make a transforming table for an arbor from a 30x80 mm board.
The author built a gazebo in his summer cottage and decided to place a garden in it
furniture, but it should be compact and not take up much space inside the arbor. He began searching for drawings on the Internet, as usual it is very rarely possible to find something sensible, there are a lot of sites, and there is no sense in "zilch". In general, from all that I found useful on the network, I had to think a lot and tweak it, compose my own. The author’s table turned out to be excellent, than he decided to generously share with us.
I used different types of boards for the table: birch, pine, aspen, but it is best to take solid types of wood for example birch, because the table and two benches are designed for 6 people, that is, the design must withstand high loads.
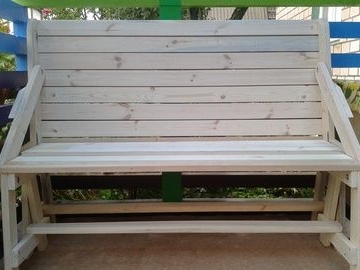
The advantage of this table is that it folds compactly into a bench with a back and back into a table with two benches, it takes up little space when folded.
And so, let's consider what exactly is needed for the manufacture of a transformer table?
Materials1. board 30x80 mm of different species (it is better to take birch boards)
2. metal corners
3. wood screws
4. carpentry glue or liquid nails
5. varnish
6. stain
7. bolts M12
8. nut
9. washer
10. nails
Instruments1. hacksaw
2. screwdriver
3. drill
4. hammer
5. ruler
6. pencil
7. roulette
8. protractor
9. corner
10. brush
Step-by-step instructions for creating a transformer table do it yourself.As already mentioned above, the author first built a gazebo on his summer cottage and decided to acquire garden furniture.
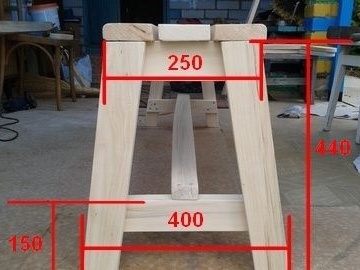
After a long search on the Internet for a suitable drawing, I got down to work, first drew leg patterns directly on the floor, you can also use a sheet of plywood.
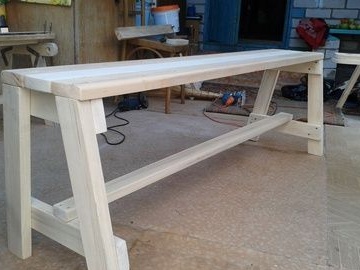
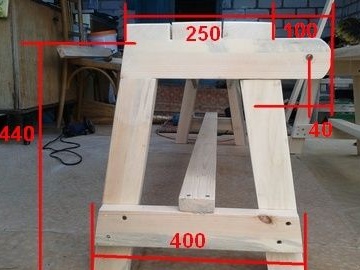
Further, it cuts the boards according to size, the author used different types of wood: aspen, pine, birch, but it is best to take solid wood. Please pay attention! There will be two benches, namely internal and external. First of all, the master makes an outdoor bench, he indicated all the detailed sizes directly to us in the photographs, which is very convenient to notice. The height of the legs is 440 mm, the width of the legs in the bottom 400 mm is very good for the stability of the bench.
Attention is an important point!the length of the inner cross member is 150 mm, once again recall
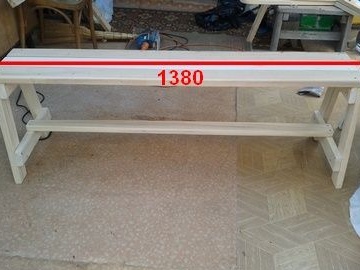
The cross member is located inside.The length of the outer bench is 1380 mm, all workpieces should be sanded carefully before being directly assembled and bevelled so that the surface is smooth, even, as they say "Without a hitch"
The bench turns out to be simple, and the master makes the fastening with the help of wood screws, wood glue and for greater reliability adds metal corners, since the design must be extremely durable.
So, move on) Now you need to collect
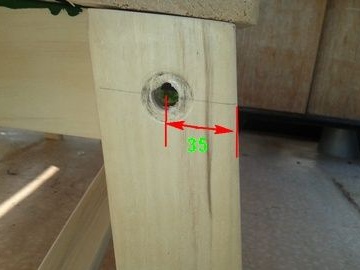
Inner bench Note! The height of the legs on both benches should be exactly the same, but the cross-member fastening the legs is brought out and its length is accordingly increased to 400 mm, the length of the upper bar is 350 mm where a hole for the M12 bolt is drilled at a distance of 40 mm from the edge and reamed to recess the bolt head into cavity board, so that nothing comes out. The author indicated all the necessary sizes directly on the photograph.
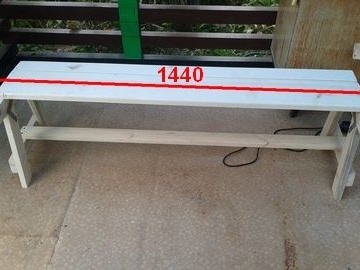
The length of the bench is 1440 mm, but in each individual case the sizes can vary, because everyone does it for themselves, but as a standard we use the sizes presented by the master.
Holes are drilled in the upper bar.
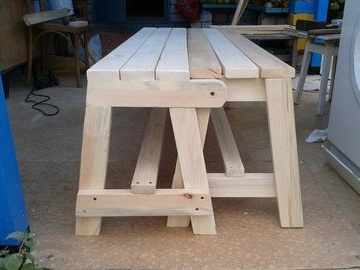
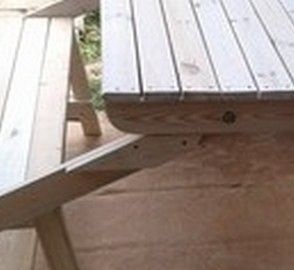
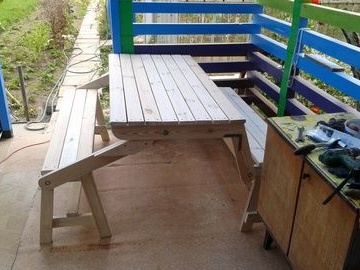
After both benches are ready, they need to be tried on and one should go into the other with a small gap (see photo)
That is, two benches when folded should create one whole.
That's actually what should happen in the end.
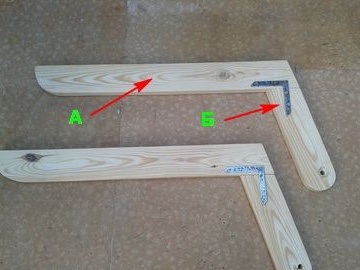
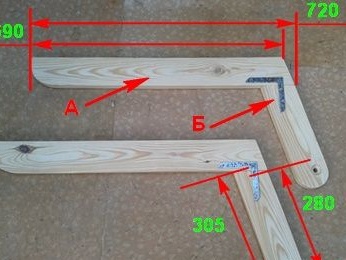
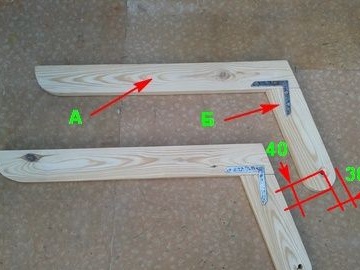
We sorted out the benches a bit, now we turn to the consideration of further actions of the author, namely the manufacture of brackets from timber. The angle of the two bars should be about 100-105
0 (see photo) where the “A” beam is responsible for the width of the tabletop, and the “B” beam is the height from the top of the bench to the tabletop.
The author indicated all the necessary sizes in the photograph.
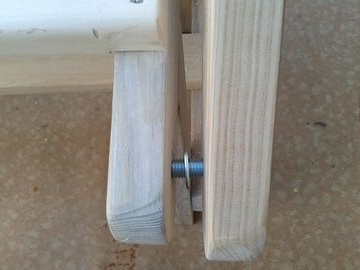
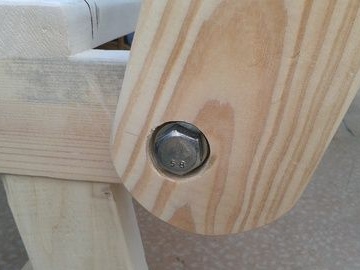
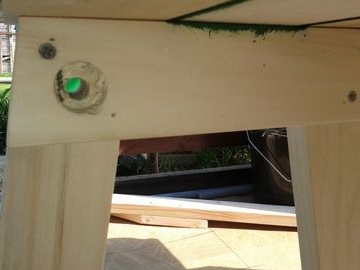
A hole for a M12 bolt is drilled in timber “B” and drilled to drown the head in the cavity of the wood.
After that, the obtained brackets should be connected to the internal bench, put a washer at the junction so that there is no pairing.
The bolt head is recessed into the drilled hole.
The same thing from the opposite side.
In general, 2 brackets that are responsible for the height and width of the countertop are thus fixed.
Then both brackets should be aligned exactly.
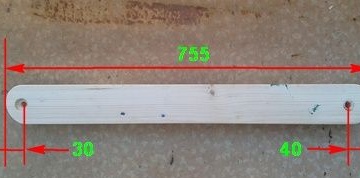
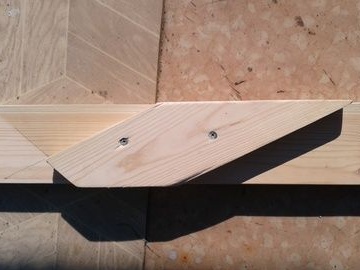
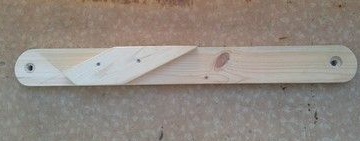
But now the fun begins)) you need to connect the countertop to the outdoor bench, this is done using a straight bar, its dimensions are shown in the photo.
2 pieces of data are required to be made, the author suffered for a long time to get the exact size in the fitting process, so that in each individual case there may be errors. To begin with, the master drove nails along the edges of the planks and using them made markings, that is, drove a nail so that he stuck out a little on the other side and made a mark, and then drilled a hole for the M12 bolt
Everything must be carefully adjusted first, and then calmly drilled, as they say, "Measure seven times, cut once."
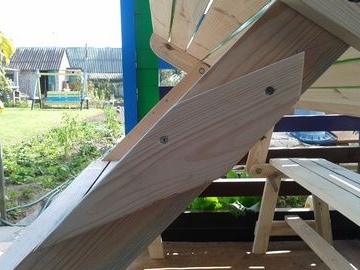
It is imperative that you make a limiter on this bar so that the countertop does not leave you, for example, it looks like this for the author.
That is, when unfolding, it will fix the countertop in a level position and will not give further progress.
As you can see, everything is quite simple, a piece of the board is cut off at a certain angle and attached to the bar with 2 screws.
For complete symmetry, the same thing is done on the second bar.
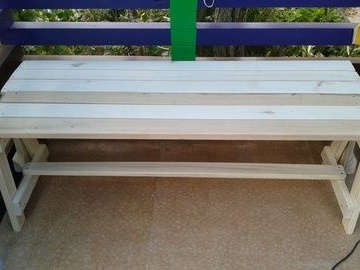
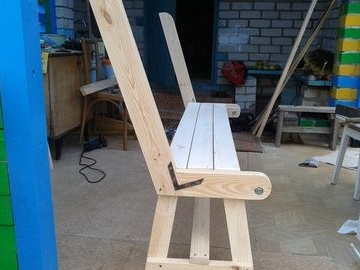
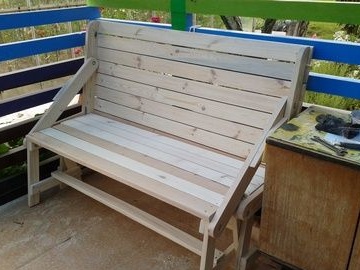
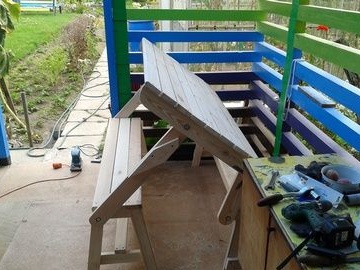
That's actually what turns out as a result of the author's work.
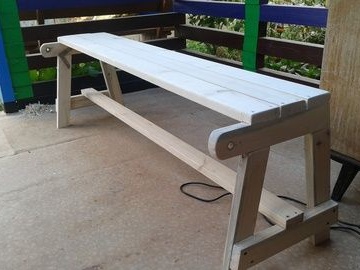
This transforming table is compactly placed in the corner of the gazebo in its folded state.
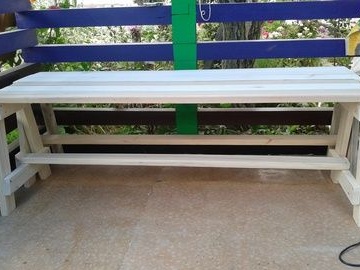
Actually what happens, the countertop turns into the back, and the two benches are connected into a single whole by insertion into each other.
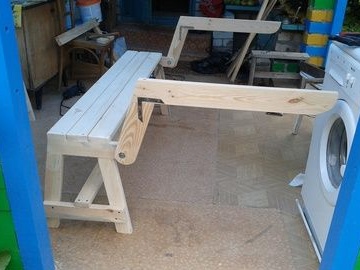
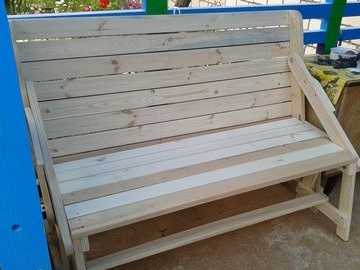
And if necessary, lay the table and arrange a "Feast of the Mountain" just pull the bench and the table unfolds.
Voila)) and you're done.
The undeniable advantages of the table-transformer is of course its compactness.
The author advises using wood to make a table of hard rock, for example, birch. This design is designed for 6 people when unfolded, so that everything should be extremely reliable. The joints are further strengthened by metal corners.
Of course, making such a wonderful table is rather difficult, but you are presented with all the necessary sizes and descriptions, which the author did not have and he collected information all over the Internet. So we take and do) Dare friends!
This concludes the article. Thank you all for your attention!
Come visit often and do not miss the latest in the world of homemade goods!