
The article presents another version of the flying wing. The peculiarity of the model is that its flight characteristics are universal. She can fly with or without an engine. Among other things, model perfectly holds in a strong wind and it can be fought with similar models. According to the author, the assembly cost of the model will not cost much, and the creation process is quite simple.
Materials and tools for homemade:
- 1 sq. M. ceiling tiles (thickness 3 mm);
- carbon fiber rod or rail 50 cm long;
- ceiling sheet 5 mm 50 cm x 8 cm;
- one bamboo stick;
- a piece of balsa 3 mm;
- glue, scissors, clerical knife, ruler, etc.
From electronics:
- D1811 3800 rpm engine (or its analog C1818);
- 12A regulator;
- batteries 360 mA / h;
- Two servos of 3.6 grams of type SO362;
- screw 5X3.
Model launch video:
Model manufacturing process:
Step one. Making a wing
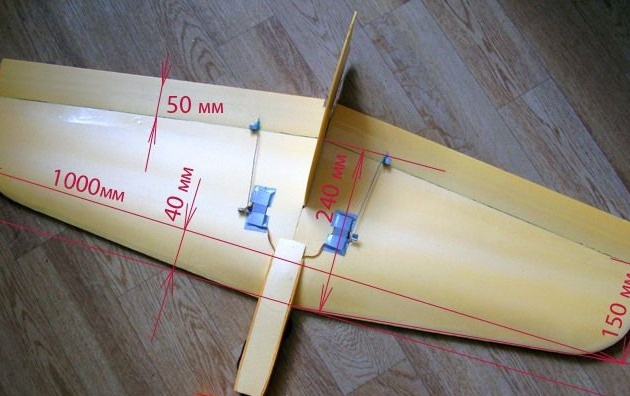
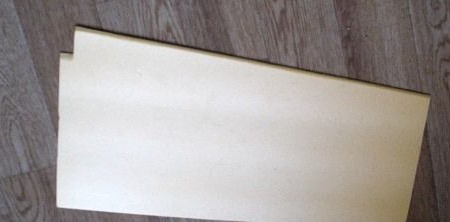
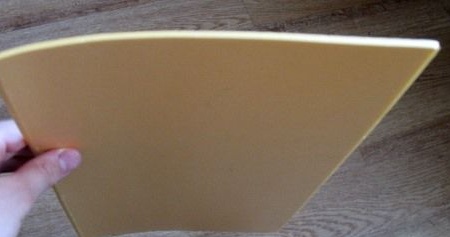
First, the drawings need to be transferred to the foam and carefully cut. The ends must be rounded. Then the parts are glued together and lines are drawn.
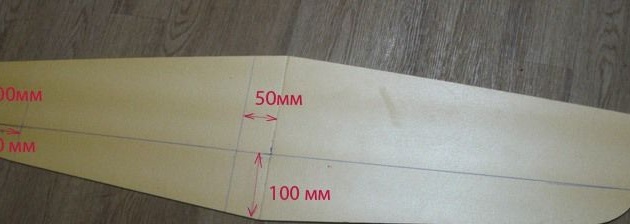
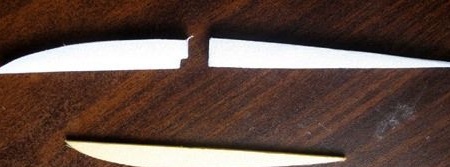
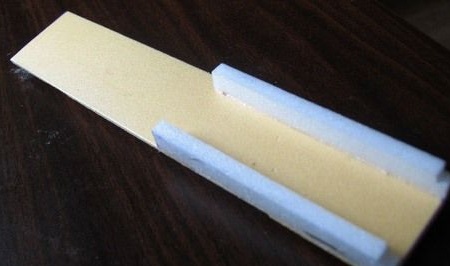
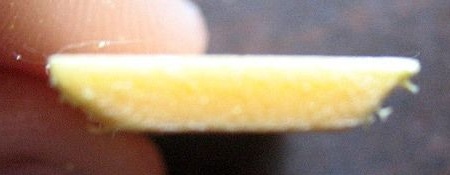
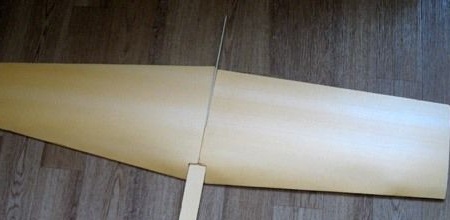
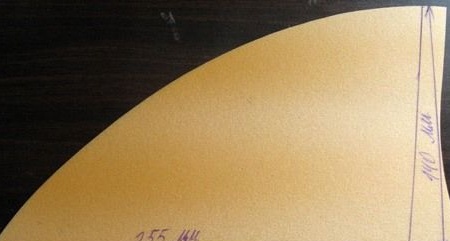
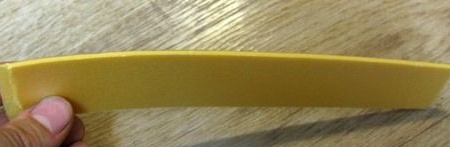
From the ceiling tiles of 5 mm, you need to make two strips. The length of the strip is 410 mm, the width of one edge should be 8 mm and the other 12 mm. Now you need to draw a line and butt this line to glue the manufactured parts from the 5 mm ceiling.
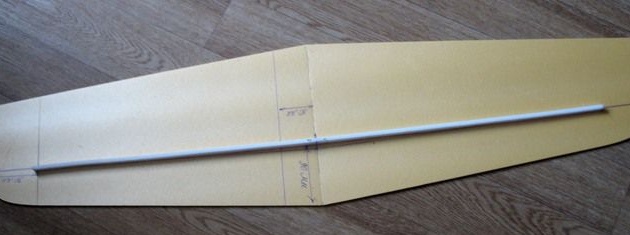
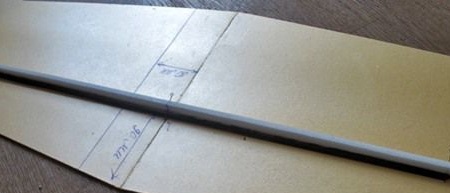
Now, a distance of 4 mm needs to be stepped back from the trailing edge, and with the help of sandpaper, grind the foam at an acute angle. Before the foam spar, you need to lay a rail or carbon fiber rod. To do this, draw a line in the middle. It is glued with glue.
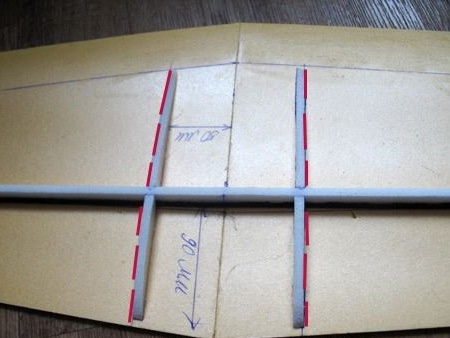
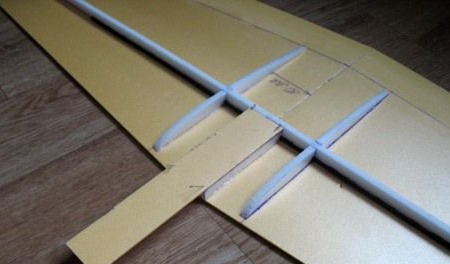
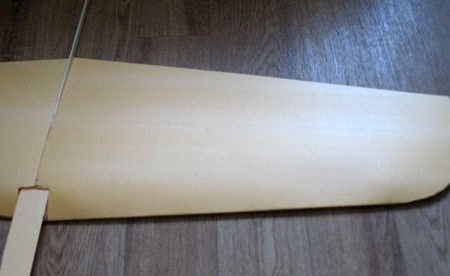
Step Two Rib making
Ribs need to be attached to the place where they need to be cut and draw a line. In this case, from the leading edge to the beginning of the rib should remain 5 mm, and the rear end should be on the sharpening line.
Well, then the details need to be glued along the lines that were drawn earlier.
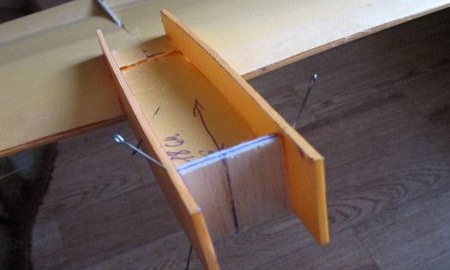
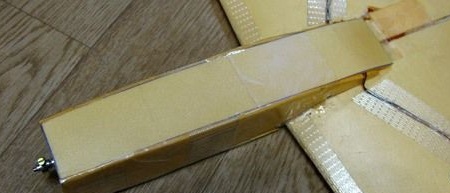
Step Three Battery compartment and winding
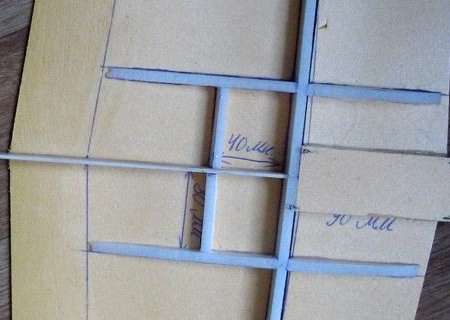
For the battery compartment, a 5 mm ceiling will be needed, two rectangles 82 mm long and 9 mm high must be made from it. The width of the battery, depending on its size, you need to make a strip 180 mm long.
Then these parts stick together. Well, then the design is glued to the wing base.
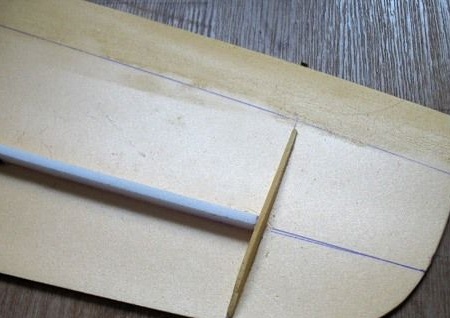
Next, from a balsa of 3 mm, you need to cut a strip with a height of 15 mm and a length of 290 mm, one end must be rounded. Now again, you need a ceiling tile 5 mm thick, from it you need to make two strips 8 mm high and 44 mm long.
Then everything is glued together again.
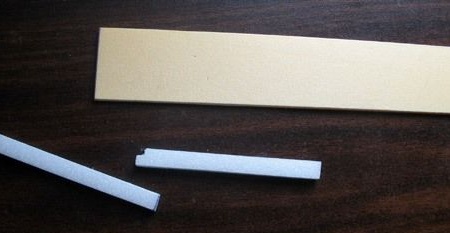
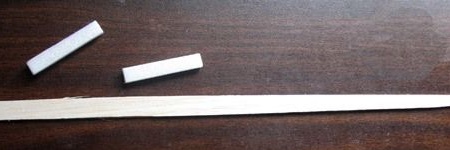
Of the three, you need to make two strips 1.5 cm long and a width such as a battery. Their angles should be sharpened at 45about.
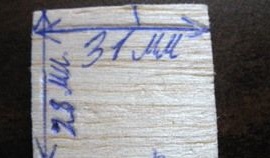
The winding is made of balsa or plywood, its height should be 28 mm, and the width is the same as that of the battery. If you put the engine more powerful, then its size will need to be done by others.
On the armpit you need to draw the center. Next, the winding is attached with glue to the strip that protrudes from the wing. The strips that were made earlier are glued to the undercoil from below and from above.
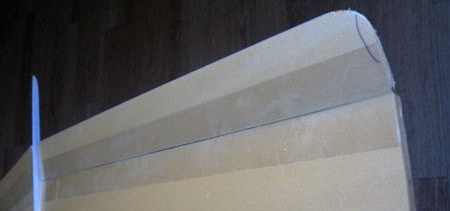
Step Four Glue the foam
At this stage, the author glues foam to the wing base. You need to draw a line along the leading edge, and also draw another line, stepping 25 mm from the trailing edge. Next, the resulting part must be superimposed on the upper part and note the distance to the strip, and also determine the place of the cut under the balsa keel reinforcement. As a result, the front edge of the manufactured part should be sharpened at an angle of 30about.
In the part where the part will be in contact with the protruding part of the wing, you will need to make a cutout. The part that is laid on the base must be ground at an angle of about 20about.
You can bend the part either using a building hair dryer or on a pipe.
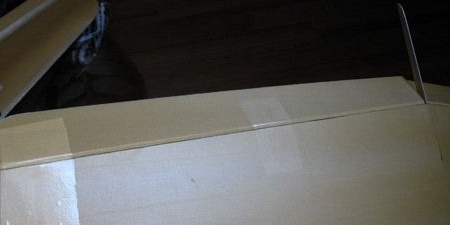
Ribs, the leading edge of the part, the side member, as well as the trailing edge of the base and the ends, must be oiled with glue. After waiting 2 minutes after applying the glue, the parts can be carefully glued. The second part of the wing is done in a similar way.
Any excess that will protrude beyond the initial edge of the part must be cut off. If there are bumps, they need to be processed with sandpaper. The leading edge is reinforced with tape for strength.
Further assembly of the model ...
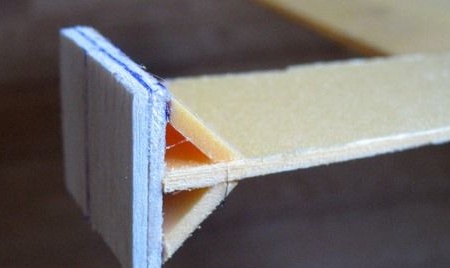
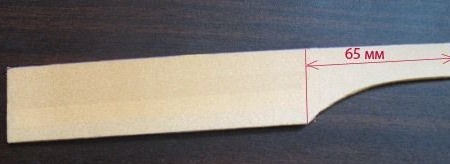
Two rectangles need to be cut from a 3 mm ceiling; their dimensions should be 185 mm x 30 mm. Having departed from the end of 65 mm, it is necessary to draw the formed wing profile. The shape needs to be cut. The second part is done in a similar way.
Now both plates need to be glued to the side of the part that protrudes from the wing. In this case, the thickness of the ceiling tile should remain from the upper part of the parts.
Below, the author glues half a bamboo stick and makes a hatch.
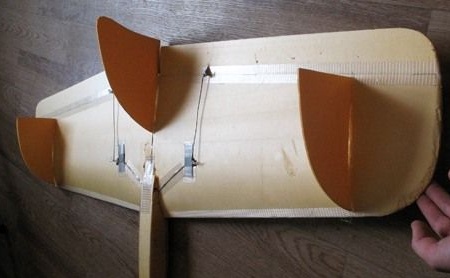
Next, ailerons are made, for this you need to measure the length of the trailing edge. The width of the aileron should be 50 mm. They are glued as in the photo, that is, this is an ordinary adhesive tape or reinforced.
The keel should be 255 mm long and 140 mm high. It must be glued to the protruding part from balsa. On this, the main part of the body can be considered manufactured.
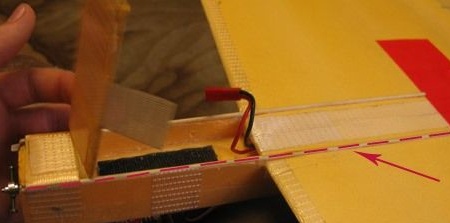
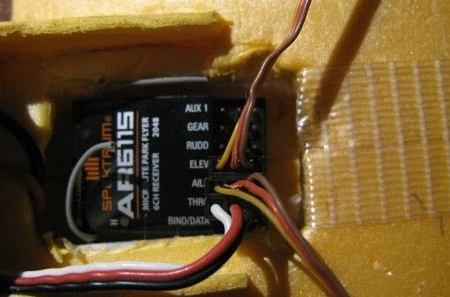
Step Five Electronics Installation
In the armpit you need to make a cut under the wires. The engine is mounted using self-tapping screws. Well, then you can insert the regulator.
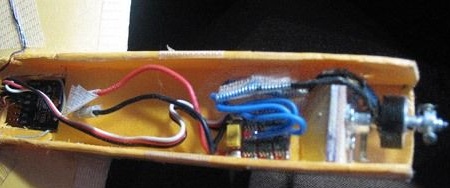
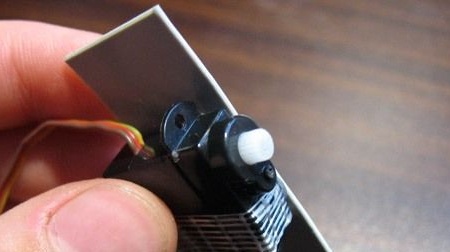
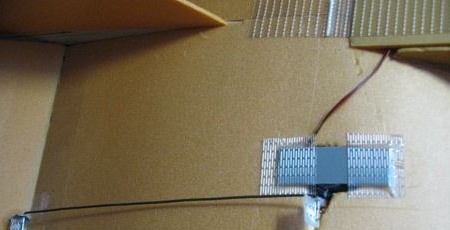
Servo motors are glued to a piece of plastic using hot melt adhesive. Determine the location of servomotors depending on the length of the wires. In the location you will need to make holes to the size of the servomotors. Well, then the plastic is glued with adhesive tape to the wing. After making the hogs and rods, everything connects together.
A hole must also be made under the receiver. After installation, you need to connect servos and a regulator to it.
To close the upper part, one more part needs to be made from the ceiling. The author sticks it with adhesive tape.
After installing the screw and adjusting the model is ready for testing.
According to the author, such models are quite strong. The author was able to use them to shoot down the “torik” in battle and another aircraft model of a classic design.
In addition, one day a raven attacked a plane and tore off its keel (defended its nest). Nevertheless, the plane managed to land even without a tail.
There was also a case when a model, in the event of a hardware failure, flew onto the roof of a 12-story building and lay there all night in the rain. However, the next morning, the author took it out and repaired it.
In conclusion, the author advises that when flying near the nests, the raven should put three keels at once, so that if the raven would tear off one, the plane would continue to fly.