
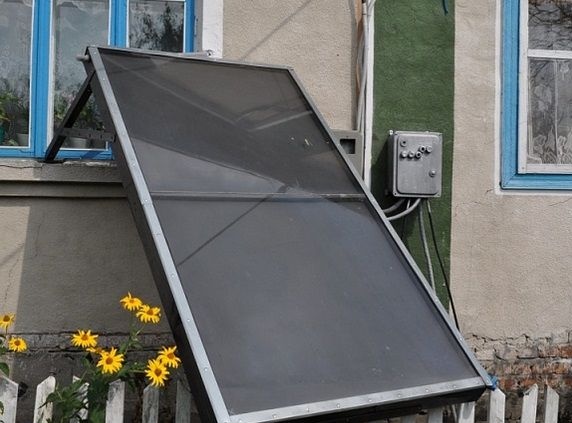
Here we will consider how to make a solar collector for heating water. With it, you can not only heat water for technical needs, but also, with some modifications, heat a small room by installing batteries. This helps to save energy, especially in spring and autumn, when the sun is shining, but at home you still have to heat and heat the water.
The peculiarity of this model is that it is assembled quickly, reliably and efficiently, and all the necessary details are in construction stores. Everything is done "brutally" and quickly, using a grinder and welding.
This assembly technique was developed specifically for the project of a German company called "Turn on the sun - live comfortably."
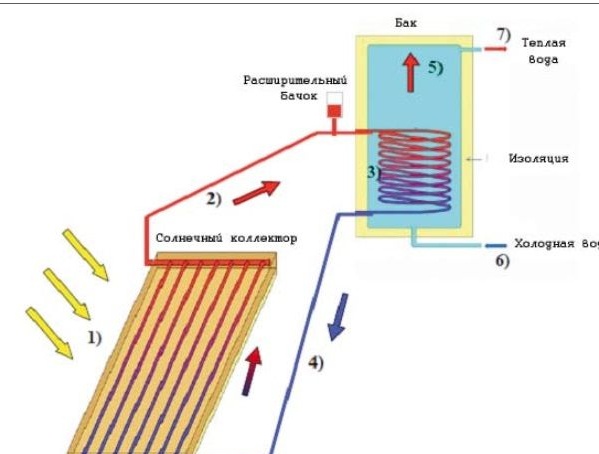
Such collectors work very simply. The dark heat-conducting element is heated from the sun and then transfers heat to the pipe with a coolant. Water or antifreeze can be used as a heat carrier. The latter is needed in order to operate the collector in winter.
The coolant can circulate either by itself or by means of a pump, specifically in this model, the liquid circulates itself due to the difference in temperature of the liquid in the pipes. A warmer liquid, expanding, tends to the tank, and a colder liquid again enters the collector and is heated by the sun.
Some craftsmen put a circulation pump to increase the efficiency and connect it to the solar battery, that is, the system still remains autonomous.
The scheme of work of the considered collector
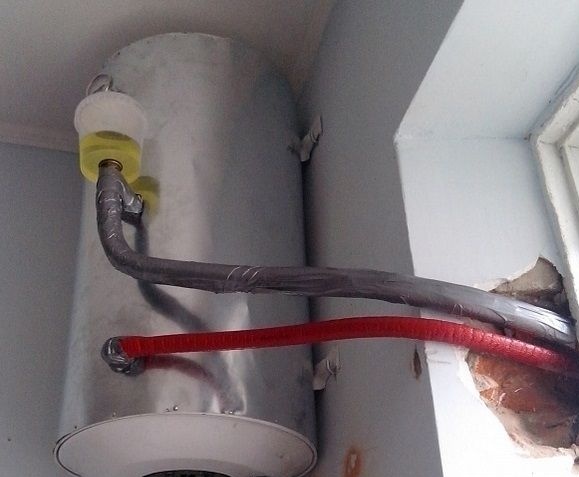
So, we have a solar collector that is connected to a heat exchanger. The heat exchanger is a spiral, which is located in the tank with heated water. That is, the water in the tank is heated not due to circulation through the collector, but thanks to the “spiral with a heat carrier” installed in it. This allows you to use not only water, but also antifreeze as a coolant.
Also, from the top of the tank, warm water is constantly withdrawn for household needs, and new cold water comes from below (as in "Titan").
Materials and tools for homemade:
- metal pipes (the author used square pipes from a hardware store);
- two round water pipes with threads for convenient connection of the collector;
- steel sheet (size depends on the size of the collector;
- wooden beam (to create a frame);
- glass, film or other materials for glazing;
- mineral wool or other insulator;
- silicone sealant;
- a tube or hose for the manufacture of a heat exchanger;
- a hose or pipes for connecting the collector to the tank;
- a tank for heating water (you can use an old gas cylinder, boilers, and so on);
- expansion tank;
- drill;
- grinder;
- welding;
- hammers, screwdrivers, screws and more.
The process of manufacturing a solar collector:
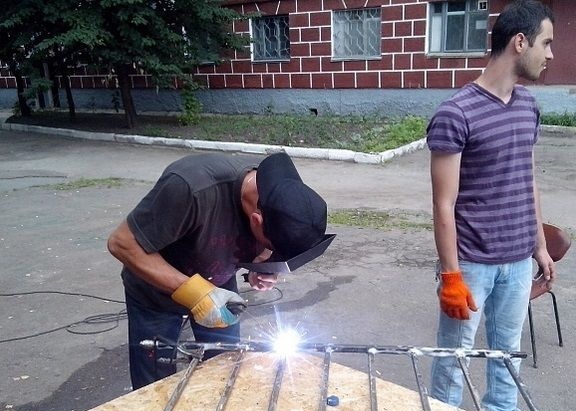
Step one. Coil Making
The coil in the collector is the second most important element after the absorber. It should conduct heat well. In this case, it is steel, the author welds it from metal pipes. Of course, the seams should be very high quality so that there is no leakage anywhere. The more pipes there are, the faster the collector will heat the water.
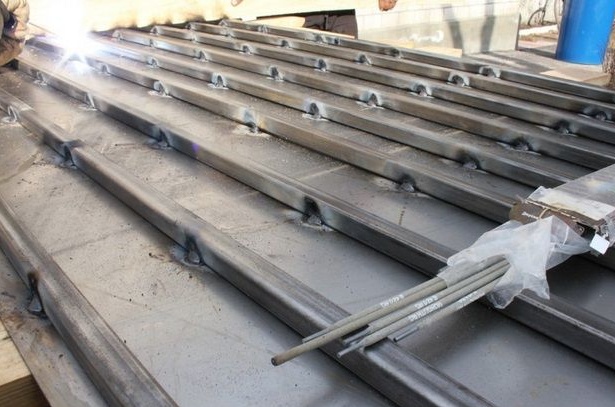
Step Two Installation of a coil on an absorber
The absorber here is made of a metal sheet, it is welded directly to the coil. Such a sheet, painted in black, heats up quite a lot and, as a result, the coil and water in it are heated with it.
Despite the fact that the collector will already have hot air, the contact between the pipe and the sheet of iron should be as good as possible, this increases the efficiency of the device.
It is important to note that the absorber is painted only with heat-resistant paint, any other will quickly burn out or even peel off.
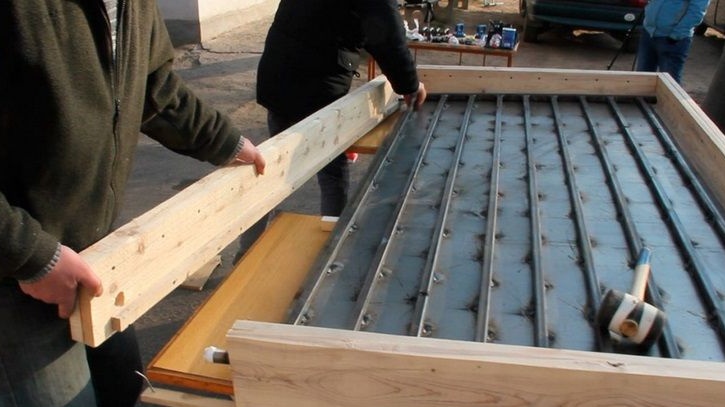
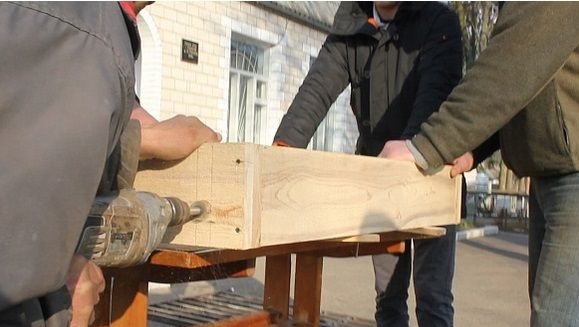
Step Three Collector frame manufacture
In order for the collector to work as efficiently as possible, the absorber must be isolated from rain and wind. Rain, like the wind, will cool the coil and it will not be able to warm the water as expected. In addition, air is heated in a closed system, that is, heat is accumulated.

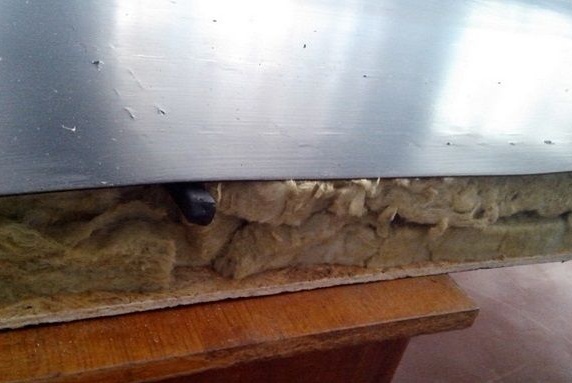
The author makes the frame from a wooden beam. It is important that there are no large gaps and everything is tight. Plywood, boards, or other suitable material are nailed to the bottom of the frame. Next, insulating material is laid, it can be mineral wool, polystyrene and more. All cracks in the frame, in the place where the back wall fits, must be sealed with silicone sealant, there should be no air leaks.
Well, already on top of the insulation you can install the absorber, it must be well fixed to the frame.
Among other things, in the frame you need to drill two holes for the pipes. Cold water will enter through one pipe, and hot will come out from another.
It should also be noted that when heated, the metal expands, so for the absorber in the frame you need to leave a couple of millimeters of space.
Before assembly, the frame must be treated with antiseptics, so the collector will last much longer. Outside, it can also be painted so that the tree does not get wet in the rain.
Step Four Glass installation
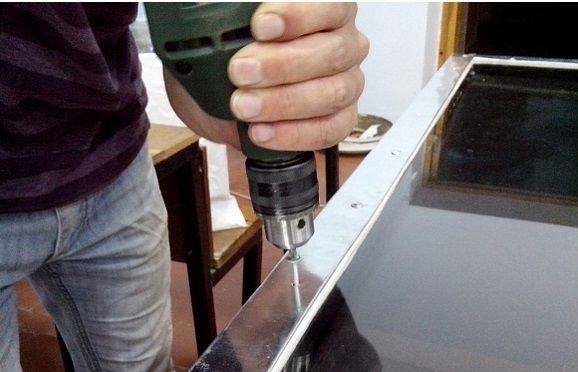
Old glass panes are suitable for glazing, it can be glass with the frame. In extreme cases, you can buy a transparent film. The author installs the whole glass, having previously placed the seal on the frame. The glass is fixed on top with galvanized metal and self-tapping screws.
Step Five Final stage
In conclusion, the collector must be installed and connected to the tank with a heat exchanger. An integral part in this design should be considered an expansion tank, since the liquid in the collector circulation system must always be kept at the right level, but when heated, it expands greatly. Excess coolant and will go into the expansion tank. In addition, the collector is charged with antifreeze or water through the expansion tank. The tank is attached to the highest point of the heat exchanger.
Homemade ready for testing. As a refinement, two thermometers can be installed here to monitor the efficiency of the collector and heat the water in the tank with a heat exchanger.