Dear site visitors, from the material presented by the author, you will learn how to independently make a full-fledged high-pressure mini-washer working with a 12 V screwdriver battery, you can also connect to a car battery through an extension cord with crocodiles.
All motorists know how constantly getting dirty
car, especially in spring and autumn, in the summer after rain. As the saying goes "Just left the car wash and then bang torrential rain," many have come across this. Every time you don’t run into a sink, it periodically runs up for a month, and without that you need money for gasoline spare parts, etc.
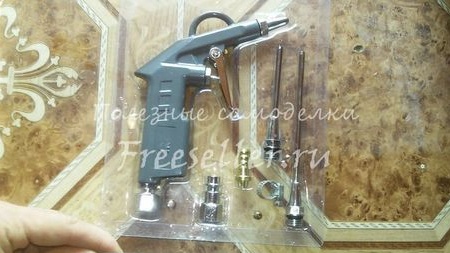
Car washing is allowed only at specially equipped stations, if you are in the city, but you still need to look for a way to save your money, and for this reason the author came up with a portable, compact mini-car wash. It consists of a high-pressure pump, an outlet of 8 atmospheres, a purge gun, a flexible hose, a battery from a 12V screwdriver, wires and a housing made of an ordinary plastic bucket, a container for water intake (bucket, canister, bottle) is also needed
The advantage of this sink: water intake from any tank, low consumption, the ability to work autonomously without a mains, thanks to the battery.
And so, let's carefully consider what exactly is needed to create a mini-high pressure washer?
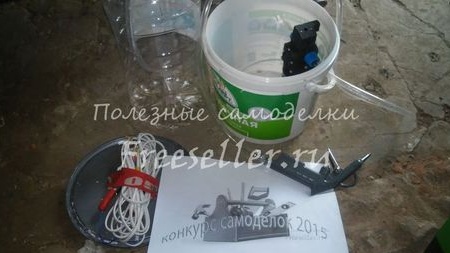
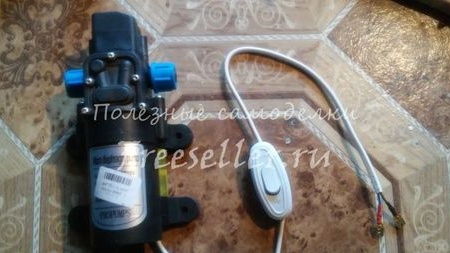
Materials1. high pressure pump 8 atmospheres
2. 12V battery from a screwdriver
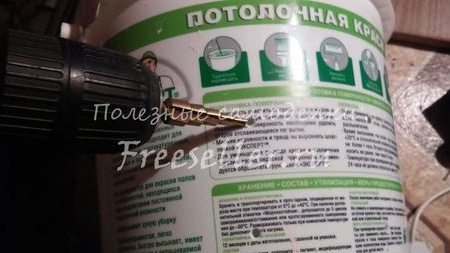
3. plastic paint bucket
4. wires
5. circuit breaker
6. contacts
7. solder
8. water tank
9. hose
10. jet from the Zhiguli carburetor
11. elastic band
12. bolts
13. nuts
14. washers
15. crocodiles
Instruments1. cone drill
2. stationery knife
3. screwdriver
4. soldering iron
5. pliers
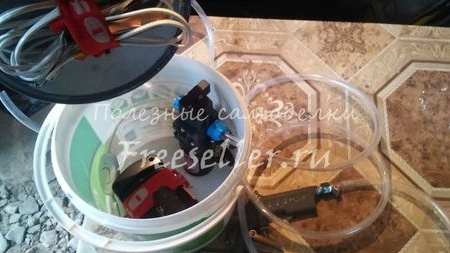
Step-by-step instructions for assembling a mini-pressure washer do it yourself.First of all, the author collects all of the above components in one place, so that it is convenient to work and everything is directly at hand.
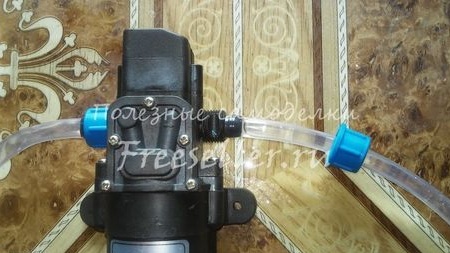
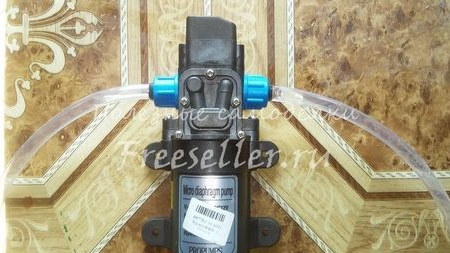
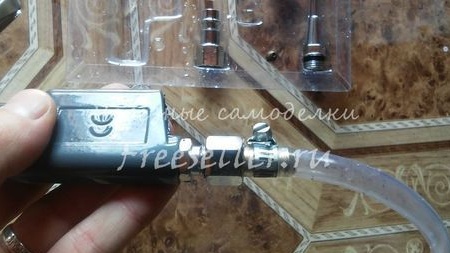
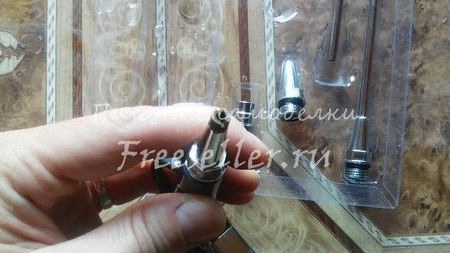
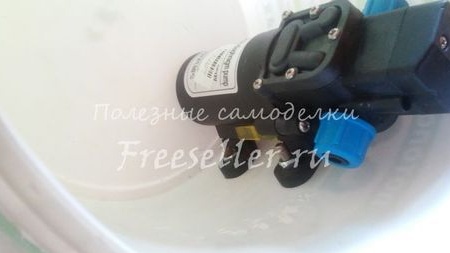
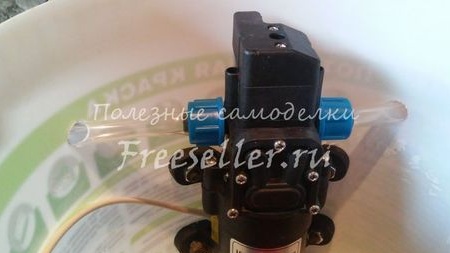
First, we check the pump's operability (the author ordered it from China), we will connect 2 of them, that is, one for water intake, and the second for supply to the gun. We unscrew the blue clip and put it on the hose.
Now we twist and the whole connection is tight, the hose has nowhere to go.
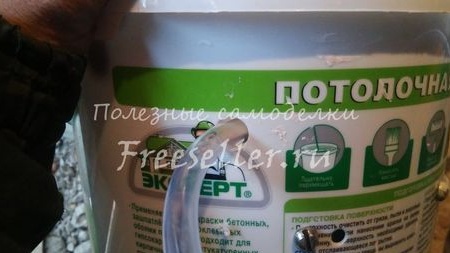
Then the author takes a purge gun.
Connects a hose and fixes with a collar.
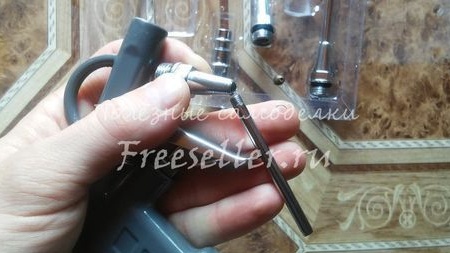
Now Attention!The blow-off gun in the kit has nozzles, but the holes in them are a little too big, in order to reduce the diameter of the outlet, the author does the following, namely, unscrews the nozzle.
Instead of the native nozzle, the nozzle from the Zhiguli carburetor is screwed in; it fits perfectly in the thread.
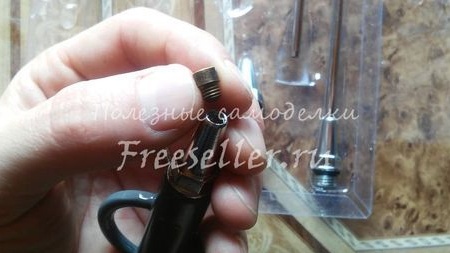
All now the hole in the gun is much smaller, which will contribute to the creation of a strong compact jet.
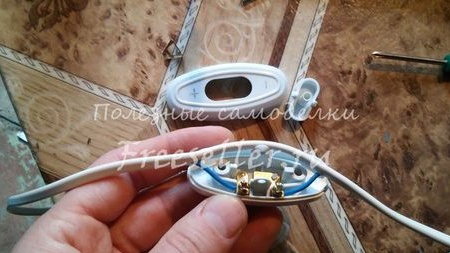
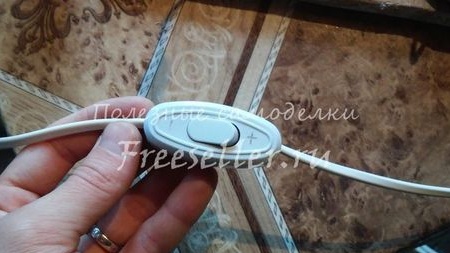
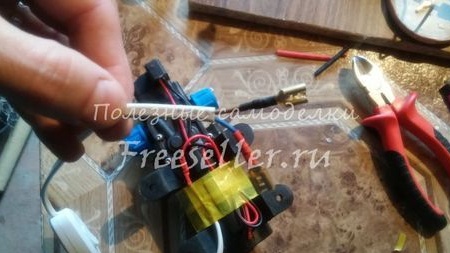
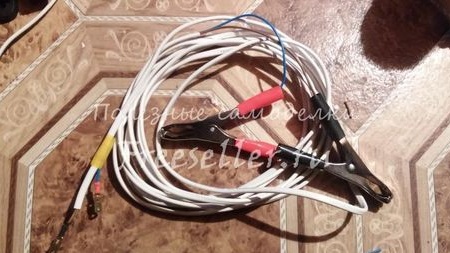
After which the author goes directly to the electrician, namely connects the toggle switch to the wire.
Such a switch is also inexpensive and can be bought at any specialized store.
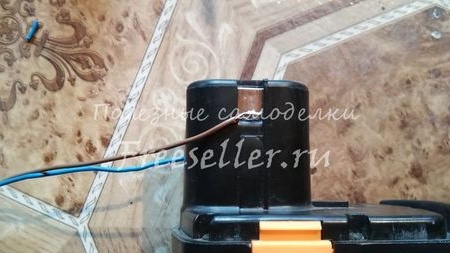
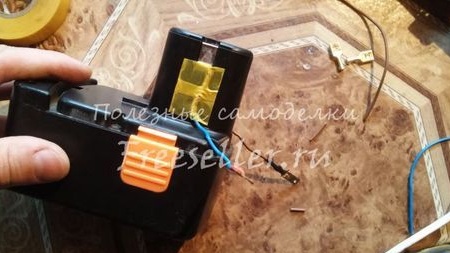
The master solders the wires with the contacts to the screwdriver’s battery, so that the solder does not interfere with the connection of the charger and the battery can be recharged.
The wires are fixed with electrical tape.
Also, the wires practically do not interfere and the battery can be freely connected to the screwdriver itself.
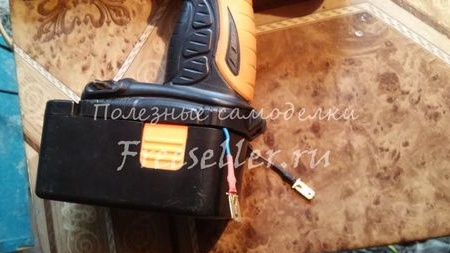
Next, the wires are connected directly to the high pressure pump.
And together the circuit is connected via contacts (dad + mom).
In addition, the author made an extension cord from 3 m wire and crocodiles, as well as contacts. It is necessary to connect power from the vehicle’s battery.
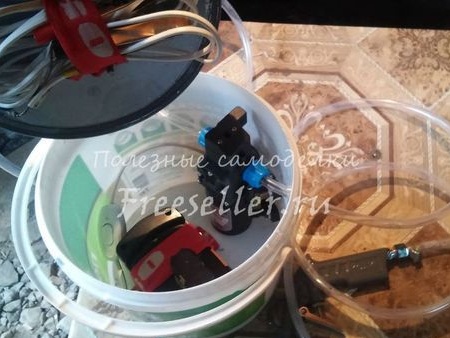
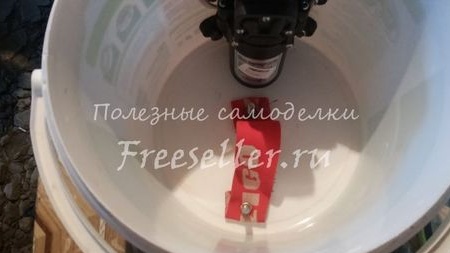
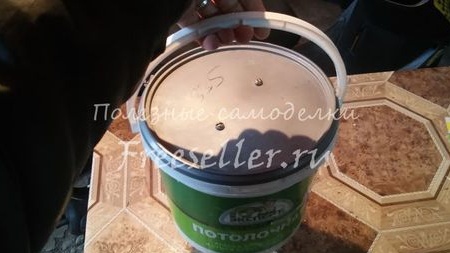
After that, the master proceeds to assemble all the details of the mini-wash in the plastic bucket body, for which he drills 4 holes in the bucket wall using a drill with a conical drill.
The pump is mounted on the wall.
Tightened with 4 bolts and nuts.
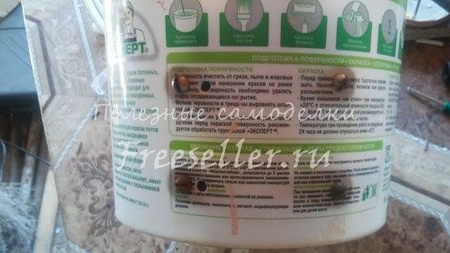
In the bottom of the bucket, a mount was also made for installing the battery of a screwdriver, for which an elastic band and a bolt with a nut were used.
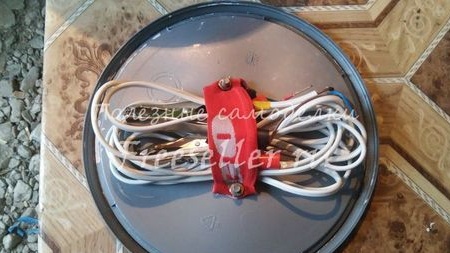
A mount is also provided for the extension cord, and it is located under the bucket lid.
Then, holes are drilled again in the bucket for laying and connecting hoses.
As you remember, 2 hoses, one at the entrance, and the second at the exit.
Everything compactly fits in this plastic bucket, the only thing is that the container must be taken separately.
That's actually such a mini-pressure washer obtained by our author.
By and large, there is nothing complicated, as you can see, components can be bought at the store or ordered from the Chinese, if you wish, it will not be difficult to assemble because you already have ready-made instructions, if you intend to repeat the homemade work, then save the bookmark site so as not to lose information.
The advantage of a home-made mini-washer of high pressure: budget, compactness, low consumption, the ability to take water from any tank.
Disadvantages: (if identified, then write in the comments)
It should be finalized: The idea is certainly cool, but it can be improved a bit, namely to assemble everything on a single case that will be a water tank. Who has ideas and suggestions?
Testing a homemade mini wash. [media = https: //www.youtube.com/watch? v = h9ZC-zhpYz4]
This concludes the article. Thank you all for your attention!
Come visit often and do not miss the latest in the world of homemade goods!