Today, in large furniture stores and networks, the widest selection of various of furniture. Manufacturers use a wide variety of materials, including those that allow you to reduce the cost of goods.
Natural wooden furniture has long been no longer an icon of furniture production. Nowadays, this is rather an exception to the rule, and for any exception you will have to pay pretty much.
Choosing a coffee table, like the one presented in the master class, will cost a pretty penny. And if you want to supplement it with other elements of a headset that is designed in the same style, you won’t think for yourself: is it worth it to empty the family budget? Indeed, the majority of modern furniture can be made even by a master with a very modest experience.
All you need is a knowledge of the basics of working with wood, experience in wood processing with a variety of paints and varnishes, a lot of diligence, accuracy and, of course, equipment and tools for working with wood.
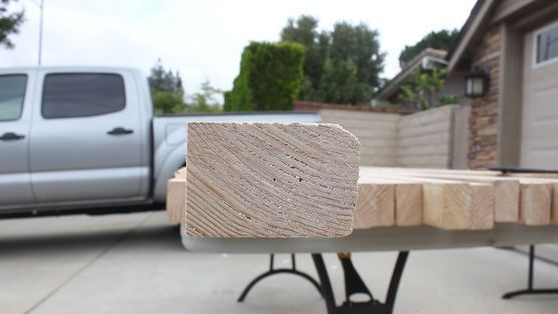
The author of this workshop will tell you in detail how to make a modern coffee table from scraps of wooden beams.
For work you will need:
1. Materials:
- trimmed wooden timber to fit the table;
- glue for working with wood;
- protective and decorative oil toner;
- polyurethane varnish or any other compatible with decorative oil;
- metal fasteners;
- furniture screws or self-tapping screws;
2. Tools:
- Sander;
- a hacksaw for wood or a miter saw;
- jigsaw;
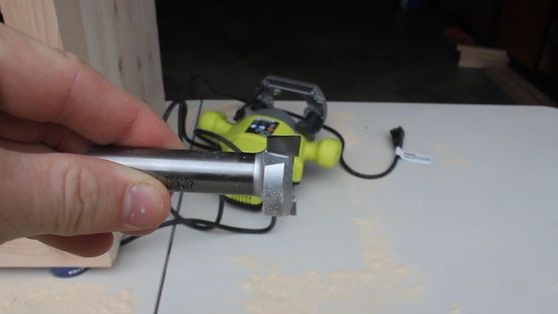
- manual frezer;
- a screwdriver or screwdriver "on the cross";
- all kinds of clamps;
- soft fabric for applying a protective and decorative oil;
- paint brushes;
- pencil and ruler;
- building tape measure.
Step One: Designing a Scheme
The author advises to begin by depicting the design of the coffee table schematically. He took advantage of a computer program, but one could limit himself to a paper plan. This will help you calculate the total amount of materials, draw up an action plan and detail the dimensions of all the details of the structure.
The first figure is a top view. Yellow areas are not taken into account. These are the grooves for attaching the side walls.

In the second figure, you see a coffee table in profile.

The third figure is a bottom view, without a lower bar.

Finally, the fourth figure shows the bottom of the proposed table.

Step two: selection of materials and their preliminary processing
It is most rational to use scraps of wooden beams left over from previous work. In any case, the purchase of non-standard sizes of bars in the store will be much cheaper, since discounts always apply to their purchase.
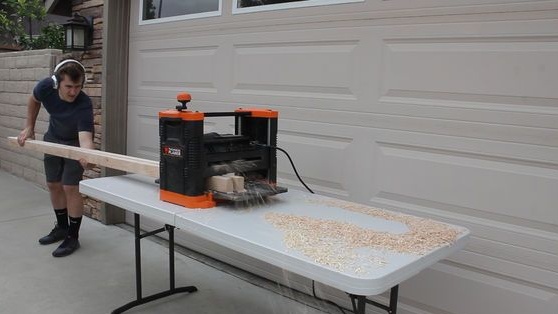
You can also take a used timber. In this case, before you begin to work, it must be planed on the machine. Such work can be done independently, or you can order a specialist.
The author also had to plan out all of his material for work, since he got bars with a rounded corner.

It is also important to treat the bonding points so that the varnish penetrates well into the pores and reliably fastens the elements to each other. Choose between planing and grinding here. There is no need to handle freshly sliced bars before selling in this way. Their surface is already ready for gluing.
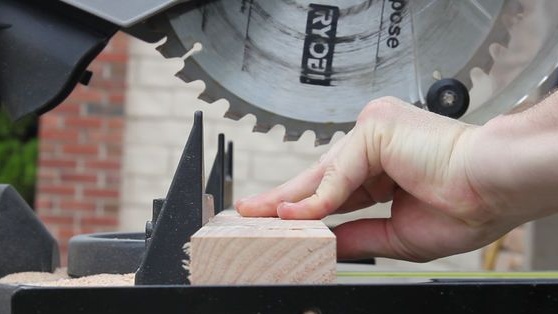
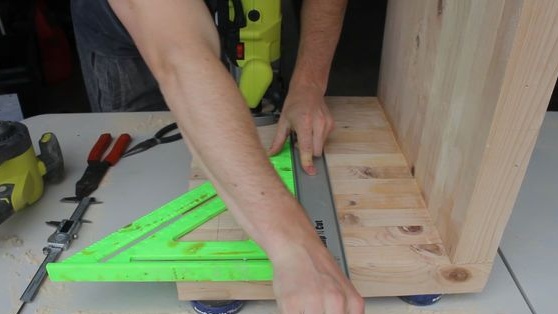
To cut the bars, the author used a miter saw. This is the best option. In extreme cases, a sharp hacksaw will fit in a tree.
The photo schematically shows all the details that you will need, as well as the dimensions in inches. Remember that 1 inch is 2.54 cm.

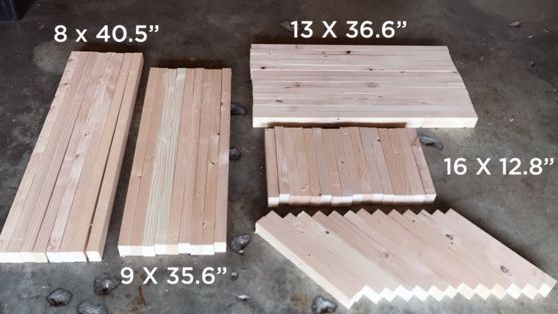
Thus, the author used bars with a cross section of approximately 5.5 cm.
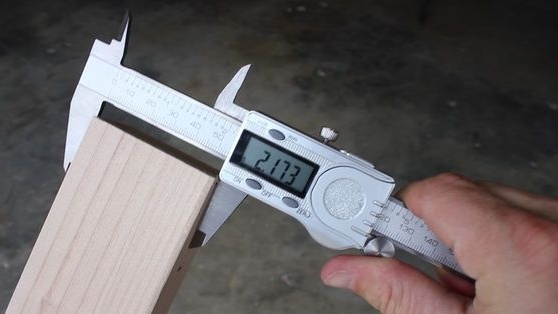
The coffee table will be assembled into a groove, so the size of the cross-section of the bars needs to be paid more attention so that during the joining of the parts, no cracks will form, but the bars will freely fit into the groove. Below you will see what is at stake.
It turns out that the short sections of the timber should be less than the long ones by the value of the section of the timber, multiplied by two, that is, in our case a little more than 11 cm.
It would be better if you saw off segments with a small margin of half a centimeter-centimeter. You can grind the excess with a grinder at any time, but the details that are cut off are shorter than they should, you only have to replace it. Therefore, the author strongly recommends spending a little more time on markup and measurements than you expected.
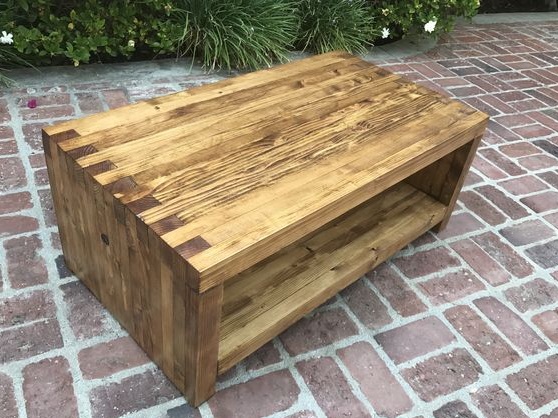
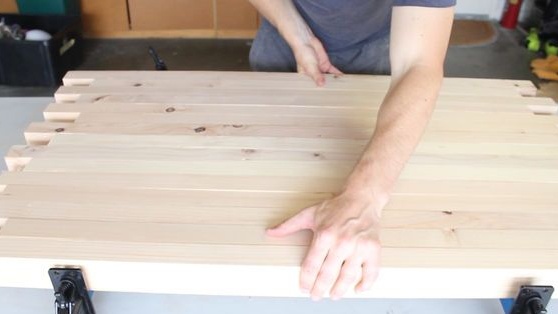
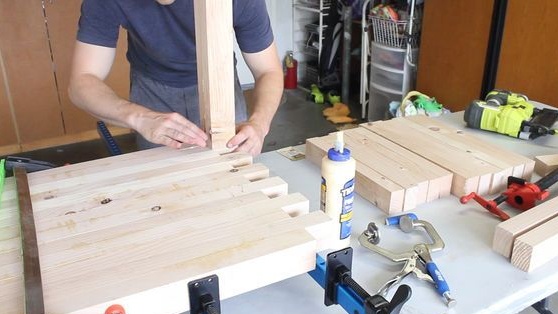
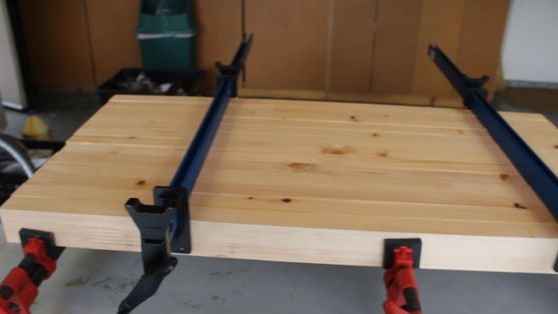
Step Three: Gluing and Countertop Making
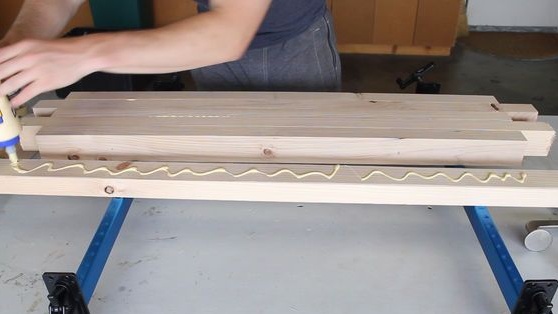
Actually, all further assembly is gluing the timber according to a previously prepared scheme, which was discussed above.
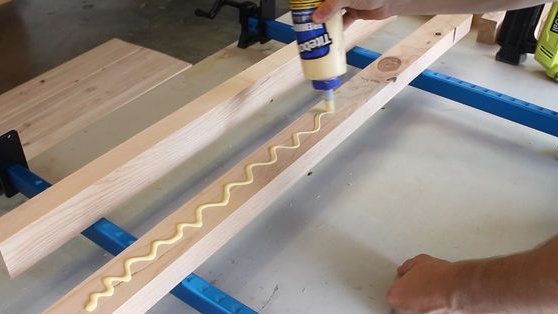
Choose waterproof glue for woodwork. You can apply it with a brush, however it is more convenient to use glue in containers like those in which silicone is made. In addition, the gun will work faster, and the glue will not dry out as soon as if you applied a thin layer with a brush.
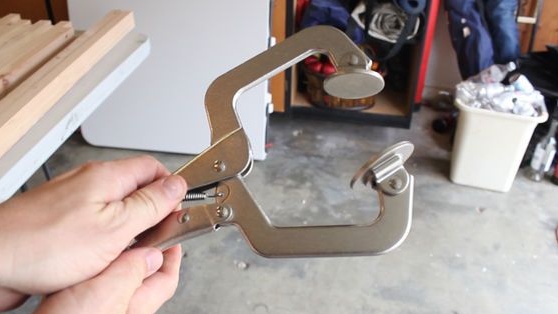
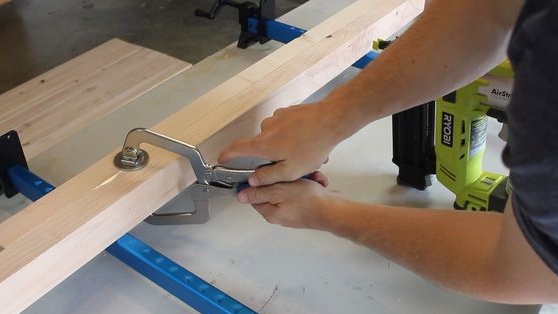
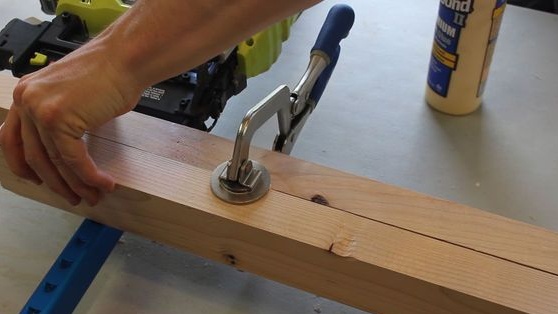
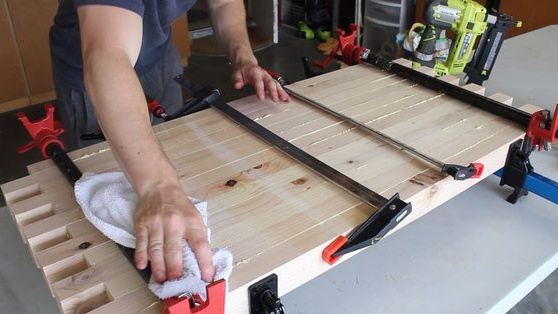
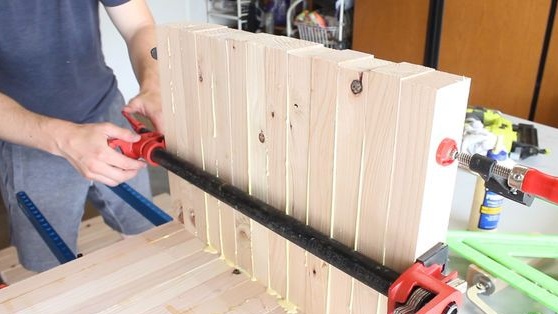
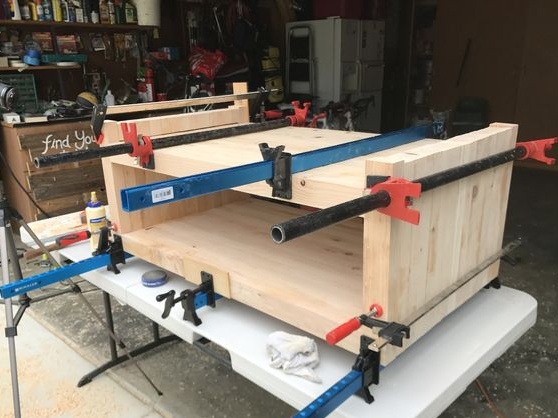
All kinds of clamps and clamps, which will require a lot, should become your main assistants.
Depending on the setting rate of the adhesive, you can assemble the structure one element at a time and clamp each one for a while until it dries, or you can assemble the entire plane at once and only then clamp it with clamps until it dries completely.
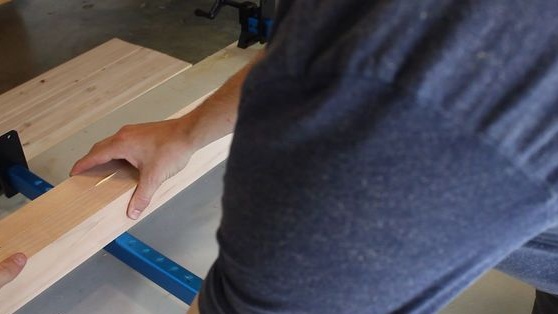
Remainder glue should be removed as far as possible with a damp cloth. All that remains, later you can grind with a grinder.
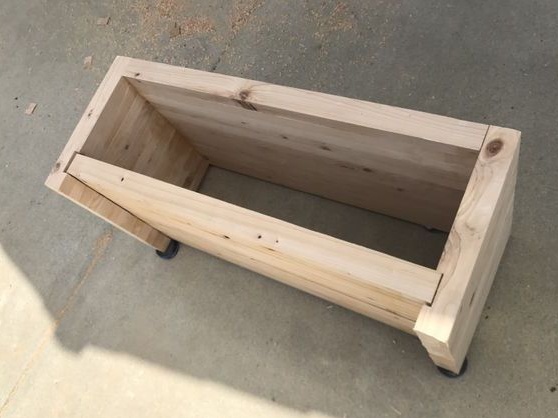
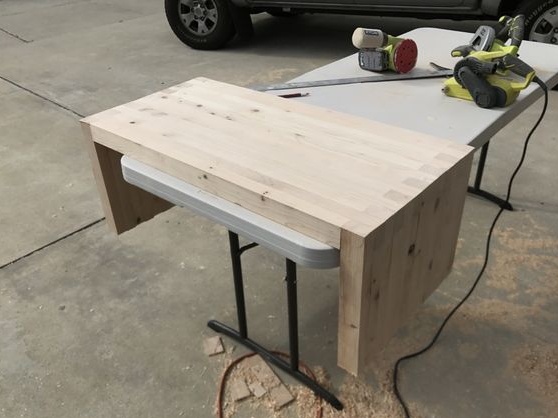
In this way, prepare the countertop (leave the two extreme bars on the sides for later) and proceed with the assembly of the side elements.
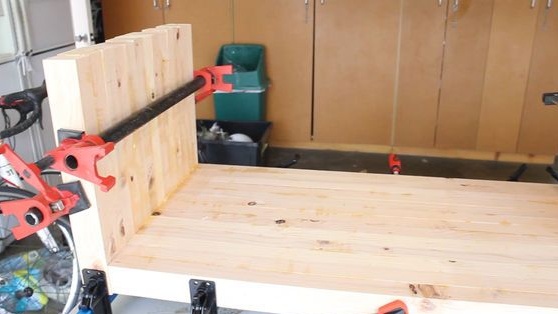
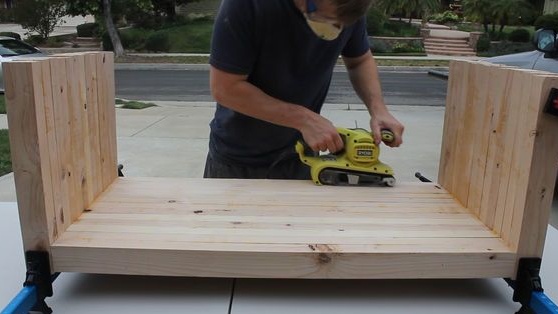
Step Four: Side Panels
Please note that they must be placed exactly at right angles. Here you need a square or something similar. Clamp the sidewall elements with clamps.
As with the countertop, leave the two extreme bars of each sidewall not glued. They will go into business after you replace the bottom of the coffee table.
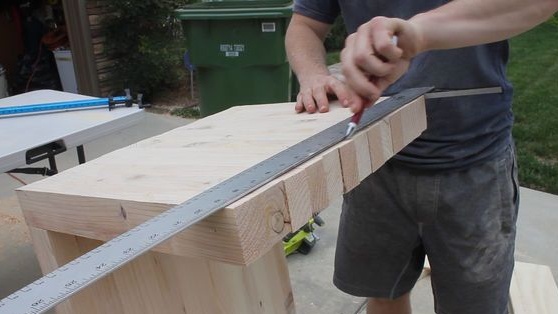
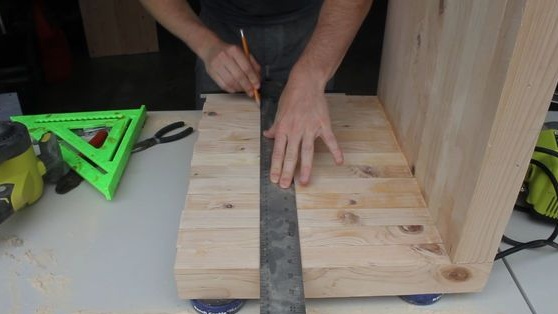
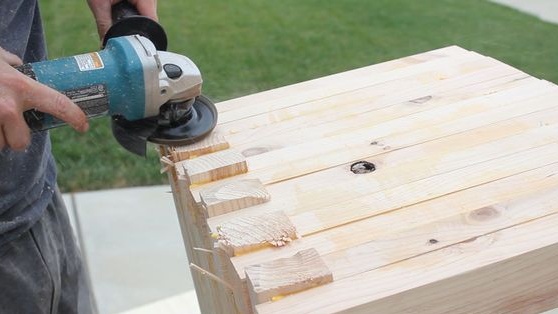
When the glue is completely dry, proceed to trimming the "legs". To do this, measure the same distance from the top, - the estimated height of the coffee table - draw a line and cut off the excess with a jigsaw as shown in the photo.If the cut is not perfect, the grinder will help to correct it.
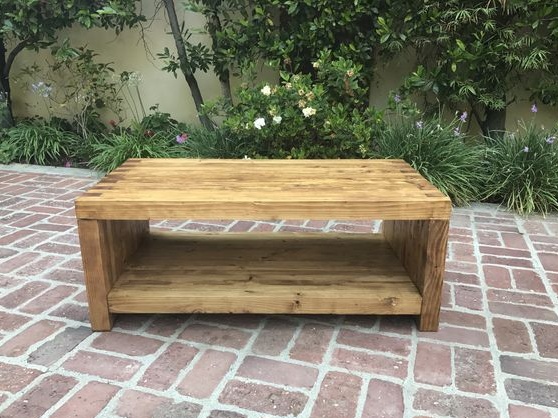
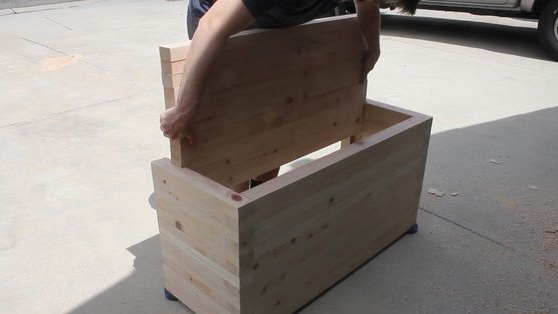
Step Five: The bottom of the coffee table
The author has planned a lower shelf for his coffee table, but claims that you can do without it.
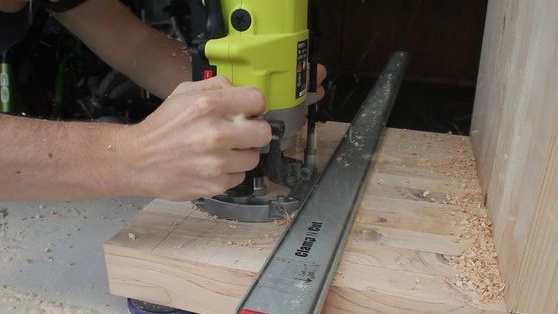
The lower shelf (it is also the bottom of the table), as conceived by the author, goes into the groove on both sides. He made it using a hand mill.
To make a groove, carefully markup and mark two parallel lines on each sidewall as shown in the photo.
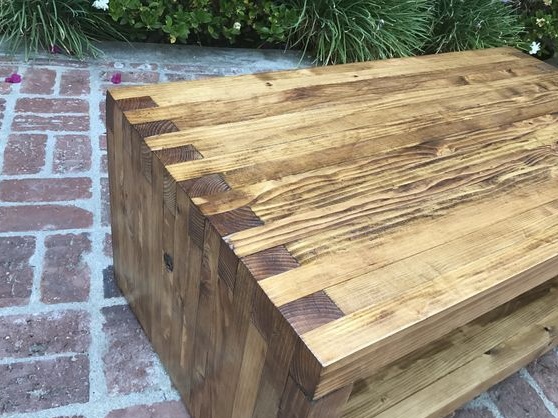
The author made a groove in several steps, since a small-width mill was at hand. The bottom went into the groove with a small gap, but this does not affect the strength of the structure. In addition, as you remember, you have to glue the finishing bars of the side panels, which will hide the groove and strengthen the design of the table.

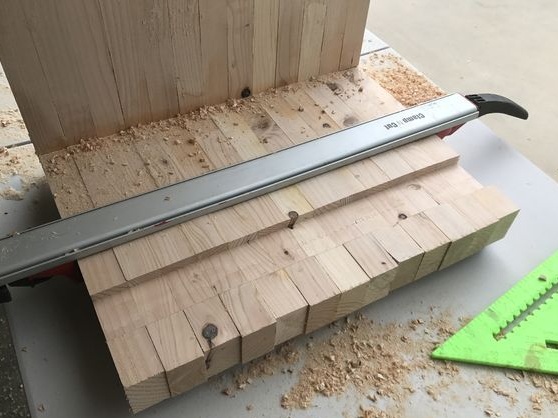
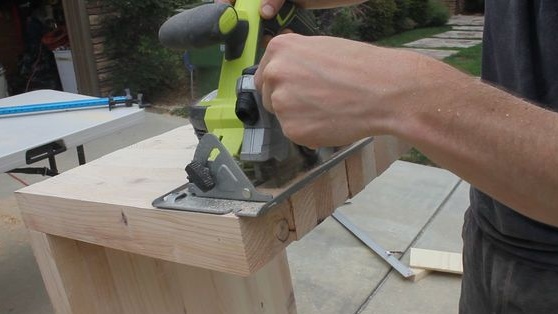
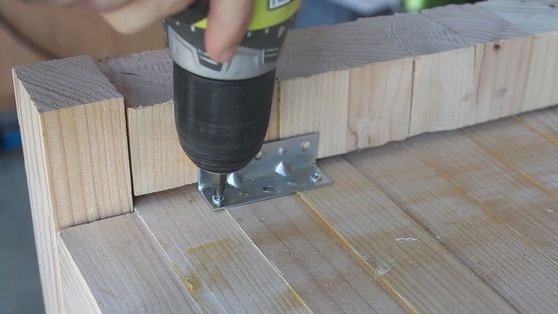
Step six: fasten the finishing bars and strengthen the bottom
Fasten the finish bars to the side panels, as well as the countertop bars to hide the grooves and place the structure in the clamps and clamps until the glue completely dries.
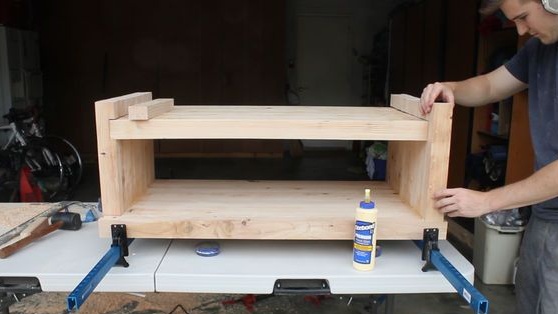
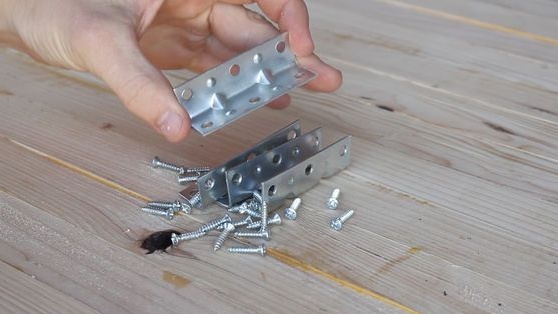
The author also used metal corner brackets and screws in order to securely fix the bottom of the table.
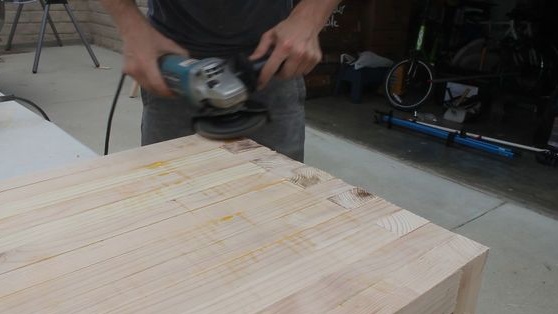
Before further processing of wood, carefully grind all surfaces with a grinder.
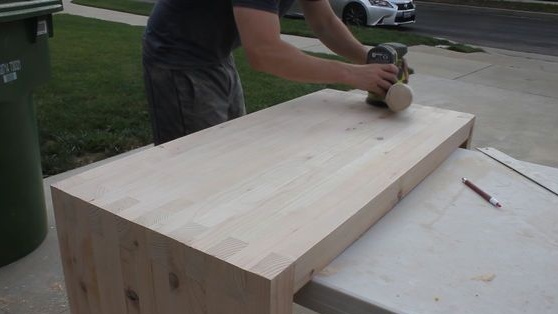
Seventh step: wood processing
For processing wood, the author chose a protective and decorative oil toner tone "Walnut". This is a great Watco product from the Danish Oil Series.
Oil should be applied with a clean, soft, lint-free cloth. So it is more convenient to rub it into a tree.
To create such a tone, two layers of oil were required. Leave the surface to dry for 8 hours. In some areas, such as cuts, it appears stronger, and this more likely plays into the hands of the style chosen by the author.
Minwax polyurethane varnish was used to consolidate the result. The author applied it in 4-5 layers, making sure that each previous layer is completely dry. In addition, he polished each layer of varnish with fine sandpaper.