Storage of bread in the summer is the most difficult task. In plastic bags, the bread is moldy; in the refrigerator, it is stale and will lose its delicate texture.
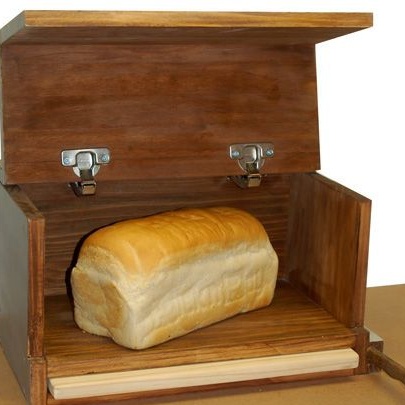
That's why people invented such a wonderful thing long ago. device for storing bread, like a bread box. True, a real bread-box should certainly be made of natural wood, however, in the master class the author used trimmed laminated boards, which is also not bad for our task.
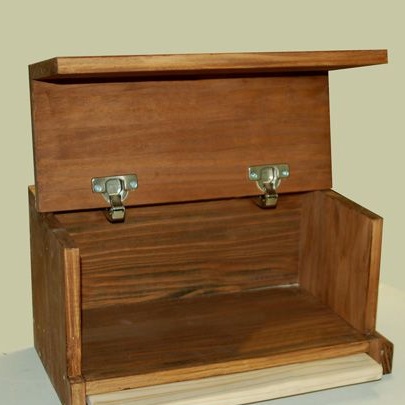
This workshop is a step-by-step guide for making an original bread box with compartments for a knife and cutting board. In order to do something similar you can use plywood, but natural wood is always preferable. What material to choose for work is up to you.
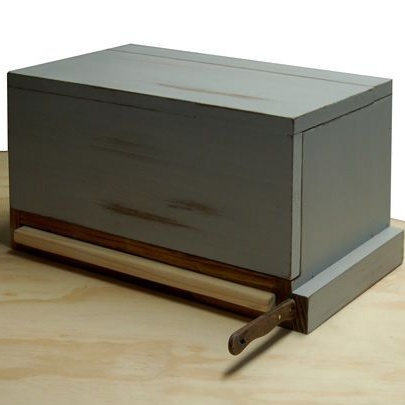
In the end, the author wanted to get a retro-style product. How to achieve this effect, he will tell in the final step.
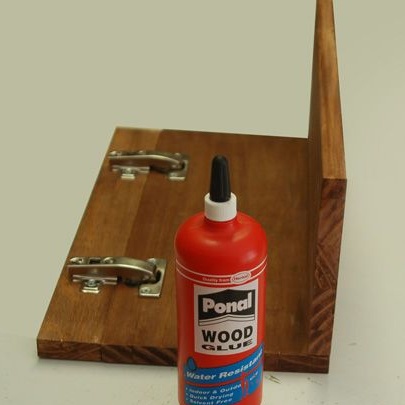
To make a bread box you will need the following materials and tools:
Materials:
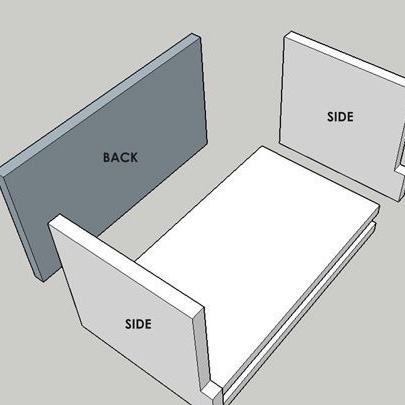
1. laminated board, plywood or natural wood:
- 218 x 240 mm - side walls (two parts);
- 221 x 384 mm - shelf and base (two parts);
- 218 x 384 mm - back wall;
- 70 x 422 mm - the base of the door;
- 169 x 422 mm - front of the door;
- 158 x 422 mm - the upper part of the door;
- part for the sheath 20 x 44 x 240 mm
2. glue for working with wood;
3. screws;
4. chopping wooden board 232 x 380 mm;
5. a pair of hinge loops at 90C;
6. paint for wood with a loose coating;
7. varnish as desired;
8. the remains of a paraffin candle.
Instruments:
- electric drill;
- a screwdriver or a Phillips screwdriver;
- a grinder or sandpaper of various grain sizes;
- construction tape and ruler;
- a pencil;
- paint brushes.
Step One: Preparing Materials
The author used the remains of the laminated board from previous works. To save a little, in the building hypermarket you can always find scraps of various lumber in excellent shape and at a ridiculous price. In addition, you can use a used board. In this case, you just have to pay a little more attention to grinding.
So, proceed to the preliminary processing of wood. If the material is new, just sand with fine sandpaper the cuts. The same goes for laminated boards and plywood.
If you have to work with old wood, in addition to the end parts, carefully grind all flat surfaces. This will help you get rid of the darkened layer and prepare the tree for painting.
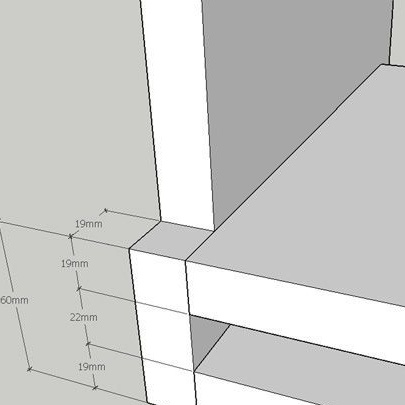
Using a ruler and pencil, transfer the dimensions of the parts to the material you have selected. Please note that in the side walls of the bread box you need to cut out the groove for the door 60 x 19 mm as shown in the photo. Moreover, the author recalls that 19 mm is the thickness of your material. If you use a material of a different thickness, this parameter should be changed.

Step Two: Get Started
All parts are ready and you can start assembling. The author advises all painting work to be done before it comes to assembly. However, in this master class she did the opposite.
Start by gluing the base and shelf, then move on to the back wall and side parts.
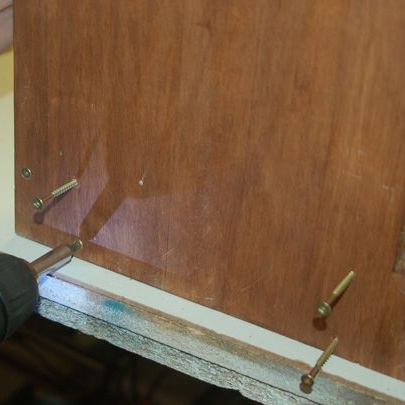
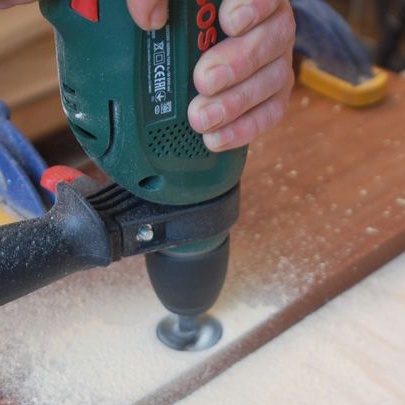
The author uses a combined connection: fastening with screws complements with the use of glue. To do this, the parts are first connected with glue. When the adhesive is set, drill holes for the screws. It is clear that such a preliminary gluing here contributes greatly to this.
Remember that small parts made of natural wood when screwing in screws have the ability to crack along the fibers. And if that happened, the damaged part will have to be replaced with a new one. Therefore, do not ignore the rules and be sure to drill holes before screwing in the screw.
In this way, collect the bread box and, while the glue dries, proceed to make the door.
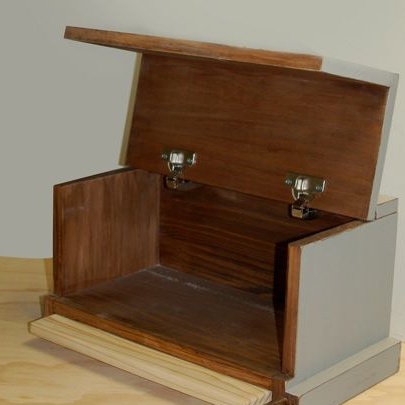
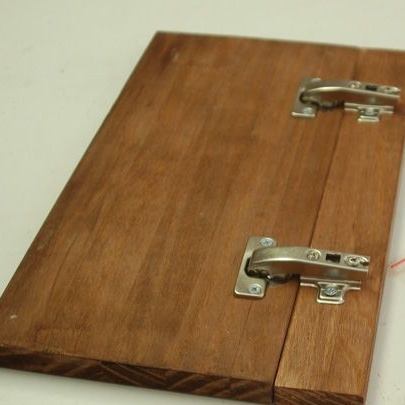
Using a special drill bit, drill holes for fastening the hinge loops. Fasten the hinges using screws.
Now is the time to connect the door parts. To do this, glue the front part to the hinged structure and screw in the screws for strength. If the hats of the screws spoil the appearance, the fasteners can be filled with wood putty or completely discard the screws. Multiple spiked joints can also be used, which is also very effective.
Attach the door to the general structure in the same way.
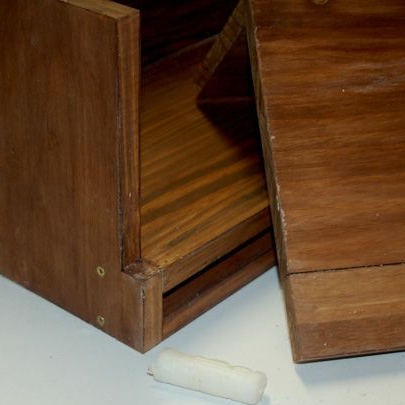
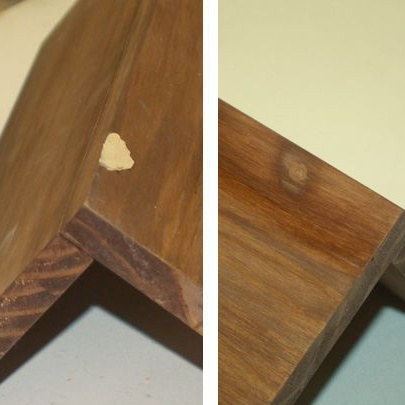
The author, among other things, needed to "fix" the downed corner of the door, since the laminated layer peeled off in one place. To do this, she used glue, putting the finish in place.

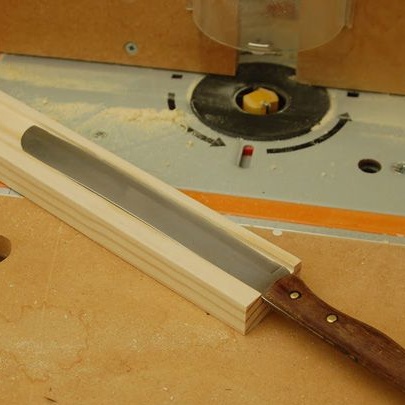
Step Three: Sheathe the bread knife and fit the cutting board
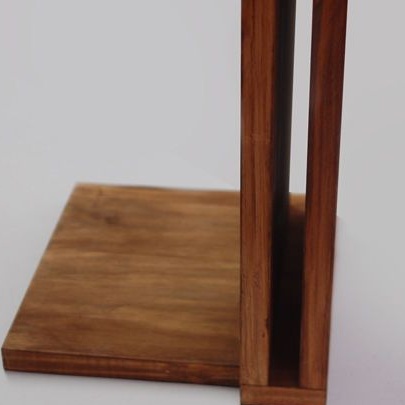
In the part intended for the manufacture of the “sheath”, it is necessary to select a groove. It is most convenient to use a milling machine for this, but you can do with a manual milling machine.
If both tools are missing from your arsenal, the parts can be made of three separate elements so that a groove for the knife blade is formed.
The blade of the bread knife should go into the groove tightly enough, but not tight, so make sure that the knife is properly attached to the cutout before screwing the holder to the bread box.
You can make a bread board yourself. To do this, select a board of suitable width and carefully grind it. Round the ends with a grinder or sandpaper.
You can also make your task easier and use a ready-made cutting board. In this case, you just have to fit it in size to the compartment of the bread box.
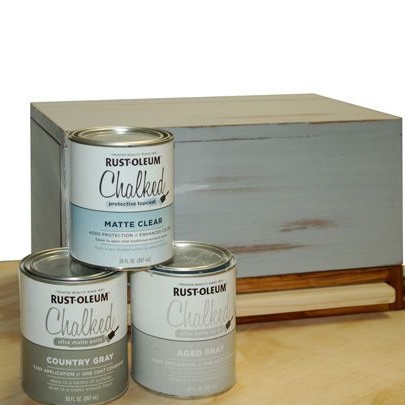
Fourth step: decorative and protective treatment
For painting bread bins, it is best to use compounds with a loose coating. Oil paints and varnishes should be abstained, because the bread box processed in this way will not “breathe”.
The author used chalk paint with a matte effect and a loose matte varnish-toner. If after the first coat of paint the tone does not satisfy you, apply a second coat to make the color brighter. You can completely refuse varnish.
Also, a classic pair of paint + varnish can be replaced with decorative protective oil or stain - in case you want to change the color of the finished bread box. If you are more attracted by shades of natural wood, use hot linseed oil or natural drying oil to protect the tree, but at the same time allow it to “breathe” freely.
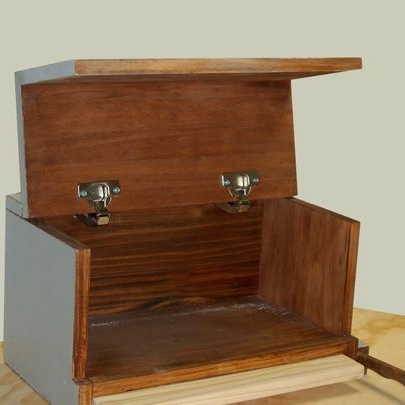
The key idea was to create a retro-style breadbasket with the effect of scuffs on the door.Therefore, before applying the first coat of paint, the author rubbed several areas of the lid with the remnants of a paraffin candle. This was necessary so that the paint does not sink deep into the pores of the wood and it can easily be sanded and identify characteristic spots that mimic old scuffs.