Everything is just delighted with picnics organized in nature. But not everyone will undertake such a picnic.
Firewood, a bonfire, cutting food on your knees, lack of a workplace, your favorite tools and food storage systems can ruin anyone's celebration.
Cooking in nature should be as comfortable as possible for the hostess, the benefit in the yard is the 21st century. There are many ready-made solutions for this, but not all of them will be affordable.
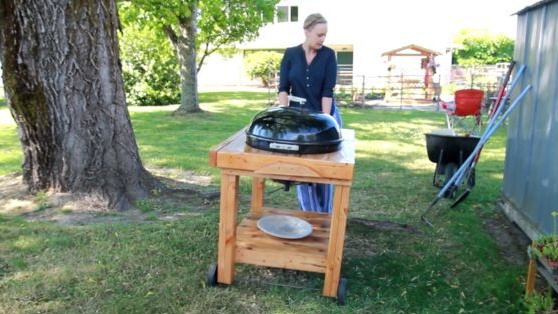
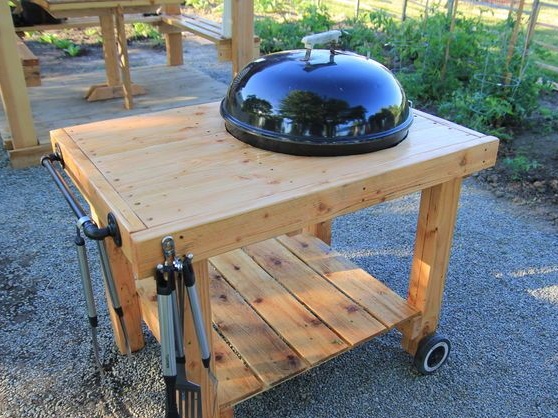
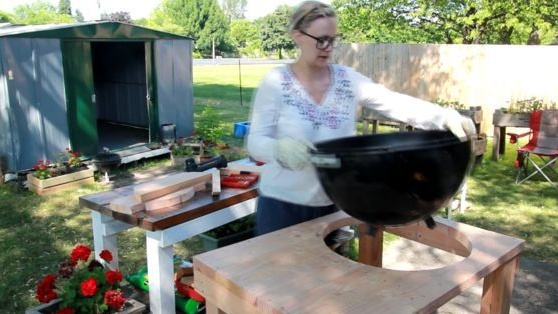
The author of this workshop made for her family a mobile barbecue grill in one weekend. Not for the sake of economy, but in order to get just such a mobile kitchen, which she had long wanted.
The project is surprisingly simple, assembled from the most common materials, except perhaps for the grill itself, purchased long before the venture with the equipment of a mobile barbecue.
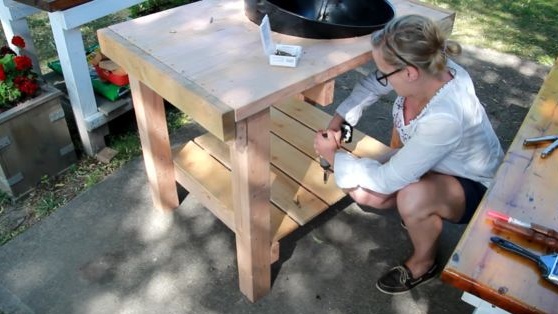
According to the author herself, this mobile grill has a solid wooden base with an opening for the metal grill itself, as well as wheels that allow it to be moved on a flat surface of the site. There is plenty of space for storing equipment, chopping food and cooking.
In order to do it yourself To make this wonderful mobile kitchen, you will need:
1. Materials:
- old barbecue grill;
- four small wheels with axles and fittings for mounting;
- planed boards of suitable thickness;
- steel tubes, corner connectors and connectors for the manufacture of handles;
- heat resistant paint for black metal;
- varnish for woodwork;
- screws and nails.
2. Tools:
- miter saw or any other tool for sawing wood;
- grinder;
- screwdriver;
- electric drill;
- jigsaw;
- paint brush;
- construction tape measure;
- a pencil.
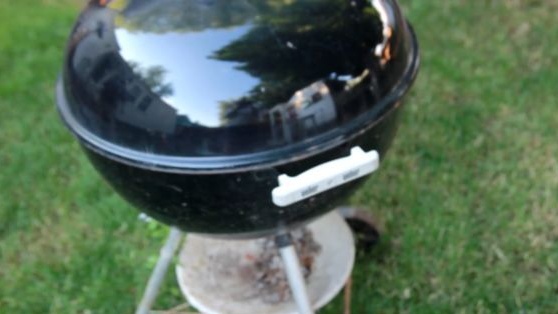
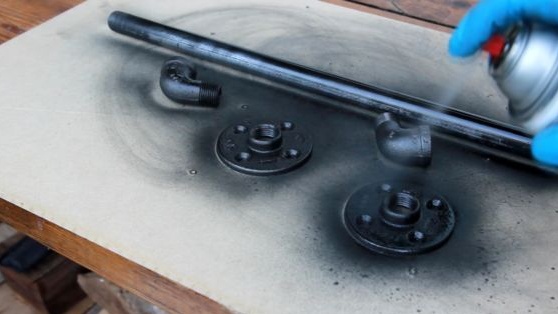
Step One: Reconstruct an Old Grill
For her project, the author planned to reanimate an old uncomfortable grill on wheels, which for a rather long period of time did not take root in her family.
Upon closer examination, it turned out that its surface is covered with small spots of rust and scratches. In addition, no one cleaned the grill for a long time, so a huge amount of dirt accumulated on its surface.
First of all, the author cleaned the grill with a rough metal brush and carefully polished its outer surface, getting rid of the rust and preparing it, thus, for painting.
She used heat resistant paint designed for working with metal. Before, the grill was black, so there were no problems with the choice of color.
The author covered the grill with two layers of spray paint and left it to dry completely. After that, she dismantled the cart on which the grill was mounted and dismantled the wheels from it. They will be needed in order to make the kitchen mobile.
Old metal axes also went into business. They will perform their direct functions, will become the basis for mounting the wheels in the new project.
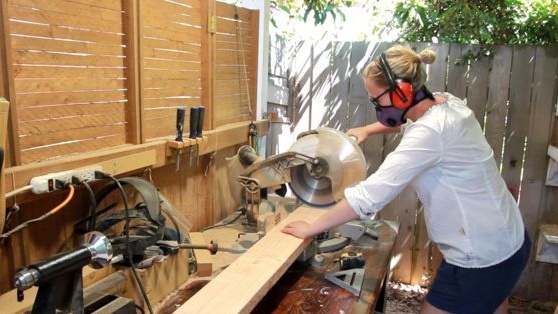
Step two: selection and preparation of lumber
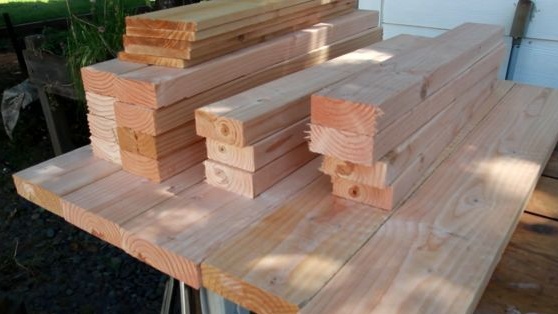
The author used pine boards from her workshop, which had long been waiting for their fate. The material was planed in advance, so it practically did not require processing.
If you are a happy owner of a woodworking machine, then, of course, you can use old lumber. Surely on your site or in the garage there is an old shop or shelves that can be disassembled and turned into something much more useful.
If the planing is carried out properly, the tree does not need additional processing. However, as a rule, you still have to resort to a grinder, smoothing the surface of the wood.
Draw on paper a sketch of your mobile kitchen and write down in detail what details you will need to assemble it.
Decide on the size, markup and cut the board into pieces of the required length. The author used a miter saw, so that the parts were immediately ready for assembly.
Step Three: Preparing Hardware
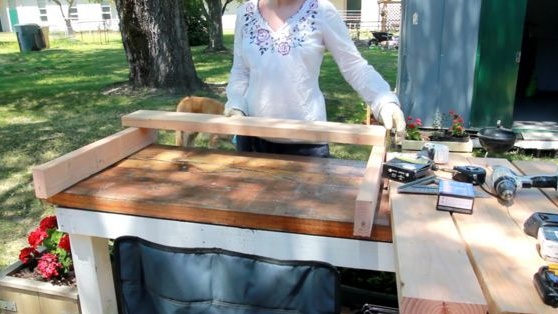
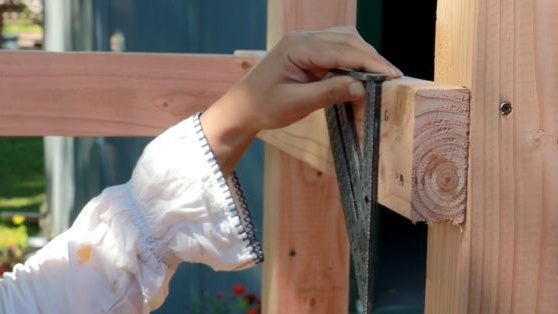
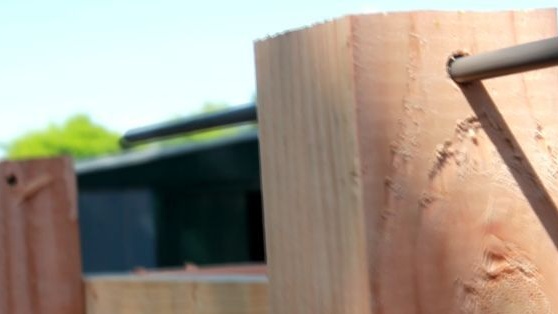
There should be a handle on the grill cart for which it would be convenient to push it in front of you. Given the weight of the structure, it is worth choosing metal parts, since plastic has too little margin of safety in such cases.
Choose a tube of small diameter so that it fits comfortably in your hand. Take also a pair of corner connectors - such as shown in the photo below. Select mounting connectors that are suitable for diameter.
All this will make a good functional pen. It is better if it is placed across the entire width of the cart, because it can serve as a place to store your kitchen utensils and towels.
If necessary, make a pair of such pens. They definitely won’t become superfluous.
The author painted all the metal parts in black metallic with spray paint. Let the paint dry according to the instructions and assemble the pen.
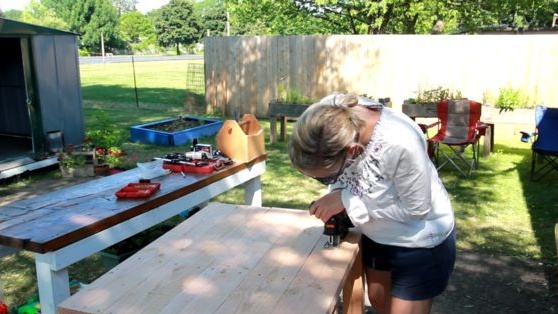
Fourth step: making the work surface
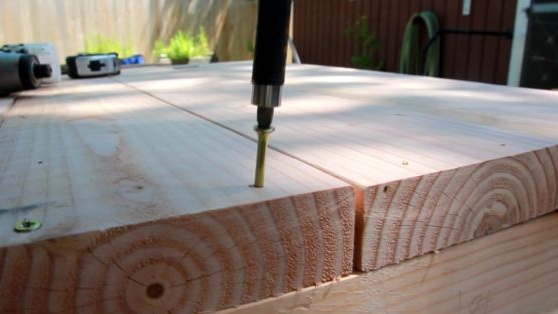
The author began assembling from the countertop. Fasten the planks of the working surface on the side bars with nails or screws.
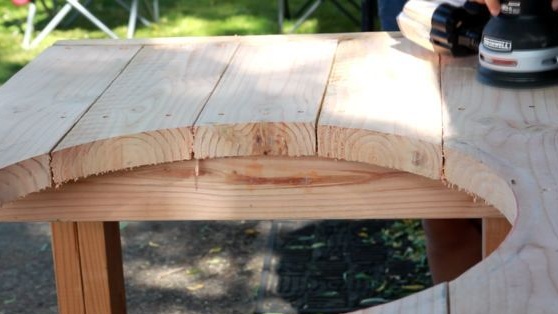
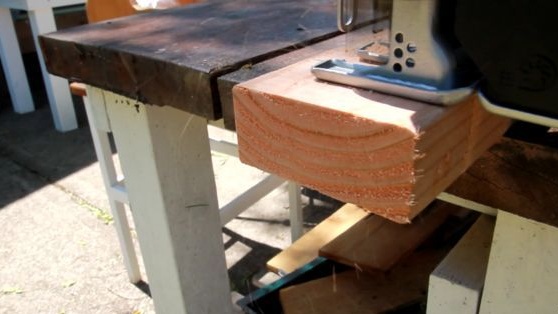
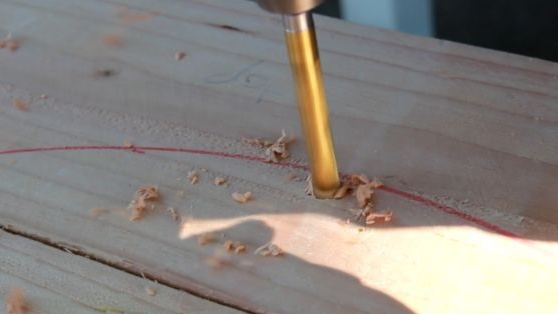
You need to cut a hole under the grill on the side. Therefore, measure its diameter and subtract a few centimeters from the resulting figure, because you need to keep the grill just above the table level.
Mark the hole using a large compass. It can be replaced using simple device from a self-tapping screw, a cord and a pencil tied to the opposite end.
Draw a circle. Now, knowing the location of the hole, you can fix the third block of the countertop for strength.

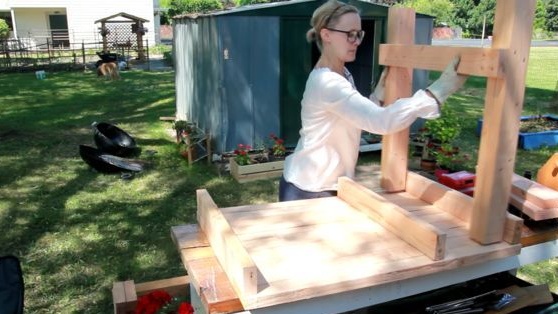
Step Five: Further Assembly
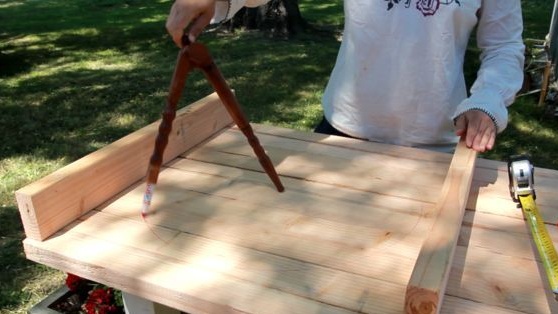
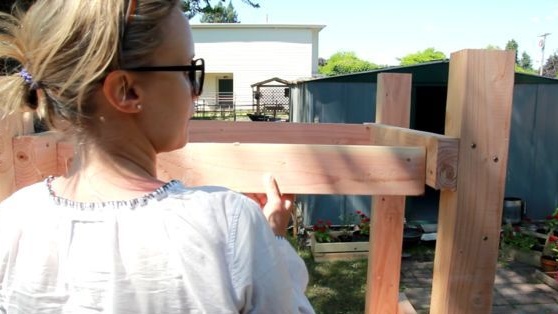
Proceed to the manufacture of legs from a pre-cut to size bar.
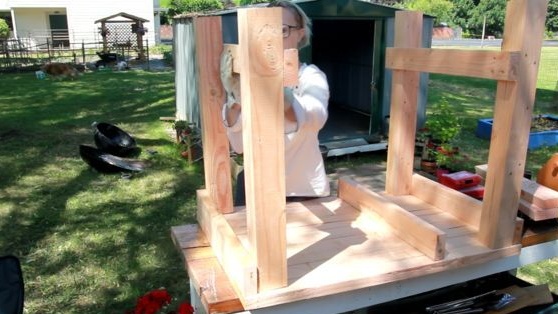
The photo shows in detail how the author copes with this work. She does not use grooves and glue to connect the parts, but simply fastens the bars with an overlap.
You can cut grooves on a milling machine or using a conventional drill and a removable cutter. This method of attachment is preferable, because it will help your kitchen serve you for many years without the need for repairs. This will improve the adhesion of parts and give the design a more accurate look.
However, even without these measures, the author’s kitchen in the end turned out to be very aesthetic. Especially when you consider that she spent only two days on its construction.
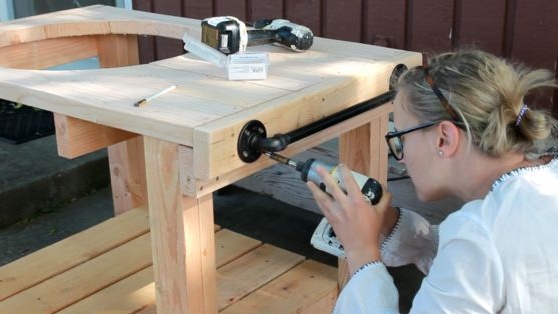
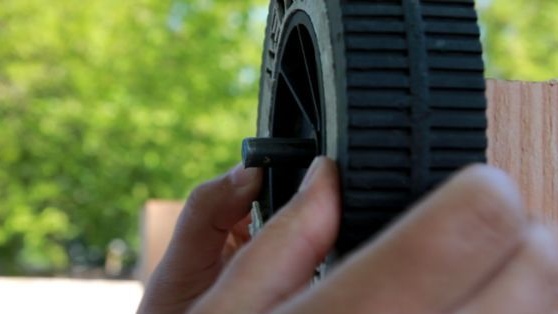
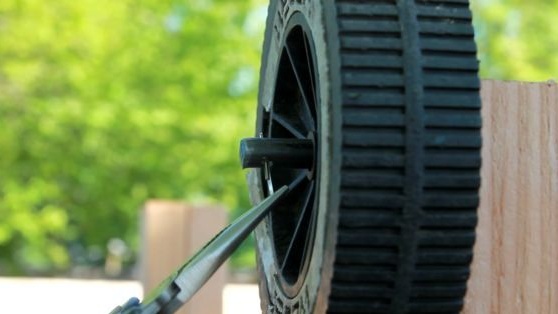
Assemble and secure the legs on the countertop. Keep in mind that on one side they should be shorter, since this is where they will be located on the wheel.
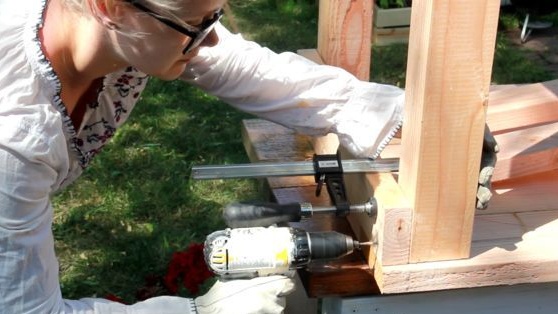
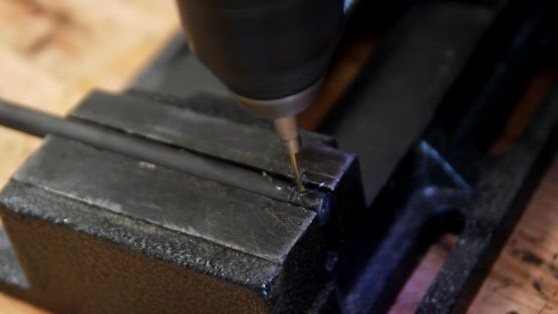
Replace the axle for mounting the wheels, having previously drilled holes in the legs.
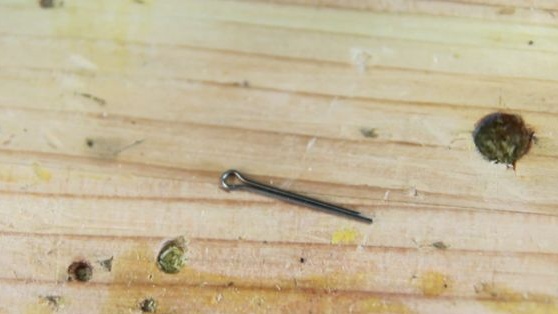
Drill a smaller diameter hole in the axle itself under the metal studs that will hold the wheels on the axle.
Firmly fix the legs and proceed to the device shelves. To do this, lay the boards on the crossbars with small gaps as shown in the photo, and fix them with nails or screws of your choice.

Step Six: Install the Grill
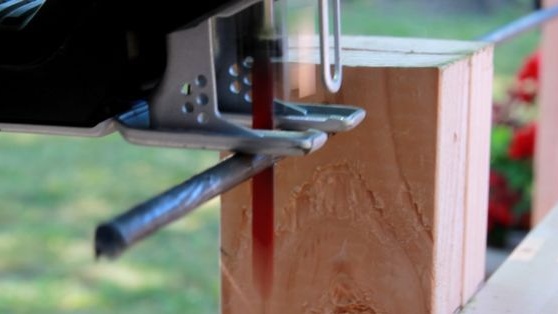
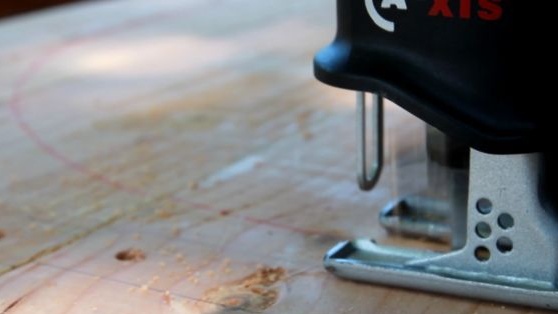
It's time to install the grill. You pre-marked, the cart is assembled, and you can start cutting holes. This can be done using a jigsaw.
Put the grill in place. If it is located too high above the surface of the table, do not rush to cut a hole wider. So you can ruin everything. You will still have the opportunity to grind the excess so that the grill sits in place a little lower.
Seventh step: sanding and finishing
Planed wood does not always look neat, so you will almost certainly have to resort to polishing.
Walk the grinder mainly on the surface of the countertop and the places where the bars are cut. You can also smooth out the edges and corners slightly as the author did.
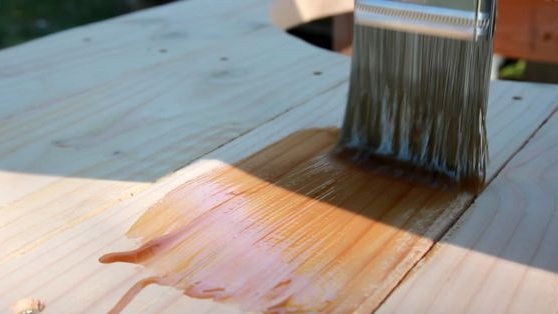
After the surface was properly prepared, the author opened the wood with two layers of polyurethane varnish.
This will reliably protect it from moisture, and prevent the penetration of fat and food debris into the surface of the countertop. The hostess will be able to regularly carry out wet cleaning and keep the kitchen clean.