To the modern nursery of furniture make more and more demands. It should be made of inert safe materials, be durable, practical, functional, have a safe design and bright colorful appearance (as a nice bonus).
If a children's desk and, for example, a crib, have all these qualities, their price will also be impressive. At the same time, not everyone agrees to save on the health and well-being of children.
That is why today it is so useful to have a number of skills in the arsenal of your own skills that will help to equip your baby. A healthy children's kitchen, the manufacture of toys, the development of training programs, the home mini-production of furniture - this is an incomplete list of talents that a modern advanced parent should possess.
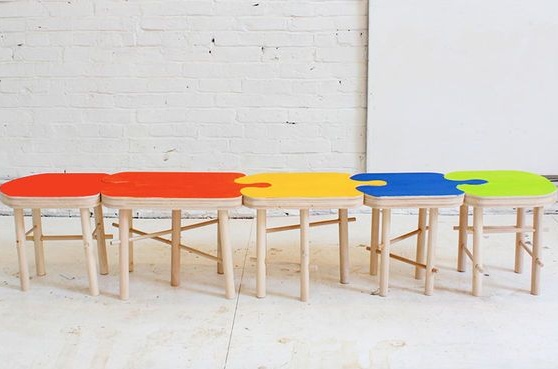
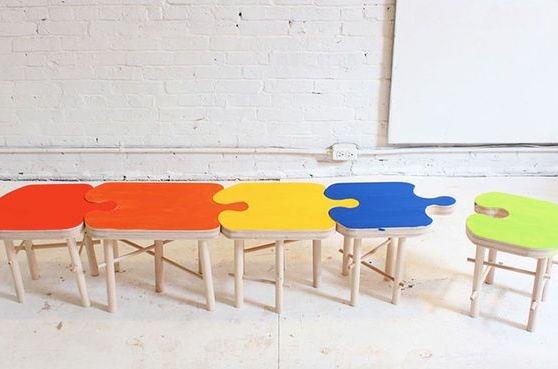
In this master class, the author will tell us in detail how to make an interesting puzzle bench for the nursery. The same idea will not be out of place to adopt for the arrangement of the game room of the kindergarten.
In order to make a shop for the nursery, you will need:
1. Materials:
- high quality plywood without extraneous odors;
- glue for woodwork;
- water-based paint;
- water-based varnish;
- cylindrical poles of two diameters.
2. Tools:
- electric drill;
- a grinder or a grinding drum for an electric drill;
- a mill for a drill for cutting grooves;
- a screwdriver or a Phillips screwdriver;
- jigsaw;
- sandpaper for processing hard-to-reach spots and curly elements;
- cargo for bonding parts;
- furniture screws or screws;
- paint brushes, roller;
- fabric to remove excess glue;
- construction tape measure;
- a pencil;
- pattern if necessary.
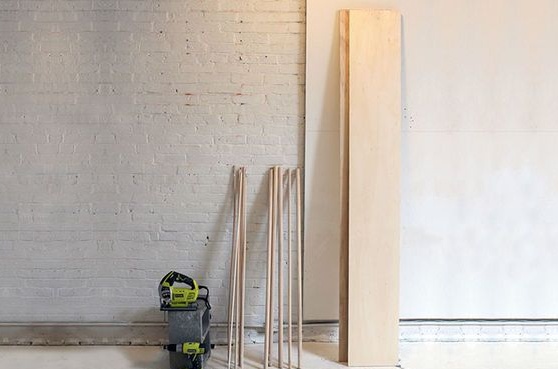
Step One: Choosing Materials
The author used multilayer plywood with a polished surface of very high quality. The thickness of the plywood was approximately 3 cm. When choosing plywood, pay attention to the smell. The material should not emit an unpleasant odor of adhesives. Good plywood smells like wood.
When choosing glue, consult with a specialist. The composition should be as safe as possible, but at the same time possess sufficient strength, and be convenient to use.
And finally, paints and varnishes. Any paint that is not made from food is to some extent dangerous for the child's body.However, each parent must understand that while the paint does not enter the body through the mouth and lungs, it is completely safe. In other words, if the dried paint does not emit an unpleasant odor, and the child does not bite the painted objects, there is nothing to worry about.
So, the choice of materials is made - and you can get to work.
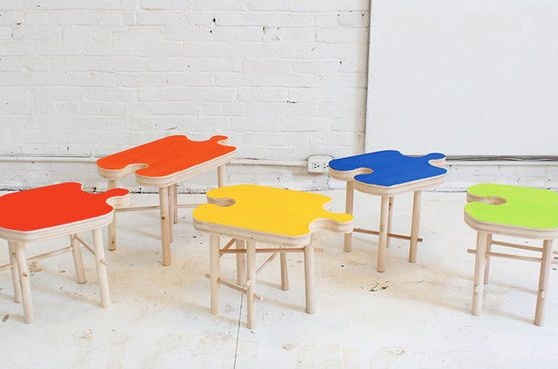
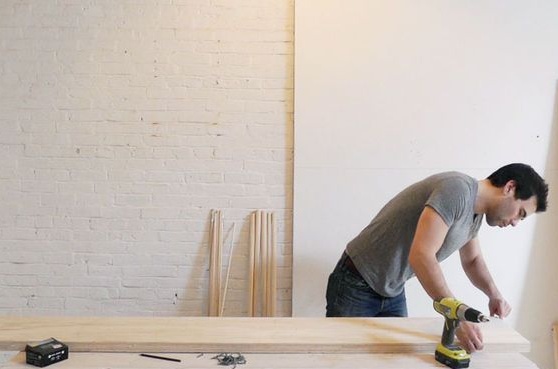
Step Two: Making Seats
You will need two sheets of 3 cm plywood, cut into strips of 30 cm thick. The author made chair seats from two layers of plywood, subsequently fastened together by furniture screws.
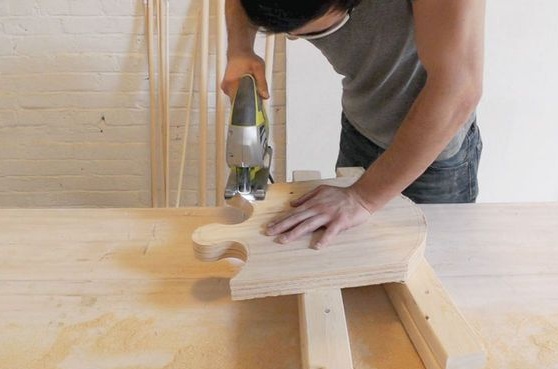
In order to cut the seats, lay the sheets of plywood on top of each other and proceed to draw the contours of the puzzle. The author did not use patterns; he simply drew lines by hand with a pencil. If it’s difficult for you to do such an operation, use a sewing pattern. You can find it in any sewing store for a modest price.
After the borders of the seats are marked, fix each of them with small screws on the wrong side. So cutting the material will be much easier.
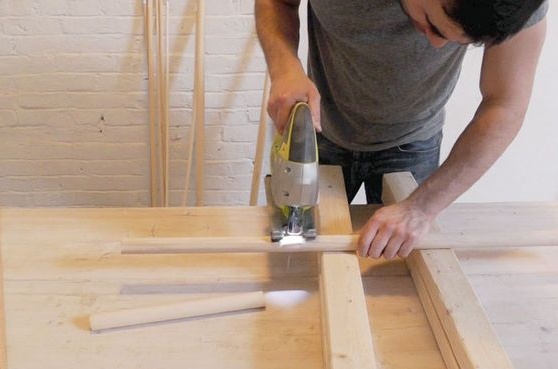
Saw the plywood along the intended lines using a jigsaw. The details are quite curly, so you need a certain amount of skill. The author advises training on the remnants of plywood, before embarking on finishing work.
Do not walk to put off the jigsaw. In each of the blanks, round off the sharp edges. They constantly cause minor injuries to young children.
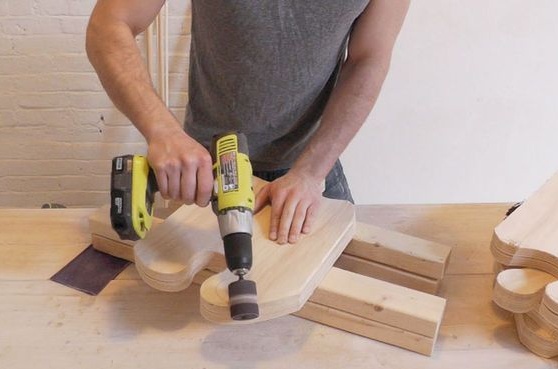
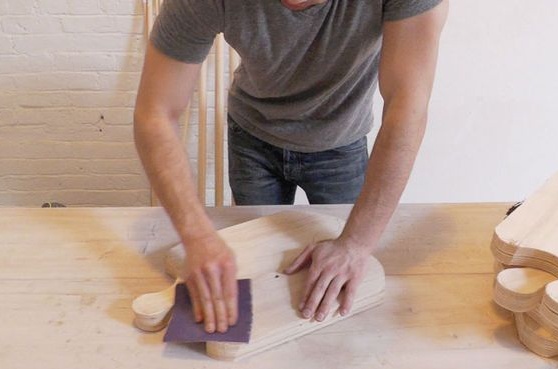
Proceed to grinding. The author used a grinding drum for a drill instead of a grinder. To process hard-to-reach spots and curly elements, he used sandpaper. Since the plane of the plywood is initially smooth, sand only the sawing points.

Step Three: Build Chairs
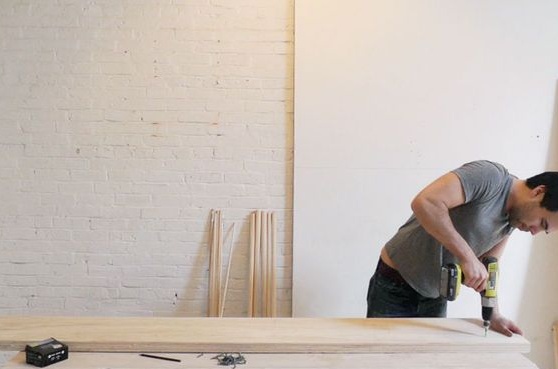
Unscrew the workpieces, which are still connected by self-tapping screws.
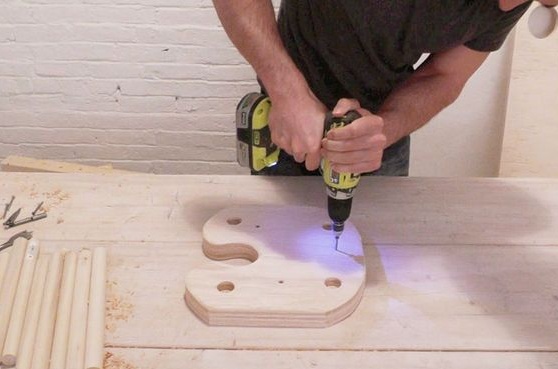
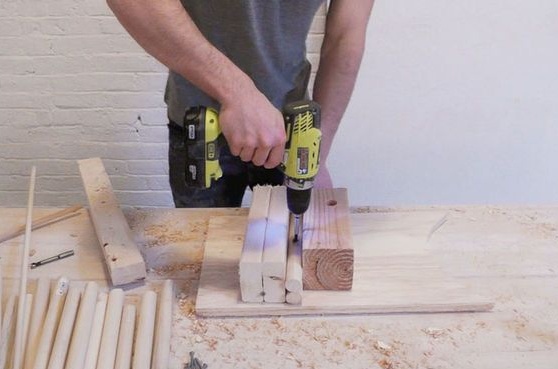
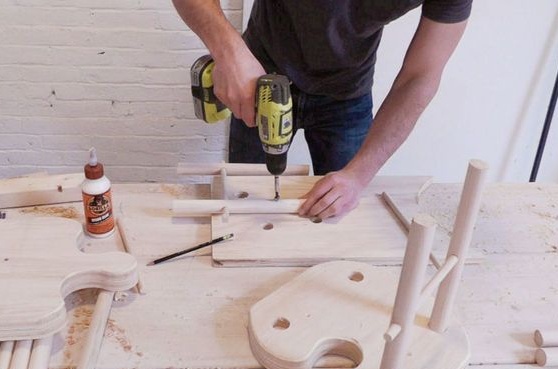
In the wrong parts, mark and drill the holes for the legs of the desired diameter using a suitable cutter.
Four legs on chairs were conceived, which is smaller and five on chairs with wider seats.
Reconnect the two parts of the seat together. This time use furniture screws, having pre-drilled holes for them. However, self-tapping screws are also suitable. Make sure that the edges of the seats are exactly aligned vertically.
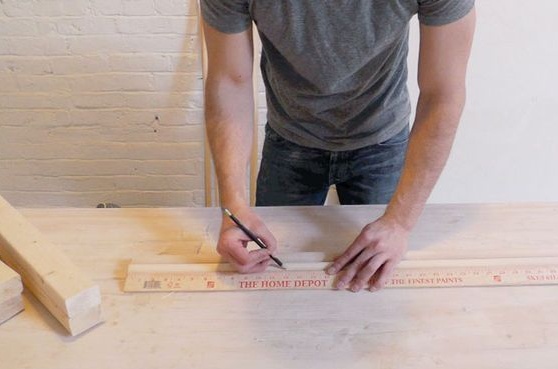
You can go to the marking and sawing of the legs. Calculate the required number and determine the height of the chairs. To speed up the process, the author used a jigsaw.
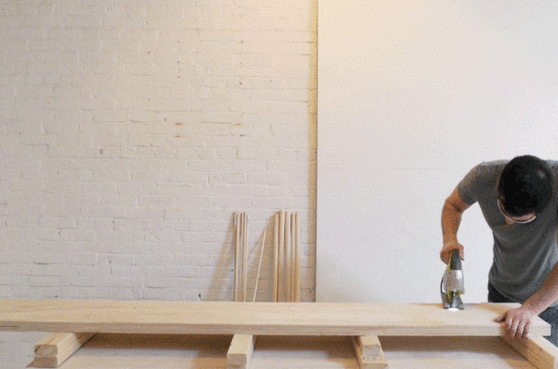
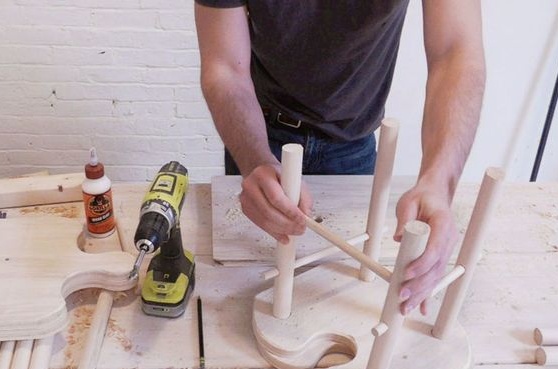
To connect the legs, the author used cylindrical poles of smaller diameter. To connect them, drill through holes in the legs. You can drill both legs at once for greater symmetry, as shown in the photo. To do this, fasten on the working surface along a pair of bars that will hold the legs in place and proceed to work.
Make sure that the diameter of the cutter corresponds to the diameter of the poles themselves, because the gap here can ruin everything. Fix thin poles in the holes with glue. Remove glue residue with a damp, lint-free cloth. Three or four crossbars for each chair was enough.
On some chairs, the author placed the poles diagonally. Thus, in addition to stability and durability, he achieved a more original appearance.
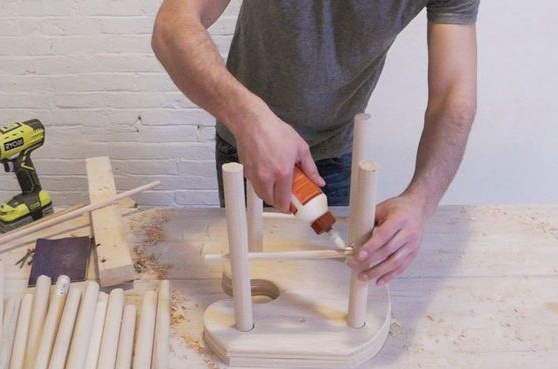
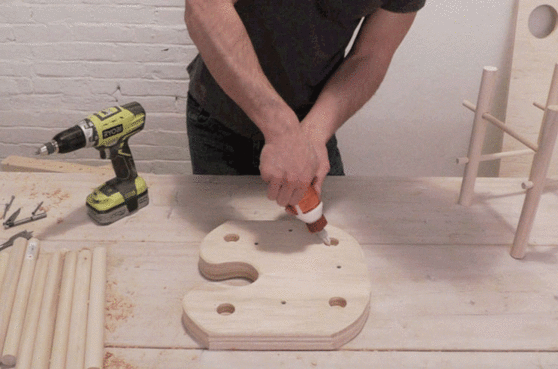
Now you can fix the legs. Given the estimated weight of the impact, the author limited himself to using only glue. If you are confident in the quality of the glue, you can stop there. Otherwise, the legs can be additionally fixed with screws.
To stick the legs, clean the grooves of dust and fill with glue. Use glue according to the instructions. Place the legs in the grooves, lay the plywood trimmings on top and place the load until the glue has completely dried. Get rid of excess glue immediately.


Fourth step: fitting and preparing for painting
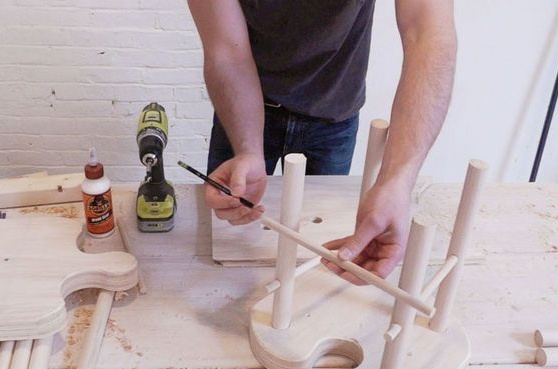
Assemble the chairs in a puzzle and lay on top of the building level or the usual flat rail. The surface of the resulting bench should be flat. If any stool is taller, adjust the length of the legs.
The same goes for the grooves. They should fit snugly together.
Inspect the chairs and use sandpaper to remove stains from glue, places to cut the crossbars and other small parts.
Proceed to the final stage.
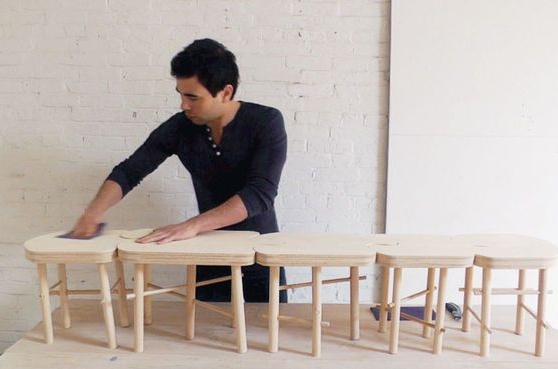
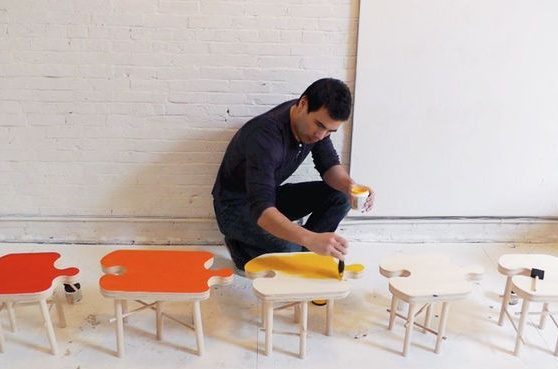
Step Five: Surface Treatment
It was the turn of painting. You have already decided on the paint. Follow the instructions clearly. Two layers of paint are usually sufficient. For durability of a covering you can use varnish. Choose only the varnish that is compatible with your type of paint, in our case, water-based.
Pause between paint coats. If you work at temperatures below 10aboutC, the time for setting the paint will need more.
Each varnish coat should be lightly sanded with fine sandpaper before reapplication.
Also varnish the legs and the back surface of the seats to make them more resistant to dirt.
And finally - a few pictures for inspiration!