Water slide is a fascinating attraction, invented in due time by the founders of water parks. She is dearly loved not only by children, but primarily by adults. The essence of the attraction is that with the help of a pump, water is pumped to the upper base of the slide and flows down to it, significantly facilitating and accelerating the sliding. And below you, as a rule, a pool or, in rare cases, a natural lake awaits you.
Of course, water parks are very expensive to build such a slide and open it to visitors. However, after thinking and scrolling the Internet properly, the author came to the conclusion that the cost of such a structure can be reduced several times, which makes the attraction accessible to everyone who once fell in love with it.
And although you will hardly be surprised by the presence of a pool near the house, not everyone is able to afford such luxury. Now imagine that a slide can easily be built on a beach by a lake or river, if the terrain allows it. Probably, having realized such a bold idea and having opened the slide for everyone who wants to experience the thrill, you will truly become famous throughout the centuries for the entire district.
What will be needed in order to build a water slide yourself? Let's figure it out.
Materials:
- a wooden bar for supports and slides of a slide with a section of 50 - 70 mm;
- OSB plate with a thickness of at least 22 mm - 4 pcs x 205 x 67 x 22 mm;
- wooden boards for the manufacture of handrails - 8 boards 10 x 200 x 25 mm;
- wood screws of various lengths;
- bolts with nuts;
- material such as carpet or something cheaper;
- a strong film of black or blue;
- a pump designed to supply water at a certain height and duration of the line;
- a rubber hose for water supply from the pump;
- coarse filter for the pump, if you use water from a natural reservoir;
- cable for water supply;
- material for waterproofing pillars of support type bitumen;
- cement, sand, water and gravel, if you plan to fix the pillars of the support in the ground with concrete.
Instruments:
- a circular saw, a miter saw or a similar tool for sawing wood (you can do with a hand hacksaw on a tree);
- electric drill;
- grinder;
- screwdriver;
- furniture stapler with staples;
- hacksaw for sawing a hose;
- a set of tools for conducting electrical work;
- shovel for earthwork;
- concrete mixer, if concrete work is planned.
Step one: sketch, calculations and diagram
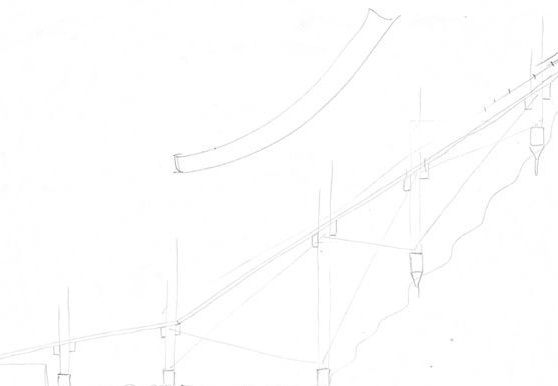
To implement such a large-scale project, you will need to spend a lot of time in the calculations. But first, start with a sketch.
Determine how high, wide, and how long the water slide will be. Estimate how many slides you will need to build it. After that, you will find out how many supports you need.
In fact, the project entirely depends on the landscape and the structure of the local soil. All this dictates to you the amount of required materials and design features to provide the necessary strength.
Note that although the slide is assembled from separate slides, the slide line must remain smooth. The shorter the water slide, the shorter the length of each slide. In general, additional smoothness is provided by a large number of such slides.
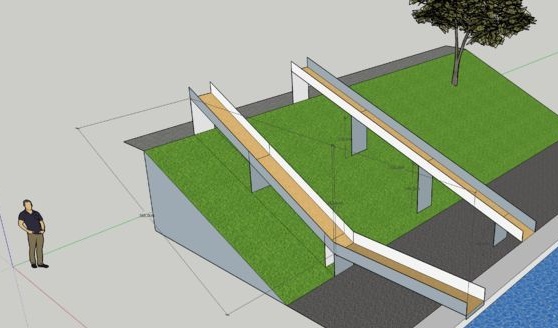
The author made a virtual slide model in a computer program. In the diagram you see which support system he chose and how he placed them in the end. A computer program allows you to automatically calculate the size of materials, which greatly speeds up the process. As a result, you simply print a sheet with a list of necessary materials.
Step two: preparing materials
Responsibly choose your materials. The beam should have a suitable cross-section to ensure structural strength. For the manufacture of racks, you can use an uncouth round log instead of a timber. This material is particularly durable and odd sawn materials. However, choose only well-dried round timber.
To fix the supports in the ground, they can simply be buried in the ground. This is a quick and cheap way, but not too durable. Especially when moving the ground in winter, the supports will certainly lead and this will damage the frame. And I would like the hill to serve at least a few years with proper care, of course.
Columns can also be concreted. A good option, but too laborious. Special. given the proposed terrain.
Ideally, it would be nice to make something like metal piles. Having a material and a welding machine, this process does not take too much time. Do not forget that the cost of their manufacture can be significantly reduced by purchasing material at a scrap collection point.
All lumber will be useful to treat with an antiseptic. It will prevent rotting of the wood and protect it from the harmful effects of fungi and mold.
If you plan to bury supports in the ground, grind the part that will be in the ground so that the tree does not rot.
Also, if you use a round timber, be sure to carefully remove the bark along its entire length. Remaining in the bark, the wood will rot several times faster than peeled.
For fastening lumber you can use self-tapping screws, bolts with nuts, as well as metal connecting fittings. Which of these will be most relevant in certain areas of the design is up to you.
Step Three: Build the Frame
It all starts with the frame. You have already decided on the method of installing the supports, so fix the support poles in the previously designated places and carefully align them vertically. Your eye for this will be enough.
Prepare the harness details. To do this, mark the bars and cut them into pieces of the length you need.
The author planned only cross support bars. If you want to make the design more fundamental, assemble each slide separately from the four elements of the frame and sheet filler.
To fix the cross bars, it is better to use metal corners or bolts with nuts.In extreme cases, self-tapping screws will fit, but the strength of the frame will suffer from this.
Remember that the higher your slide is above ground, the more frame elements you will need, since you will have to connect the support posts and slides with additional crossbars, similar to how bridge designers do.
Therefore, it would be more rational to raise the hill above the ground level not too significantly. This will greatly save your finances and construction time.

Fourth step: constructing the sliding surface of the slide
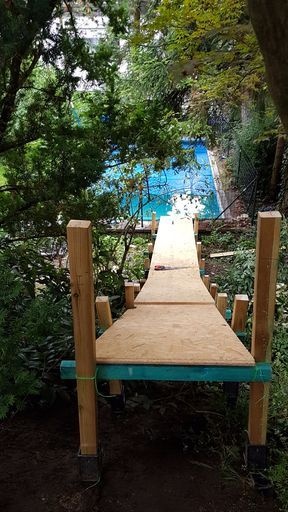
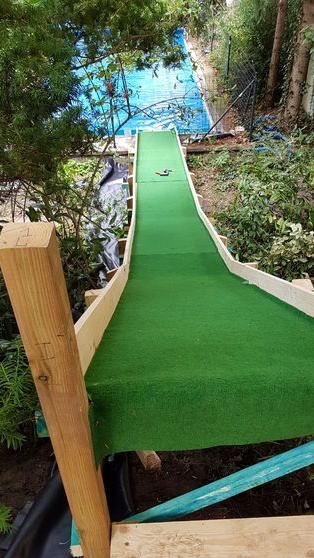
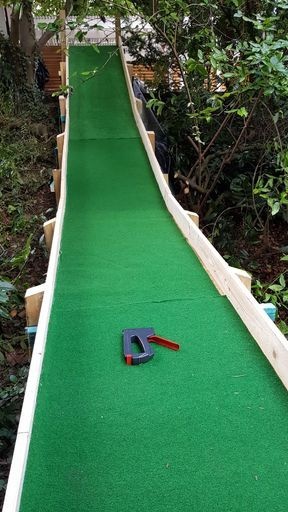
The author used OSB sheets as flooring. They are quite durable and easy to process. Lay pieces of OSB avoiding gaps. Fix them on the frame using self-tapping screws. You can use the washers to make the connection last longer.
From the remains of the material, make the details of the handrails. For this purpose, it is convenient to use ordinary boards, but remember that they must be sanded, otherwise bumps and chips can damage the film.
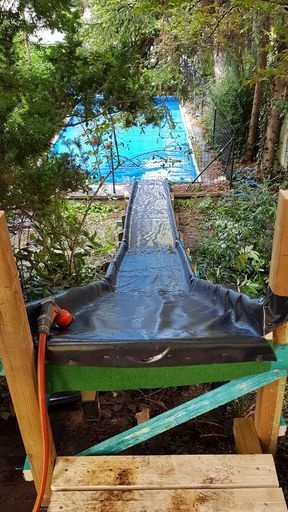
On top of the OSB, the author laid a carpet. It can be replaced with any suitable material, up to linoleum, although the latter does not have softness, but it is durable and smooth - just what you need.
Fix the carpet with brackets using a furniture stapler and lay the film on top. The film must be thick and strong. Fix it with an overlap on the outside as shown in the photo.

Step Five: Provide a Constant Water Supply
The trick is that due to the constant supply of water to the base of the slide at the top, you slide along the slide several times faster and more comfortable. Even the film cannot prevent you from doing this. Therefore, worry about installing the pump.
Choose a pump of the required power, a cable of suitable cross section, rubber hose and electrical fittings.
If there shouldn’t be any problems with the water supply of the slide near the pool, then the slide near the natural reservoir, whatever one may say, needs electricity. This is only possible if there is a residential building, cafe, shop nearby, or at least an electric pole from which you can power the pump.
In any case, this will not be an easy task, but without a pump and water, unfortunately, the plan will not work, so you should try and find ways to resolve this issue.
Supply water using a pump and a hose. Fix the hose on the back of the bottom of the slide so that it does not sag and is not in the sun. Now it remains to connect the power and ...
... the water slide is ready! Enjoy the summer, friends!