
Almost no interior is complete without mirrors. Surely you have repeatedly heard allegations that mirrors expand space and fill it with light. So it is, if you apply the method of decorating with mirrors wisely.
In the old days, mirrors were so rare a household item that only a select few possessed them, and the mirrors themselves were invariably decorated with precious metals and stones.
Later, with the use of simpler technologies for the production of mirrors, they became indispensable attributes of almost every home.
And now we perceive them so mundane and insignificant that it becomes sad, plunging into the history of studying their occurrence.
Mirrors can perform not only their direct function. They really significantly expand the space due to the illusion, as successfully as the use of light colors in the interior of the premises.
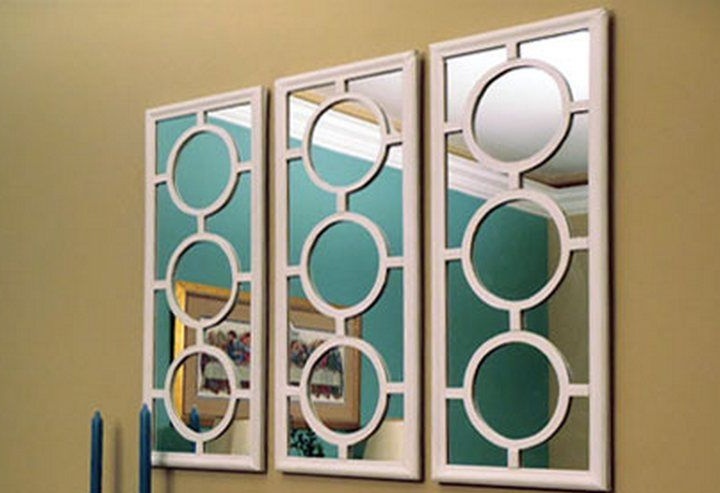
However, there is another function of mirrors - decorative. They can be an unrivaled decoration for your home. Moreover, to transform the mirror under the power of everyone. This will be discussed in the master class. Its author kindly shared with us the idea of how to turn an ordinary mirror into a decoration of a living room or hallway.
To do this, you will need:
Materials:
1. a suitable size mirror;
2. a sheet of chipboard or thin plywood;
3. universal glue for glass and wood;
4. a wooden baguette, such as that used in the manufacture of picture frames;
5. metal corner connectors;
6. sheets of chipboard for the back of the mirrors;
7. paint and varnish on wood.
Instruments:
1. electric drill;
2. stationery knife or jigsaw;
3. a drill with a mill for grinding wood or sandpaper;
4. a screwdriver or Phillips screwdriver;
5. compass;
6. pencil;
7. hacksaw for wood;
8. building tape and ruler;
9. paint brush.
Step one: material selection and preparation
You will need the right material for making mirror frames. Most often, a baguette is used for this purpose, which is also used in the production of frames for art paintings.
If there is no baguette workshop nearby, try your luck and visit a building hypermarket. There you will find a wide range of all kinds of wooden skirting boards, and perhaps some of them are suitable for the manufacture of frames.
And finally, in art stores they sell ready-made frames for paintings, however, the acquisition will cost a pretty penny. It turns out that this is the most expensive option.
For the manufacture of decorative elements, select thin plywood. Particleboard in this case can also be used, but its strength is doubtful.
Finally, a mirror. The easiest way is to order a mirror in a specialized workshop. There it will be cut in size and properly packaged.
If you are not afraid of difficulties or have previously dealt with cutting glass and mirrors, you can do this work yourself. To do this, you will need a perfectly flat work surface, ruler, marker and high-quality sharp glass cutter.
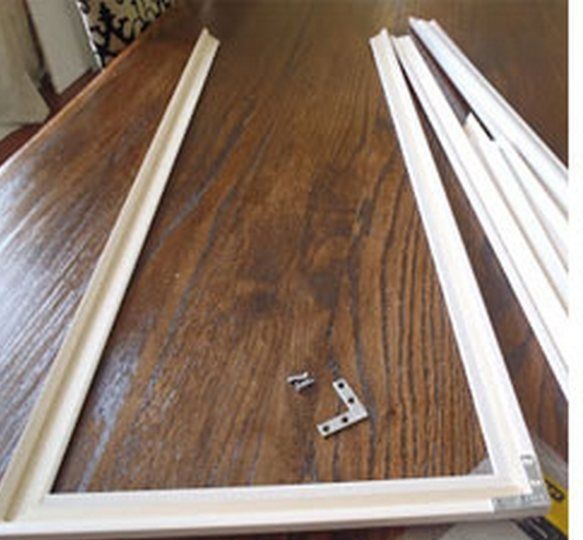
Step Two: Parts Manufacturing
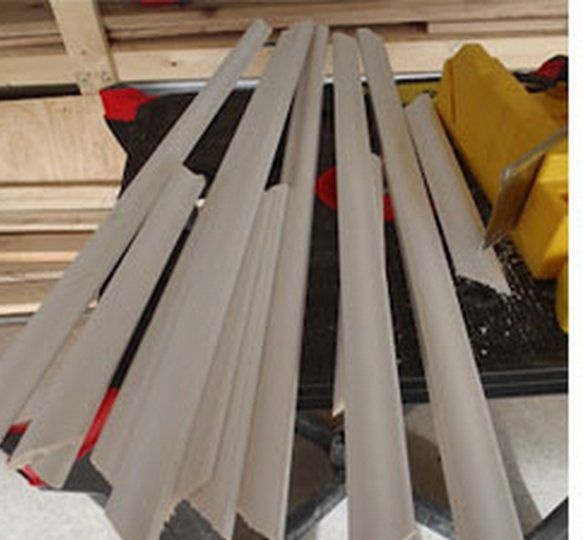
Start by making frame parts. Decide on the size and markup. Saw the pieces at an angle of 45 degrees. The best hand-held hacksaw for wood with a small tooth is best suited for these purposes.
Estimate how many decorative parts from plywood fit on a segment of the mirror and write down how many of them you need.
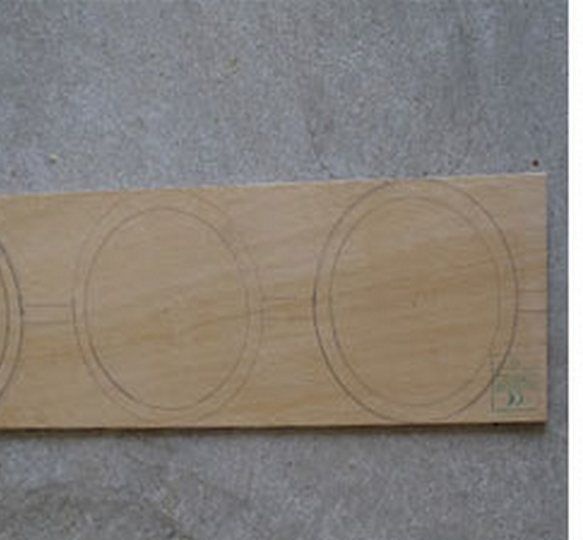
Armed with a compass, check the marking of the rings on the plywood sheet. Their thickness should be approximately 1-2 cm, depending on the size of the mirror.
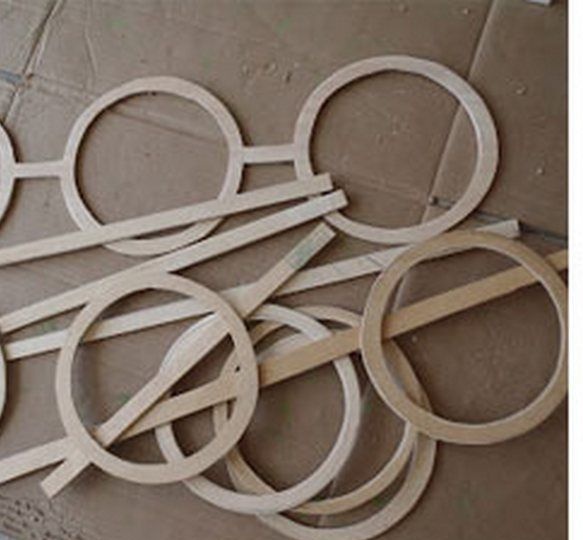
You will also need strips of plywood of the same width as the rings. If you chose a chipboard, a regular clerical knife will do the job. Plywood is a stronger and more durable material. If the knife is powerless, use an electric jigsaw to cut out all the decor elements.
In any case, the edges of the parts will almost certainly not be smooth enough. Do not worry, because any irregularities can be eliminated during the grinding process.
It is most convenient to use a drill for these purposes. It is designed to handle small parts. However, this is not such a common tool. It is not difficult to grind the parts manually with sandpaper. Remove any excess with coarse emery paper and sand fine-grained.
Step Three: Frame Making
Assemble the frames. Use glue, metal connecting corners and wood screws for this.
If you were to make a frame for a picture, you would not need corners and screws. However, the mirror is a weighty material and creates decent pressure on the frame. Metal compounds are designed to strengthen it.
Lay out the details of the first frame together, attach the corners and mark the points of attachment of the screws. Using an electric drill, drill holes at the designated points.
Put a little glue on the ends of the frame parts, connect them and press for a few seconds. Attach a corner and screw the screws.
Given the volume of work, it is not necessary to use a screwdriver. Short self-tapping screws are easily screwed into the wood with a screwdriver. Moreover, you made holes for them in advance.
Repeat these operations with the rest of the frames and leave them for a while until the glue completely dries.
In the meantime, take the dimensions of the back of the frame and set them aside on the chipboard sheet so that you get a rectangle. Cut the resulting part and make two more of the same.
Chipboard sheets will be attached to the back of the mirrors to protect them from shock and other damage.
Fourth step: painting frames and decorative finishes
The frame and decor must be painted. Choose a water-based paint that you can work with even indoors.
It is more convenient to work with spray paint, since all parts, including the frame, are small and it will take a very long time to paint them with a paint brush. Moreover, the aerosol coating will lie smoother and more accurate.
Cover the floor with paper, lay out all the parts next to each other and spray paint from the spray can at a certain distance from the surface.
Wait for the time when the paint hardens according to the instructions. Apply a second coat of paint and let it dry completely.
The varnish will help you fix the paint on the surface of the wood, and subsequently you can regularly wet the mirrors without fear of damaging the painted frames.
Apply a couple of layers of varnish and leave all the parts to dry thoroughly.
Step five: assembling mirrors and decorating them
Fix the mirrors in the frames. To do this, put a little glue in the grooves of the frame and lay the mirror on top. Press it firmly so that the grip becomes stronger and the glue is evenly distributed.
When the glue is completely dry, turn the mirror over and attach a piece of chipboard from the back.Fix it with small cloves or a small amount of glue.
Finally, you can start decorating the surface of the mirrors. All decorative elements at hand. To make sure of this, lay them out in the intended composition. Glue the parts to the glass surface.
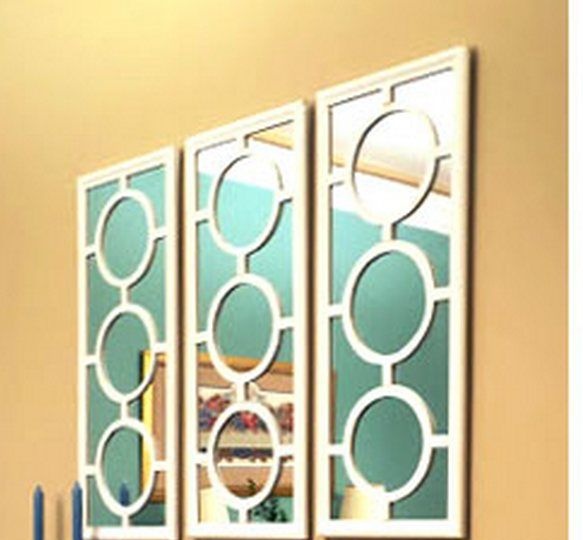
You probably did a great job, and now all that remains to be done is to hang the mirrors on the wall!