

I like to go out with friends to nature, go fishing or go on vacation to the mountains. Often we stay overnight or sit until dark and without good lighting, even in the fresh air it is not very comfortable. The lights that are sold in the store, I do not really like, then a little light, then the batteries go down. And so I decided to make a universal and bright lamp that could be connected to a car battery and other 12 volt batteries.
A regular 12V LED strip came to my aid. There was nothing to do, and in my spare time I decided to make a lantern from it. The result is a fairly powerful, compact and economical light source that constantly lies in my car and helps out in any situation, whether it's going out into the countryside at night or when you need to highlight something.
So, for the manufacture of such a flashlight, I used:
- LED strip - 1 meter
- A piece of thin plywood - 9X16 cm
- Aluminum tape
- Double wire - 2.5 meters
Unfortunately, I can’t put all the stages of assembling the flashlight into a photo, since I decided to write an article after it was assembled, but I will try to explain that everything would be clear.
Frame for a lamp
First you need to cut a rectangle from plywood 9X16 cm in size. You can use other material, for example, any piece of sheet plastic or even better a piece of a printed circuit board, I used plywood, because it is convenient to work with it. The size of the segment must be calculated individually, taking into account the footage of the LED strip, its width and the shape of the future lamp. Personally, I took 1 meter of tape and made segments 15 cm long.
This segment will serve as a frame, we will stick an LED strip on it. A piece of plywood must be sanded with fine sandpaper and fat free with alcohol or acetone. Then, it is advisable to stick aluminum tape on top of the bar, but without it, it is necessary in order to improve the reflective properties, and the LED strip adheres to it better.
Making a lantern
When the frame is prepared, you can proceed to the assembly itself. As I said above, we need to cut the LED strip 1 m long into 15 cm pieces, the last piece should be a little shorter. In general, it all depends on your imagination, you can give any shape and size, I liked this particular option.
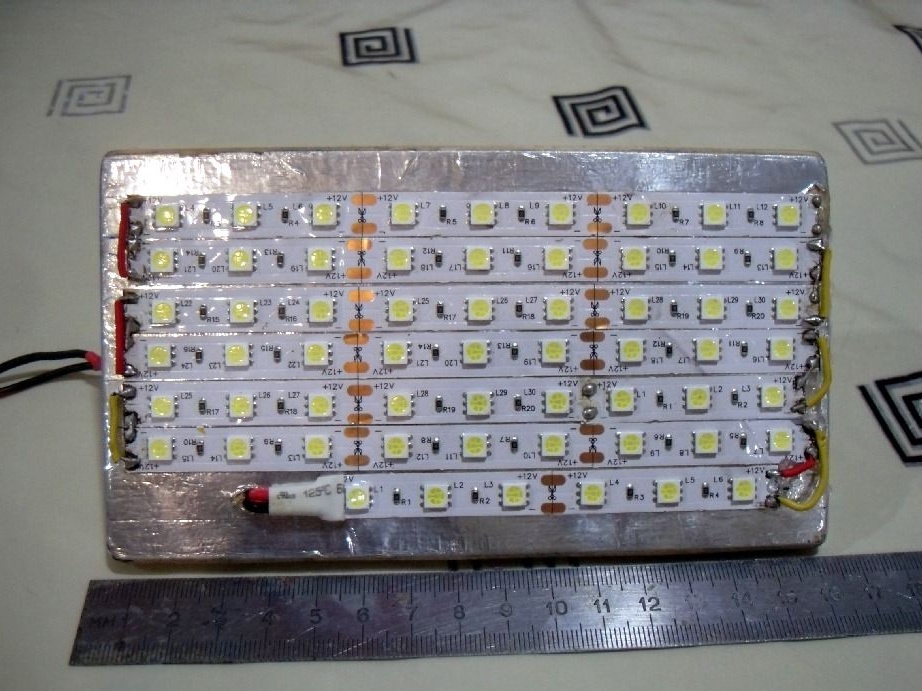
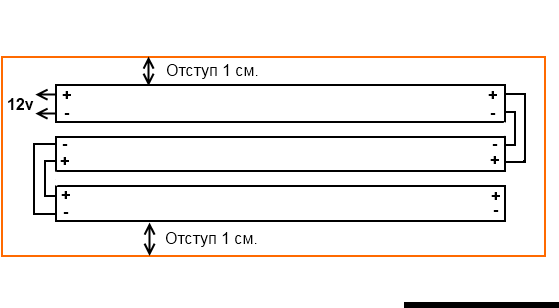
Now we take and just glue the pieces of tape next to each other on the bar, take into account the indents from the edges of 1 cm, so that the entire tape fits in the center. After everything is glued, solder the tape together. Please note that the tape must be soldered along the way, as it was in its entirety.
Here is the soldering tape:

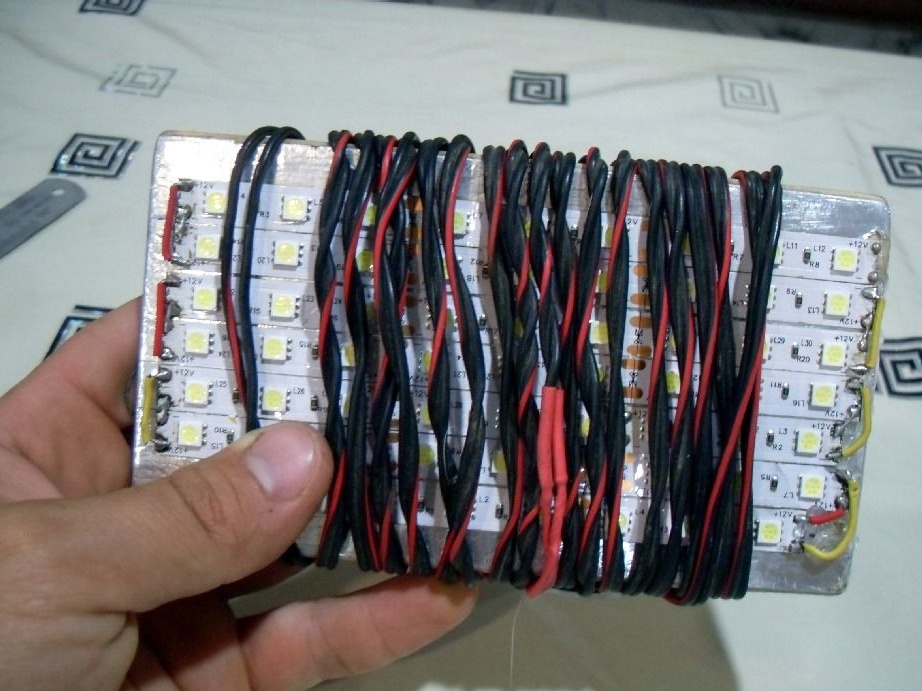
After everything is ready, solder the power wire to the tape, make a hole with a drill, as in the photo above and thread the wire so that it comes out from the back. In order for the lantern to be suspended, I screwed an ordinary screw in the center, but you can come up with another mount, it all depends on your imagination))

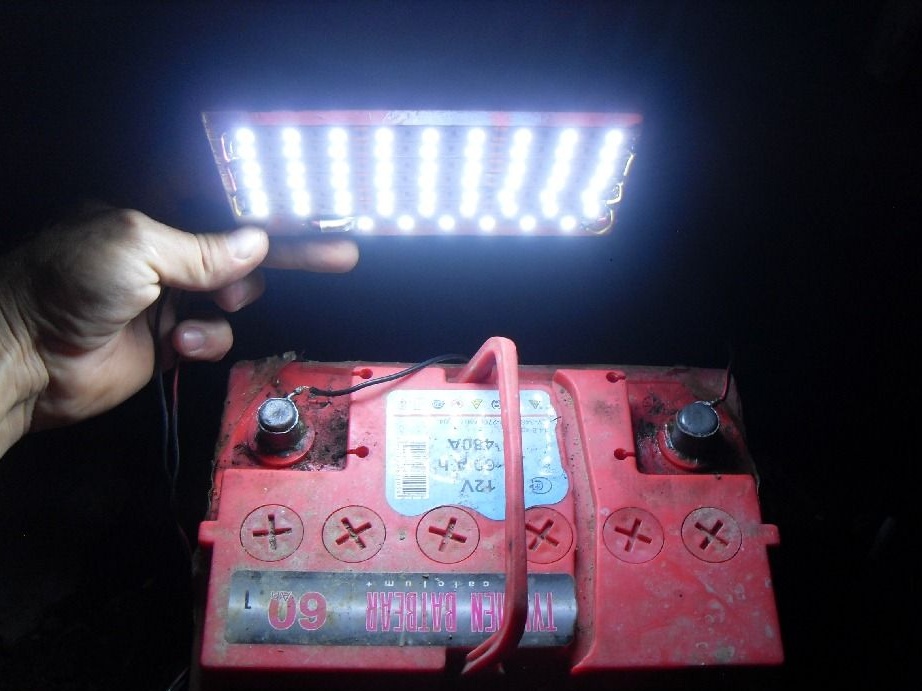
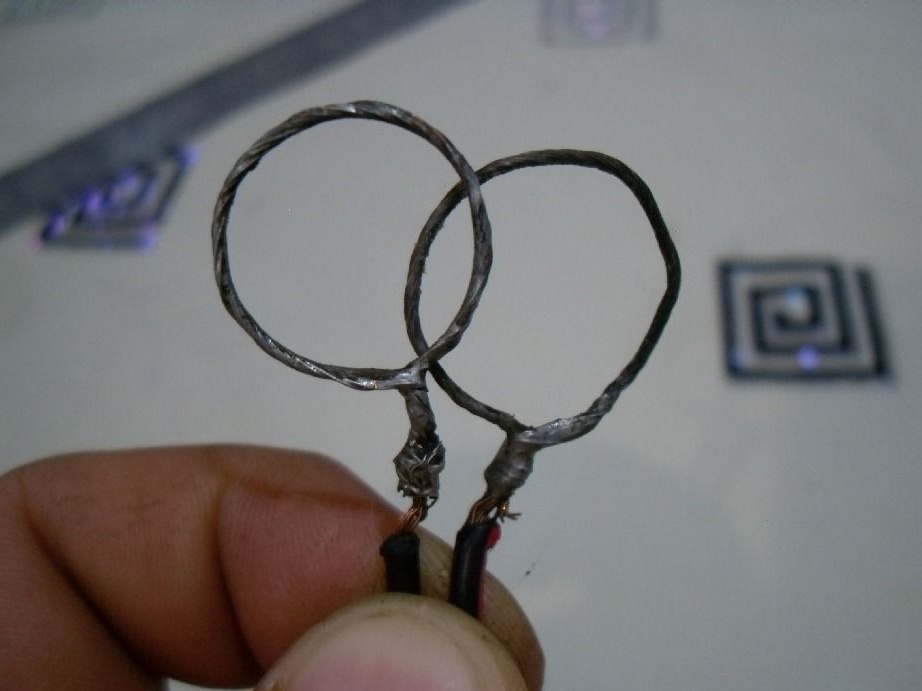
That's all, the flashlight is ready for use. As a source for powering the flashlight, I use a car battery and so that I can easily connect it, I made wraps in the size of the terminal on the end of the power cord. They are made very easily, you need to wrap the stripped wire around the terminal, fix it and poke it with tin. But the best thing is to connect crocodiles.
The lantern shines very brightly, according to the parameters of the tape that I bought, its power is about 14 watts per meter. So pay attention to these options when buying. As for consumption, I can’t say for sure, but with a fully charged battery and continuous operation of the tape for 12 hours, the 60 A / h battery was discharged by almost half a volt. I believe that this is a pretty good result, in terms of savings.
This is how the lantern shines:
And here is the flashlight assembled:
Personally, I and my friends really liked this lamp, it shines brightly, illuminates a fairly large area. And you no longer need to illuminate the table with flashlights and telephones)) By the way, you can power the flashlight from any battery or 12 volt battery, even suitable from a screwdriver.
The total price that it cost me is not very high, a meter of LED strip costs 120 rubles and a 2.5 meter wire is about 25 rubles, a total of 145 rubles for an excellent flashlight with a power of 14 watts.
Try to do it, recommend it! Thanks for attention.