In the best of times, the population of a village around the world could afford the luxury of a beautiful and spectacular of furniture.
In addition to the desire for beauty and attempts to imitate the decor elements of furniture for the nobility, rustic furniture still had its own characteristic features.
Masters invariably used wood as the main and almost the only material in the production of their masterpieces.
As a rule, each area was rich in certain types of wood, which on the other side of the world were considered not just a curiosity, but an unprecedented exotic.
Some compositions were so loved by the population that they turned into classics for centuries. Such furniture finds its admirers in our time, but it is rarely seen in stores. As a rule, a return to basics in the process of creating furniture for today is a destiny home masters and small theme workshops.
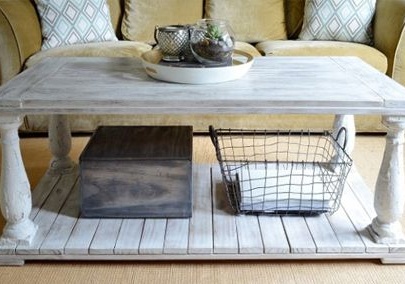
The author of this master class prepared for you a draft of his coffee table, very eclectic, but with obvious retro elements. So it will be easier to refer to this style as "rustic."
In order to do it yourself to make this coffee table with curly legs, you will need:
1. Materials:
- 2 pcs x 100 x 1200 mm - longitudinal details of the tabletop frame;
- 2 pcs x 100 x 400 mm - transverse details of the tabletop frame;
- 1 pc x 100 x 400 mm - the central part of the tabletop frame;
- 2 pcs x 100 x 600 mm - extreme details of the front side of the countertop;
- 6 pcs x 100 x 1100 mm - longitudinal details of the front side of the countertop;
- 2 pcs x 100 x 1200 mm - longitudinal details of the lower tier frame;
- 2 pcs x 100 x 400 mm - transverse details of the lower tier frame;
- 1 pc x 100 x 400 mm - the central part of the lower tier frame;
- 16 pcs x 77 x 600 mm - flooring details of the lower tier;
- curly legs - 4 pcs;
- self-tapping screws or furniture screws;
- paint is milky or snow-white;
- glue for woodwork;
- varnish on wood.
2. Tools:
- electric drill;
- grinder;
- jigsaw or any other tool for sawing boards;
- a screwdriver and a Phillips screwdriver;
- clamps or suitable clamps;
- paint brush;
- soft fabric without lint;
- construction tape measure;
- a pencil.
Step One: Material Preparation
Choose planed boards, as they have the same thickness, and in your case it is very important.
If you use second-hand material, take care to remove the aged top layer of wood using the same thicknessing machine. Try not to use the planer, as you will not be able to adjust the boards to the specified thickness.
Avoid raw, freshly sawn lumber. Only after high-quality drying is wood ready for the production of any wood products. Otherwise, cracks will appear on the surface of the furniture, and the structure itself will lose strength by changing the mass of the material.
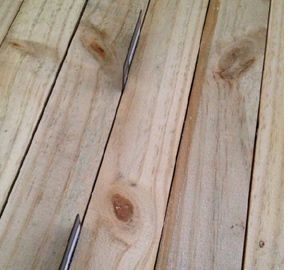
Use furniture screws or self-tapping screws in the joints of those joints that support the design. To fasten parts of the lower shelf or countertops, you can use nails. By the way, do not forget that in construction hypermarkets or online stores you can find a wide selection of nails with decorative hats.
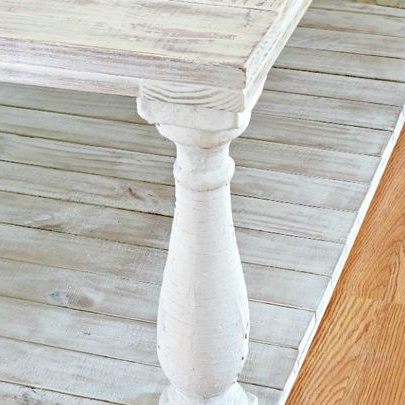
The author used ready-made legs, pre-painted, with the effect of a cracked coating. Such legs can be found in stores "all for the production of furniture", you can order a turner, or you can dismantle from old tables or flights of stairs, where such elements were primarily used.
Step two: marking and manufacturing of parts
The author of this workshop shared the measurements of the coffee table, so you can safely take them into service. If the table is too big for your living room, reduce the proportions. However, do not forget that the more massive the legs you managed to find, the wider and longer the table should be in order to look harmonious.
Mark up, especially carefully, if you nevertheless changed the original dimensions of the parts. Saw boards into pieces of the required length.
Step Three: Assembling the Lower and Upper Frame
First of all, you need to make two frames of the same size and design for the countertop and the lower base shelf.
Each of them consists of two longitudinal and three transverse crossbars. Moreover, the latter are equal in length, as can be seen in the photo below.
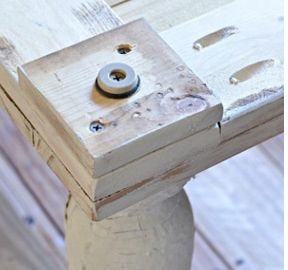
The author used hidden diagonal joints with screws so that their hats would not interfere with fixing the upper front surface of the countertop.
Using a drill, make diagonal holes (see photo below), clamp the parts with a clamp to fix them securely, and screw in the screw. Thus, assemble the frame for the countertop and get down to making the frame for the shelf.


Fourth step: subsequent assembly
Fix the frame of the countertop to the legs. To do this, mark and outline where the legs will be. Make sure they are equally spaced from the edge of the table.
Install the frame on the legs and make four holes for their fastening: through the frame and at the end of the legs. It will not be superfluous to drill a hole for the screw head with a larger drill bit.
Put glue on the torus of each leg and securely fix it with a screw to press the frame to the leg. With such a combined connection, it is not necessary to wait until the glue sets, but you can safely continue to work.
On the frame intended for the lower shelf, nail or screw the transverse braces as shown in the photo. On the reverse side, in each corner, the author fixed low "legs" made of scraps of boards and having the shape of a square.
You can screw the wheels to them, or you can limit yourself to rubber protection, which protects the floor from scratches during the operation of such furniture.
Combine the base of the table with its upper frame and legs and proceed to create the front of the countertop.
To do this, fix the transverse flange of the countertop from one edge, nail the longitudinal parts and fix the second transverse board from the back edge. Make sure that the edges of the countertops remain flat.
The assembly is finished, and you can proceed to the most pleasant stage - painting.

Step Five: Finishing
Before you start painting, carefully grind all surfaces with a grinder. Pay special attention to wood cutting sites. Remove dust with a damp cloth.
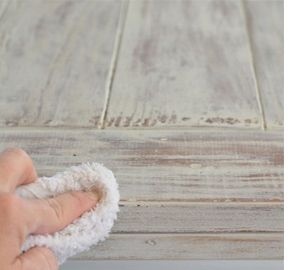
The author used the now popular "chalk" paint. To prevent it from drying out too quickly, he mixed a little acrylic paint into the composition, about 1: 3.
Apply paint to the surface of the table and lightly wipe it with a soft, lint-free cloth. This is a kind of imitation of old painting.
You can also paint the wood, wait until the paint is completely dry and lightly sand the surface with sandpaper. However, this will give you a slightly different effect, a more even, albeit worn out coating.
In any case, which of the aging methods to choose, you decide, based on the properties of the paint itself. If it is sticky, then you can’t remove it with takany.
Fix the paint with a suitable varnish. For strength, apply it in several layers, using interlayer grinding so that each new layer reliably penetrates the previous one, forming a coating that is resistant to mechanical damage.
You can use a transparent varnish, or you can find a composition with a suitable shade for this project. Translucent lacquer will give the color of completeness, and the table as a whole will look more organic in its own style.

The master class has come to an end! Make this wonderful coffee table with your own hands and it will bring a little rustic comfort to your home!