
Every little girl dreams of being a princess at least once in her life. Dazzling outfits are an integral attribute of any princess. And if your daughter likes to try on clothes, you should take care of where to store them.
Surely you need something special, even fabulous, to satisfy the tastes of a little fashionista, because the parent is the very wizard who is able to turn the dreams of children into reality.
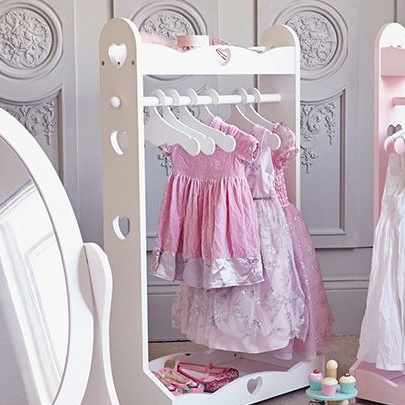
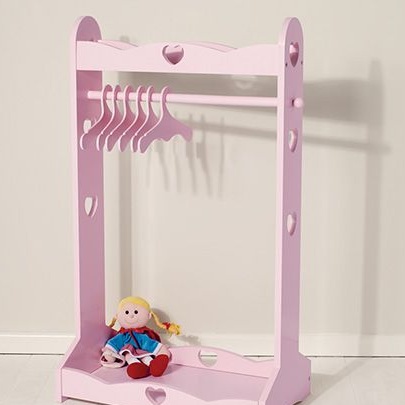
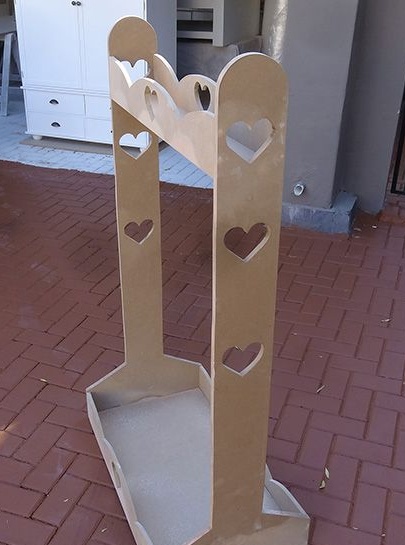
This beautiful and elegant outdoor wardrobe will delight any girl. It looks great in snow-white performance. The wardrobe painted by the author in pale pink turned out to be just as spectacular.
The design of this wardrobe-hanger is more than simple, and for its manufacture the most convenient sheet material is used.
To make such a clothes hanger do it yourself and to please your beautiful daughter, you will need:
Materials:
1. 16 mm sheets of plywood or MDF:
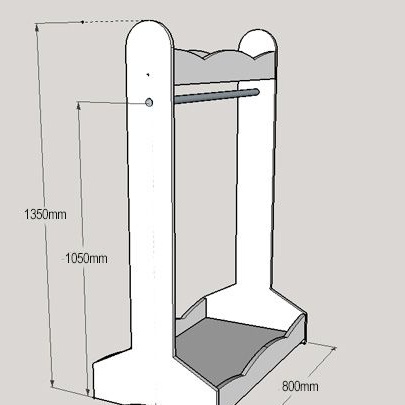
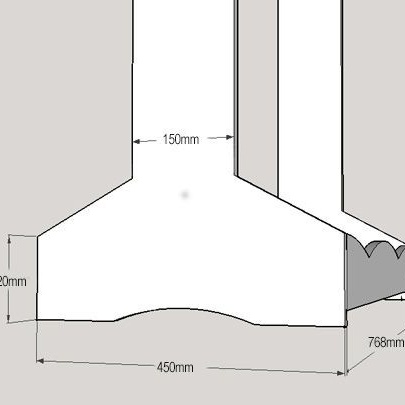
- 2 pcs x 16 x 450 x 1350 mm - side parts of the hanger;
- 4 pcs x 16 x 100 x 768 mm - longitudinal sides of the lower and upper shelves;
- 16 x 418 x 768 mm - the base of the lower shelf;
- 16 x 118 x 768 mm - the base of the upper shelf;
2. glue for woodwork;
3. paint for wood;
4. varnish for wood processing;
5. round wooden caps for the cylindrical crossbar;
6. the cylindrical crossbar itself;
7. furniture screws or self-tapping screws (decorative caps for self-tapping screws);
8. putty on wood.
Instruments:
1. jigsaw;
2. electric drill;
3. a screwdriver;
4. grinder;
5. a spray gun for paint or paint brushes and a roller for painting hangers;
6. building tape;
7. pencil;
8. sewing pattern;
9. putty knife.
Step One: Material Selection
The author in his master class used MDF sheets for making a hanger. If necessary, it can be replaced with high quality pine plywood.
The paint you choose should have a safe composition. It is better if it is a water-based paint. The same goes for varnish. Paints and varnishes simply must be of high quality. Therefore, erasing a layer of paint during wet cleaning or peeling varnish is unacceptable and the concept of "safety" is definitely not included.
The choice of the shade of paint completely and completely depends on your preferences and the interior features of the nursery, where you plan to install a hanger-wardrobe.
Step two: sketch and outline of the product
Before you start work, sketch on paper a sketch of the product that you would like to receive at the exit. Think through all the details and present the end result.
The author provided his scheme, where the design of the hanger is visible in detail. You can safely take it as a basis, because all the little things have already been taken into account here.
If you plan to resize the finished product, recalculate the dimensions of all its individual parts in order to prevent errors in the manufacturing process of the workpieces.
Step Three: Part Marking and Fabrication
Now is the time to mark the parts on the sheets of material that you have chosen. For example, on MDF sheets, like the author of this workshop.
You can draw details by hand, or you can first prepare paper patterns and use them to transfer the outlines of parts to MDF sheets.
When building parts, use a sewing pattern. This is a simple and not at all rare tool in sewing practice and not only. You can find it in any sewing store.
The sewing pattern allows you to draw smooth curly lines in the process of drawing. If you resorted to the manufacture of paper patterns, then before drawing the contours of the part, fold a sheet of paper in half. So you end up with a symmetrical pattern.
Cut the paper patterns of the elements of the hanger with scissors, put it on an MDF sheet and draw a pencil around the outline. In the second case, draw the part by hand and make sure that it looks quite symmetrical.
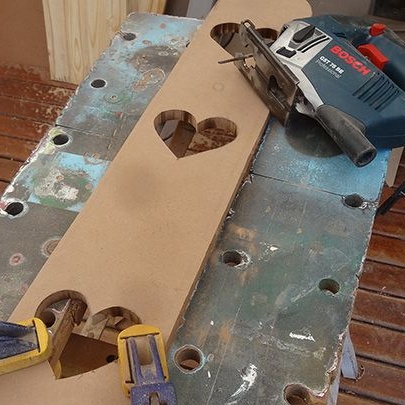
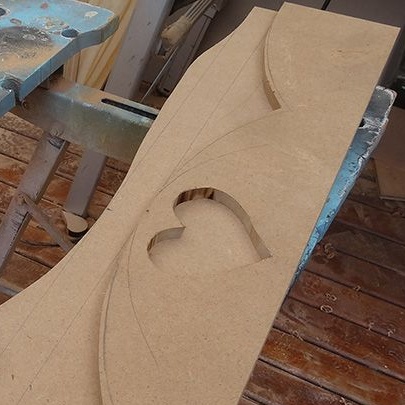
Saw the parts with a jigsaw. In the process of cutting the same elements, such as, for example, the sides of the shelves or the side parts of the hanger, try to cut the right number of layers of material at once to get the right number of parts.
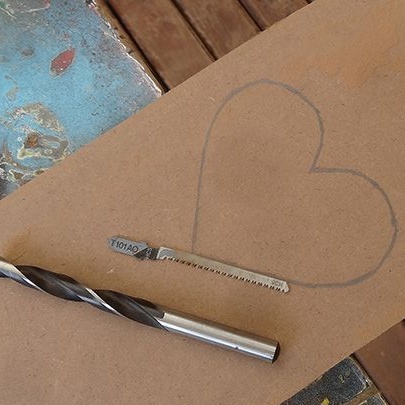
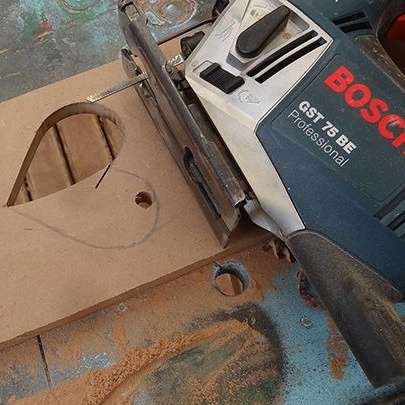
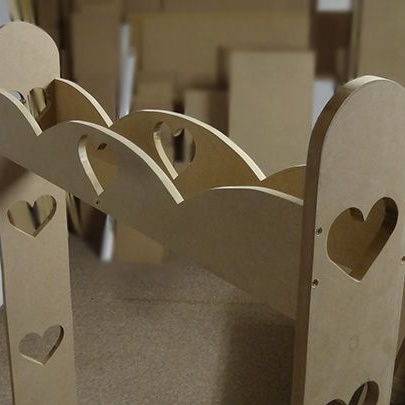
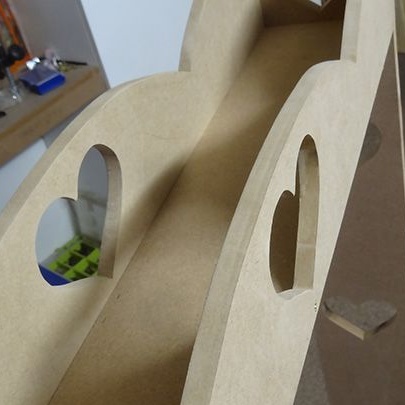
On the rest of the paper, draw a small heart and cut it with scissors. Decorative holes in the shape of a heart are cut in the side racks of the hanger, as well as on the sides of the shelves. Lay a piece of paper on these parts at the locations of the holes and mark them. Cut out the holes in the shape of hearts with an electric jigsaw.
To cope with this task, the author first drilled a couple of holes into which he started a jigsaw file.

Fourth step: assembly of the structure
After all the parts are assembled, you can finally proceed with the assembly of the hanger structure.
Start with its foundation. Connect the side posts to the sides of the lower shelf. To do this, use the combined method, which consists in the simultaneous use of glue and fastening with screws.
Apply a small amount of glue to the joints, press against the posts for several seconds and screw in the screws, pulling the parts together.
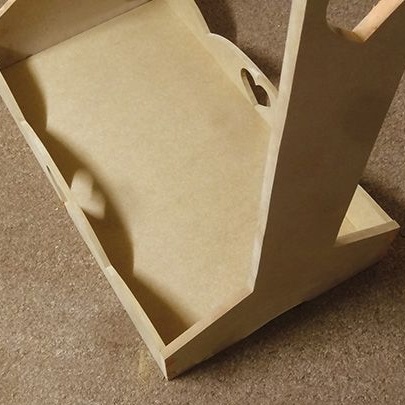
Please note that the shelf is located a couple of centimeters above the level of the base of the hanger, which allows the latter to easily find a stable position not even on the most even surface of the wooden floor. Fasten the bottom of the lower shelf.
Assemble the top shelf by the example of the bottom, reliably fixing the design with screws.
Holes for the cylindrical crossbar are also provided in the side posts. Pass the crossbar into the hole and use glue to fix the decorative round wooden caps at its ends.
Fifth step: preliminary preparation of the surface for painting
Before starting the painting, the surface of the hanger must be properly prepared. In this case, this concept includes puttying and grinding of the material.
Fill the gaps and screw-in points with a reliable putty for woodworking. Let it dry and harden completely.
The author used the Bosch orbital sander for grinding. Walk over the entire surface of the product until it acquires a characteristic smoothness. Pay special attention to the end parts of the parts where they were cut.
Also thoroughly sand the puttied places, smoothing the surface and removing excess material.
Sixth step: painting and varnishing of the product
Proceed to painting the hangers. Apply a coat of paint and let it dry. Repeat the painting procedure and wait for the coating to dry again. The master class hanger-wardrobe is painted with matte paint with an even velvety tint.
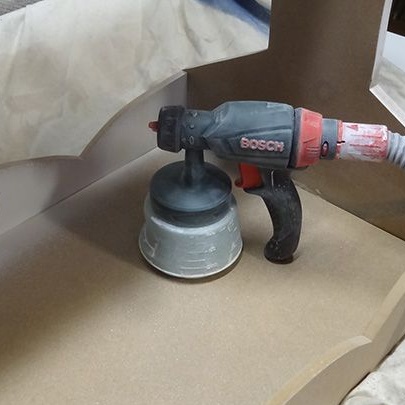
The author used the Bosch PFS spray gun for painting. He copes with such tasks. However, in case you do not have such a miracle technique, paint brushes and rollers are at your service.
If the type of paint, its quality and durability of the final coating allows, this can be stopped. This is what the author of this master class did. However, more often all have to resort to a fixing layer of varnish.
Varnishing protects the paint from fading and reliably fixes it to the surface. In addition, a layer of hardened varnish allows wet cleaning of the product at least every day.
Apply the varnish in several layers, sanding each intermediate layer with fine-grained sandpaper. This will make the adhesion of the varnish layers more durable. Apply a final coat of varnish and let the product dry until the coating has completely hardened.
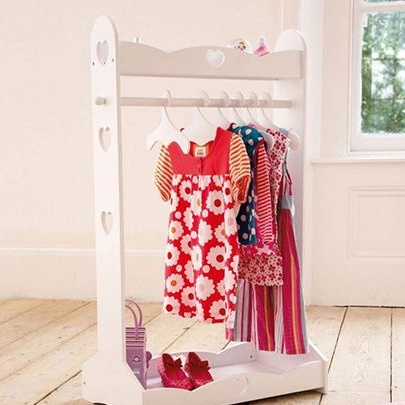
The work is over, and the fabulous hanger for outfits of the little princess is ready!