
Who would like to regularly wipe dust off bookshelves? It is time to stop this tedious and boring occupation. There are tons of ideas on how to store books, and open bookshelves are not the best of them.
A bookcase with lockable doors is a great alternative. In addition, it is universal and it can be used with equal success both for storing books and for storing dishes or even clothes.
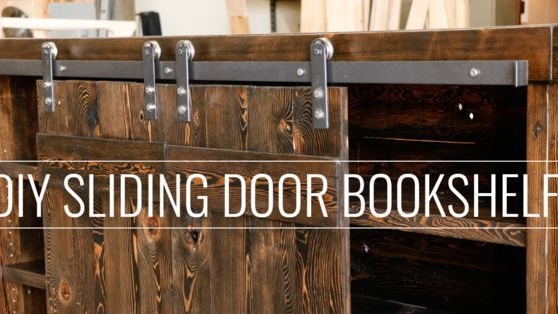
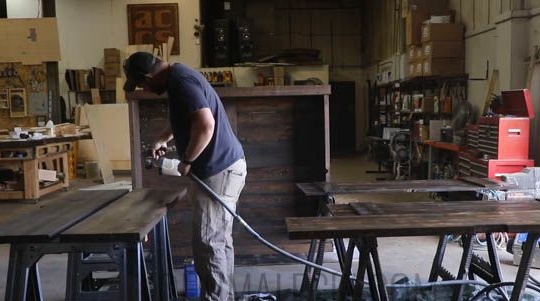
Sliding door systems using roller elements have become particularly popular. Just one of these the author made independently and kindly shared his method. In this workshop, John Malevsky will explain in detail how do it yourself make a cabinet for your favorite books with a system of sliding doors.


For work you will need:
Materials:
1. planed boards of any kind of wood;
2. glue for woodwork;
3. protective and decorative coating, such as stain and varnish or oil toner;
4. furniture screws and nails for a pneumatic nail gun;
5. metal strips with a width of 3.5 - 5 cm and metal rollers.
Instruments:
1. miter saw;
2. woodworking machine with a circular;
3. Bulgarian with a cutting disc for metal;
4. grinding machine or manual grinder;
5. planer and planer;
6. pneumatic nail gun or joiner's hammer;
7. a screwdriver;
8. a spray gun for varnish or paint brushes, a roller and a soft, lint-free cloth;
9. electric drill;
10. building tape and pencil.
Step One: Selection and Preliminary Preparation
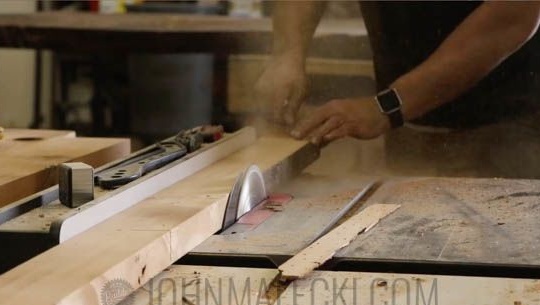
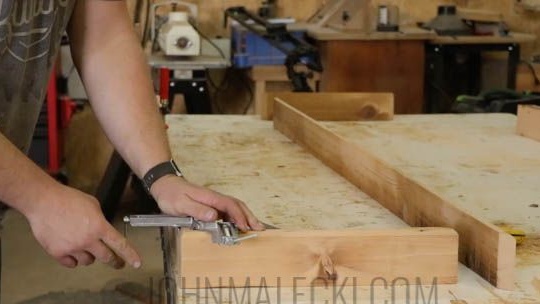
The author used non-planed boards, which he specially ordered for the implementation of his project. You can purchase lumber of any kind of wood, including classical pine for our latitudes. In any case, select the boards with the most interesting and pronounced pattern.
Pass the boards through the woodworking machine in the jointer mode if their plane is uneven or when you are using used material, as well as material that has been stored outdoors for a long time.
Proceed to adjust the thickness of the boards. To do this, use a thicknessing machine. Set the thicknesser to the required thickness and plan the boards.
On a woodworking machine with a circular, also adjust the lateral longitudinal faces of the boards, that is, remove all unnecessary so that the boards fit snugly together.
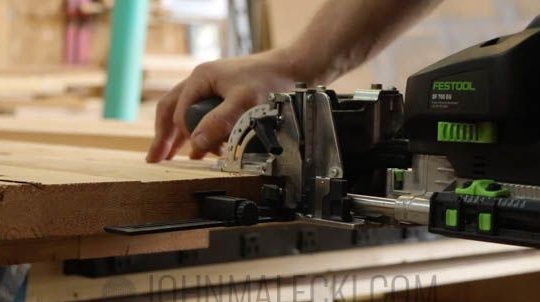
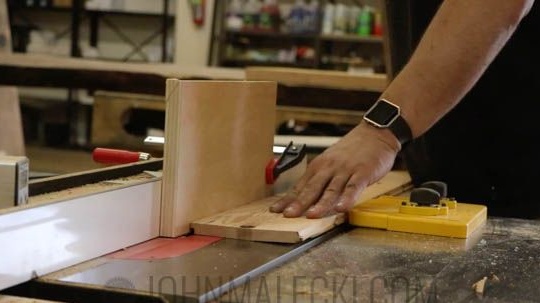
Step two: marking and cutting parts
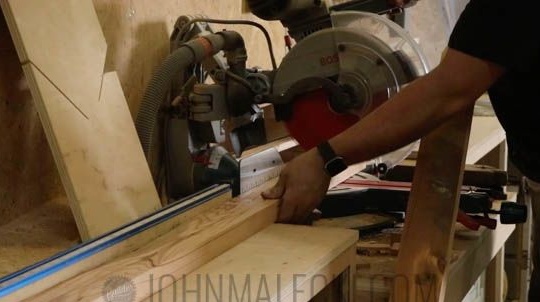
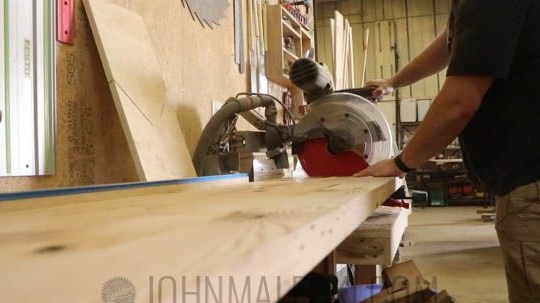
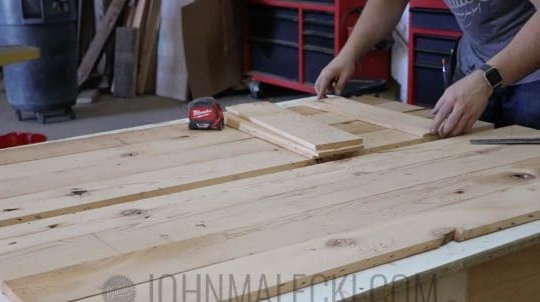
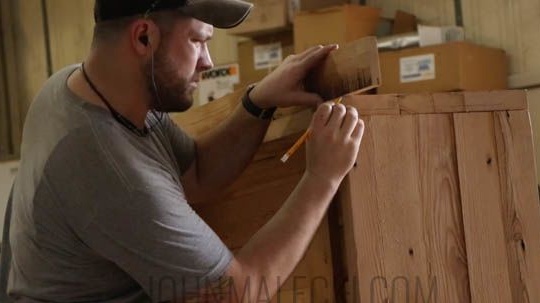
The bookcase is completely made of natural wood, without the use of sheet materials. Therefore, you have to work on marking and sawing boards into segments of the required length.
Before you get started, determine the dimensions of your future cabinet. Based on detailed photos from the master class, you can make a complete list of details that you will need to work. Carefully work through the list and start marking the parts.
The author used a miter saw in order to cut the details of the desired length. This allows you to immediately put them into operation without first fitting the slices. Parts after the miter saw fit snugly together and form even regular angles.
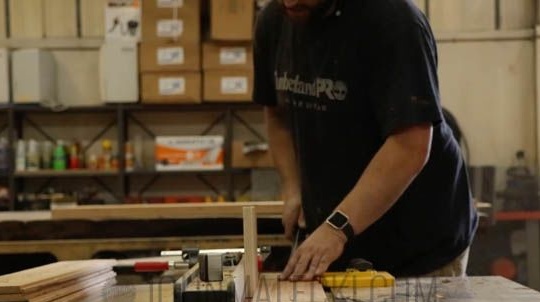
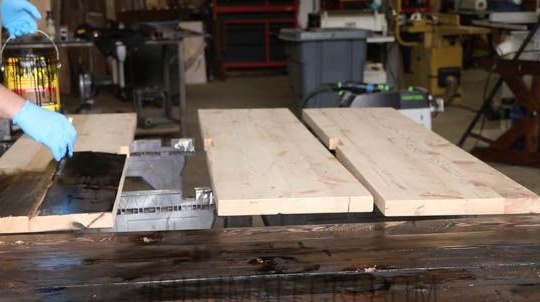
Step Three: Preparing Panels for the Cabinet
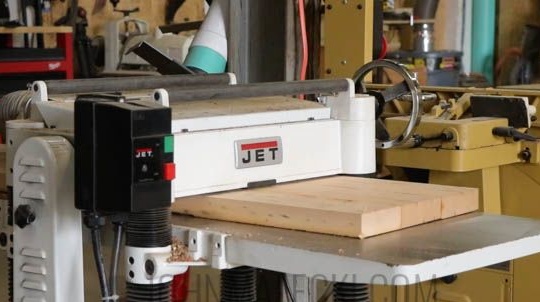
Before turning to the thicknessing machine for help, the author glued the panels for his cabinet.
To do this, he used glue on wood, applied a small amount of it to the side faces of the boards, gathered them on an even plane and clamped them in a vice until the glue completely hardens.
And only after that he passed the glued panel through the machine, adjusting it in thickness and leveling the surface.
Such an integrated approach allows us to produce perfectly even panels, from which the final product looks much more aesthetically pleasing than after a single planing of each piece.
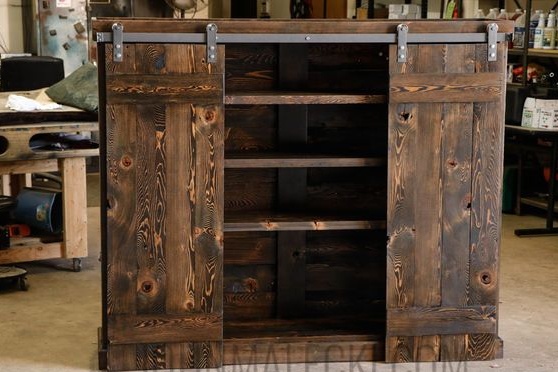
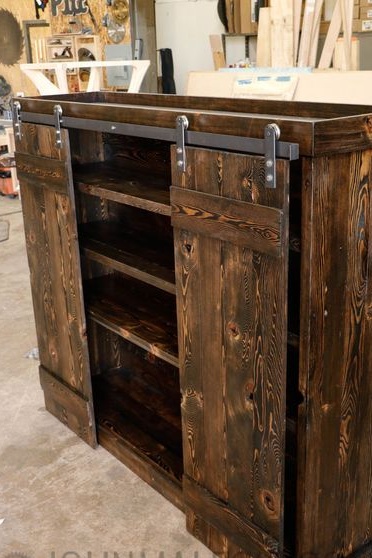
Thus, make the sides of the cabinet, its doors, bottom, top and shelves. In short, everything except the rear skin.
At this stage, you can tint the wood or leave this step for later, when the cabinet is already assembled. The author resorted to the second option.

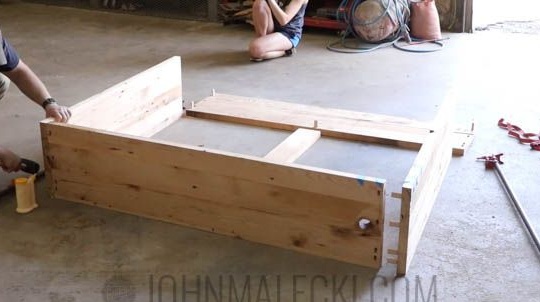
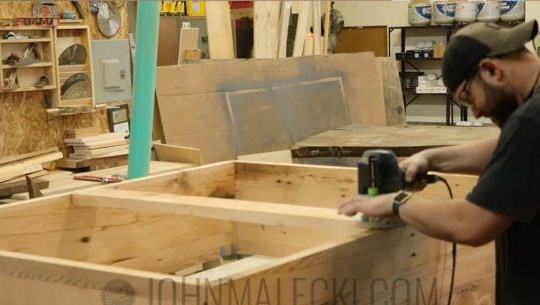
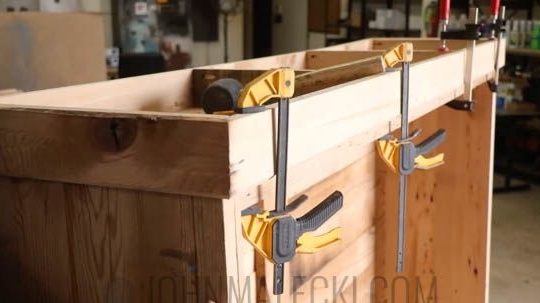
Fourth step: assembly of the structure
First you have to connect the side parts with the top and bottom of the cabinet.
The author used groove joints, which in combination with the use of glue allowed him to abandon the use of screws. This method can be successfully combined with metal connectors, which as usual are used in places inaccessible to vision, but significantly increase the strength of the structure.
This is especially true if furniture They plan to transport, often rearrange or send by courier delivery.
So, assemble the perimeter of the groove cabinet into the groove with glue. You can also use small cloves to improve traction on parts.
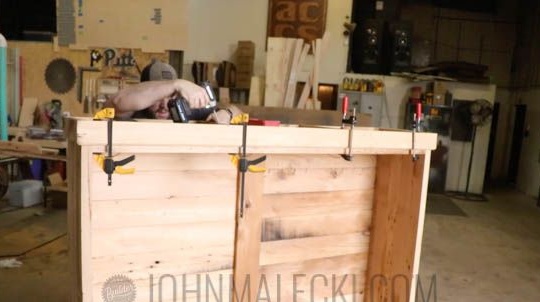
When gluing, use a clamp and vise system. These are mandatory attributes of the wizard when working with adhesive joints.
Please note that there is a vertical frame post on the back wall.
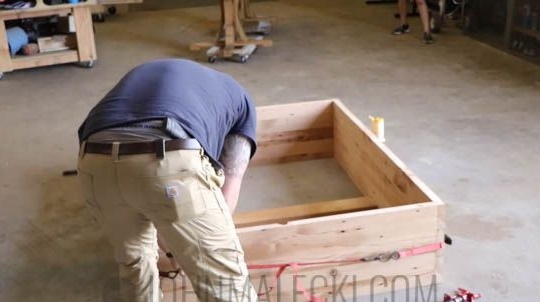
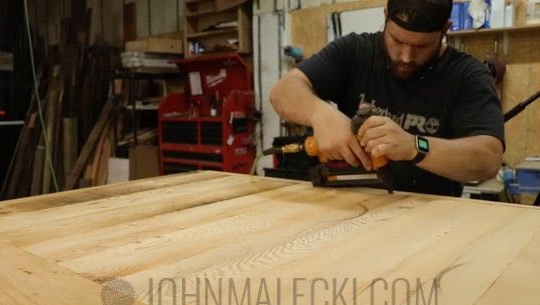
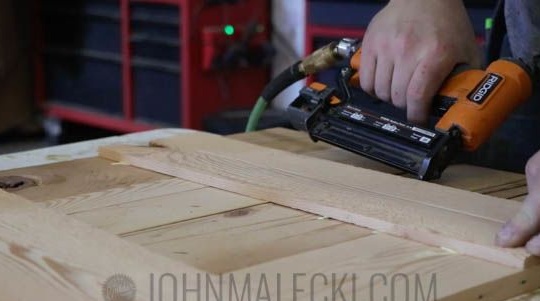
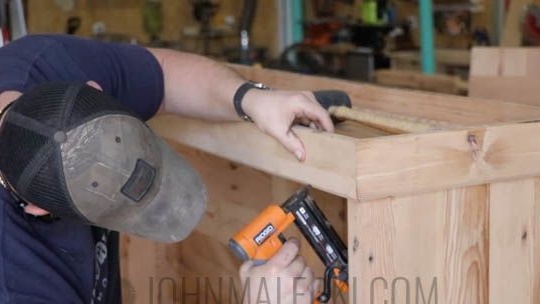
You have previously planed the details of the back wall and are ready to mount them. Fasten the fasteners to the back of the cabinet using glue and nails.
Here, the author used a pneumatic nail gun, which is incredibly convenient. However, an ordinary carpentry hammer will also work, because there is not much work here.
Before attaching the boards to the back wall, the author cut a groove in the frame for an angular connection and, thus, the boards went flush.
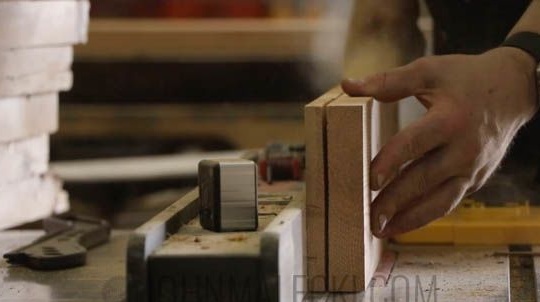
Attach the decorative crossbeams to the cabinet doors. For this you need glue and a pair of clamps. The author additionally fixed the crossbars with studs in the area of the side faces.
For the manufacture of crossbars, he used thin parts. Such as those that went to the rear wall trim.
The use of thin material in those areas that do not carry a load is very important, because the weight of natural wood furniture is very noticeable, and the use of sheet material spoils the whole appearance.Thin boards significantly reduce the weight of the finished product and save you lumber.
At the top, the author also secured the binding of narrow strips of wood. On the one hand, it will serve as the finishing touch, and on the other, it will become the basis for installing a system of sliding doors.


Step Five: Wood Tinting
The author, unfortunately, did not specify what type of material he used, but the appearance of the coating resembles either a protective-decorative oil with the effect of tinting, or varnish-toner.
Both that and another means will allow you to achieve the expected result, however, the varnish gives a coating more durable to mechanical damage. In principle, oil and varnish can be combined. The same goes for an inexpensive alcohol stain in combination with a transparent matte or semi-matt varnish.
Make sure that the compositions of paints and varnishes are compatible with each other and carefully select the tone.
Treat the wood surface with oil or alcohol stain until you achieve the desired color and apply a couple of layers of varnish, if necessary.
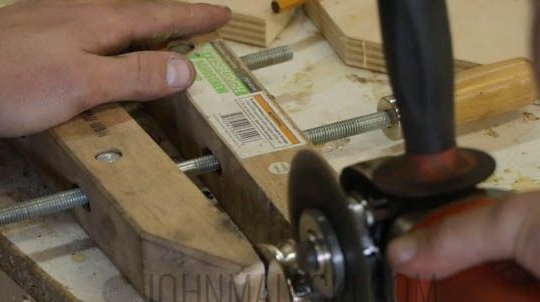
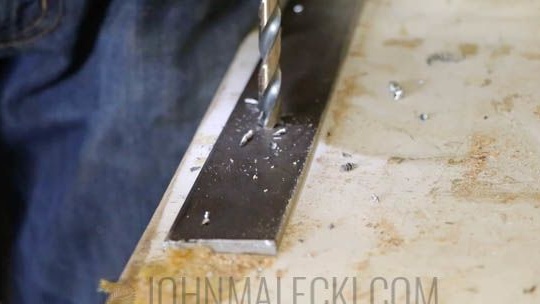
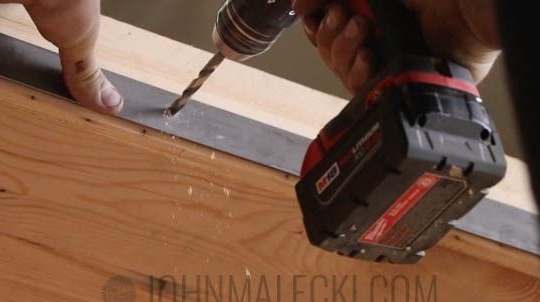
Sixth step: manufacturing and mounting a sliding door system
Similar systems in our time can already be easily found on the shelves of a building supermarket.
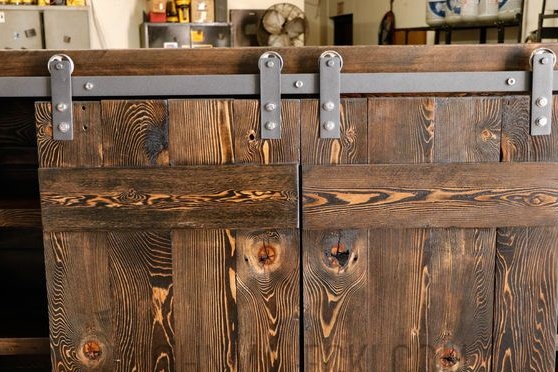
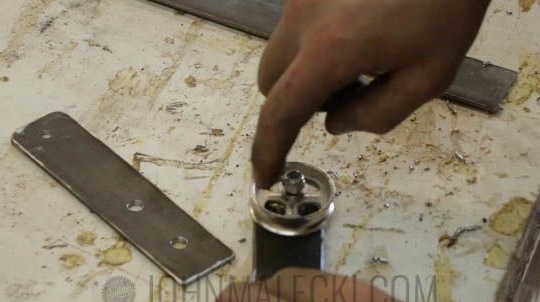
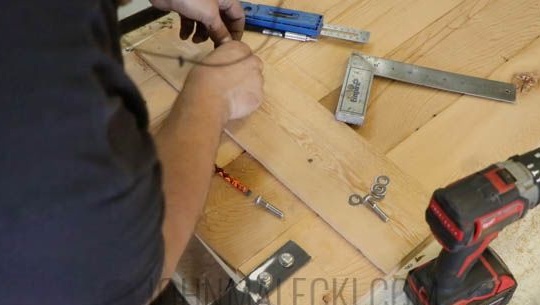
The author made it on his own. He used a metal strip, strong metal rollers, bolts and screws.
Using a grinder, saw off a long longitudinal strip of metal across the width of the facade of the cabinet. Drill holes in the wooden trim and fix the strips with screws or bolts and nuts.
Fastenings for rollers make of short segments of a metal strip, fix rollers with bolts and fix them on doors.
Slide the doors onto the steel strip. At its ends you can place improvised restraints so that the door does not fly off the hinges.


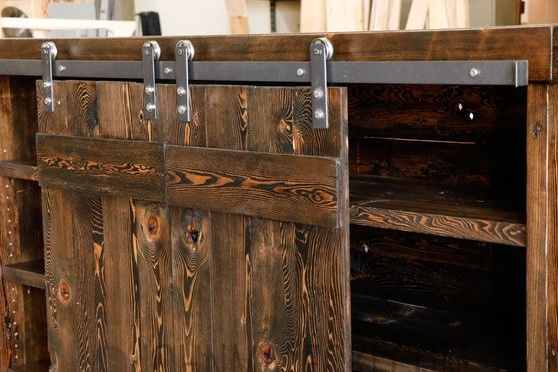


A closed cabinet with a sliding door system is ready to use! Enjoy the order!