
Many dream of a rocking chair, but for some it remains a pipe dream. There will always be another very important, pre-planned purchase. And a rocking chair is after all just entertainment, such a selfish whim.
How many admirers of this subject of furniture, so many armchair designs. All of them differ in form, type of material used, style, the presence of various additions and a number of other parameters.
Making a classic rocking chair is not easy, and sometimes completely incomprehensible to a person without certain skills.
However, the diversity of modern materials gives us a sea of new opportunities and turns dreams into reality. Sheet materials are easy to work with. They take any unimaginable form.
Very large details can also be made of them, which was problematic in the old days, when the master had the opportunity to use a very limited set of materials for the manufacture of rocking chairs: natural wood, metal and raw materials for weaving.
But working with all of them required experience and honed skills. Unlike sheet materials like plywood. If you already had a jigsaw in your hands, you know how to use a screwdriver and work with patterns - this is just the job for you.
In order to do it yourself you need to make a rocking chair:
Materials:
1. durable pine plywood of optimum thickness;
2. wooden or plastic cylindrical rungs;
3. glue for woodwork;
4. water-based paint;
5. varnish for wood;
6. furniture screws and nails;
7. cardboard for making an impromptu ruler;
8. rubber or plastic overlays for "runners" of a rocking-chair.
Instruments:
1. jigsaw;
2. electric drill with drills and a mill for sawing grooves under the crossbars;
3. a screwdriver;
4. a grinder or sandpaper;
5. hammer;
6. paint brushes and roller with a paint tray;
7. A damp cloth to remove excess glue;
8. scissors;
9. building tape;
10. pencil.
Step One: Choosing Materials
The author used pine plywood of small thickness. This is a strong glued material, so even when using thin plywood, it will be possible to achieve the necessary degree of rigidity of the product.
Choose a safe water-based paint. It has almost no smell, dries quickly and has an unlimited palette of colors.
In order for the decorative coating to become resistant, you need varnish. You can use acrylic varnish, however, choose products from well-known manufacturers, otherwise you risk getting not quite the effect after painting that was expected.
Finding material for the manufacture of cylindrical crossbars can take a really long time. However, in large construction hypermarkets you will not be left without attention. In extreme cases, these parts can be ordered from a carpentry workshop or replaced with flat poles.
For the runners of the rocking chair, protective pads made of rubber or plastic are provided. They not only protect the product itself from mechanical damage, but also protect your floor from scratches.
Try to find something similar in a hardware store. Alternatively, you can use a flattened rubber or silicone hose. And you can get a poetic version.
Step Two: Making Crossbars and Blanks for Sidewalls
All materials are collected, and you can safely proceed to the manufacture of parts of the rocking chair.
As a pattern, copy the form from this master class or create your own. Avoid overly narrow transitions and make sure that the bend is as comfortable as possible when rolling the chair back and forth.
Draw a pattern on cardboard. You can try to do it by hand, or you can use a sewing pattern and a pair of compasses - you decide. Put the picture on cardboard and cut with scissors.
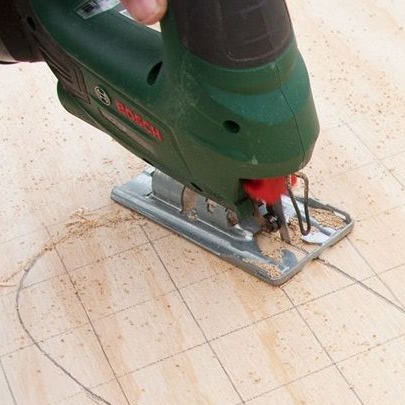
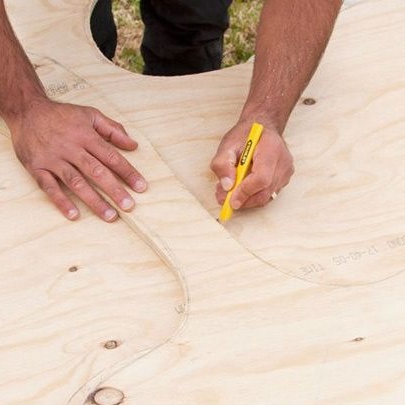
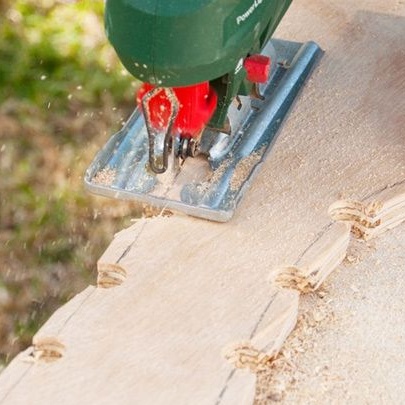
Apply the plywood pattern, circle the contour and cut the part with a jigsaw. In order for both halves to be identical in shape and size, cut through two sheets of plywood at once.
Remember that for the manufacture of two side panels you will need four parts, which is clearly visible in the photo. All of them are the same size.
Determine for yourself the optimal width of the seat, taking into account all kinds of mattresses and rugs. Also calculate the number of crossbars that you will need to make a chair.
Mark the poles and cut them into pieces of the required length. Grind the ends of the crossbars so that their edge fits snugly against the flat surface of the side parts.
Step Three: Making Grooves for the Crossbeams and Correcting the Sidewalls
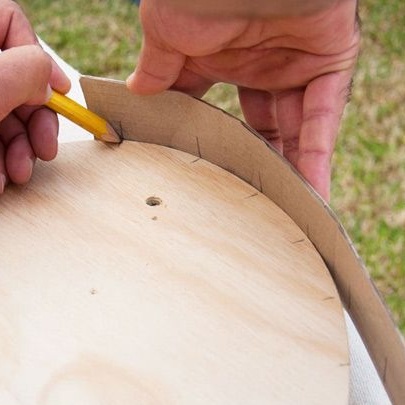
From a strip of cardboard, make an impromptu ruler, on which indicate with what frequency the crossbars will be placed on the chair.
Cardboard was not chosen for nothing, it is easy to bend. Attach your cardboard ruler to the curved bends of the side parts and transfer the marking. In this case, you are interested in the internal details of the sidewalls, which will not be visible in the final product.
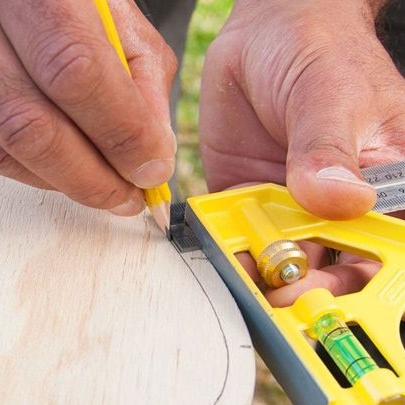
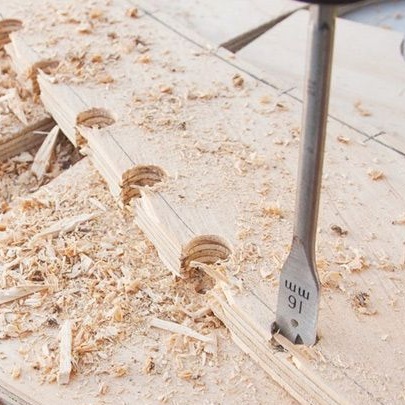
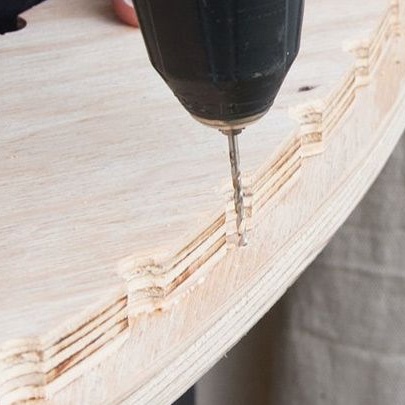
With the help of an electric drill and a milling cutter of a suitable diameter, drill holes for the crossbars for the rails at the intended points, as shown in the photo.
Draw a line exactly through the center of the cut holes and cut the parts so that semicircular recesses for the poles are formed.
Step Four: Sanding Plywood and Wood Parts
Carefully sand the edges of the plywood used to cut. To do this, use a grinder or sandpaper - first coarse-grained and only then - fine-grained, finishing.
In the second case, you will need a little more time, but the result will be approximately the same. Be sure to use construction gloves, otherwise you risk creating a splinter or a couple of painful scratches.
Step Five: Build
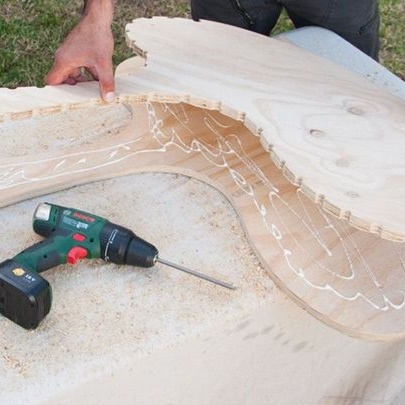
Start by gluing the sidewalls. To do this, evenly apply glue to the inner surface of the parts for the sidewall, lay them on top of each other as shown in the photo and press, putting the weight on top. Leave the sidewall until the glue has completely dried.
Fasten the skid plates to the skids using self-tapping screws and a screwdriver. In order to pad tightly, use glue.
The screws of the crossbars are attached to the sidewalls through one. Other parts are simply glued without the use of screws and screws.
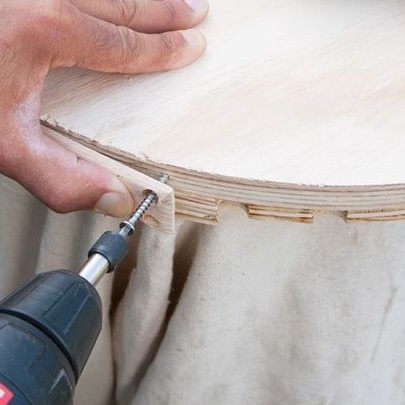
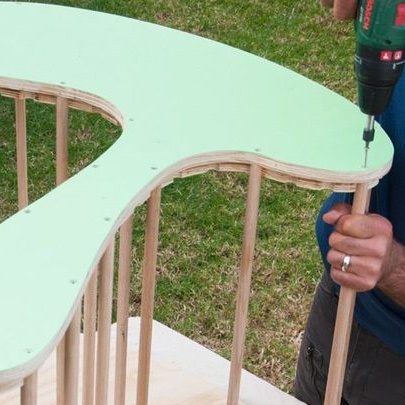
Therefore, in the fastening points, make holes for the screws using an electric drill. Drill through the plywood layer so that a mark is formed on the back side.
Start assembling the chair. Start with the poles that are additionally fastened with screws. Put a little glue on the end of the crossbar, place it in the grooves and fix with screws on the back sides of the sidewalls.
Then proceed to gluing the intermediate bars. Make sure that they fit tightly between the sidewalls. If the pole is noticeably shorter and you can see the gap, change it to a longer one. Remove excess glue with a damp cloth as you work.
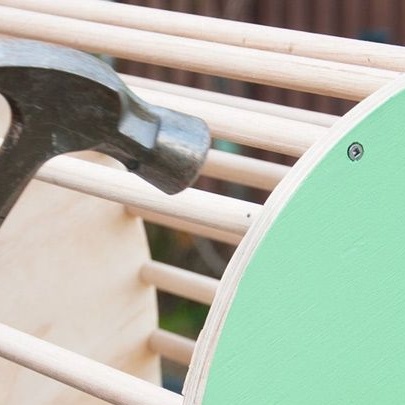
If you want to add some strength to the chair, these poles can be nailed into the end of the sidewall with cloves. Use thin, long studs to prevent the bar from accidentally cracking.
Step Six: Painting
As for painting, the author decided to paint only the outside of the side parts of the chair. If plywood quality allows, you can follow suit. You can paint the chair completely and completely, combining colors and shades.
All painting work can be done before assembly. Especially if you are planning to paint the inside of the chair as well.
Paint the chair with the color of the shade that you have chosen. If the color does not suit you, apply another coat of paint. Each new layer gives the shade brightness, up to the formation of the color declared by the manufacturers.
In any case, you will need varnish to fix the paint and protect the plywood from moisture and dust. Choose a varnish that is compatible in type with the paint, otherwise the coating may peel off.
Apply the varnish in several layers (at least two), allowing each of them to dry completely. Sand with fine emery paper each new coat of varnish before applying a new one. This will give the coating strength. Leave the outer coat of varnish unchanged.
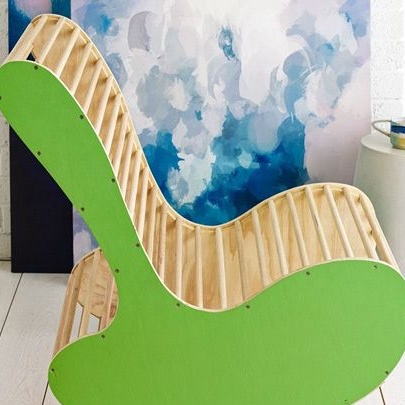
Wait until the top coat is dry - and your dream rocking chair is ready! From now on, always strive for the realization of your dreams!
