
Stationary overall furniture takes up a lot of space. This statement is especially relevant for one-room apartments, cottages and small houses. But any square meter of space can be used wisely.
To do this, compact storage systems, folding and movable furniture, as well as the principles of using countless secluded corners of our apartments, which often do not carry any functional load, were invented.
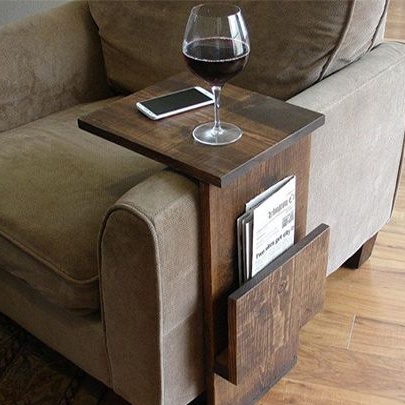
In Europe and the USA, side tables have become popular for armchairs and sofas, which take up very little space, but are very convenient to use.
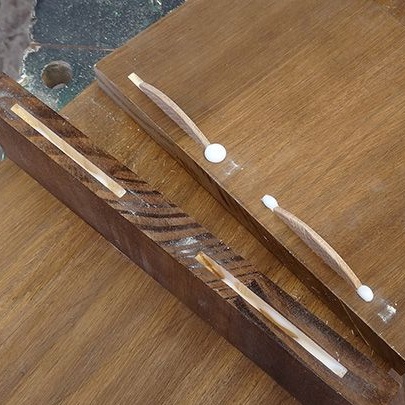
It’s convenient to leave mobile gadgets, tablets and laptops on them, use them as tables for drinks. In the design of the table, invented by the author of this master class, there is even a pocket for writing instruments. Now you will surely never lose your notebook and work diary.
In order to make such a side table for a chair do it yourself, you will need:
Materials:
1. pine plywood or particle board laminated board, 305 mm wide:
- 305 x 350 mm - worktop detail;
- 305 x 600 mm - the height of the rack, where 600 mm is the height of the former in your chair or sofa;
- 305 x 50 mm - bottom of the pocket for writing instruments;
- 305 x 150 mm - the pocket itself.
2. glue for woodwork;
3. stain or protective-decorative oil for wood processing;
4. varnish on wood;
5. self-tapping screws or furniture screws.
Instruments:
1. jigsaw or sharp hand saw with a small tooth for sawing wood;
2. electric drill;
3. square;
4. paint brushes, roller, soft cloth without lint;
5. a screwdriver;
6. grinder;
7. emery fine-grained paper;
8. building tape;
9. pencil;
10. Clamps if necessary.
Step One: Making Table Parts
To make a side table from this master class, the author used wood-shaving laminated material. You can take plywood, because finding and choosing it is much easier. In an extreme case, for the same purposes MDF trim left over from previous work is suitable.
Please note that this table is designed to be used in tandem with an armchair with flat, wide and rigid past. The table has no solid foundation, such as this. In this case, it is not required.
However, if you have a soft chair, take care of making a small rectangular base, deployed in the same direction as the countertop. To understand, with this design, the table will look like an upside down stool.
Decide on the final dimensions of your table. In particular, this concerns the height of the rack. The author had it about 600 mm. Measure the height from the base of the floor to the plane of the buttress on which the countertop will lie. When marking the table stand on the material, set this value aside.
Mark out the remaining details: countertops, the bottom of the pocket and the pocket itself, as well as the base of the table, if necessary.
Cut out all the details using an electric jigsaw or an ordinary hacksaw for wood with a sharp and small tooth.
Step Two: Part Pretreatment
All obtained blanks must be processed before painting. To do this, they need to be sanded. Use an orbital sander or sandpaper.
Carefully grind the ends of the parts that were sawed until they become perfectly smooth.
Now is the time to start painting, or rather tinting wood. To this end, the author used protective and decorative oil company Woodoc.
Unlike natural oils such as linseed oil, it has excellent tinting effect and protective properties. The oil closes the pores of the wood and thereby prevents the penetration of moisture and dust into it. In addition, protective and decorative oil protects the tree from the appearance of fungi and mold on its surface.
However, in this case, we need its decorative tinting effect. As an oil substitute (since it is not the cheapest material), you can safely use an alcohol-based stain.
Apply several layers of stain or protective decorative oil on the surface of the parts. Before applying the next coat, make sure that the fluid is completely absorbed. Multilayer toner application is justified if you want to get a deeper and darker shade.
Alcohol stain should be applied to the surface of the wood with a brush along its fibers. Try not to paint over already painted parts at a time, otherwise the tone may be uneven.
Rub oil with a sponge or soft, lint-free cloth. Continue rubbing until it is completely absorbed. Excess, if any, remove with a dry cloth.

Step Three: Assembling a Table
Assembly of the structure is not particularly difficult due to its simplicity. However, there are some peculiarities here, and you will have to try to make the product look neat and finished.
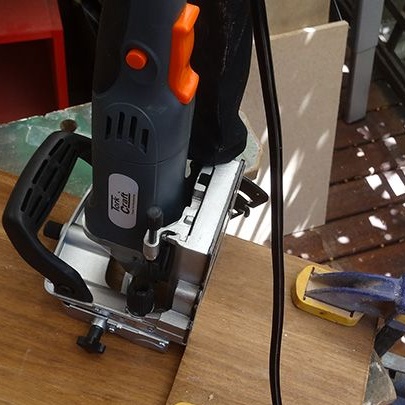
The author offers a choice of two methods of joining parts: gluing and fastening them with screws. It will be more rational to combine both methods.
Pick up glue for woodwork in advance. In places where parts are fastened with screws, make diagonal countersunk holes using an electric drill.
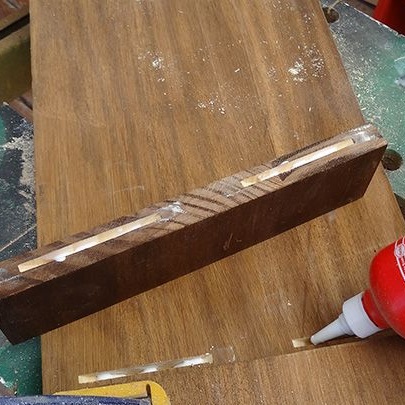
Apply glue to the mounting location and hold the parts firmly for a few seconds. Then screw in the screw, firmly pulling the parts together. So put together a table.
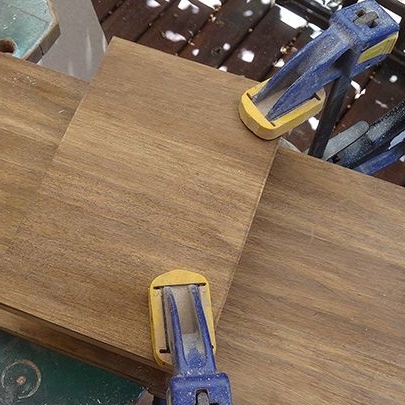
If you decide to limit yourself to using only glue, you will need clamps. They will replace the screws for the period of time until the glue hardens and sets. In this case, glue the parts in turn, waiting for each of the joints to gain adhesion.
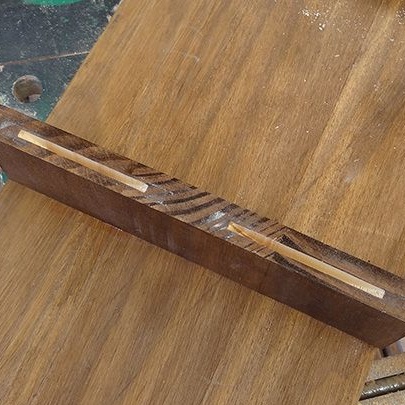
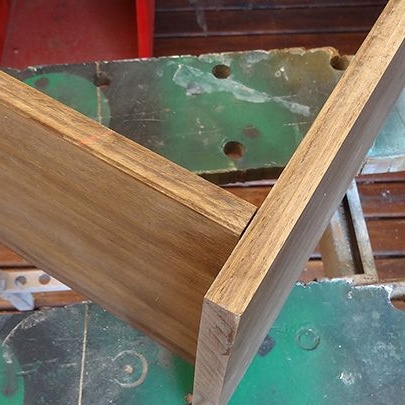
The author did just that. He used grooved glued joints, as can be seen in the photo below. Making grooves requires certain skills and tools, but it is considered more professional. Especially when it comes to small items such as this side table.
Your table is assembled and ready to use! For some, he is likely to replace the bulky coffee table, and for someone - and a temporary workplace.In any case, this original design solution did not leave many indifferent and continues to gain popularity.