
Keeping things in a small house is not just a difficult task, it is a feat that not everyone is capable of. True, in our time it will be much easier to cope with this problem thanks to hundreds and thousands of wise ideas gleaned from the Internet.
Some of them use obvious opportunities, others work wonders, changing the space with the wizard’s skill so that it serves for the good.
It would seem that you did not have a cupboard for spices or, for example, for souvenirs. And here is one small idea, it takes only 10 free centimeters - here you have a locker, which seems to exist between dimensions.
The author of this master class shared one of these ideas. He just contracted the project to turn all the doors of the house into racks for storing useful small-sized items. And he did it well.
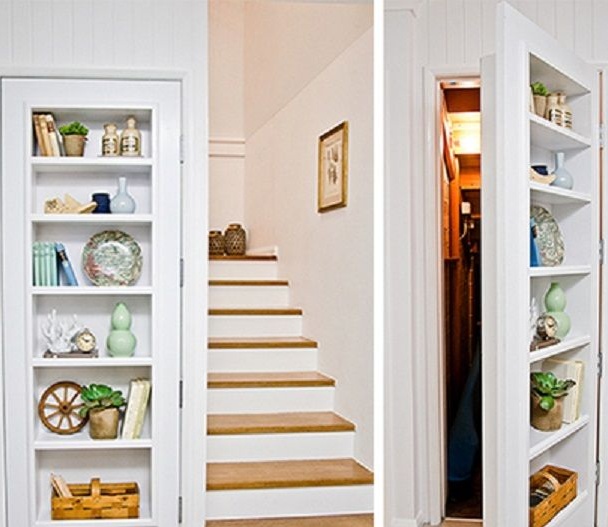
The essence of the idea is that each door along its entire area is supplied with a recess, and on the reverse side you get a full open cabinet. Though not wide, but functional. And the main thing is that you won’t even notice it, because the doors still fulfill their role.
In order to convert the door and turn it into a functional door with a cabinet, you will need:
Materials:
1. thick plywood or MDF sheet according to the size of your old door;
2. pine board or the remains of plywood for the manufacture of shelving systems;
3. wooden decorative frame for the cabinet;
4. glue for woodwork;
5. new door hinges or second-hand hinges from the old door;
6. oil resistant paint;
7. polyurethane varnish;
8. a narrow wooden baseboard for the manufacture of a stopper for shelves;
9. small cloves;
10. furniture screws or wood screws;
11. new or old door hardware: handle, magnetic lock, and more.
Instruments:
1. circular saw hand;
2. jigsaw;
3. electric drill;
4. grinder;
5. a screwdriver;
6. square;
7. building tape;
8. pencil;
9. hammer;
10. paint brushes.
Step One: Selection and Measurement
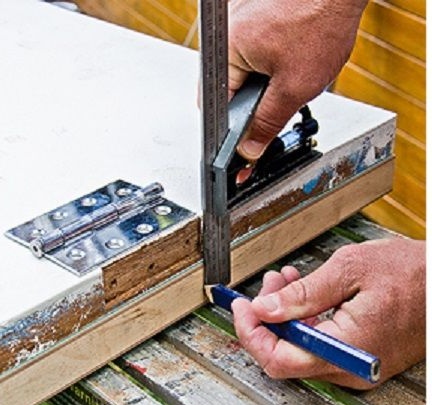
The author completely replaced the old door with a new one, but the latter still came in handy for him to work. He used it as a template for marking height, placing hinges, and also a lock and handle.
Therefore, put the old door on a new one, aligning it along the edge where the hinges will be. Circle the doors to skip this long step of taking measurements.
Mark the hinge points if you plan to use hinges removed from the old door. Also note the location of the lock and handle.
The author used plywood to make the base of the doors. In principle, you can take a sheet of MDF, but plywood in this case is much better.
In addition, you can also use natural wood. In this case, you will have to think about the design of the corner joints, since you have to work with the boards, and not a solid sheet of material.
In order to make shelves, the author used a set of natural wood for the manufacture of finished shelves.
Decide on the number of shelves, their width and length, based primarily on the characteristics of the material that you plan to use.
Step two: marking and manufacturing of parts
Using the services of old doors, you have already received the dimensions of a new one. Now proceed with the layout of the frame into which you will later place your cabinet. Its width depends on the size of the cabinet itself.
The author stepped back from the top and sides 100 mm, and from the bottom - 200 mm. This is enough to place the hinges and in general to ensure the strength of the entire structure.
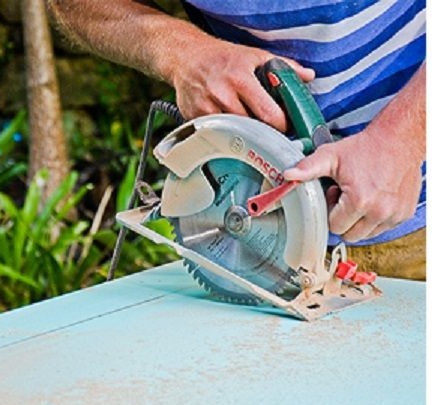
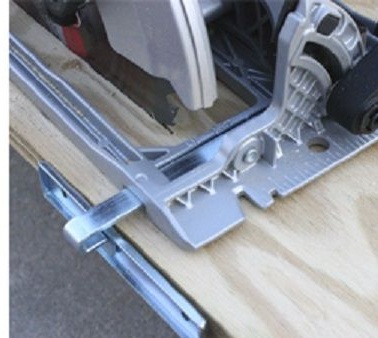
Thus, draw the inner perimeter of the frame and proceed to sawing. The author used a hand-held circular saw, but since the tool is rare, you could replace it with a jigsaw.
In order to place the jigsaw blade along the sawing line, first drill a hole in one of the corners - sufficient to allow the saw to enter.
Cut out the frame. Work carefully, as you will need the inside as a wall for the cabinet.
Mark and cut boards intended for shelves into pieces of the required length. Grind them thoroughly with a grinder. And at the same time, process the outer and inner edges of the frame and the back wall of the shelves. You can also lightly walk with a fine-grained nozzle along the plane of plywood. This will prepare its surface for painting.
At this point, you can also mark and file decorative finishes, such as cornices and curly stops. However, this can also be done a little later, when the main structure will be already assembled. So you can avoid errors when measuring parts.
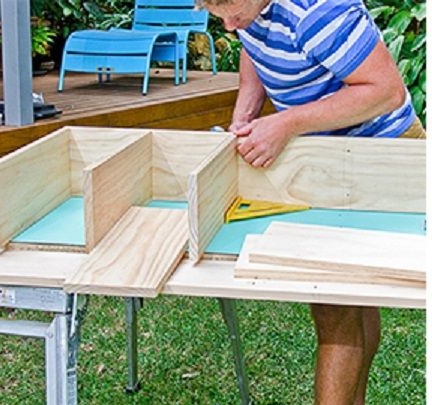
Step Three: Assembly
Assemble the shelves using a square so that their corners are located strictly at an angle of 90about. Make notes with a pencil in places of fastening of shelves and proceed to assembly.
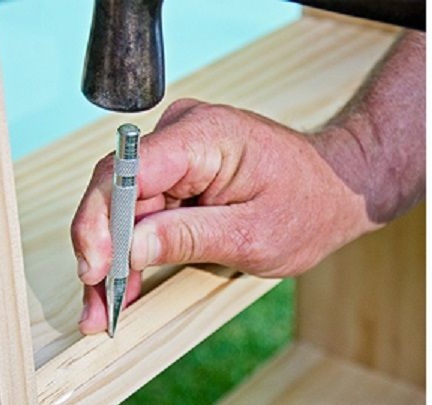
The author used self-tapping screws and glue for woodwork. In order to prevent the details from the natural wood from cracking when screwing in the screws, make holes in the mounting points beforehand.
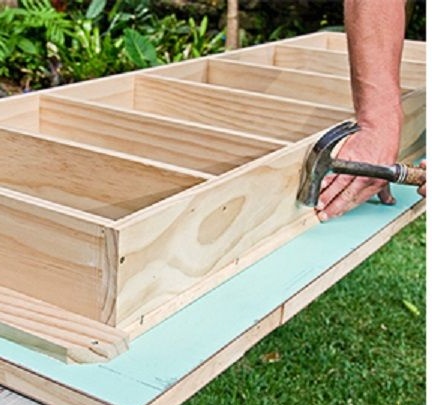
Assemble the frame of the shelf and install curly decorative stops so that things fit securely inside. Here you will also need glue, but self-tapping screws can be replaced with small cloves, which will be invisible from the side.
Measure, mark and cut a decorative baseboard designed to frame the cabinet.
Fasten the back wall to the back of the shelves. Do not forget about the glue. Lay them flat on the work surface, with the back wall down.
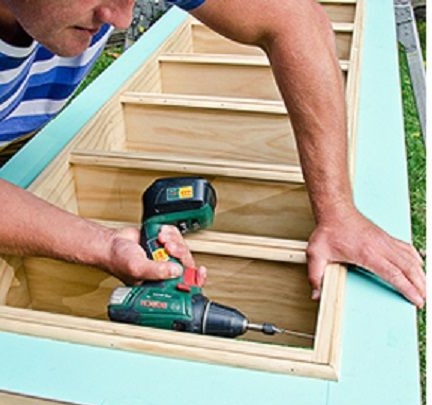
Position the door frame at the level at which it will be attached to the shelves as shown in the photo below. Use the pads until you align it around the entire perimeter. Secure the frame with screws from the inside of the shelves. And on top, fix the baseboard on the glue and cloves. On the back, also use the baseboard as a decoration.

Fourth step: painting and varnishing
The author used oil paint of a snow-white shade. Apply the paint with a paint brush or roller in two or three layers until you get a perfectly even and dense coating. Let each layer dry for 12-24 hours (carefully read the instructions).
Never apply a new coat of oil paint if the previous one is not properly hardened. Correcting defects will be quite difficult.
Good oil paint alone is an all-in-one coating. However, if you are making a product that can last you several decades, be sure to use varnish to protect the coating from mechanical damage.
In this case, polyurethane varnish is suitable for you. Apply two or three layers of varnish, allowing each of them to dry. Interlayer grinding can be used if you want a more durable coating.
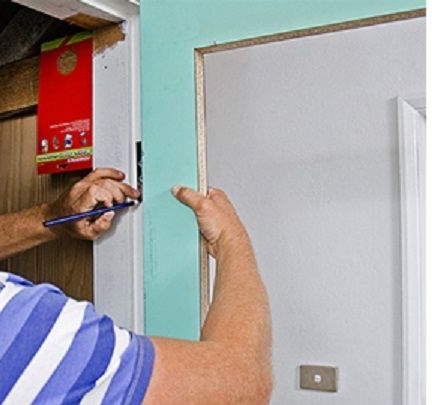
Step Five: Installing Doors
Do not forget that the material in the design of the new door arrived, and it became at least twice as heavy. This means that the mount must be as reliable as possible.
Use four instead of two door hinges, as the author did. This will evenly distribute the load on the jamb and the door will not warp over time. When choosing hinges, make sure that there is no play in them, otherwise the door will not close and open well.
The door with the built-in wardrobe for storing things is ready!