The construction of stairs requires certain skills. Even if you are dealing with a low staircase just a few steps. And there’s nothing to think about the stairs leading to the second floor! How to build such a community, having only the basic tools for wood processing and the production of lumber?
Thank God, there are quite simple designs, which are not as difficult to penetrate as it might seem at first glance. For the manufacture of such stairs, as a rule, elementary lumber is used that does not require milling. Their construction is also relatively small tree.
Processing mainly involves the protection of wood, and this is limited. Sometimes such a simple and economical project is needed as an alternative to a more complex, elaborate and expensive one.
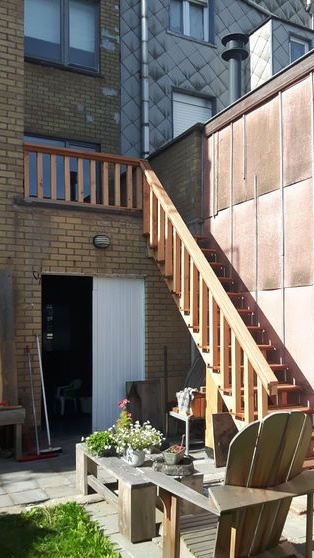
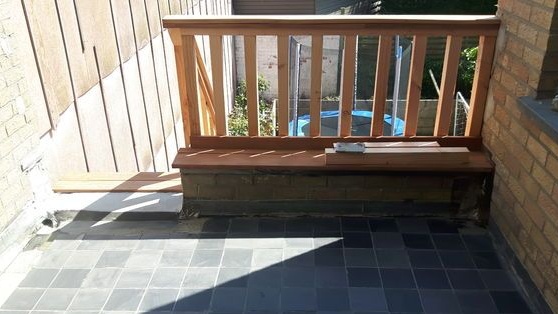
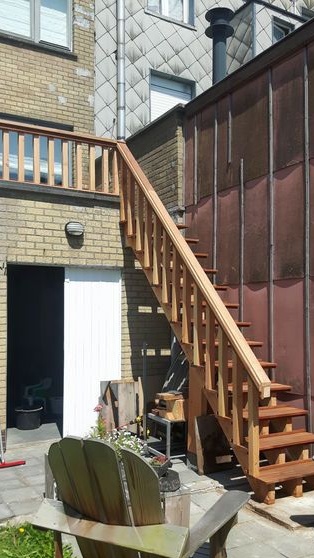
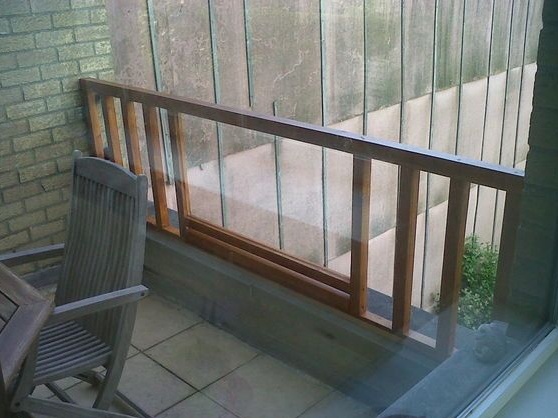
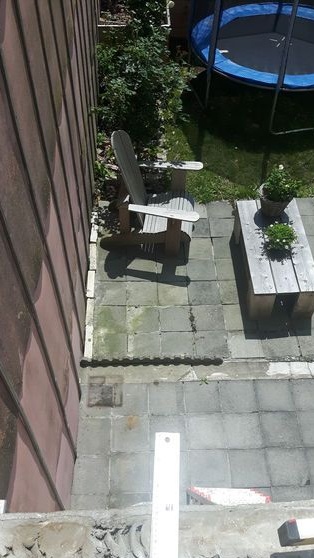
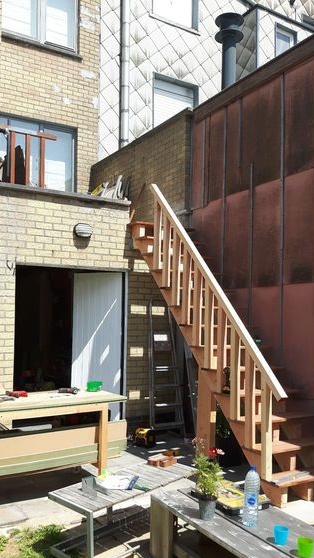
The author of this master class set out to make direct access to the garden from the second floor of his own apartment. Previously, it was necessary to go down through the public staircase, go around the house around and go into the garden from the back yard. But, thanks to the new wooden staircase, the task was greatly simplified, and the slightly functional balcony turned into a landing with a mini-tarassa.
So, what is needed to build a wooden staircase to the second floor? We will see:
Materials:
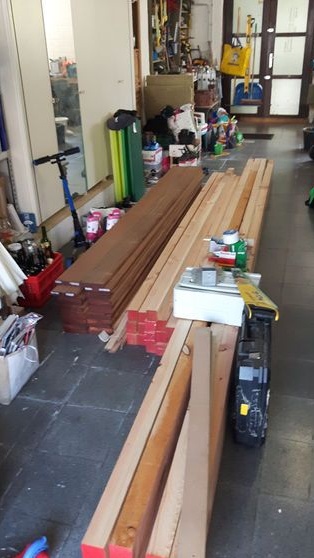
1. lumber:
- 3 pcs x 70 x 220 x 5400 mm - a bar for the manufacture of a base under the steps;
- 20 pcs x 60 x 60 x 3000 mm - bar for the manufacture of handrails of stairs and landings;
- 20 pcs x 22 x 140 x 2750 mm - board for the manufacture of steps.
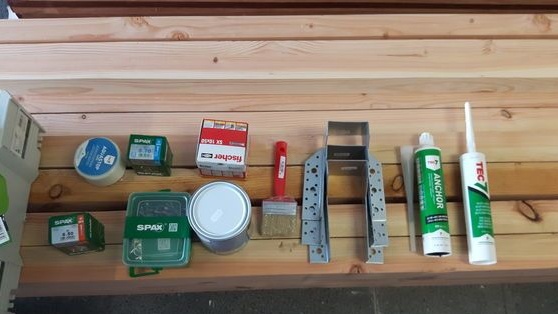
2. finishing brick for the construction of the staircase parapet;
3. cement, sand and water for bricklaying and leveling the base under the stairs;
4. protective impregnation for wood;
5. large threaded screws for concrete and wood screws;
6. metal mounting hardware;
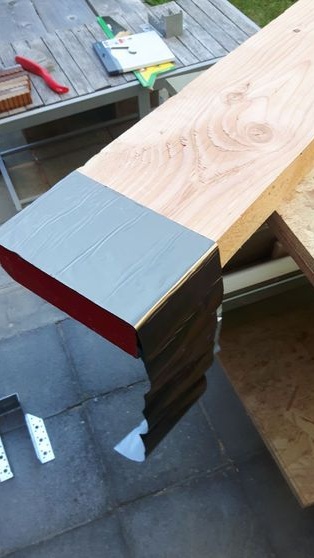
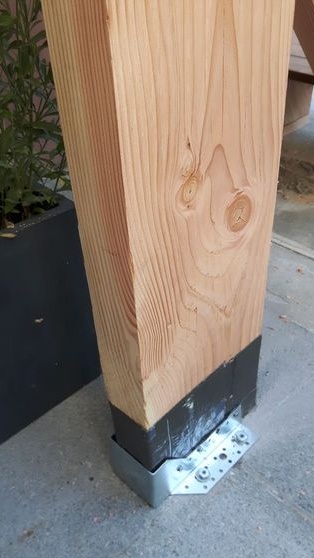
7. aquaband to protect wood from moisture.
Instruments:
1. grinding machine for wood processing;
2. hammer drill with drill for concrete, drill for wood;
3. jigsaw and a pair of spare files;
4. circular, miter saw or hand saw in wood;
5. a screwdriver with large bits;
6. building level;
7. building tape;
8. marker or pencil;
9. square;
10. paint brushes.
Step One: Select Material and Sketch
The author used hardwood lumber. If the staircase faces south and is exposed to the scorching sun for a long time during the day, this option is especially relevant.
Choose hardwoods such as maple, oak, and the like. Of pine species, pine is perfect.
Sawn timber must be of good quality and well dried. Avoid areas with large knots in the manufacture of parts.
Given the amount of work, it would be better if all the lumber is at least planed, and also have a standardized thickness and cross section.
Otherwise, you will need a planer / planer, since it is very difficult and tiring to process such an amount of lumber with a hand tool.
Responsible to the choice of mounting hardware. It must be strong and must not bend. The thickness of the sheet of metal from which the hardware is made also matters, because the load on the parts is incredible.
Protective agents for wood impregnation, as a rule, do not carry decorative functions. They are designed to extend the life of natural wood in its original form. Therefore, choose products of well-known brands with the widest possible range of protective properties. Additional decorative chips will only increase the cost of the product.
Draw a sketch of the stairs on paper and determine for itself its components and details. You, as the author of this master class, can transfer your sketch to a computer program to get a complete list of structural elements and more detailed information on their sizes in a convenient form.

Step two: marking the structural elements of the stairs
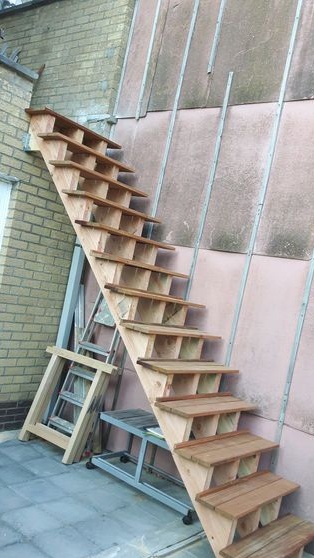
In order to create a sketch and start marking the parts you need to determine the angle of inclination of the stairs. The author stopped at 45 degrees, however, the ladder will receive a fairly steep slope.
If you expect to use the ladder intensively, make it more gentle, with lower steps, reducing the angle of inclination to 40 degrees. If the amount of space does not allow you to give the stairs optimal characteristics, but you have to use it regularly, think about other types of construction, such as a double staircase with a turn, as well as a spiral staircase.
After the level of the staircase is selected, you can find out how many steps you will need to fill the span. Do not make them too narrow or too high, as going down such a ladder is not only tiring, but also dangerous.
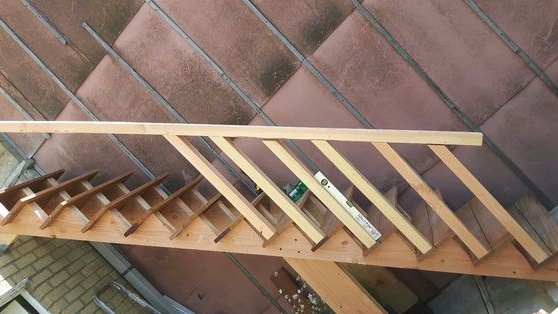
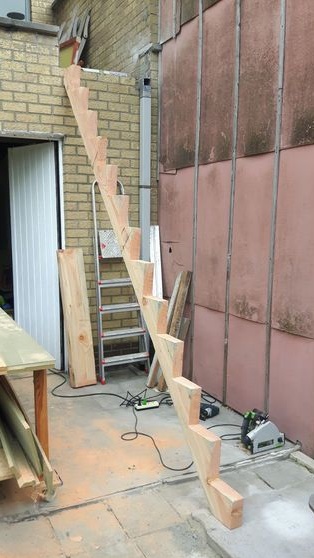
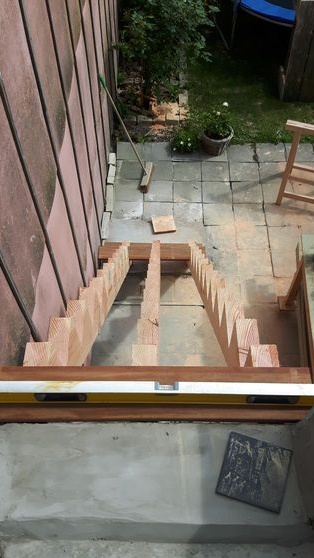
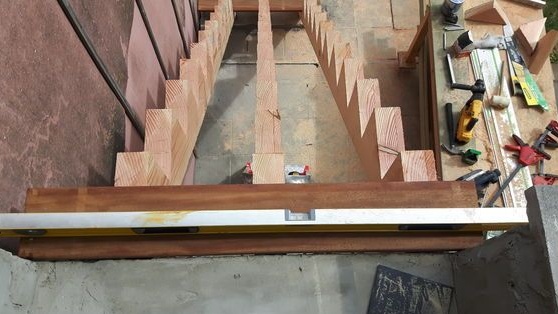
Having decided on the main characteristics, proceed to marking the details of the structure. Start with the base elements under the steps.
Make sure that the plane on which the stairs lie has a strictly horizontal level. The second plane, which is responsible for the height of the step, can be located diagonally, if the length of the stairs allows it.
In total, you will need three details of the base and all of them must be absolutely identical.
Also determine the height of the railing and mark out all its parts. The author, among other things, planned a section for the landing.
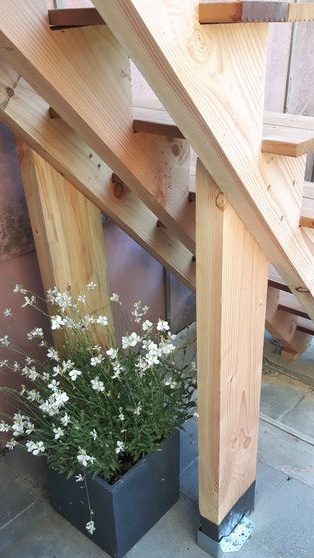
You will also need two support parts made from the same beam that was used for the base elements. Determine in which area you plan to install them, measure the height and markup at the desired angle.
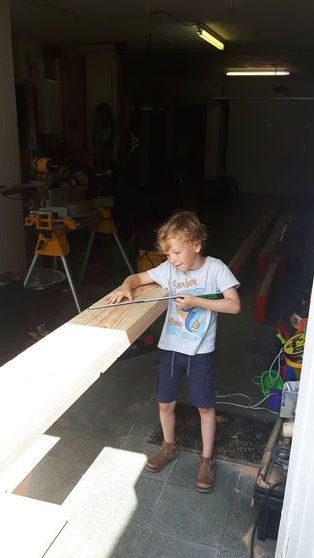
Step Three: Making Stair Parts
Using any convenient tool for sawing wood, make the details of the stairs: the base elements, the longitudinal and transverse details of the railing, the support posts and the details of the steps.
Grind the edge along which the cutting took place with a grinder to get a smooth surface.
At this stage, you can impregnate wood with protective compounds. The same can be done after the structure is assembled, however, some areas will be out of reach, so it is better not to tighten.

Step four: preparatory work before installing the stairs
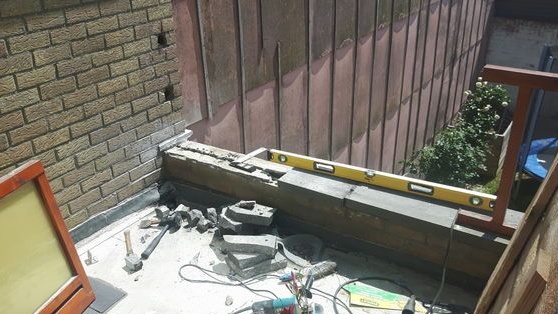
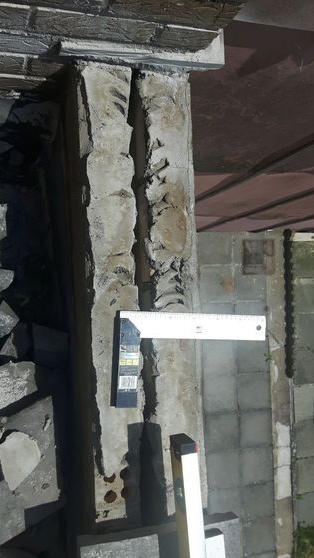
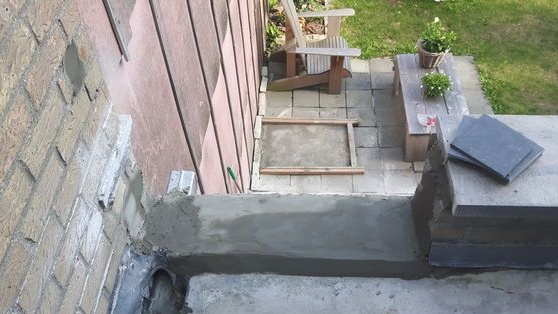
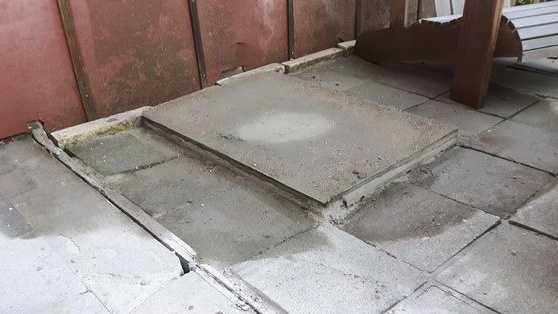
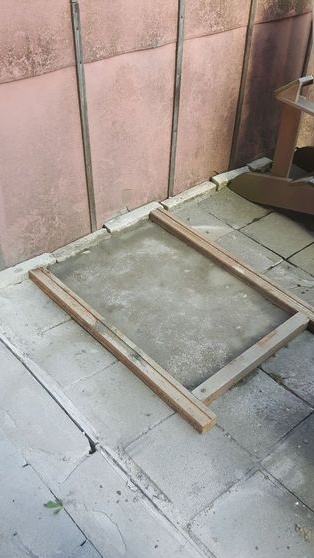
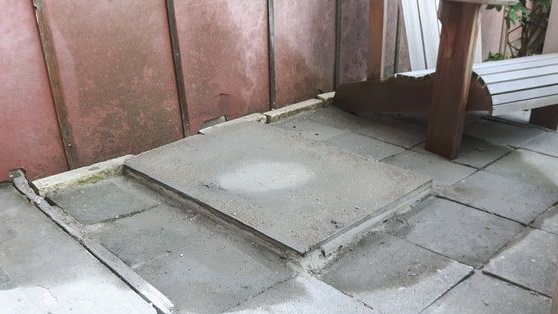
The author sweated a lot in order to prepare a place for the installation of the stairs. Firstly, he had to slightly re-equip the future landing. He built a low parapet of facing bricks and strengthened the base with the mortar on which the upper step will lie.
He also concreted the area under the lower base of the stairs, as he planned to lay the garden in tiles in the future. Such trifles must be taken into account in advance.

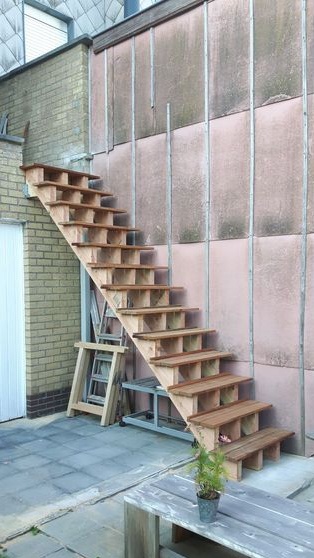
Step Five: Mount the stairs in place
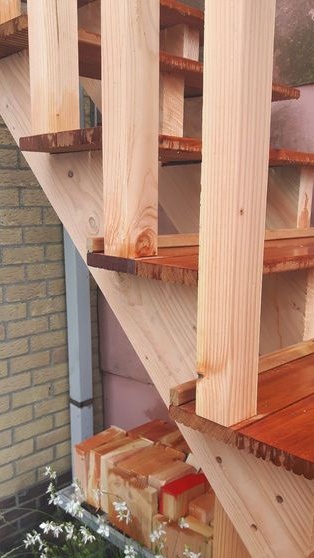
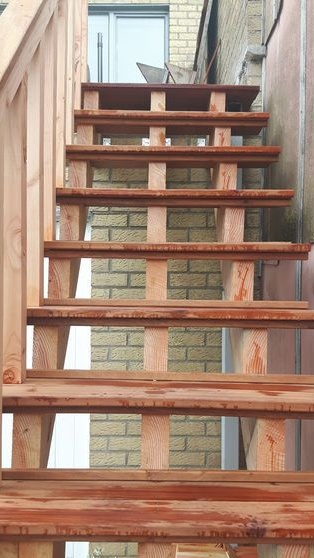
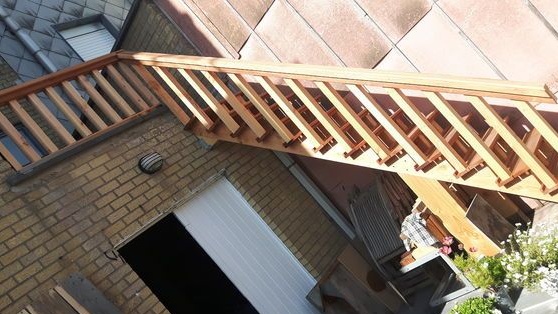
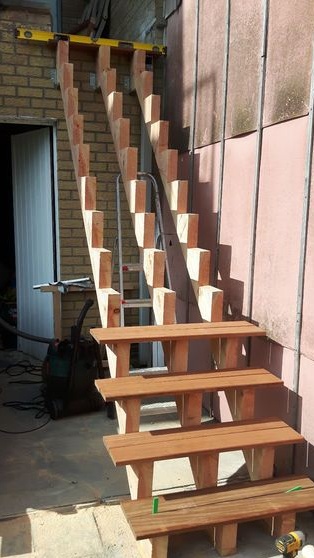
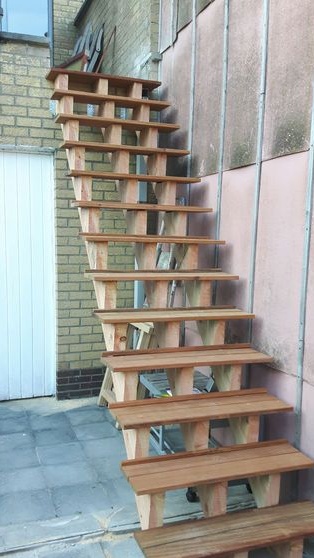
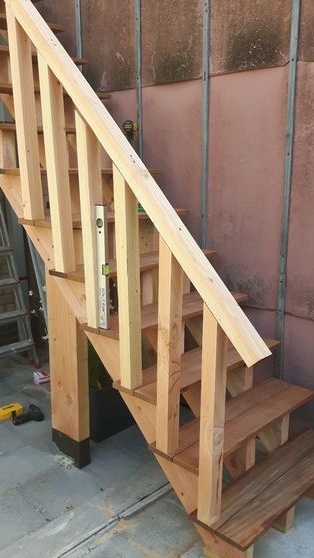
Start by fixing the base elements under the steps. The author everywhere used metal mounting hardware for this purpose. To connect the base, lock the lower and upper steps. To do this, you can use screws or nails - to choose from.
So lay all the steps. Install the support posts, securing them with metal connectors as shown in the photo below.
Mount the railing, properly machining the angle through which the railing of the staircase passes into the railing of the landing. The base of each crossbeam is a step.

Step Six: Protective Wood Processing
The author used protective impregnation in two layers, but not everywhere, but only in those areas that are more susceptible to adverse effects than others.
First of all, these are the steps and the longitudinal part of the railing. However, if you live in a zone of temperate or temperate continental climate, the wood here needs more serious protection and care.
Exposure to moisture due to incessant seasonal rains, severe frosts and the scorching sun can destroy wood of even the most durable species. Therefore, it is better not to save on impregnation and it will pay off handsomely.
Such compounds easily penetrate the upper layers of wood and reliably protect it from adverse environmental influences. They also prevent the formation of fungi and mold on its surface.
As a periodic cosmetic care, you can use mineral oils or drying oil. They take care of wood and prevent cracking. As a reward, the wood acquires a beautiful matte luster and well-groomed appearance. Such treatment should be carried out at least once a year.