Designer furniture never ceases to amaze us with the boldness of ideas. Fancy bends and fantastic shapes, an incredible combination of colors, the use of unusual materials and functionality that amazes at times - these are just a few of the things that await us in the world of modern furniture.
Often, individual pieces of furniture are designed specifically for photo shoots and filming. Their main task is to enrich the interior and inspire the viewer. As a rule, these are single products that do not have a special margin of safety, but are a figment of the designer’s imagination.
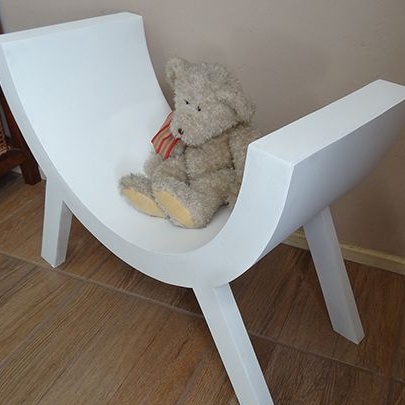
This chair with a curved seat was born first, as an idea and clearly did not count on replication for mass use. However, the hands of the master are not asleep, and the author of this master class set out to realize the idea in such a way that the chair could be used every day.
To do this, he used more durable materials and tested the resulting product. And he kindly shared his technology during this detailed workshop.
In order to do it yourself to make a chair with a curved seat, you will need:
Materials:
1. sheets of MDF or pine plywood:
- 2 pcs x 12 x 500 x 900 mm or 1 pc x 12 x 1000 x 900 mm - curly facade details;
- 24 pcs x 12 x 50 x 300 - connecting rails of the frame.
2. durable plywood for sheathing the frame;
3. glue for woodwork;
4. white paint for coloring wood with a gloss effect (preferably aerosol);
5. varnish for woodwork;
6. wood screws;
7. putty on wood.
Instruments:
1. jigsaw;
2. electric drill;
3. orbital sander;
4. a screwdriver;
5. drill with a cutting mini-disk (you can do without it);
6. putty knife;
7. building tape;
8. pencil;
9. steel chain with a large cell - 1 meter;
10. fine sandpaper.
Step One: Choosing Materials
With equal success, you can use plywood or MDF sheets to make a chair. The author settled on the second option, and picked up sheets with a thickness of 12 mm. You can purchase a slightly thicker material, but somewhere after 20 mm it is already inconvenient to work with it along curved lines.
If everything is clear with MDF, then choose high-quality and dense plywood at the cut. The product has a lot of cuts and all of it will be in sight, so that inaccurate crumbling edge to process will be unrealistic.
Very important from an aesthetic point of view will be the quality of the putty. Unsuccessful compositions sometimes can not boast of strength at all, although they will not necessarily be cheap. So if some kind of putty suits you, it is better not to experiment.
Step two: marking parts from MDF
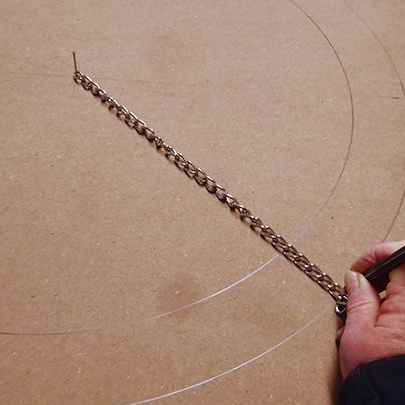
To mark out semicircular details, the author used an old trick with a cord and a pencil. He took a metal chain instead of a cord, which is incredibly convenient.
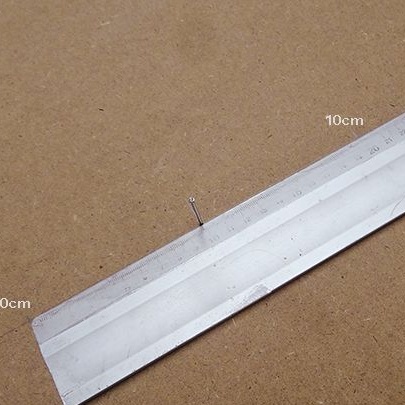
Determine the center of the working area and fix a small carnation or self-tapping screw at the intended point. Put one end of the chain on the hat, and use the opposite end as a compass, passing the tip of the pencil into the cell.
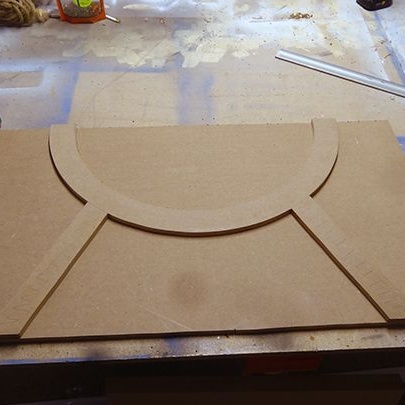
Determine the radius of the circumference of the seat and set the value aside on the sheet from the self-tapping screw. Draw a perfectly even circle. Add 50 mm and repeat the reception, getting a circle of a larger diameter nearby.
Both parts of the circle will go to work, because you need to make two curly parts. Each of them is integral and consists of a seat and legs, so get down to contouring the legs.
If we take as a basis the fact that the legs diverge to the sides by the same amount as the width of the seat, their marking will not be difficult. Just draw two parallel lines down from the protruding peaks of the seat and at the intersection of each line with a specific leg, get its length.
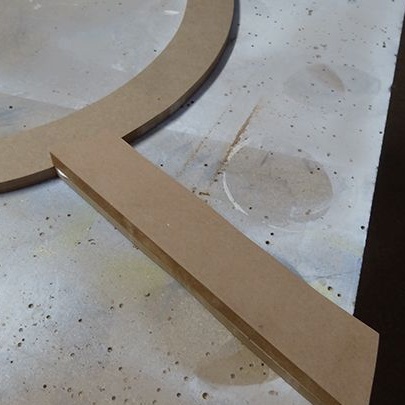
In order to strengthen the legs, the author made them composite. Separate elements are attached to the whole part as shown in the photo from this workshop. You will need four of them.
Saw also 50 x 300 mm slats, where 30 cm is the width of the seat. You need to do about 24 reiki.
You will also need sheets of durable fiberboard. It should be thick enough to ensure the strength of the structure, but should not lose its bending elasticity, since the bending of the part itself during the sheathing is noticeable.
Partitioning of parts from fiberboard is best done in fact, when the frame is already assembled, otherwise you can not avoid additional correction and trimming.

Step three: manufacturing parts and assembling the frame
You have made the markup and you can safely proceed to sawing parts using a jigsaw.
Remember that the rails must be perfectly flat in order to fit snugly against the sidewalls. It is convenient for this purpose to use a miter saw, however, even a square and a hand saw will fit in skillful hands.
Begin assembly with sidewalls. As you remember, these are composite parts, so you need to strengthen the legs with additional parts as shown in the photo below.
The author used glue for woodwork. Evenly apply a small amount of glue to the joint and fix the patch. Place a load on top or clamp the workpiece with a pair of clamps.
To prevent dents from denting on the parts, place pieces of soft material such as packaging foam under the metal.
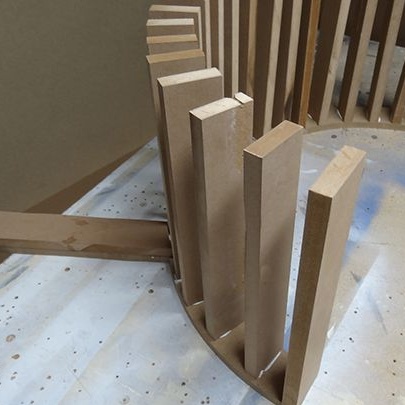
Now proceed to fix the rails. Initially, all work is carried out with glue. Apply glue to the end of the rail and press it to the base. That is why it is so important that the slats are sawn off evenly. Otherwise, they will be fixed anyhow.
The thicker the slats, the more convenient it is to glue them, since the contact area increases, and they gain stability.
Glue the second sidewall from above and place a load on it until the parts are pressed together until the glue has completely hardened. Remove excess glue with a damp cloth.
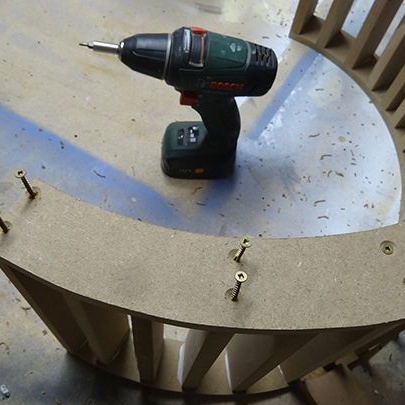
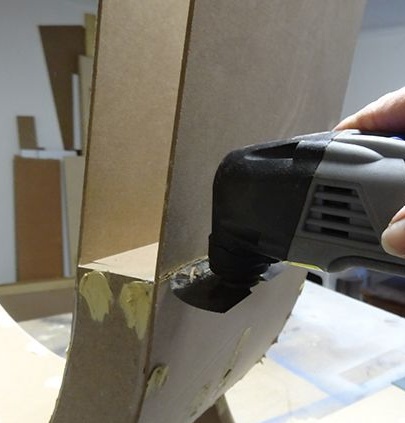
When the structure has acquired sufficient strength, fix the rails through one or two screws as shown in the photo. The space for the screw head must be expanded and deepened with a drill of a larger diameter. Later, these grooves will be puttied, but the sticking-out hats of self-tapping screws will definitely not be useful to you.
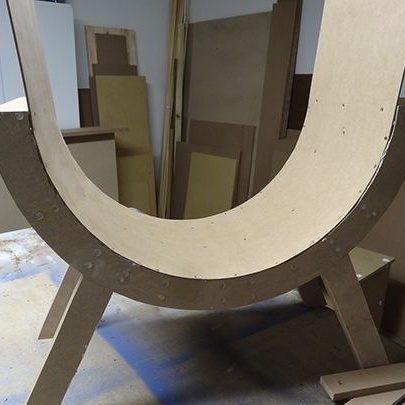
Step Four: Carcass Cladding
In order to make the cladding parts from fiberboard, take the necessary measurements. Measure the inside of the seat and then the outside. You already know the width of it, so you only need to find out the length.
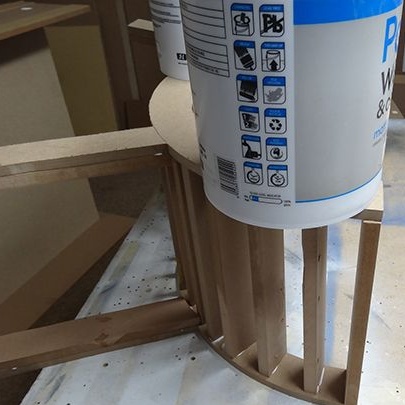
The author used a fiberboard strip in width, secured it, and only then sawed off excess material.A good option, but for this you need a drill with a cutting disc, and this is an infrequent tool in our workshops.
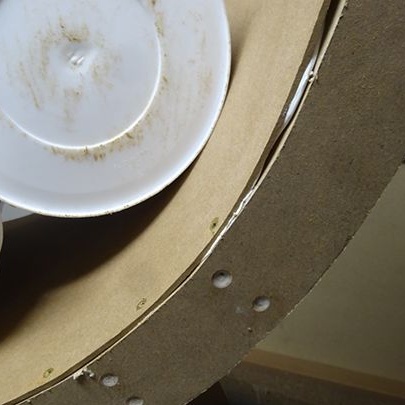
Mark and cut trim parts. Begin fixing each sheet with glue. As a load, you could use several small cans of paint in order to evenly press the lining to the edges of the rails.
When the glue hardens, drill small holes for screws and caps, screw them in with a screwdriver.
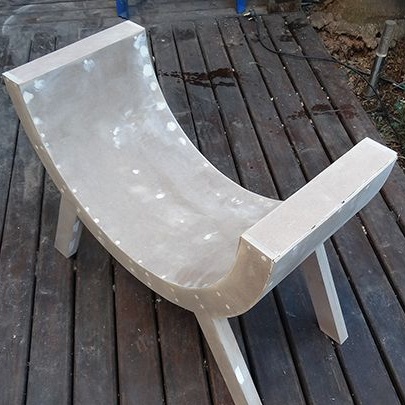
Step five: protective and decorative treatment
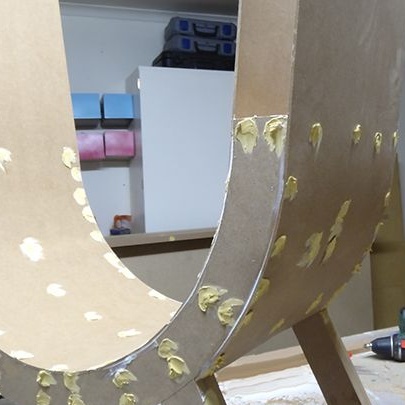
You probably can not wait to start painting, but first you have to slightly retouch the surface, because you got a lot of slots and holes for the screws.
Putty work is more or less large-scale, so the quality of the putty you use is so important. If pieces of it during the operation begin to fall off, it will be very unpleasant, agree.
Apply putty, and remove excess with a rubber spatula. Allow the composition to harden and sand the surface thoroughly.
If you bought spray paint in a spray can, painting does not take too much time. Simply cover the workspace with newspapers and spray the first coat of paint. Give it a few minutes to dry and repeat application. If the tone suits you, you can stop there. If not, apply as many coats of paint as needed.
No matter how resistant the paint is, it is better to coat the product with varnish. This will protect it from minor mechanical damage such as scratches. Apply varnish in two or three layers with obligatory intercoat sanding. Such light grinding is usually carried out manually using fine-grained sandpaper.

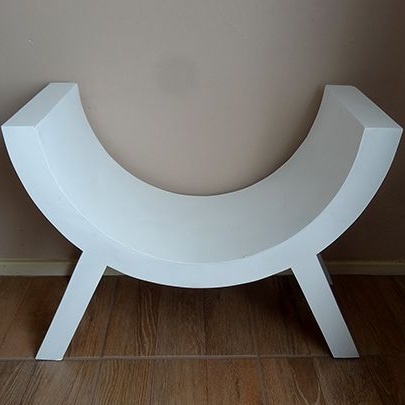
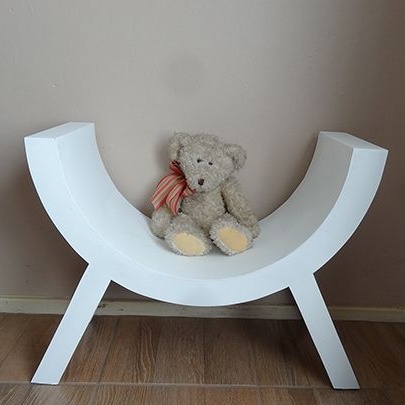
The work is finished, and a chair with a figured seat is ready to decorate your home!