
Hi the inhabitants of our site! Today I will show and tell you how to make a weather predictor or home mini "weather station" and if simpler, then just a "barometer".
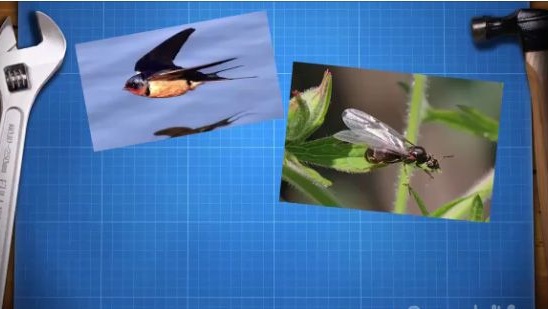
Almost everyone knows the signs that portend rain, like birds flying low, it’s not clear where they came from and it’s not clear where the winged ants fly away, as well as the grandmother’s back a few hours before the rain and predicts this much more accurately than many meteorologists. But it’s not always possible to observe birds, ants, and grandmothers, and so the idea came to make electronic a weather predictor or a mini “weather station” that can predict rain, snow or just worsening weather, and this can, albeit not much, make our life easier.
To begin with, let's see how the representatives of the living world can predict the weather, well, and then we will teach you to do the electronic representative as well. It can rain for two reasons: a cyclone or rain clouds, usually coming in the summer from outside, whence this happens along with a drop in atmospheric pressure. And it is precisely the pressure drop that the animals feel, well, and everyone else.


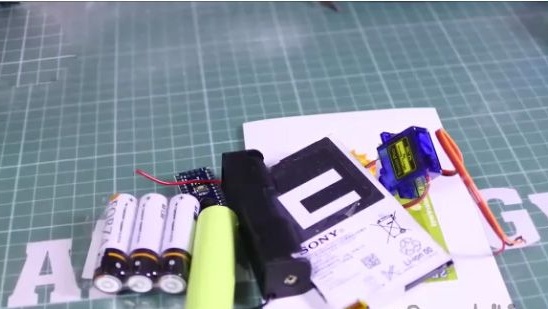
To make a barometer we need:
1- Barometer Sensor for Arduino.
2- Arduino nano.
3- You can also print the scale (it will be in the folder along with sewing)
4- Servo drive.
5- Battery.
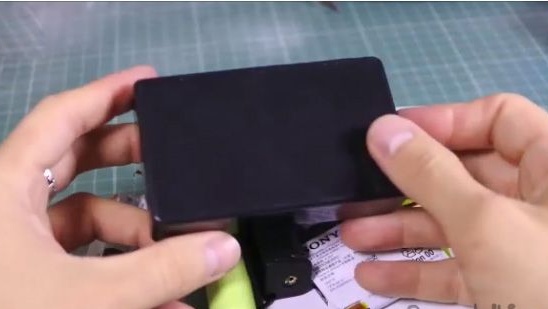
6- Case.
Manufacture:
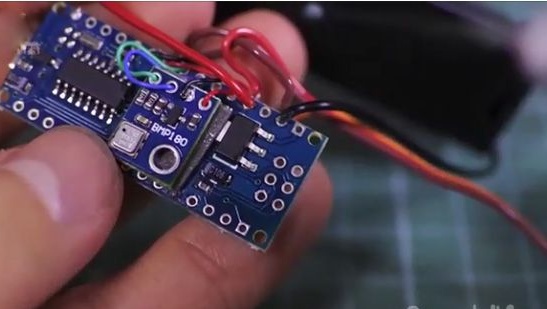
It will connect according to the scheme below. See her again.
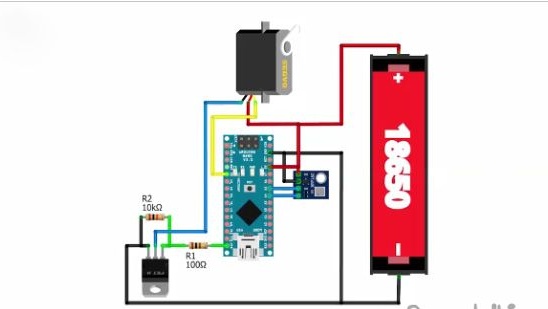
For connection, you can use a mounting wire up to 100mA; it is perfect for connecting sensors.
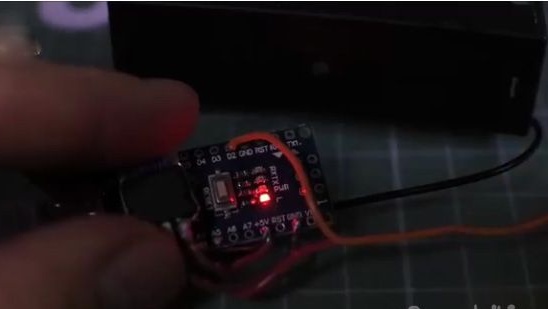
In this project, we will focus on the duration of work and unsolder or simply pick out the red LED, which stands for "Power".
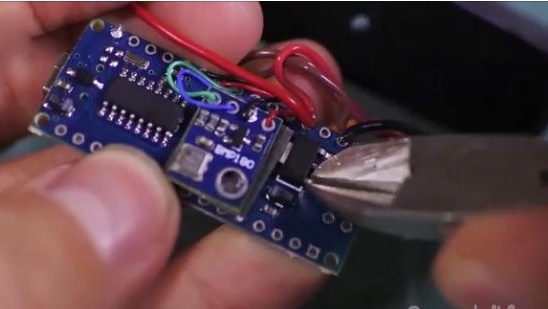
Also on the bottom of the board there is a voltage stabilizer that we do not need, just bite off his left leg as shown in the photo.
We mount the barometer with the transistor on a double adhesive tape to the board. Now our device can work for more than six months, it all depends on the elective battery.
Now the main thing remains is the firmware. We connect the arduino to the computer and download the firmware.
It can be found and there we already do everything according to the instructions specified in the folder
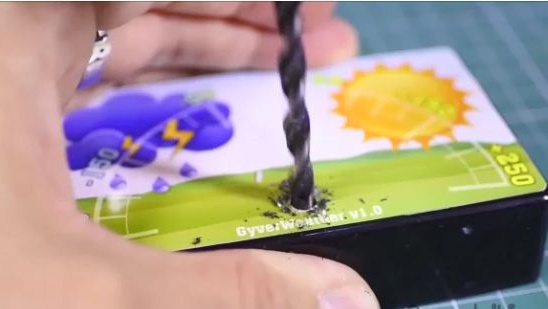
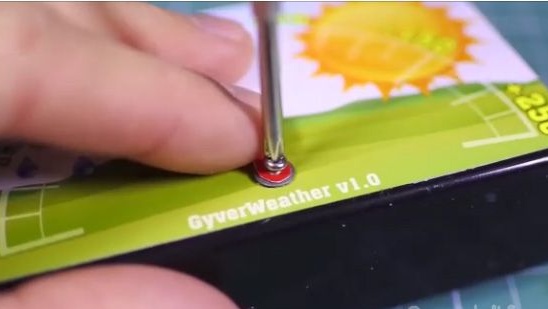
Next, we proceed to the assembly of the housing. To start on a glue scale.
On the scale indicated hole equal to the diameter of the gear servo machine. Drill
Next, we attach the servo machine to super glue and then we pour it well with thermo glue. So she’s definitely not going anywhere.
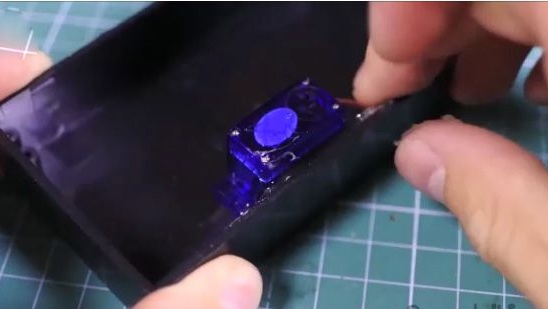
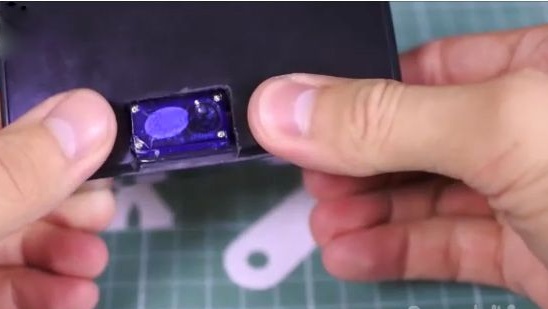
But in our Chinese case the servo machine does not fit, so it was decided to make a window and paint over the machine with a marker.
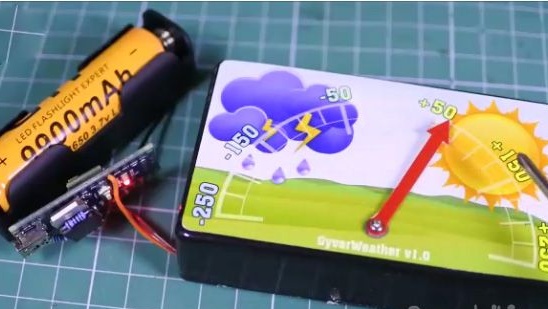
Now we connect the battery (it is desirable that the weather is good), we wait 4 seconds, when the servo machine stops rotating, turn off the battery. And we fasten the arrow to the gears of the servo machine. READY !!!
Application:
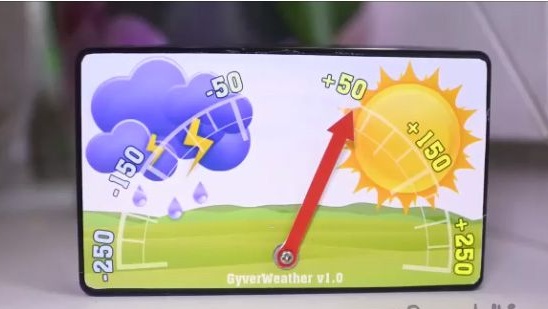
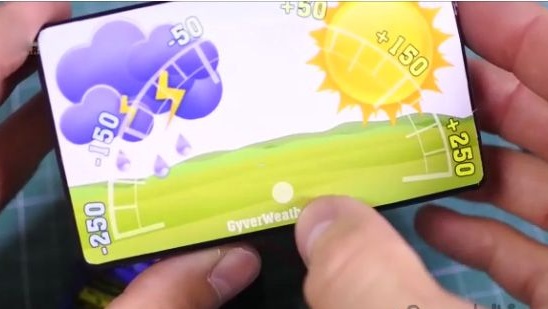
Insert the battery. The arrow goes to the far right position, then for 3 seconds it shows the battery charge level, then the arrow goes to the zero position and the system falls asleep. But after an hour of accumulated information will be enough to provide you every ten minutes with information on changes in atmospheric pressure.
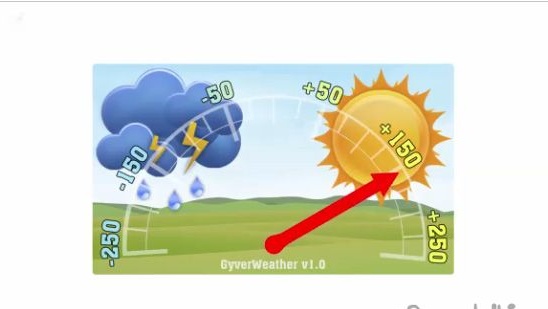
Put it in a place protected from sunlight, as the battery does not like overheating. If the arrow ranges from "-50" to "+50" then most likely the weather will not change.
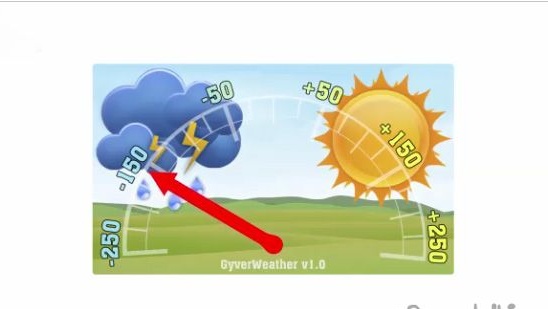
If the arrow fluctuates around "-150" then the weather is likely to get worse, but if it fluctuates around "+150" then the weather will improve.
I hope the information provided in the article will not be useless. You can also watch a video assembly of this project.