
Some people have the real gift of transforming simple objects. of furniture into small works of art. These little things help to fight through life with everyday life and depression.
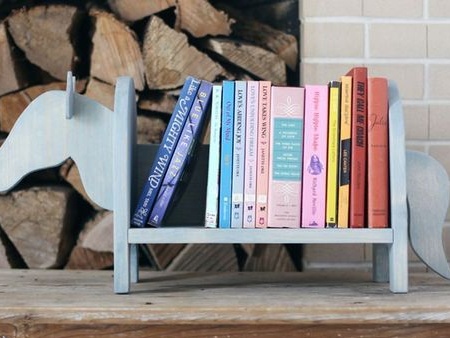
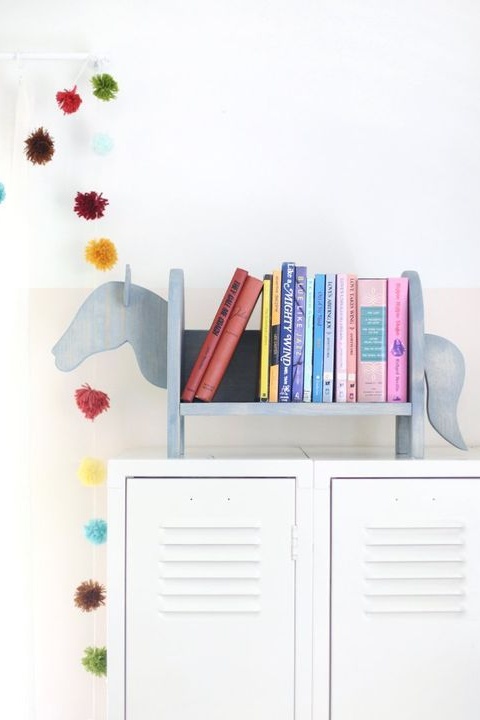
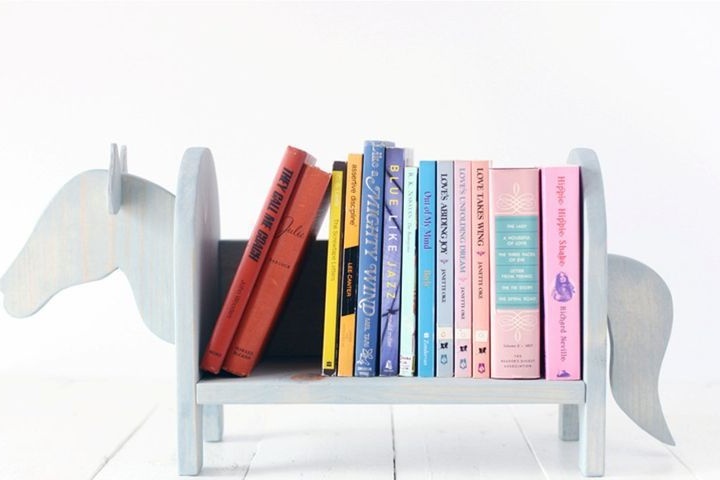
This shelf in the form of a horse at one time received a lot of flattering reviews and enthusiastic praise. But there is nothing special about her. Probably all these shapes and colors make us plunge into the long-forgotten and hidden, something from childhood.
The shelf is made of natural wood and can be used to store books or souvenirs. It is lightweight and mobile, does not require additional installation. Just collected and used.
The shelf is perfect for lovers of animals and horses, as well as fans of equestrian sports. It will not leave indifferent children, on the contrary, it will perfectly fit into the interior of any nursery, becoming its decoration.
In order to make such a shelf in the form of a horse do it yourself, you will need:
Materials:
1. planed boards made of pine or any other wood species;
2. plywood for the manufacture of decorative elements;
3. glue for woodwork;
4. thick paper, paper wallpaper or cardboard for the manufacture of patterns;
5. acrylic paint or protective decorative toner oil;
6. self-tapping screws.
Instruments:
1. jigsaw;
2. electric drill;
3. device for drilling holes at an angle with a vice;
4. clamps;
5. a screwdriver;
6. paint brushes, soft lint-free fabric for tinting wood;
7. building tape or ruler;
8. scissors;
9. pencil.

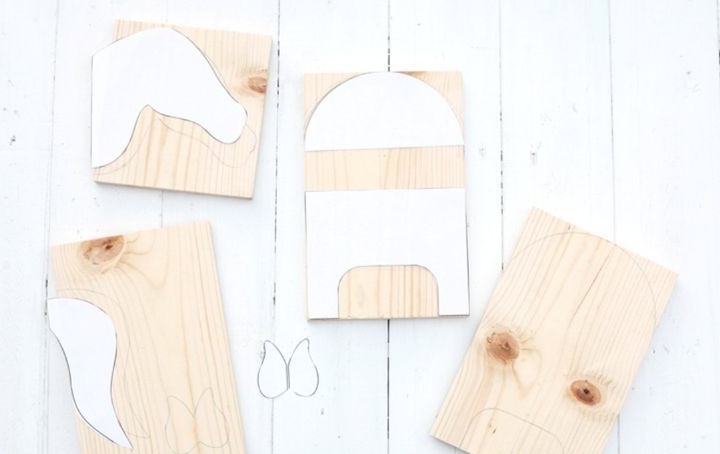
Step one: sketch, diagram and production of patterns
In order to achieve the fullest possible shade after toning, use natural wood. For this purpose, any type of wood that is convenient for you to work with is suitable.
As a last resort, you can make the whole body of the shelf from plywood, however, in a natural wood version, it will look more organic.
In order to make decorative elements of the shelf imitating a horse, the author used plywood. This is very convenient, since it is much easier to cut curly details from plywood than from wooden boards.
Start your work with making patterns. Draw a sketch on paper and sketch out individual decorative details: a head with a neck, ears, tail and curly side-legs.
Using the resulting sketch, try transferring all the details to a plywood sheet. To draw straight semicircular lines, select a cup or bowl of suitable diameter.In order to depict smooth curved shapes, you can also use a sewing pattern.
Draw details until you get the shapes that suit you. If you use an ordinary pencil, you can easily erase all your mistakes during the drawing process with an eraser.
You can go in an even safer way and make patterns from paper or cardboard. Later, you can cut the resulting paper parts and easily transfer them to a plywood sheet.
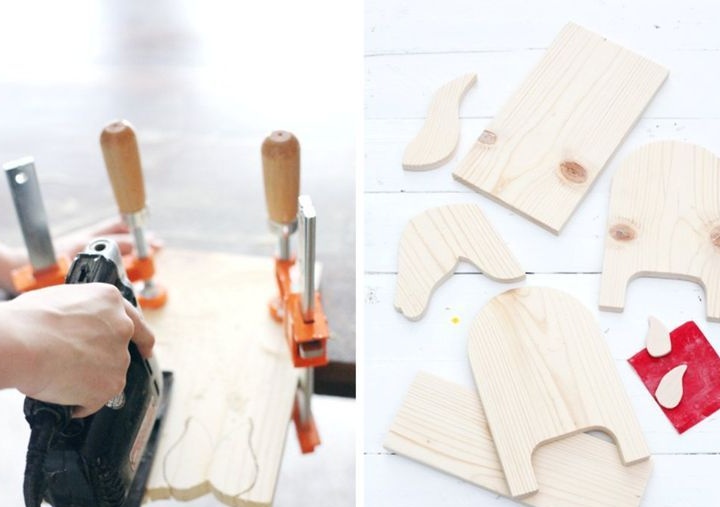
Step two: manufacturing of parts and their preparation for painting
So, markup and cut the board into pieces of the required length. Cut decorative elements from plywood.
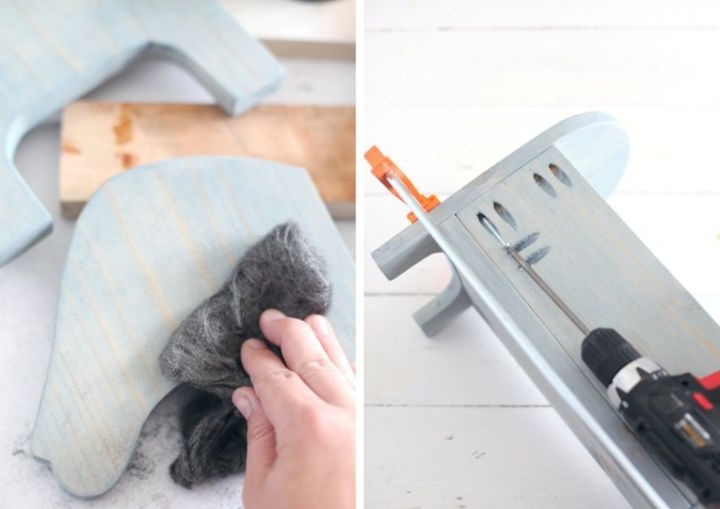
Prepare the surface of the workpieces for tinting. To do this, carefully grind every detail until it becomes smooth and pleasant to the touch.
Grinding properly prepares the wood. A fresh, opened layer of wood remarkably absorbs coloring pigments and contributes to their uniform distribution. It is especially important to polish a tree that has been stored outdoors for some time and darkened.
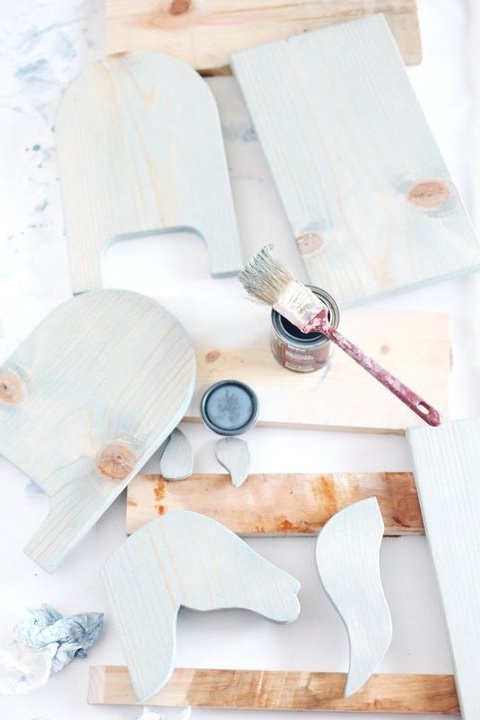
Step Three: Toning
Start painting. You can choose from two of the most suitable means for tinting wood: protective decorative oil or water-based paint, such as acrylic paint.
In the first case, a wide selection of toner oils is available on the market. They have the most diverse palette that can tint a tree in any color, including sky blue.
Thus, you get a loose coating, an elegant velvety sheen, and wood, among other things, acquires protective properties.
In the second case, water-based paint is most suitable in order to obtain a translucent tone.
For this purpose, you can dilute it with water until you achieve the desired shade during the test process. You can do otherwise.
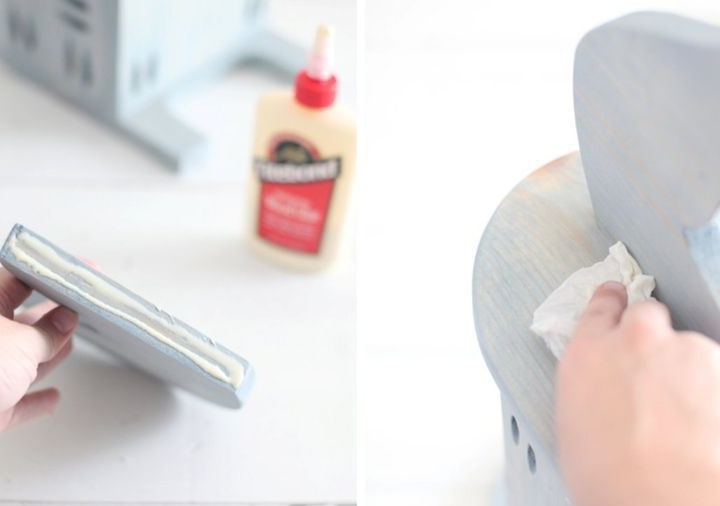
As usual, you apply a coat of paint to a wooden blank. And until it is completely absorbed into the pores of the wood and does not freeze, you have the opportunity to influence the degree of toning. Wipe off excess paint with a cloth, getting the effect that you see in this master class.
You can fix the paint on the surface of the tree, as well as prevent the shelf from moisture and mechanical damage with varnish. However, the author did not use varnish in his work.
Step Four: Assembling Parts
The author chose to work a combined connection of parts using glue and screws. In the photo you do not see any signs of attachment, as they are all conceived in secret.
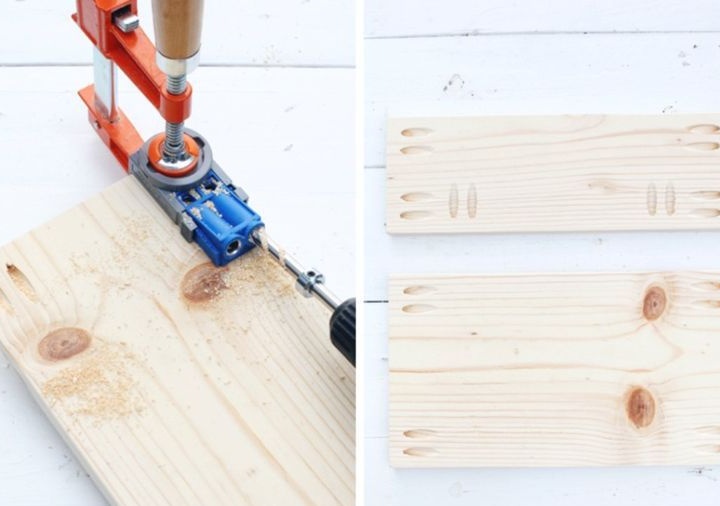
The holes for screwing in the screws are drilled diagonally, flush using a special device for drilling with a vise. You can see it in detail in one of the photos.
Later, the holes can be filled with putty or any suitable sealant such as epoxy and sanded when it hardens. However, this must be done at the stage before toning. You can also leave the hole unchanged, as they are located behind the shelf and are not visible to the eye.
So, drill holes in the fastening points of the screws and proceed with assembly. Apply a small amount of glue to the joint, press the parts for a few seconds and screw in the screw, fixing the joint securely.
Thus, assemble the shelf completely. Fasten the decorative elements and make sure that they are arranged symmetrically.
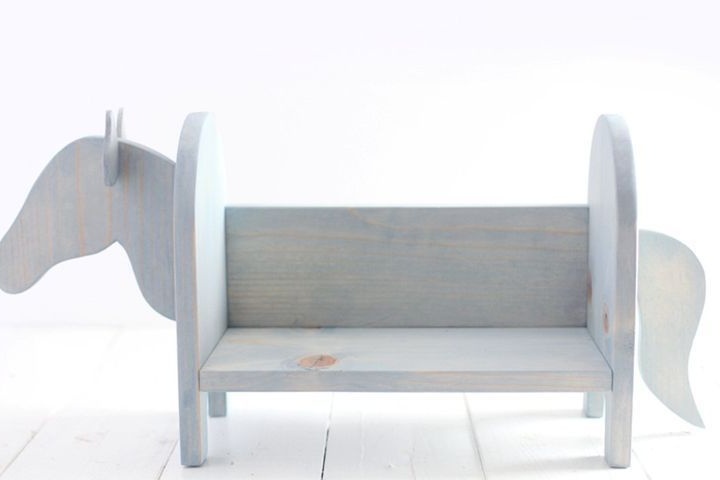
The shelf in the form of a horse is ready. It will definitely become the highlight of your interior. In addition, the shelf is a wonderful man-made gift to a loved one, made with love.