

Nowadays, the creation of the so-called potato guns has become a popular pastime. They can shoot a variety of vegetables, including potatoes, apples and other suitable items. These guns work on different energies. Some craftsmen build guns on fuel using aerosols, gasoline, propane and other substances. And some are building such homemade on compressed air, pumping it with a pump. This time we will consider an example of creating a gun that works on a couple.
We look at the video how it works
To make a shot, you need to pour a couple of drops of water into the gun, and then bring it to a boil with a special device from the lighter. After a minute or two, a shot occurs.
Of course, such a gun is not the limit of perfection, but it can still be significantly improved. For example, such a gun can be made in the style of steampunk.
Handle this weapons you need to be careful, since there is a source of open steam, hot surfaces, hot steam, and the power of the shot will be enough to injure a person.
Materials and tools for homemade:
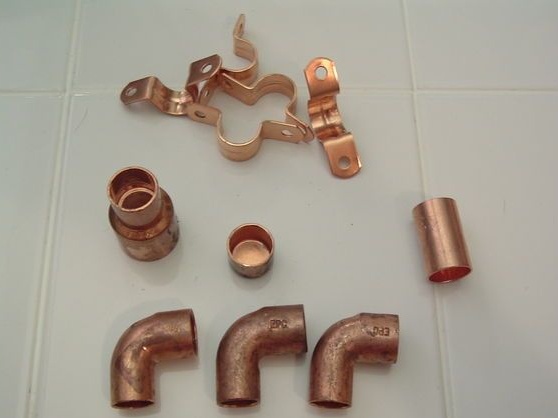
- copper pipes (suitable for plumbing and so on);
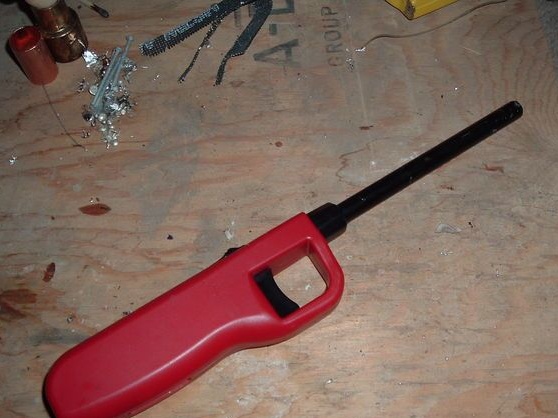
- gas lighter on a piezoelectric element;
- a couple of screws;
- a piece of wood to create a pen;
- a piece of leather or other material to make a lighter mount;
- a piece of pipe with a length of about 10 cm and a diameter of about 1-1.3 cm;
- copper cap for the tube;
- copper strips (or other metal) to create brackets;
- potato and cork.
From the tools:
- a torch for the soldering;
- screwdriver;
- a hacksaw and more.
The process of manufacturing a steam gun:
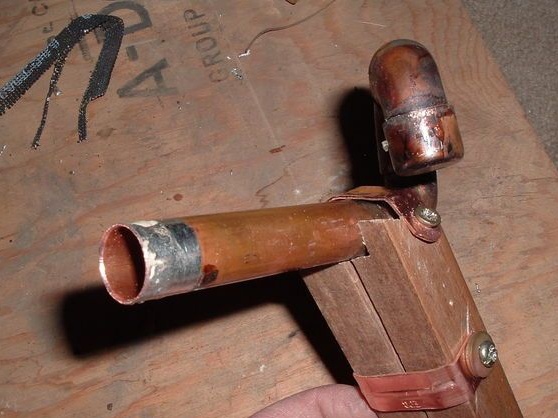
Step one. We prepare the details
The first step is to prepare the blanks. The author used copper as a metal, since it can be brazed, conducts heat well and can hold high pressure. The only thing that the author did not take into account is that copper has a high heat capacity and as a result, it needs a lot of heat to heat it. If you make a boiler of thin metal and it is best to replace it with aluminum, you will need to spend less gas and as a result of time to shoot.
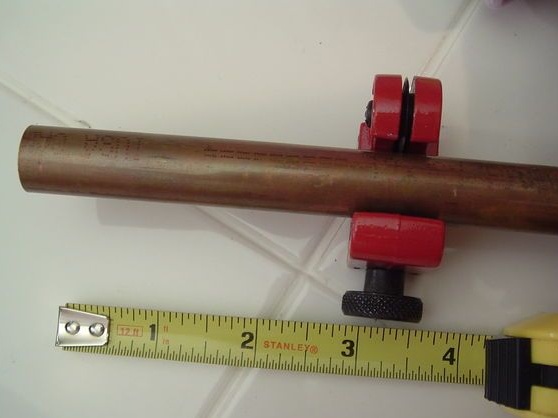
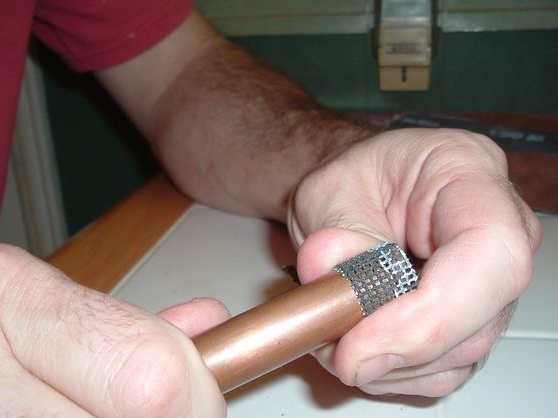

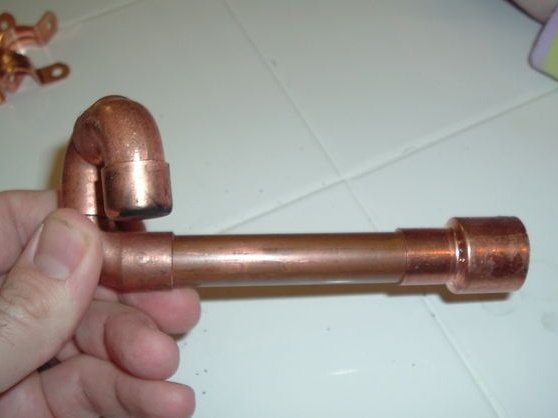
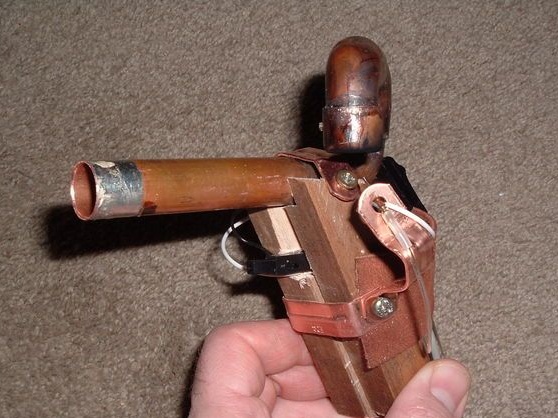
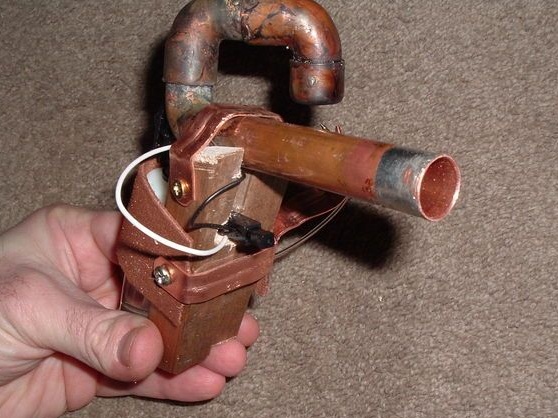
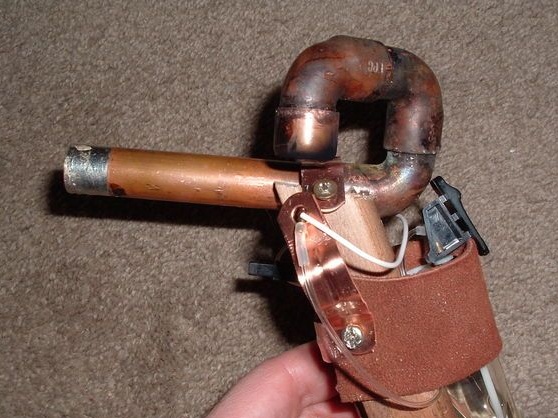
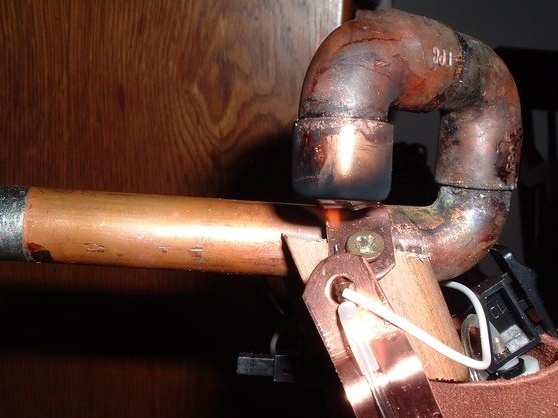
The main part of the pistol is its muzzle, the length here should be about 10 cm. Well, as for the diameter, there is already someone who finds it. The prepared parts will then need to be cleaned well with sandpaper so that you can solder. The shape of the tube may be different, the most important thing is that there is a "boiler" on the tube (let's call it that), and how to do it, everyone decides for himself.You can simply attach it to the side of the tube.
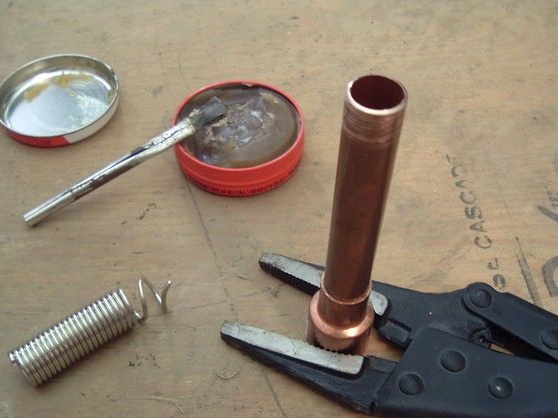
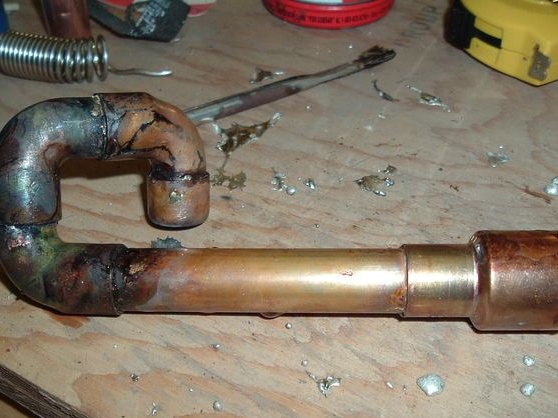
Step Two Soldering
Perhaps this is the most boring, but the most crucial moment when assembling the gun. It is necessary to solder all the nodes well. They must hold tight and most importantly do not let off steam, as the gun will not work efficiently or will not work at all. After soldering, all components must be checked. The gun is placed in the water, and then you need to blow it into the barrel with your mouth, bubbles should not go from the rations.


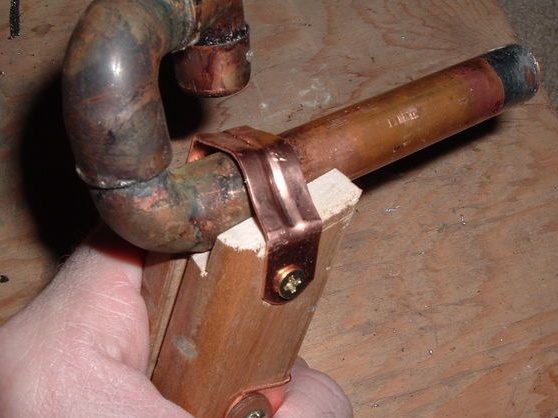
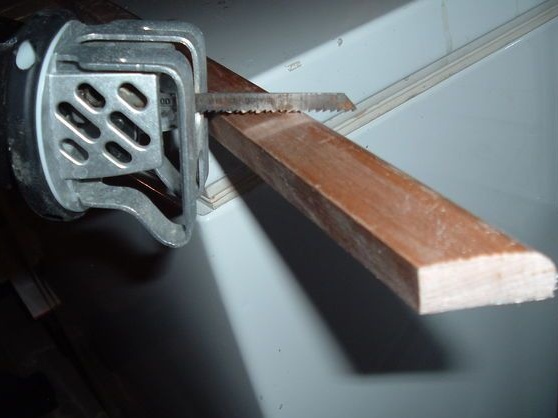
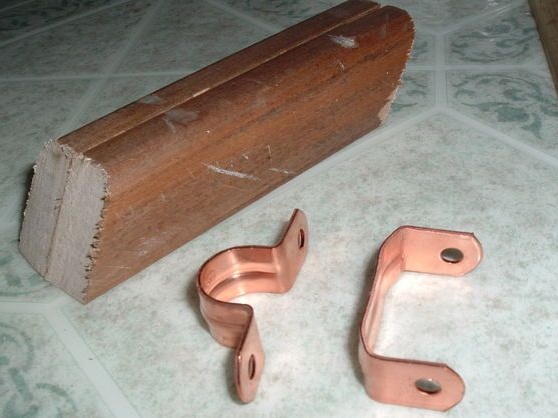
Step Three Making a pen and fixing the barrel
Now you need to make a pen, for such purposes you will need a piece of board, timber or other suitable piece of wood. The workpiece must be cut at an angle. Now the mounting brackets will be needed, they will need to be bent so that they fasten the pipe. This whole thing is fastened with screws or self-tapping screws. For ease of assembly, it is preferable to pre-drill holes for them.
Step Four We install a heating system
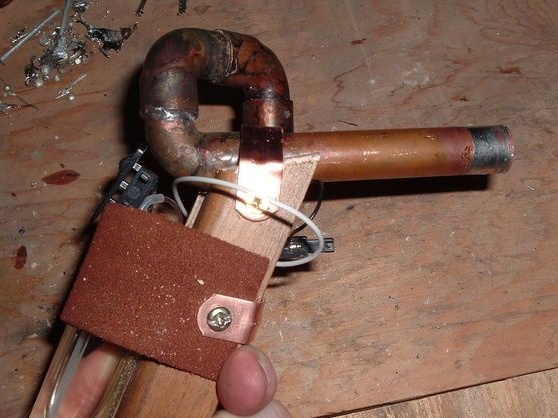
The author decided to use a gas lighter as a heat source. First of all, it needs to be disassembled, we will need a container with gas, as well as a piezoelectric element. Lighters are very different, so there may be differences in the assembly. The bottom line is to bring gas directly under the boiler, this can be done using an additional hose, or you can place a container of gas directly under the boiler. You will also need to figure out how to open the gas supply. The author made for such purposes a special button made of plastic.
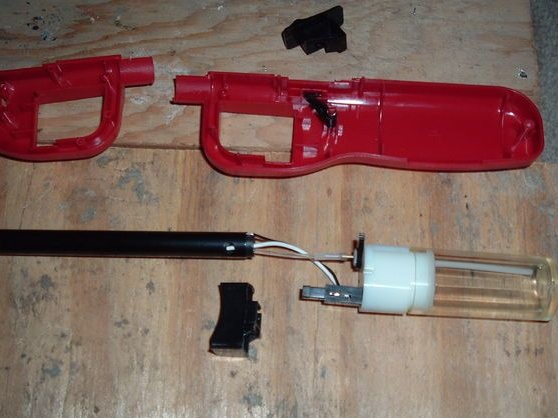
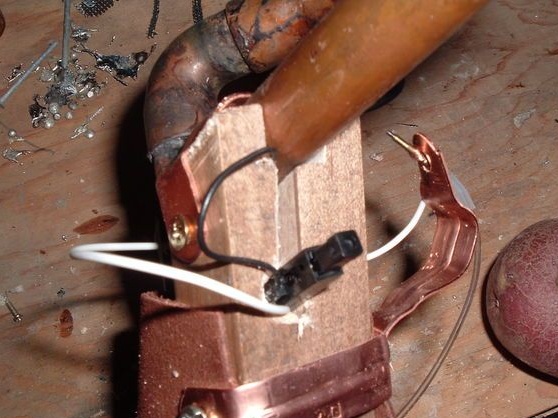
It is not enough to install gas; it still needs to be set on fire. The spark here forms a piezoelectric element from the same lighter. It needs to be placed so that you can conveniently press the button. One contact of the element is connected to ground, that is, to a copper tube. Well, then you need to bring the second wire and set a small gap between the tube in the gas supply.
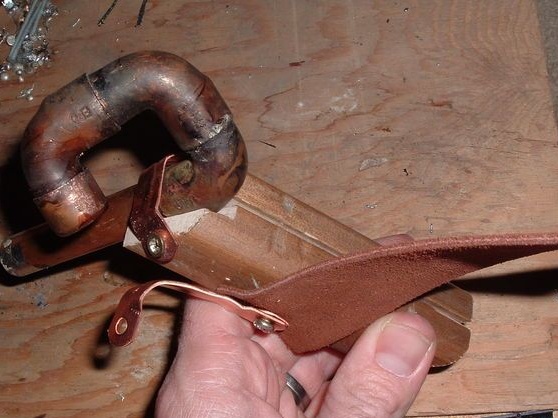
To fix the gas container, you will need a piece of leather or other suitable fabric. It is screwed to the wooden base with self-tapping screws. For a piezoelectric element, the author drilled a hole in a tree and inserted it there. It is advisable to put the element on the glue so that it does not fall out.
Step Five Testing a steam gun
That's all, now the gun can be tested. First of all, it needs to be filled with water, for this the barrel rises up so that water can enter the boiler. In total, you need to pour about 10 drops, for such purposes the author uses a pipette. The more drops, the higher the pressure, but it will take longer to warm.
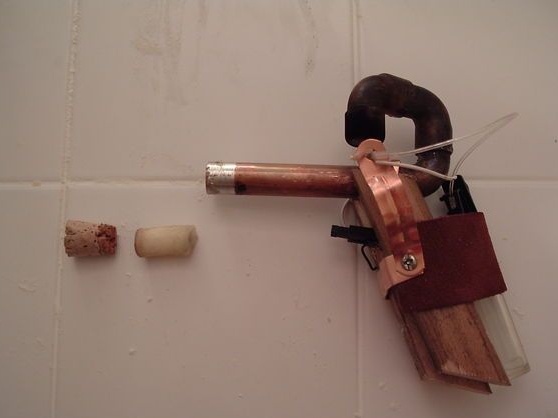
Next, you need to make a shell, potato is used as it. You need to take a tube in diameter such as a muzzle and insert it into a potato. The fabricated shell is then inserted into the barrel. In addition, a cork is needed for the shot, it provides the necessary tightness. It is important to remember that the stronger the cork is inserted and the more water is poured, the stronger the shot will be. If you insert the cork too much and pour a little water, the shot may not happen, so here you need to experiment.
Now you can make the first shot. To do this, the gas supply is opened, and the gas is ignited by pressing the piezoelectric element. In order for a shot to occur, it will take 1-2 minutes of time for the water to boil and the necessary pressure to form. When the vapor pressure exceeds the friction force of the plug, the gun will fire. The author of the projectile flies at a distance of 7-10 meters.
If the shot did not happen within two minutes, the gas must be shut off and the gun allowed to cool. Most likely, the vapor left through cracks in the soldering areas or in the area of the projectile. It is also possible that the cork is inserted too tight.