Rustic stools and chairs look great in modern kitchens where new technologies seamlessly blend with traditional peasant the furniture.
The stool with extended legs easily replaces you with a bedside table or a voluminous curbstone for indoor plants. This truly versatile piece of furniture is worth attention.
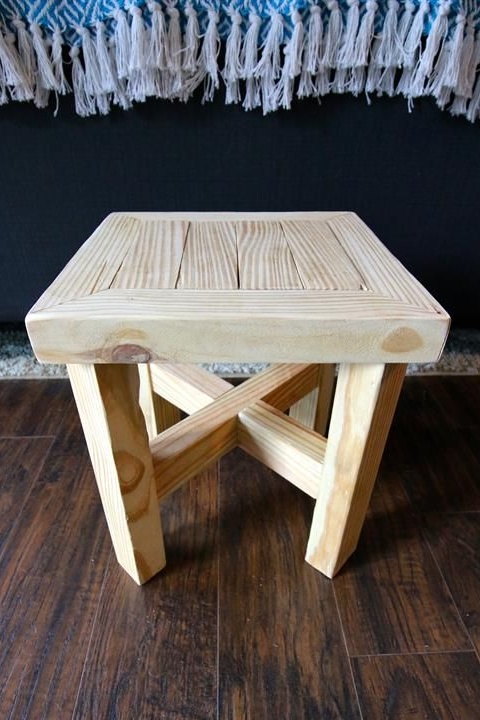
The design of the stool presented in this master class is distinguished by its strength and durability. In fact, it is eternal furniture. In his performance of oak, he probably will last more than a dozen years.
This is a basic design that can be complemented with a soft base or artistic carving. At any time, the stool can be repainted in a new shade and it will fit into any interior design without any problems.
In order to make such a stool for the home do it yourself, you will need:
Materials:
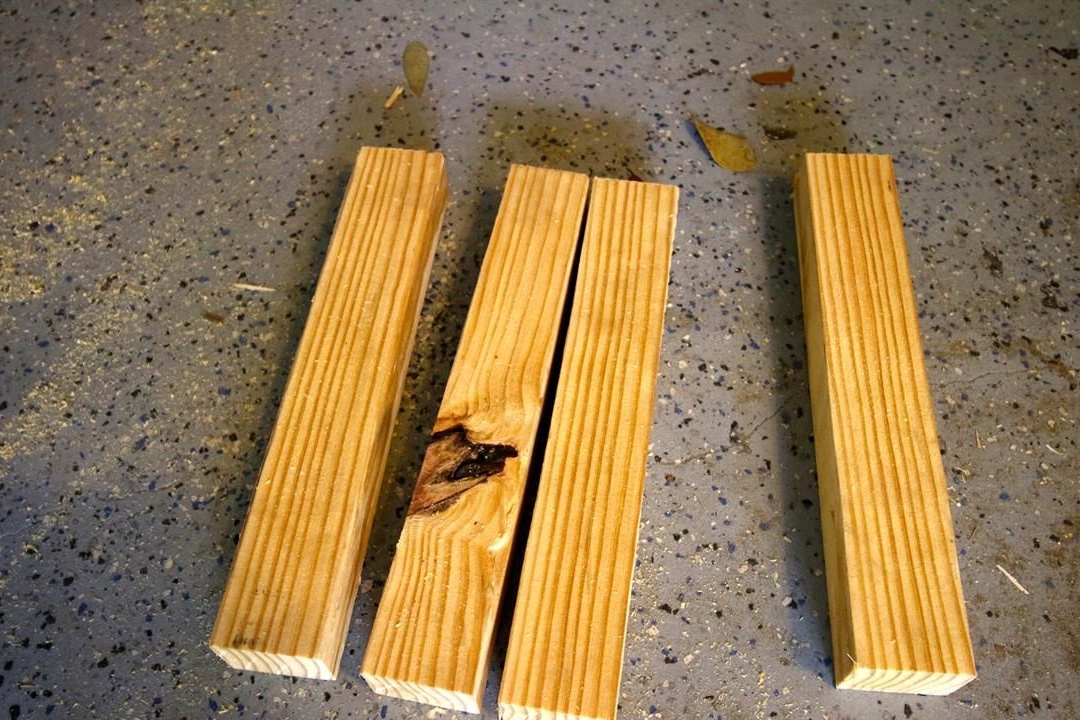
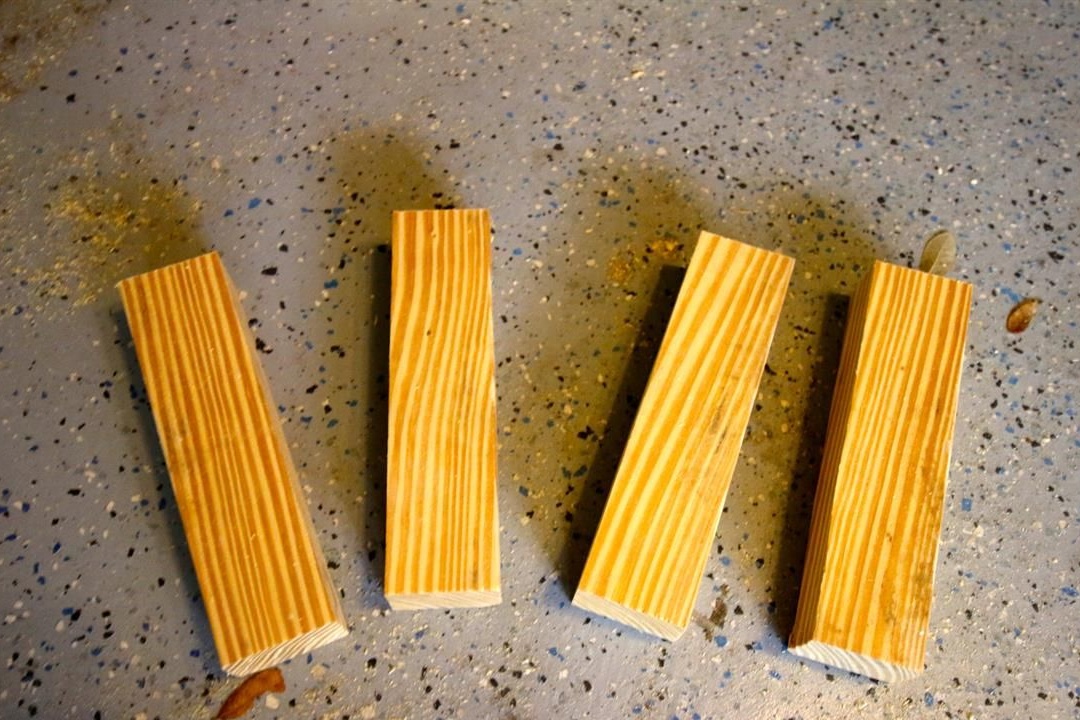
1. natural pine block with a section of 40 x 50 mm:
- 4 pcs x 40 x 50 x 300 mm - parts for legs;
- 4 pcs x 40 x 50 x 200 mm - seat parts;
- 4 pcs x 40 x 50 x 300 mm - details of the seat frame;
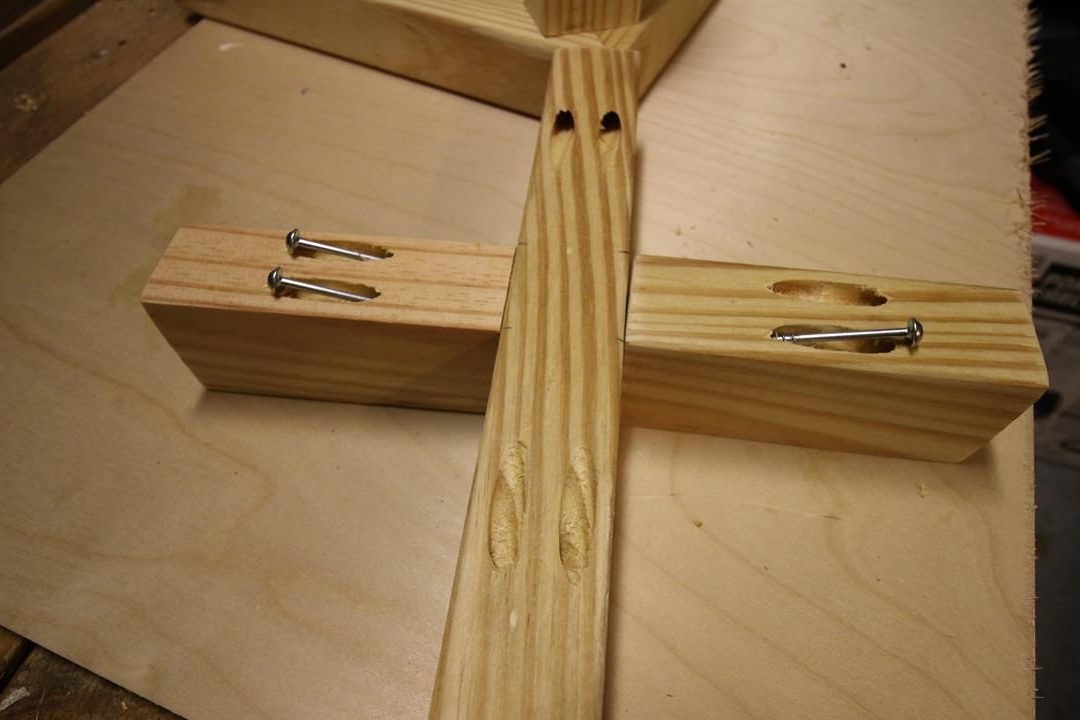
- 2 pcs x 40 x 50 x 125 mm - details of the cross.
2. glue for woodwork;
3. paint, stain, drying oil or protective decorative oil for wood processing;
4. resistant furniture varnish;
5. furniture screws or wood screws.
Instruments:
- miter saw or any available tool for sawing timber;
- electric drill;
- screwdriver;
- grinder;
- fine sandpaper;
- paint brushes and soft, lint-free fabric if you use oil or drying oil;
- clamps;
- building tape measure and square;
- a pencil.
Step one: determine the size and mark the parts
First, decide on the basic functions of your future stool. Will he serve as a pedestal for home plants or an ordinary stool at the dining table - it depends on what dimensions will be the final product.
In any case, the legs of the stool can be extended and used as a small table. Do not forget that this is a basic design, which, if desired, can be increased even to the size of a full table.
Write on a piece of paper a list of the parts that you have to make. Determine their exact sizes and specify them to avoid confusion during the work.
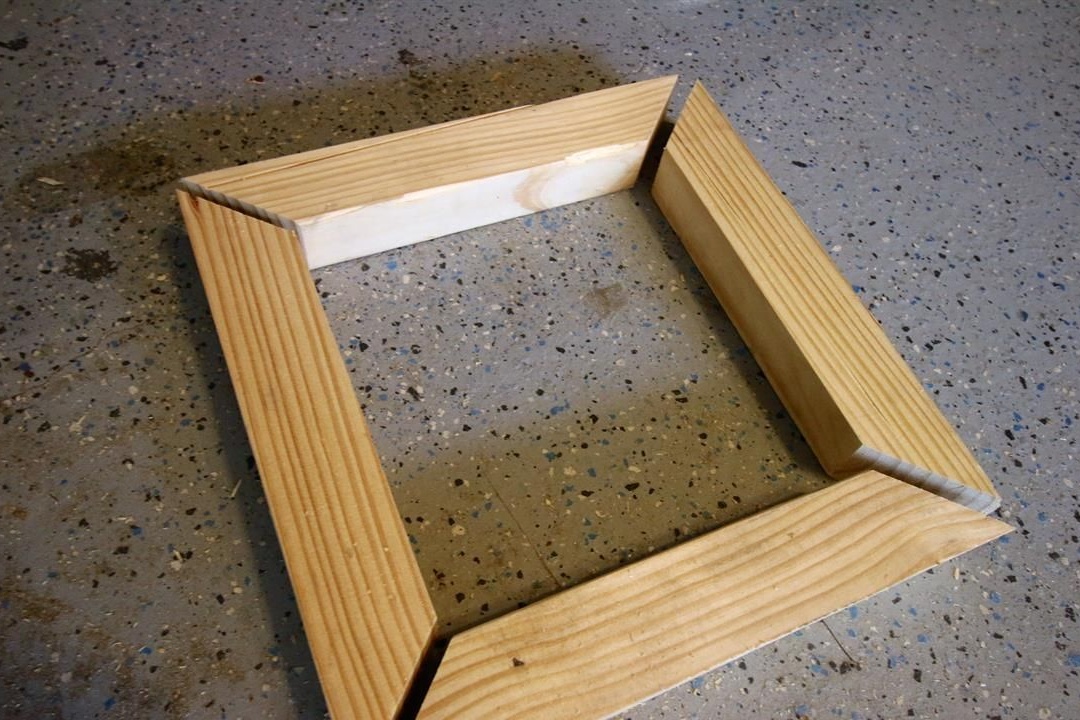
Proceed to marking parts.Use for this a construction square. Please note that the frame details are sawn at an angle of 45 degrees. Mark the angle on all four parts.
The author did not use groove joints, but if you do not plan to follow his example, add a little to the grooves during the marking process.
Step two: manufacturing of parts and their preliminary processing
Go into the manufacture of parts. To do this, cut the beam into segments of the required length using any available tool. The most convenient in this regard is a miter saw, although this is an inexpensive pleasure today. It allows you to make strictly perpendicular cuts and saves you from having to adjust the joints to each other.
In this way, prepare the details of the frame, seat, legs and cross. Grind on the machine or with a manual grinder. In extreme cases, you can use sandpaper, since the amount of work allows. Especially if you are dealing with pre-planed materials.
Begin sanding with coarse sandpaper to remove all excess and smooth out tangible bumps. Then switch to fine-grained paper and finish sanding until the surface is smooth and pleasant to the touch.
Step Three: Build Stool Design
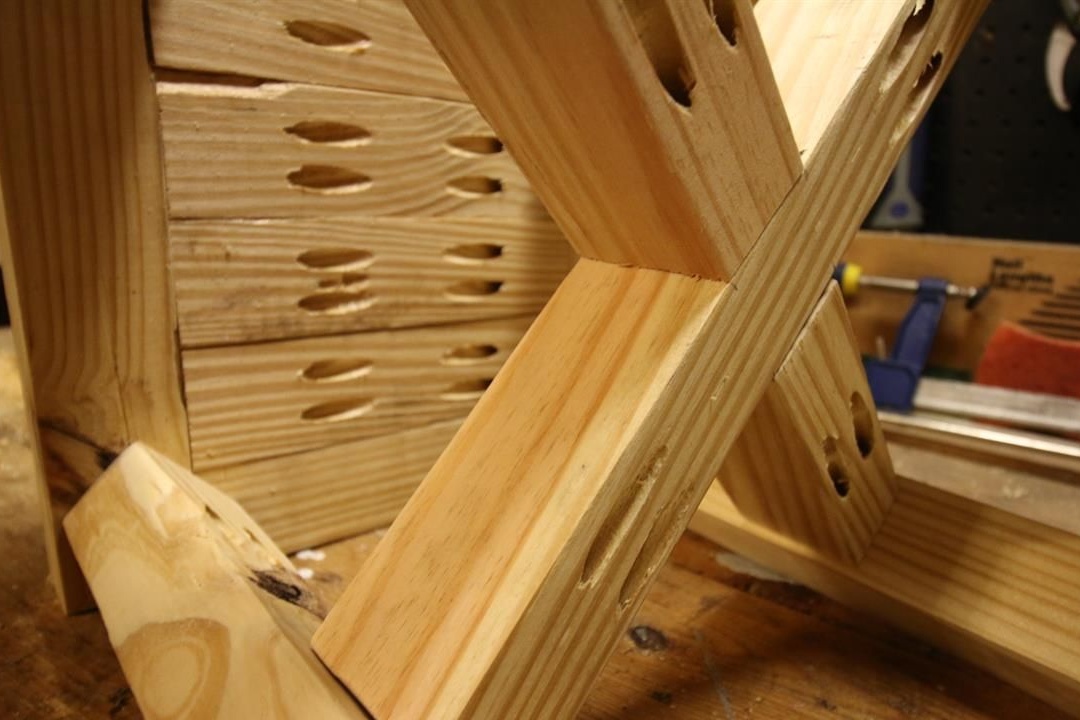
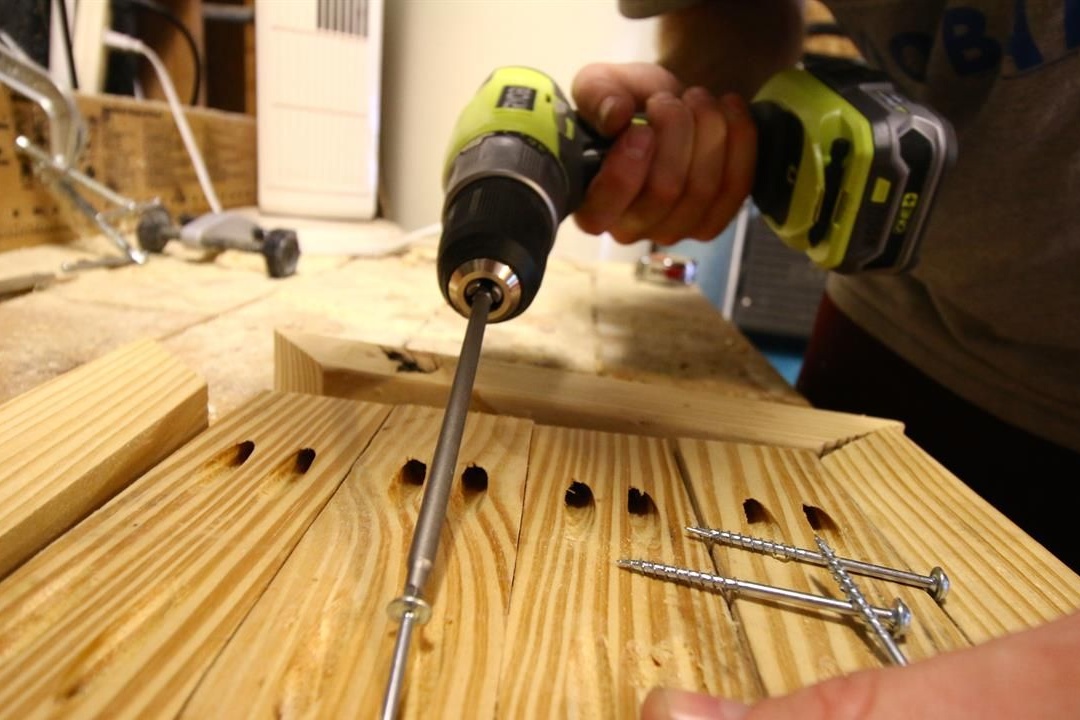
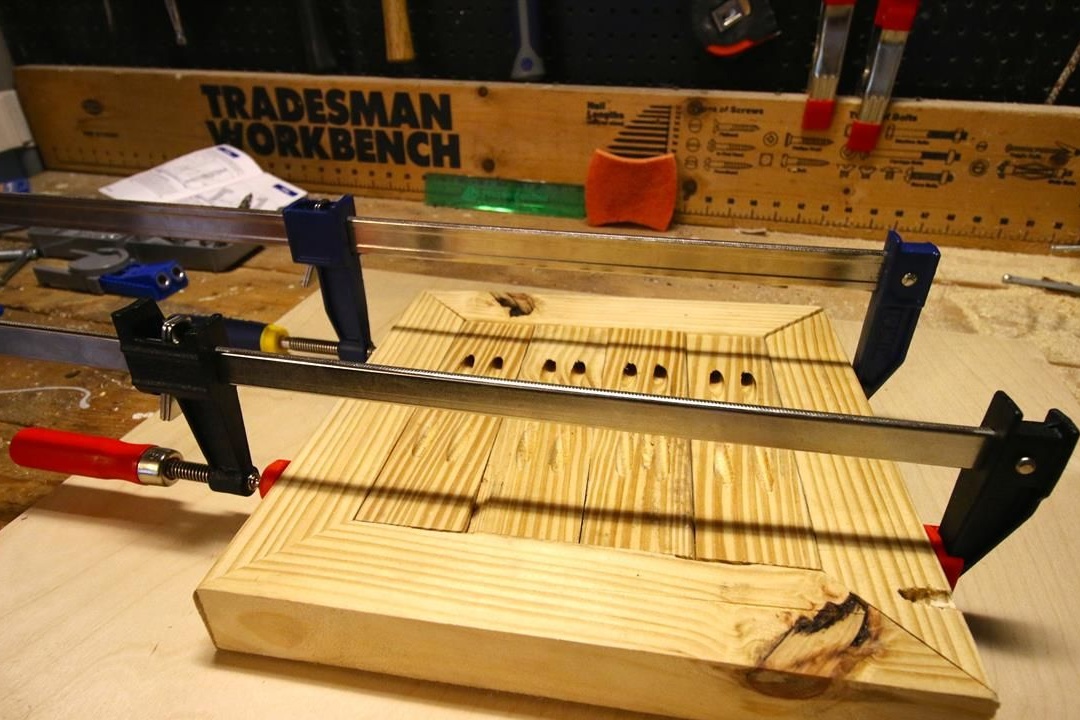
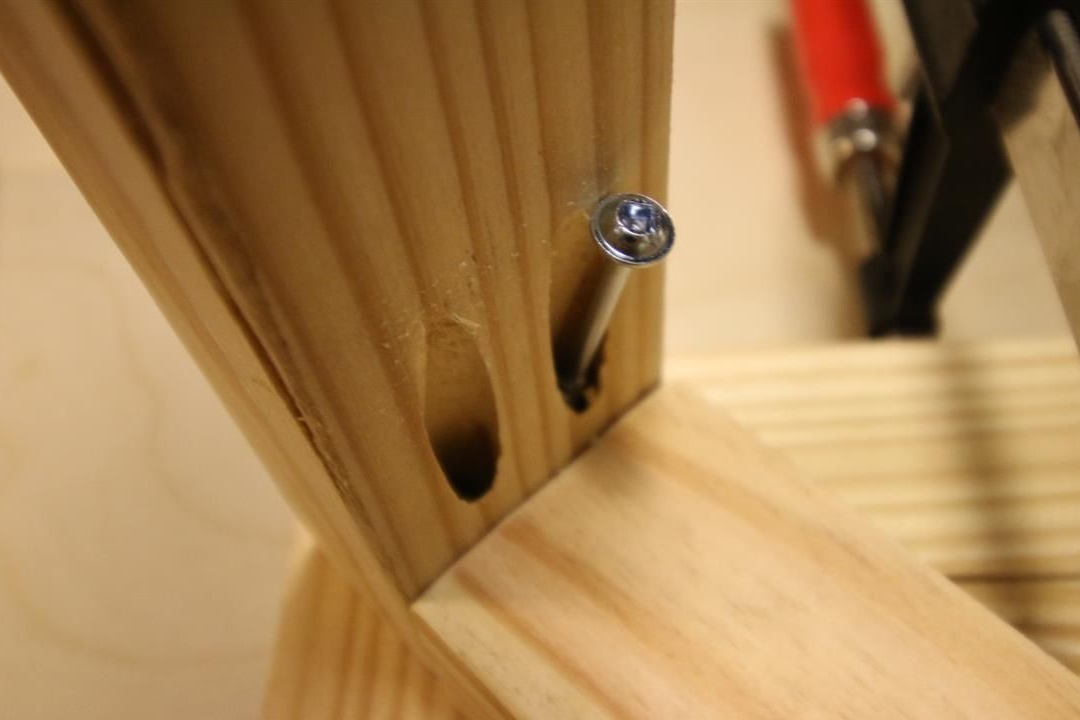
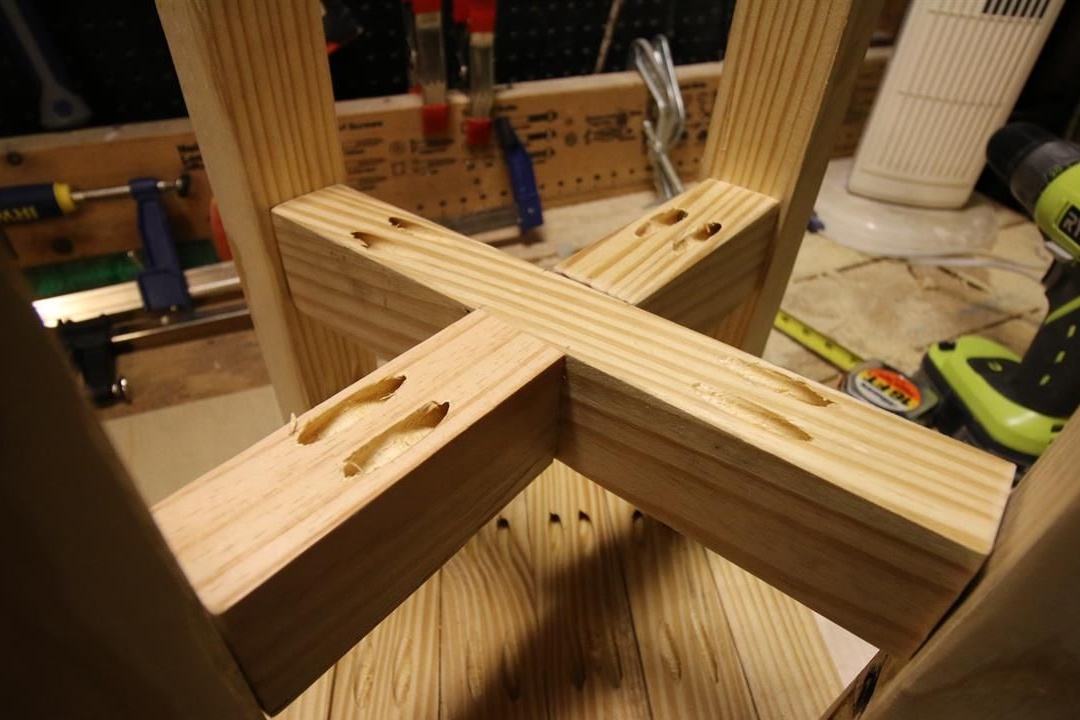
Define and mark with a pencil the joints of the parts with each other. Among the masters from the USA, the practice of using diagonal pocket holes for screws, which allow you to completely hide the fastening places of parts, is popular.
This is a very simple and convenient technique that can be successfully used instead of traditional domestic groove joints. Although the latter, of course, are much more reliable.
Both options for connecting parts to each other are best combined with glue. Only in this way can you be sure that the repair of new home-made furniture is not waiting for you soon.
Drill the inclined holes for the screws and proceed with assembly. Apply a small amount of glue over the entire surface of the joint, press the parts against each other and screw in the screws. Thus, you pretty much save time on the hardening of glue.
You can do it in a more traditional way: glue the parts by placing them in clamps and only then strengthen the structure with furniture screws. The second option is more professional, but will require more time from you.
So, assemble the seat and crosspiece as described above. Fix the legs in place, turning them much around the corner as shown in the photo. Establish and fix a crosspiece.
Fourth step: surface preparation and wood processing with paints and varnishes
Fill all pocket openings with screw caps with sealant or wood putty. The first option is preferable, since it will securely fix the screw caps and add even more strength to the structure. In addition, the composition of the putty is not always as high-quality as the manufacturer claims. Over time, it can crumble and partially crumble.
Wait for the sealant to harden and finish polish if necessary. Sand the surface of the seat thoroughly to smooth all parts at the same level and remove traces of glue.
Treat the surface of the stool with any of your favorite means. The most elementary in this case are natural and mineral oils, home-made mixtures of oils with wax or paraffin and natural drying oil.
Such processing will be quite enough for home furniture. It must be repeated once every couple of years in order to refresh the appearance of the product. Before reprocessing, it is better to sand the surface slightly with fine sandpaper.
If you want to tint wood, use an alcohol stain as the most economical and affordable option. It allows you to simulate valuable wood species. Top stained wood should be covered with a couple of layers of furniture varnish.
The stool can also be painted, rubbed with protective and decorative oil, or simply varnished. In the latter case, a wide range of varnishes on a transparent basis is presented for you, as well as varnish-toners that change the original shade of wood.
Any paint or oil coating should be varnished. Experienced furniture makers do this and advise everyone the same. If you are not a big fan of varnish shine, use matte varnishes. They reliably protect the product from damage, but at the same time look very natural.
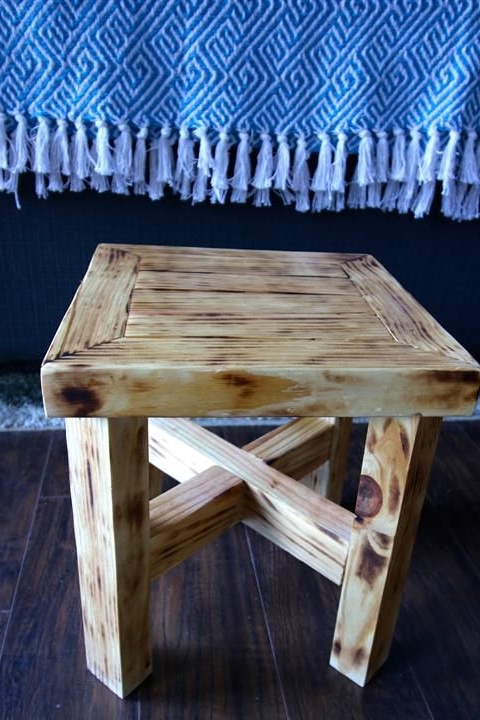
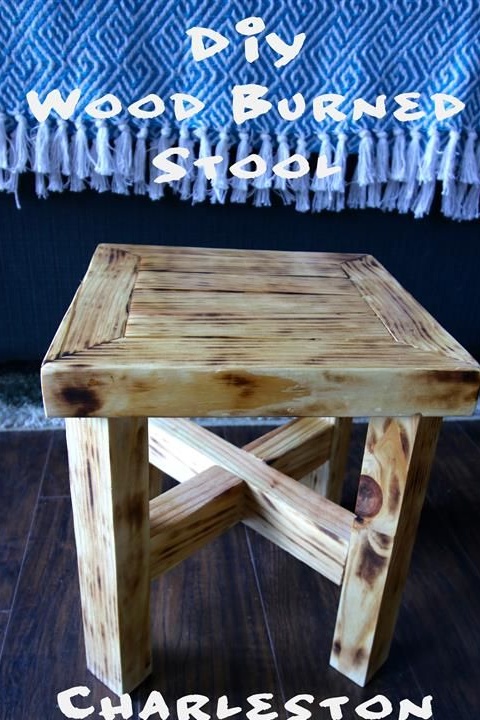
The author burned the surface of the stool with a heat gun, so he got such a spectacular appearance. The heat gun is a relatively rare tool and has not yet received wide distribution among craftsmen. But it allows you to achieve interesting effects when processing wood. In particular, in the process of its artificial aging.