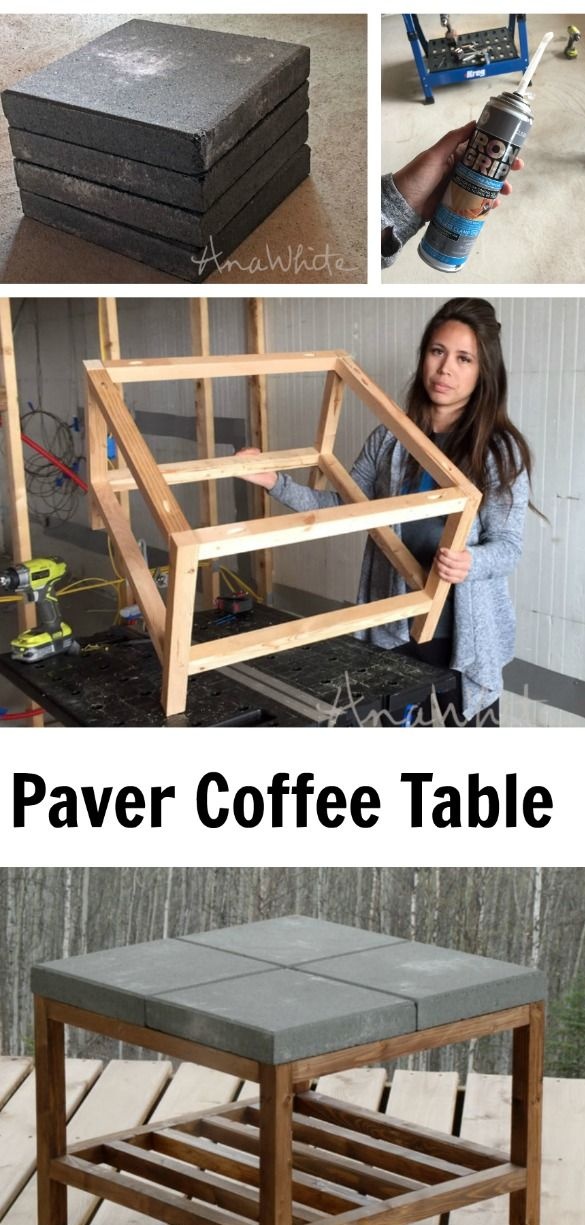
The combination of concrete and wood only at first glance gives the impression of something "inedible". In fact, this trick is now widely used in the manufacture of not only street, but also home of furniture.
As for furniture for the open courtyard, as well as garden furniture, the use of concrete on flat horizontal surfaces reliably protects the wood from the adverse effects of rainfall.
Such furniture is easy to clean, it does not look trivial, but serves for a very long time, without requiring any special care or repair. However, the consumer is usually attracted not so much by the practical characteristics of such furniture items as the usual contrasting combination of materials.
In a fit of fresh and new ideas, you can try to make something like this yourself. A table or bench is perfect for a training flight.
The author of this workshop offers us do it yourself make a small wooden table with a concrete tabletop for a terrace. For work you will need:
Materials:
1. natural pine block with a cross section of 50 x 50 mm for the manufacture of a table frame:
- 4 pcs x 50 x 50 x 390 mm - leg parts;
- 8 pcs x 50 x 50 x 525 mm - horizontal frame parts;
- 4 pcs x 50 x 50 x 525 mm - details of the lower tier-shelf;
- 2 pcs x 50 x 50 x 525 mm - transverse details of the tabletop frame.
2. glue for woodwork;
3. silicone glue for fixing concrete tiles to the frame or tile glue;
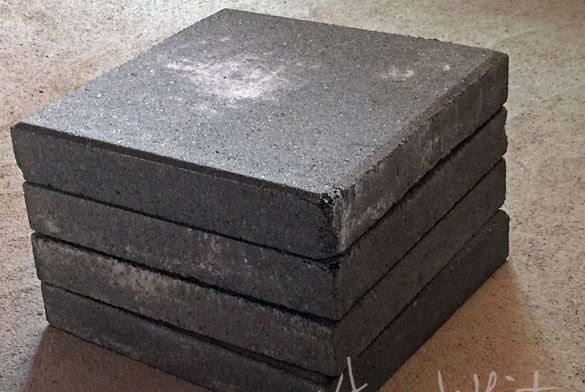
4. four concrete tiles to fit the countertops;
5. furniture screws or wood screws;
6. means for protective and decorative processing of wood, such as furniture varnish or decorative oil.
Instruments:
- miter saw, jigsaw or hand saw for wood for sawing bars;
- electric drill;
- screwdriver;
- grinder;
- building tape measure and square;
- paint brushes;
- soft fabric without lint.
Step One: Choosing Materials
Lumber. Decide on the type of wood that you plan to use to make the outdoor table. Choose a traditional pine or dense hardwood, such as oak, maple, acacia or ash.
The volumes of material are modest and will cope, for example, with the processing of oak is not difficult. However, in the process, you can not avoid grinding with an electric grinder.
Instead of a grinder, you can also use a grinder with a nozzle for grinding paper wheels.
It is better if the bars are pre-quality planed. This is especially true for dense wood.
Tile. Concrete tiles of suitable thickness can be purchased at large construction hypermarkets. She is no longer as rare as before. In extreme cases, you can replace it with a regular tile for the floor.
In addition, concrete elements for countertops can be made by yourself. In addition to traditional concrete components such as cement, sand and water, you will need a gray dye for concrete mixes. However, if you manage to find a special dark gray cement, dye is not needed.
With a certain color scheme, white concrete countertops look great. In this case, for the manufacture of white tiles, you will need white cement and white dye.
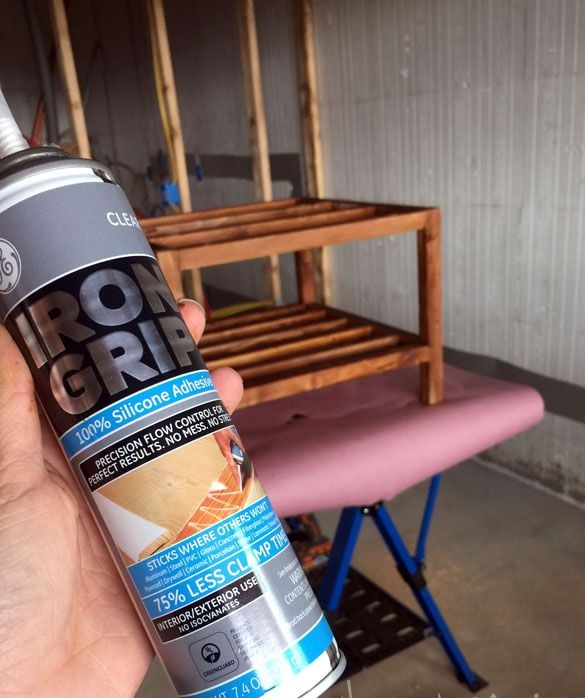
Glue for a tile. The author uses silicone glue. She proved in practice that this wonderful glue is able to glue anything, including a couple of concrete blocks.
If you are unable to find silicone glue for sale, select the appropriate tile adhesive suitable for working on wooden surfaces.
Step two: structural detailing and marking of frame parts
Making a wooden frame for a street table in this case will not be difficult, since the author of this master class shared with everyone who wished his computer circuits.
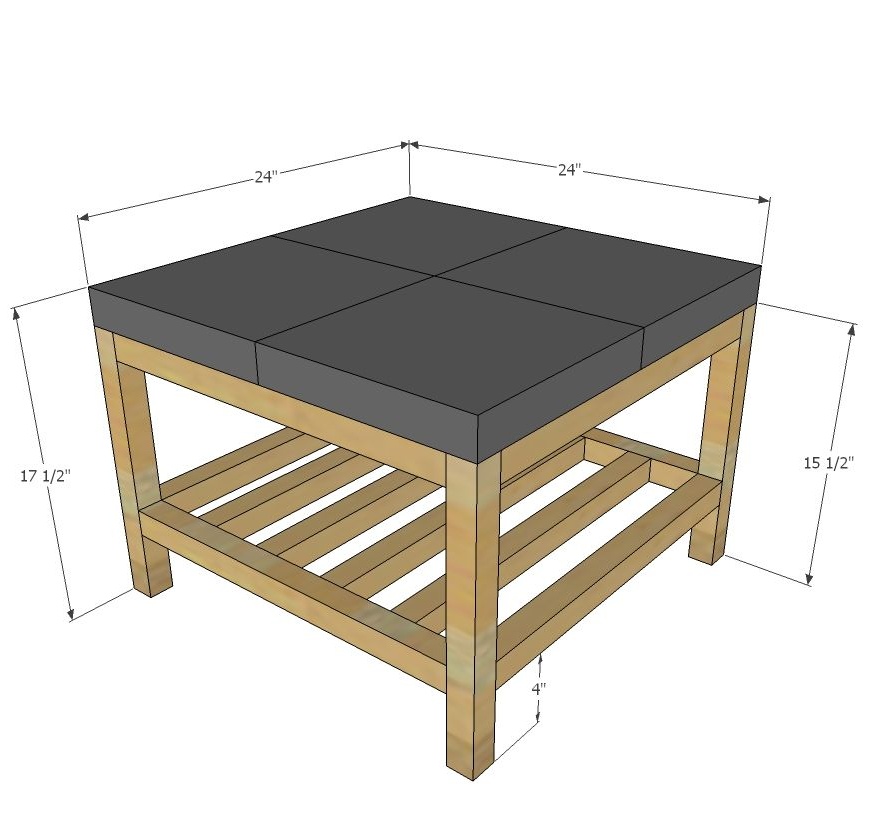
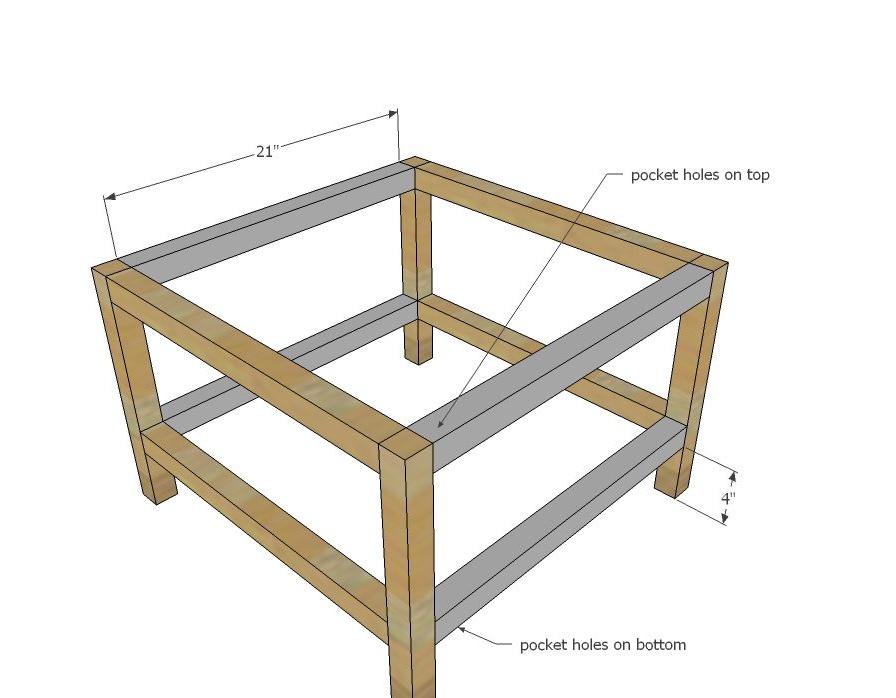
Dimensions are in inches, so let's try to figure out what details you need.
First of all, mark the elements of the main frame. It consists of four legs, 39 cm long and eight horizontal strapping parts, located lower and on top of the frame. The length of each of them is standard and is 52.5 cm.
You will also need two supporting rails of the countertop, 52.5 cm long and four parts of the lower shelf of the same length.
As you can see, the sizes are as standardized as possible and getting confused here will be difficult even for a beginner.
Mark each element of the frame using a square and pencil and go to the next step.


Step three: manufacturing parts and assembling the frame
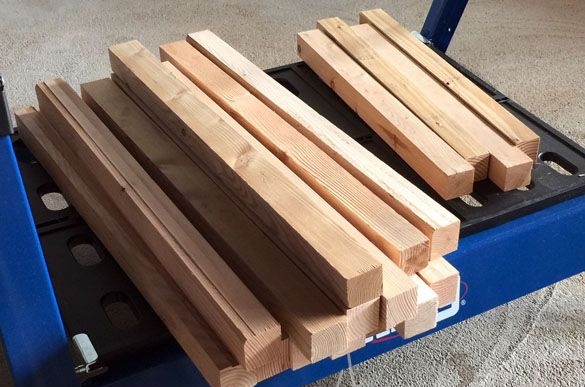
Saw the timber into segments, according to your list of parts. Count them. In total, you should get 18 elements.
Grind each part with a sander before proceeding with assembly. At this stage, wood processing is always made easier.
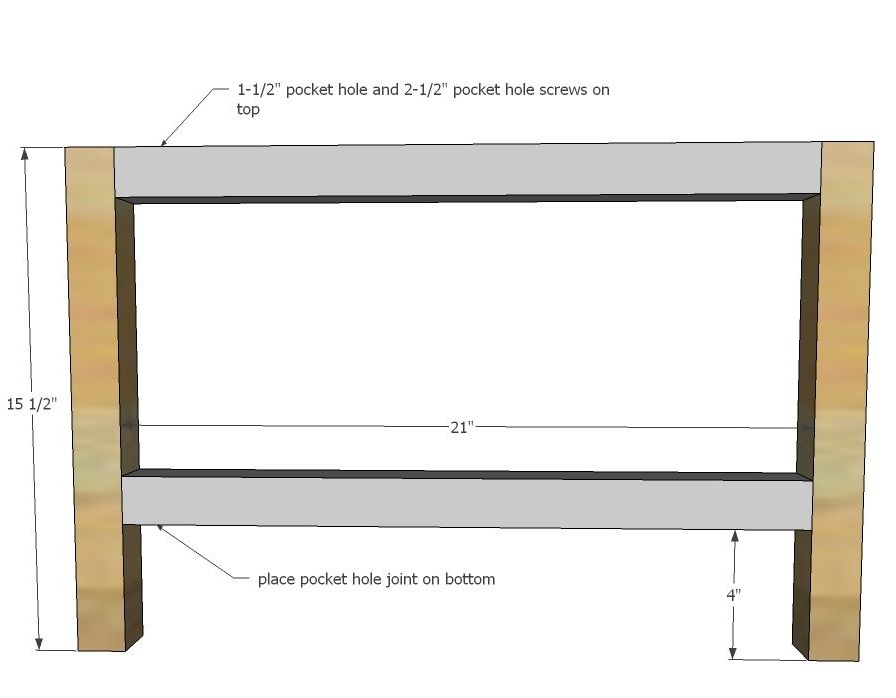
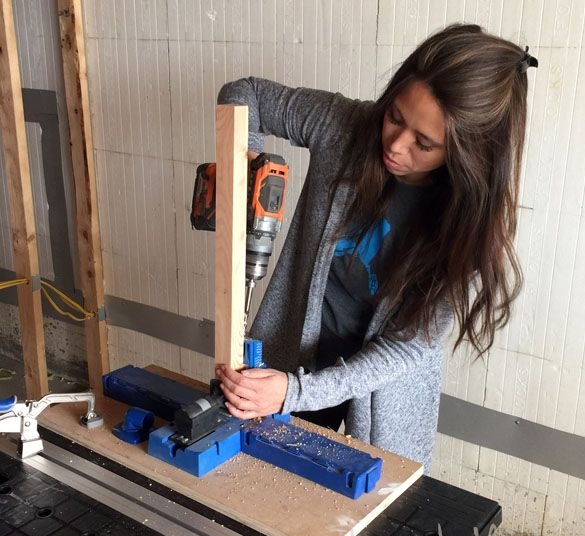
Identify the joints and mark them with a pencil or marker. At pocket points, drill pocket holes for furniture screws at an angle. The author uses a special machine with a clamping system for this.
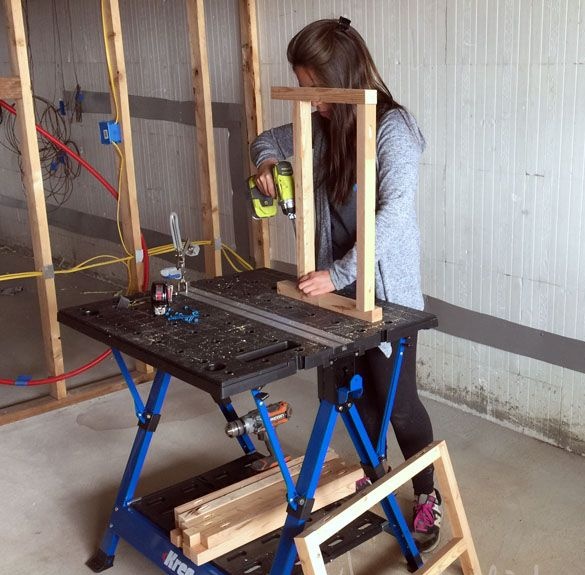
Now feel free to proceed with the assembly. First make two side panels, then attach to them two horizontal parts of the trim.
Fix on the frame the crossbeams for the concrete countertop and the elements of the lower shelf.

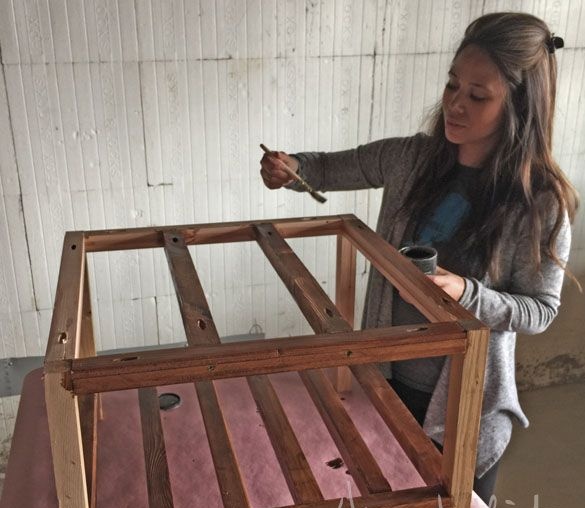
Fourth step: protective and decorative processing of wood
The author used a special protective and decorative gel-shaped toner. He is very popular in the USA. You can easily replace it with a protective-decorative oil-toner. It gives no less qualitative result.
Choose the right tone and apply the first layer of oil, carefully rubbing it into the wood with a soft, lint-free cloth. If the color is not as saturated as stated by the manufacturer, repeat the application and wait until the oil is completely absorbed. Two layers should be enough.
Coat the wooden frame with suitable furniture varnish. Varnish intended for varnishing of furniture is usually characterized by increased resistance and hardness of the coating. It has a pronounced unpleasant odor and in liquid form is very toxic, however, after drying forms an absolutely safe coating.
When working with varnish, observe all safety precautions. If possible, carry out any such manipulations on the street or under a canopy. Use a respirator and gloves. Get used to it all from the very beginning, like a real professional.
Apply several coats of varnish (from two to seven), waiting time until each previous coat hardens.
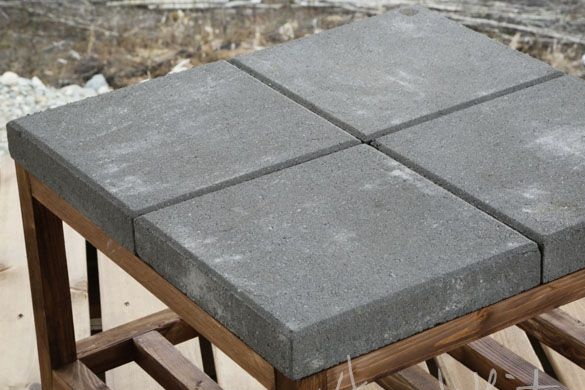
Step Five: Concrete Countertop
This master class uses ready-made industrial tiles, so we will not dive into the issues of home production of concrete parts.
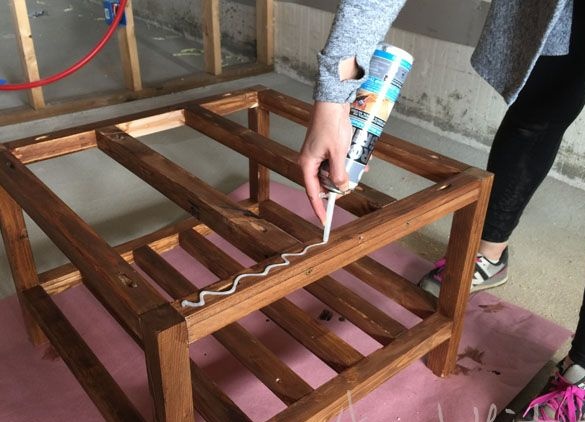
The author used silicone glue to fix the tiles. The tile adheres directly to the frame, without the use of sheet materials. Given the size of the frame and countertops, this does not affect the strength of the structure.
Apply evenly a small amount of glue to the entire surface of the frame at the points of contact with the details of the tabletop. Lay the tile, make sure that it is at the same level and leave the table until the glue has completely set.
If the concrete tile has a porous surface, it must also be varnished, otherwise moisture will constantly penetrate the countertop. On sale there are special varnishes for brick and concrete. You can try experimenting with ordinary varnishes, which after drying form a hard coating.
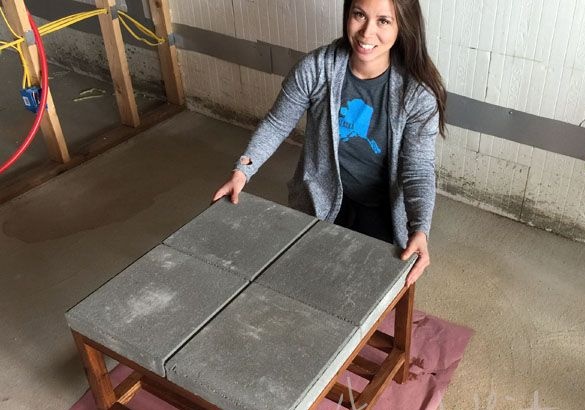
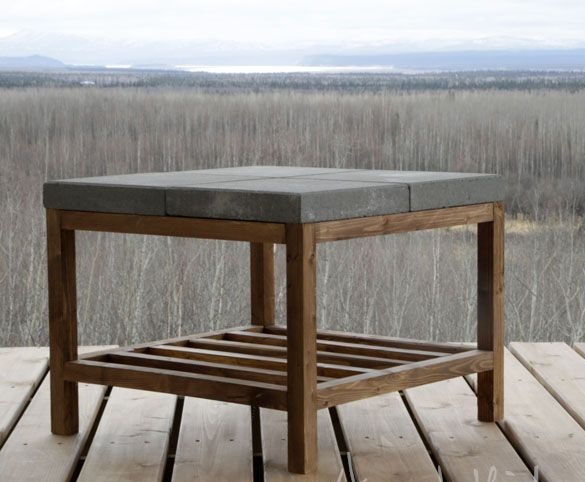
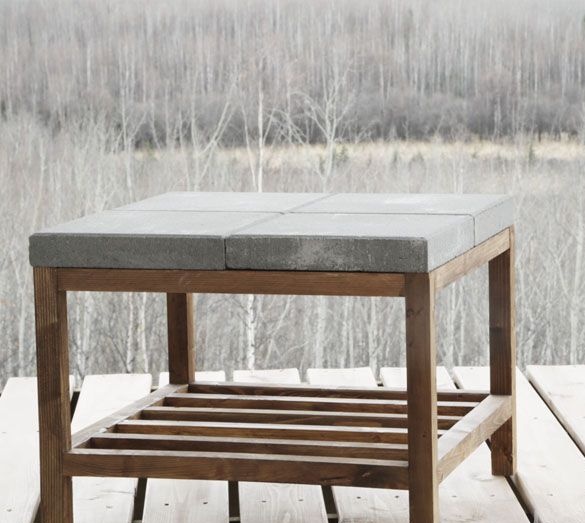
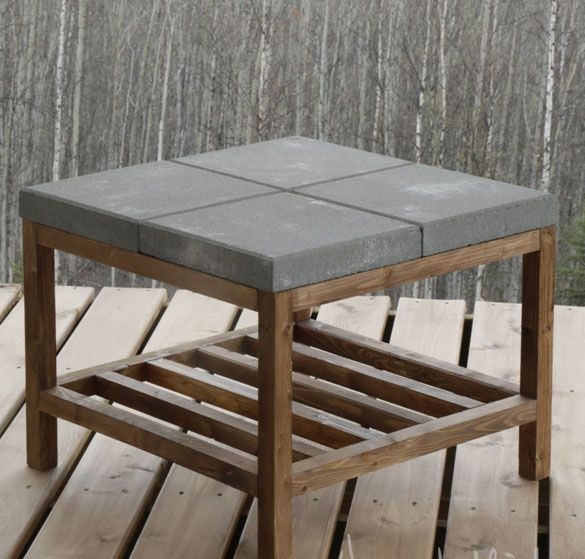
A wooden table with a concrete tabletop for the terrace is ready! Here are a few last photos for inspiration. Create with us!