

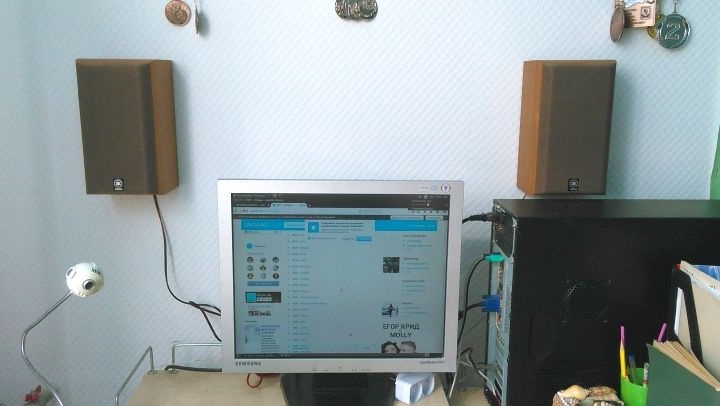
My kids love to drive a computer .. And then one day the computer speakers blazed with a blue flame, in connection with which my headphones began to periodically disappear. And since there are two children, I practically did not see my headphones. This could not continue for a long time, and then he informed them: "I will come up with something with speakers."
Tools used: soldering iron, pliers, side cutters, screwdriver, 8mm drill bit, stranded wires, solder, screw contacts, amplifier board.
It was decided not to buy new ones, but to adapt the unused rear speakers from the 5.1 receiver. But they need an amplifier. There is no finished amplifier. I dug in the bins a long time ago bought a board with Aliexpress express amplifier class D - lay for a long time, waiting in the wings.
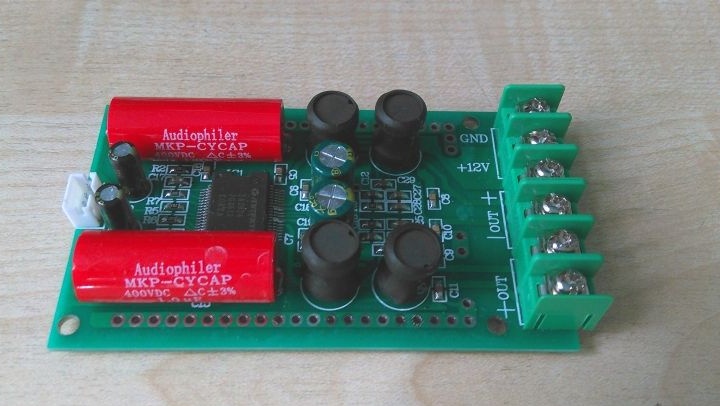
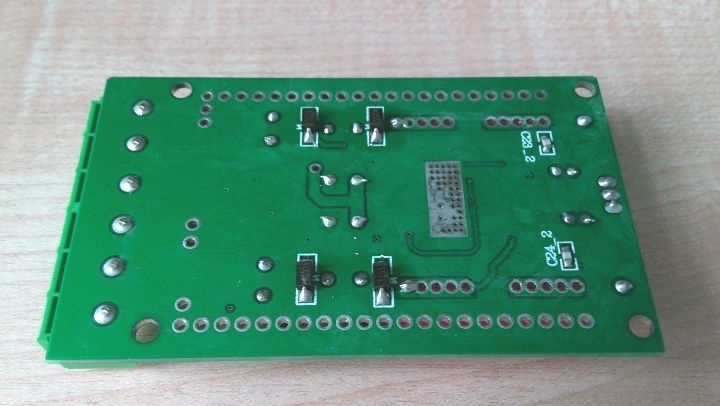
This is a digital amplifier on the TA2024 chip of the Korean manufacturer Tripath, a high-quality power amplifier with a low harmonic distortion and high efficiency.
Amplifier specifications as specified by the manufacturer:
- Class D amplifier;
- supply voltage 9-14V;
- high sensitivity;
THD:
- 0.1%, 9W, 4Ohm;
- 0.1%, 6W, 8Ohm;
- 10%, 15VT, 4Ohm;
- 10%, 10W, 8Ohm;
- efficiency 84%, 15W, 4Ohm;
- efficiency 90%, 10W, 8Ohm;
- surge protection;
- protection against overloads;
- protection against excess temperature.
Dimensions: 90x53 mm.
Step 1.
Placement of the amplifier board in the computer case
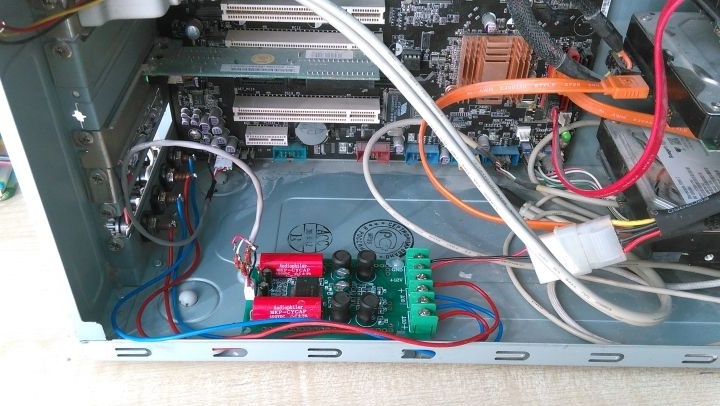
At first, a separate case with a power supply was supposed, but in the process he refused this thought and decided to place the amplifier directly in the computer. We will take power from the computer’s power supply, since there is +12 v. Now the question is: where and how to fix the amplifier board in the computer case. In my case, I decided to fix the amplifier at the bottom of the case, closer to the sound source. Racks made of screws with put on tubes. He refused to drill the case due to the formation of metal shavings during drilling, which can close something. I glued the racks to the body with hot melt adhesive.
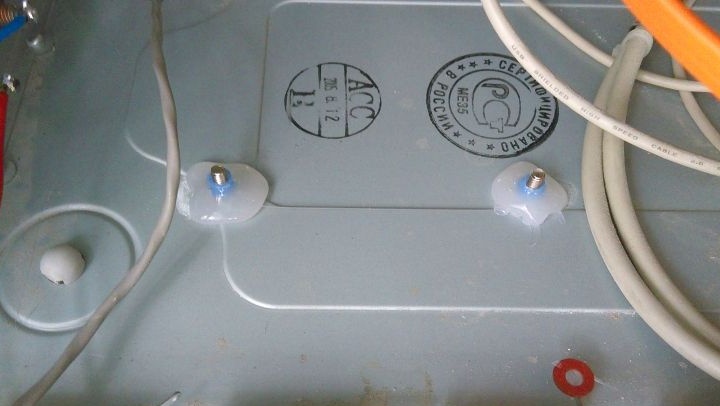
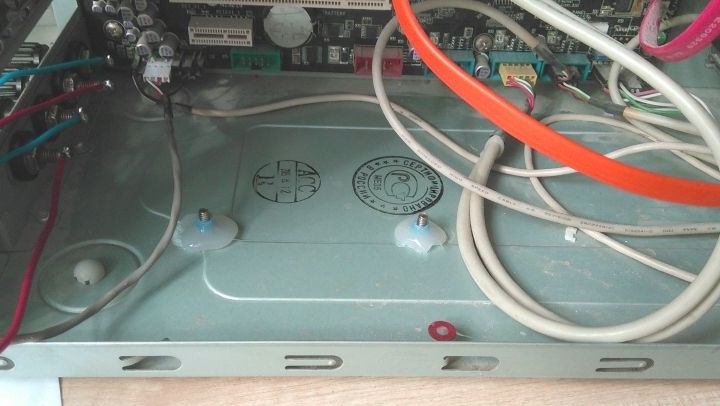
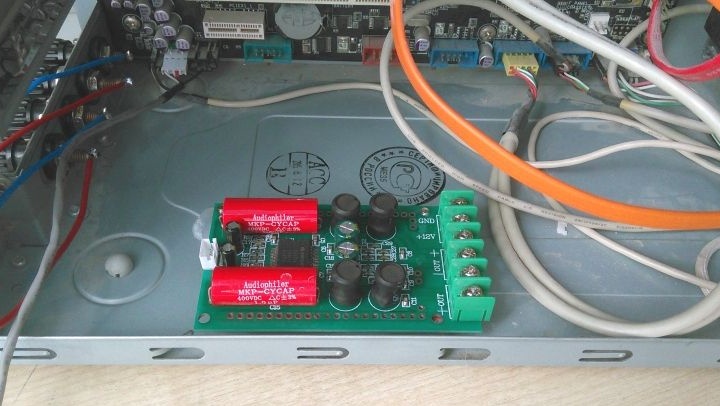
The amplifier itself took them to the racks.
Step 2
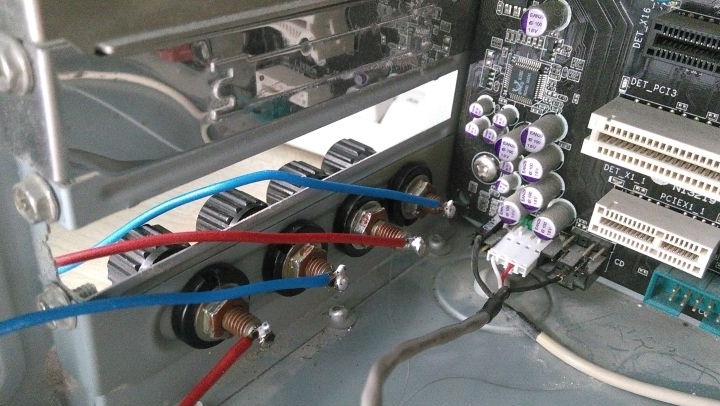
Making contacts for connecting speakers
To connect the speakers, I found screw contacts from some old device. Placed them on the blank for the PCI slot of the computer. To do this, marked and drilled four holes with a diameter of 8 mm in the plug. I screwed the contacts. I put it in place and secured the plug.
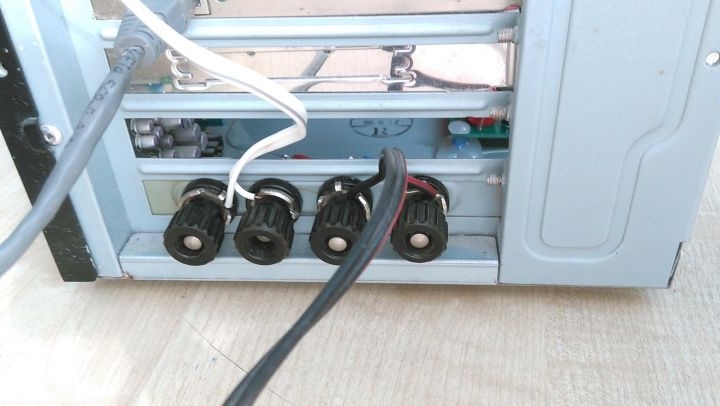
It remains to make all the connections.
Step 3
Electrical connections
There was a problem where to get the sound signal.In the manual of the motherboard I read where it has an audio output.
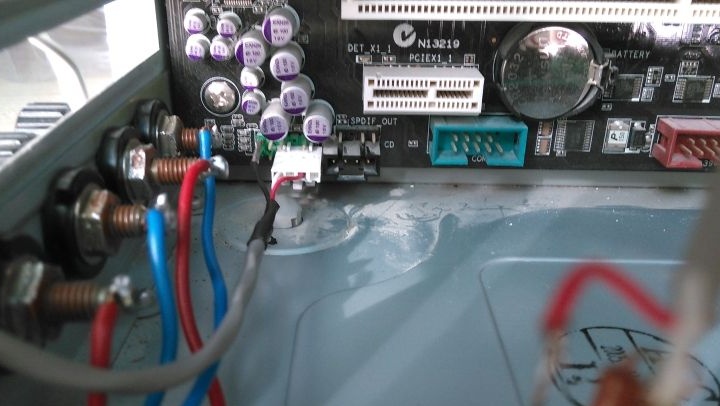
To connect to the amplifier, I redid the audio cable from the cd-rom drive a little. I did it this way. On other motherboards, the connection may differ, you need to look at the place.
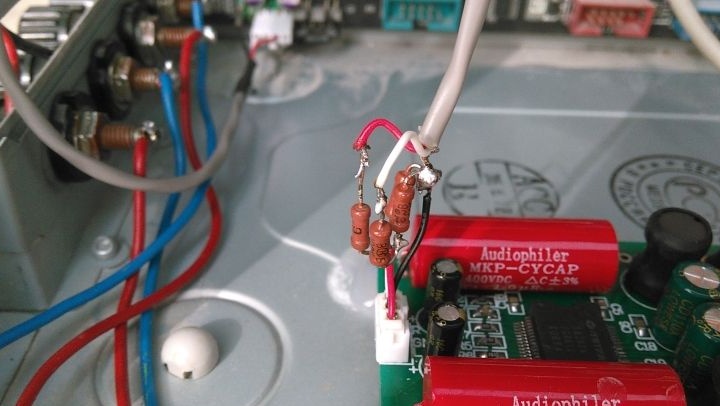
The amplifier is sensitive, when connected directly at minimum volume, interference from a working computer is heard. Since the amplifier has no adjustment of the input signal level, you need to put a variable resistor at the input. Instead, I soldered the voltage divider as in the diagram.
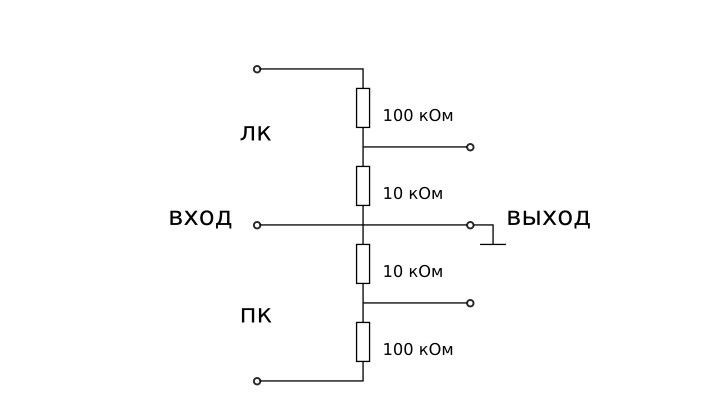
Here's what happened.
With such parameters, the maximum volume suited me (well, so that the neighbors would not hang themselves), noises from interference could not be heard.
To connect to the power cut off from the old computer fan MOLEX connector.
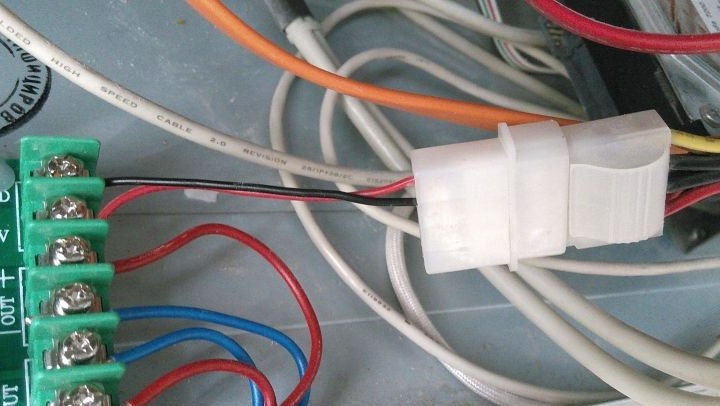
All stripped sections of wire tinned solder. I soldered the wire segments to the screw contacts, tried them in place, the excess - down, cleaned the ends, tinned. All wiring clamped screws on the terminal block of the amplifier.
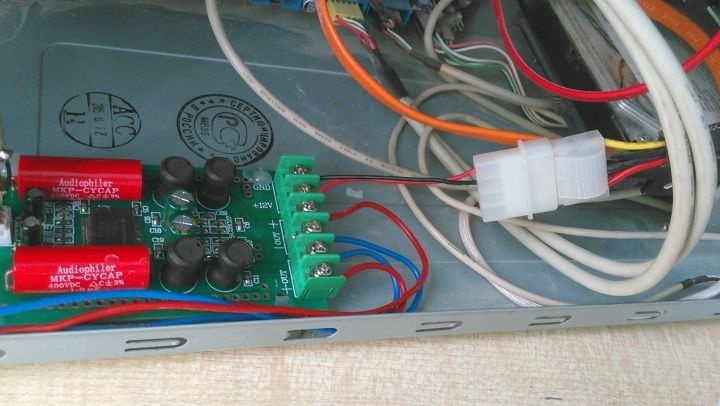
It is important to observe the polarity: if you reverse the polarity of the power supply of the amplifier, it will burn;
if you mix the polarity on the speakers - they will work in antiphase, which is not scary, but they say that this affects the sound quality.
All preparations are completed and here is the first inclusion.
What can I say, the amplifier works, the sound is better than that of the old computer speakers, and most importantly, the children are happy and the headphones returned to the owner and within 2 hours.