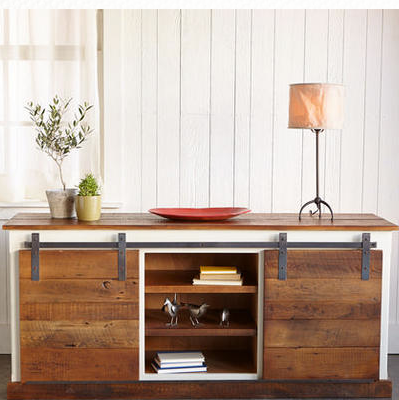
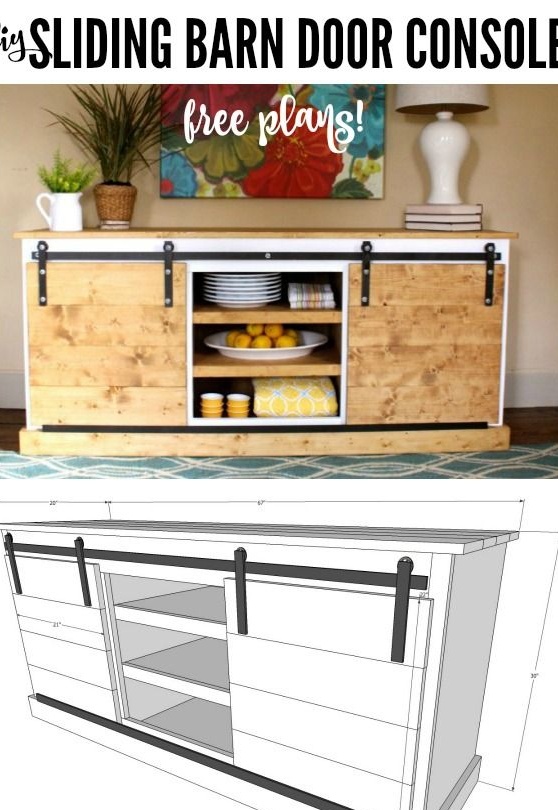
Furniture from unpainted wood is extremely popular. People are tired of artificial materials and intuitively reach for everything that is born of nature. Such simple, it would seem, rustic-style furniture fits perfectly into the interiors of modern homes.
Equally popular are systems for sliding furniture doors. Once upon a time, everything started from rare photos on the Internet with interior doors sealed on them, which, to everyone’s surprise, opened to the side. Furniture designers adopted this idea, and very soon wardrobe cabinets, sideboards and chests of drawers with creative doors appeared in fashionable furniture salons.
You can find sliding systems in large construction hypermarkets or, which is easier and faster, order in one of the online stores. Master craftsmen successfully collect them from improvised materials. Actually, the rarest component is a rotating roller. Everything else consists of angles, metal plates, bolts and nuts. The author, like many others, made a system of sliding doors for his dresser with his own hands.
To you in order to do it yourself you will need to make a chest of drawers with sliding doors:
Materials:
- Strong pine plywood for the manufacture of the frame, partitions, shelves, legs, as well as the back wall of the dresser and its front frame;
- pine boards for the manufacture of doors, bottom panels and countertops;
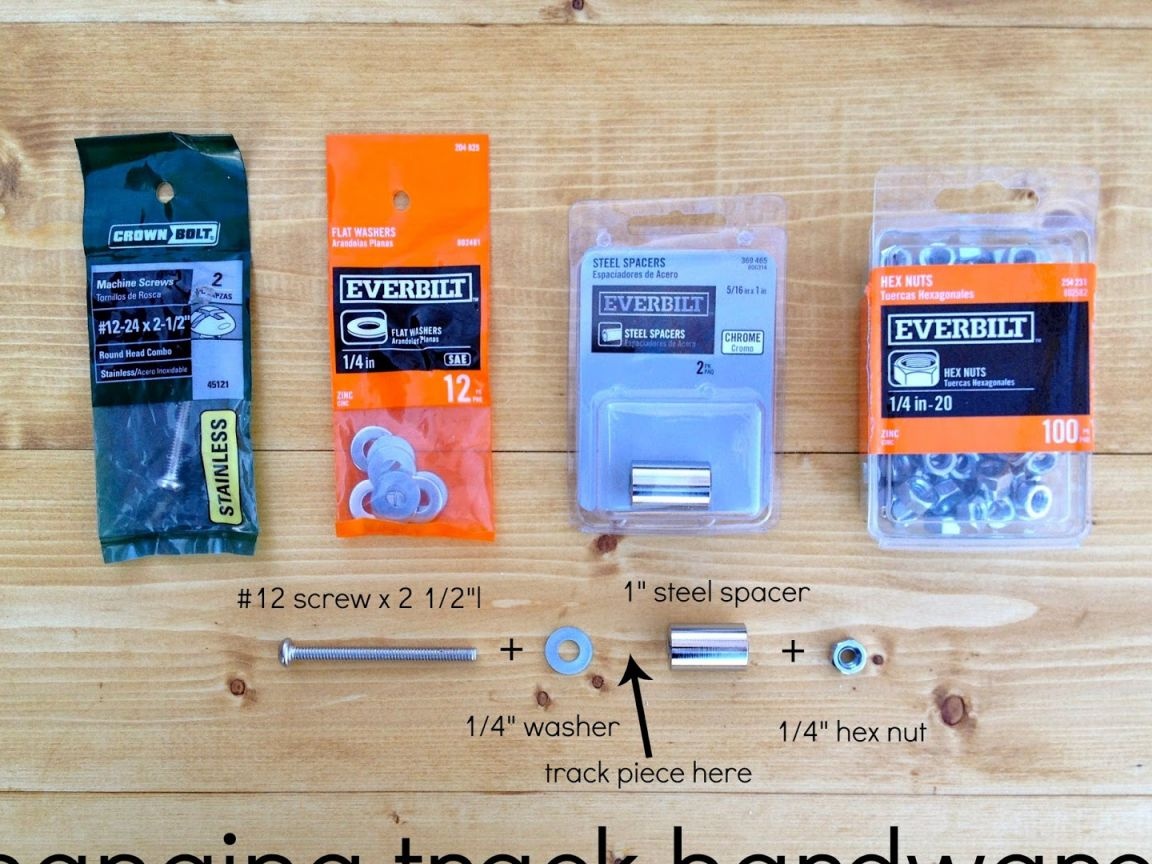
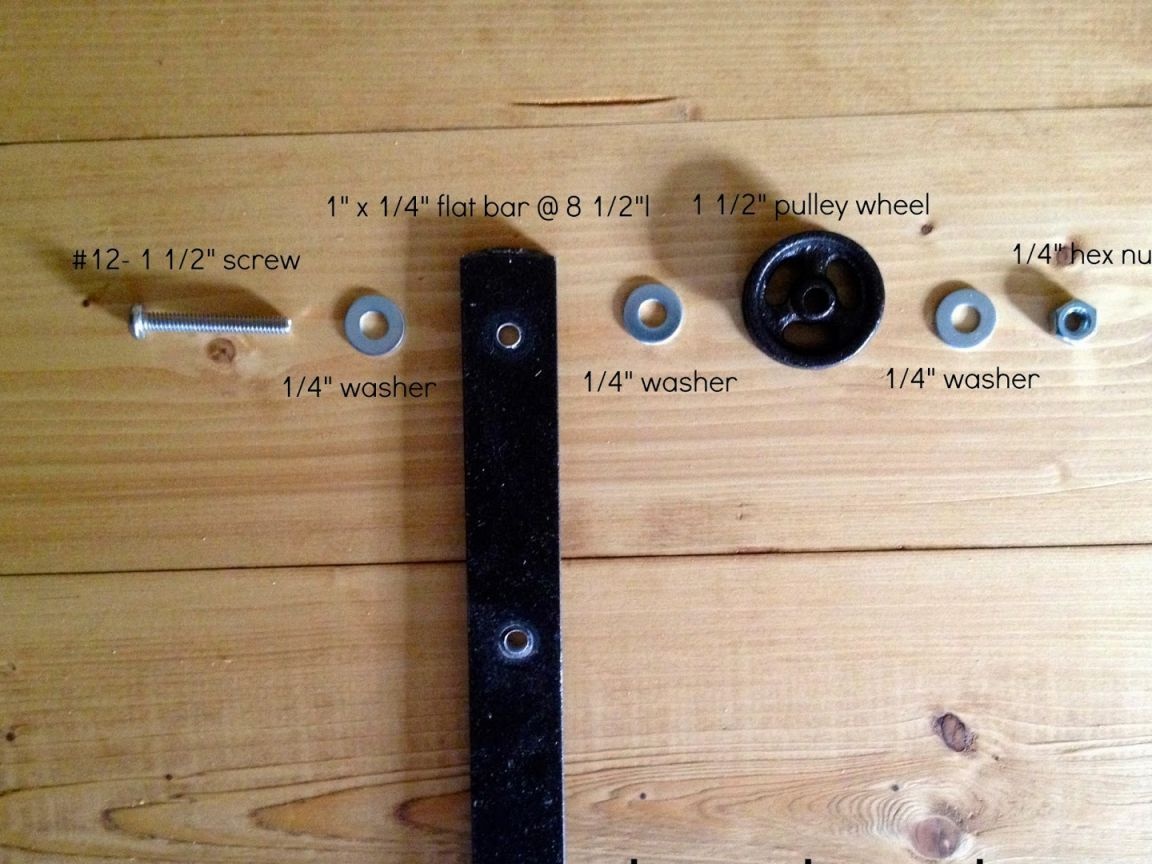
- a system of sliding doors, which consists of metal plates, a metal corner, four rollers, bolts and nuts;
- glue for woodwork;
- white resistant paint;
- transparent furniture varnish;
- any paint and varnish for protection and possibly tinting wood: decorative impregnation, decorative oil or varnish-toner;
- furniture screws or screws.
Instruments:
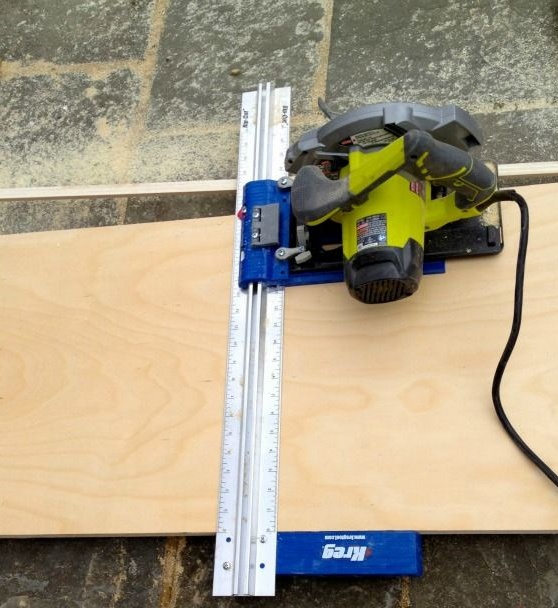
- miter saw or circular saw with guides for precise cutting;
- grinder;
- electric drill;
- screwdriver;
- jigsaw optionally for working with plywood parts;
- pliers and a screwdriver for fixing bolts;
- construction tape measure;
- paint brushes;
- square and ruler;
- sandpaper;
- a pencil.
Step one: marking and manufacturing of parts
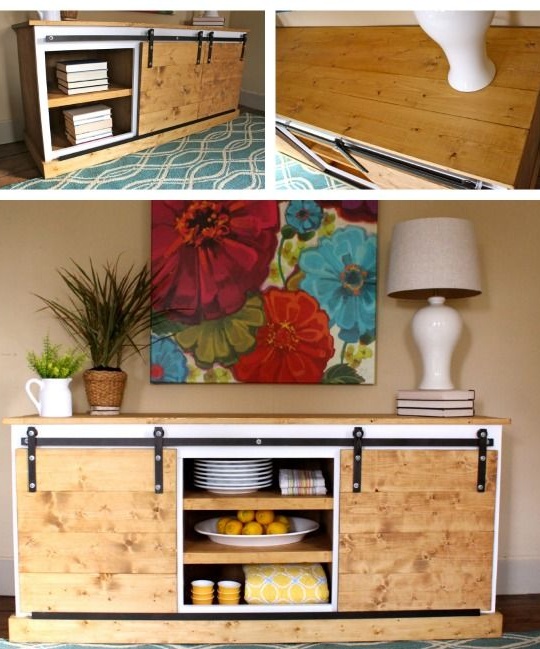
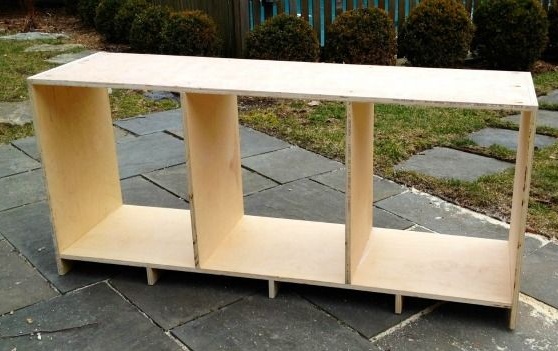
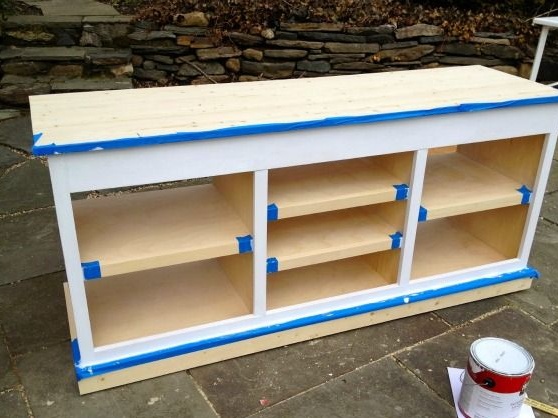
The chest of drawers consists mainly of plywood, however, its entire facade, one way or another, is covered with wooden details.Its dimensions on the countertop are 1670 x 500 mm, so it is very capacious and can be used for storage, dishes, clothes, books and even toys.
Considering the fact that the inches sizes indicated in this master class are not desirable to be converted to centimeters, you can safely set your general dimensions, and calculate the dimensions of individual parts based on them.
Therefore, determine the width and length of your chest of drawers and carry out its full detailing, writing each piece on a piece of paper and indicating its exact size.
Mark up the plywood blanks for your dresser, and this:
- two sidewalls;
- the back of the dresser;
- two partitions are shorter;
- two central legs;
- upper base under the countertop;
- bottom of the chest of drawers;
- four parts shelves.
Mark also the details of natural wood:
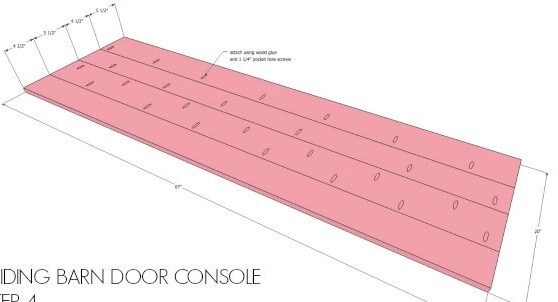
- blanks for countertops;
- decorative slats for the front frame of the chest of drawers;
- top panel of the facade frame;
- bottom panel of the facade frame, including side parts;
- and finally, blanks for the manufacture of sliding doors.
If desired, the front facade frame can also be assembled from plywood. In the final version, it is painted with white paint and glued plywood faces will not be visible.
Cut all parts to size. Grind each of them carefully, especially when it comes to natural materials. You can leave the front part of blanks for countertops for a snack and polish them already in the assembled state. The same applies to the front of the doors. So you get a monolithic smooth surface, ready for further processing.
Step Two: Build a Dresser
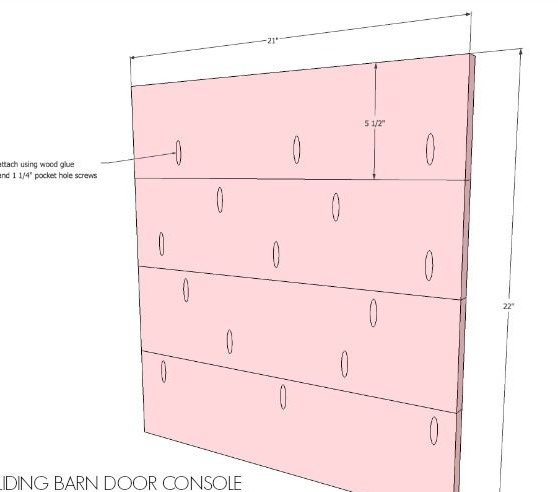
The entire assembly of this chest of drawers is based on the use of glue and furniture screws with pocket holes for them. Even flat panels of tabletops and doors are joined joint by joint according to this principle. Therefore, consider where to place the joints, outline them and drill pocket holes with an electric drill. In the USA, a clamp with a special device for drilling at a given angle is widely used for this. Having a certain skill, you can do without it, however, with a clamp, the work goes much faster and looks much neater.
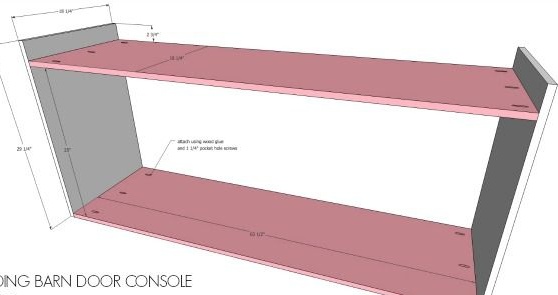
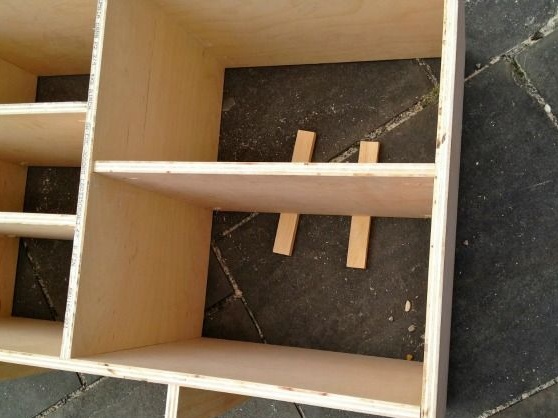
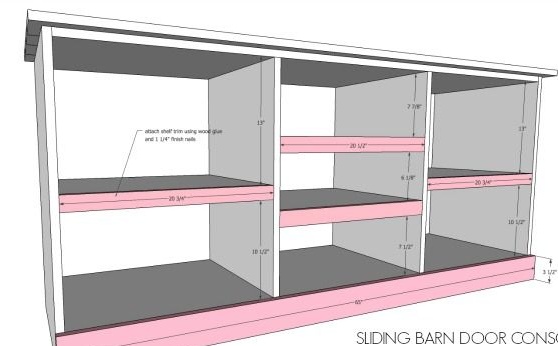
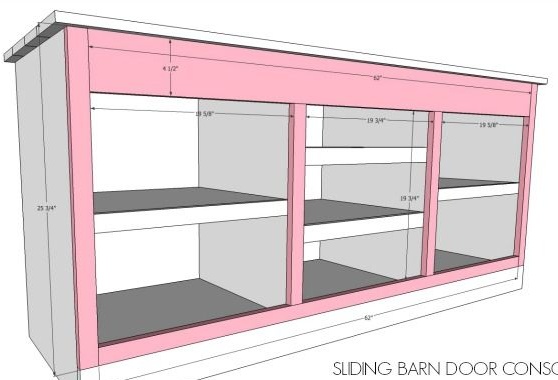
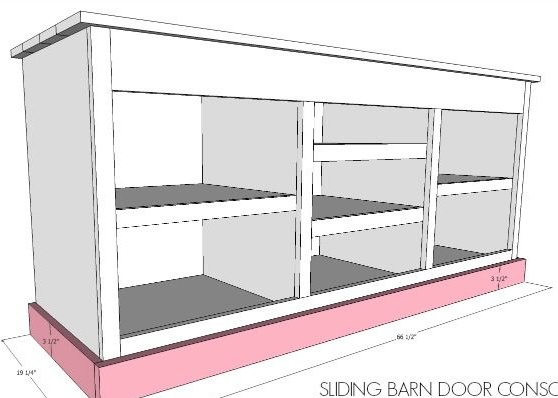
In order not to get confused in the process and details, as well as in order to understand what for what and where to fix it, use step-by-step computer circuits from this master class.
The author traditionally suggests starting with the assembly of the frame. To do this, connect the sidewalls with the base under the countertop and the bottom of the chest of drawers. Do not forget about glue. Apply it to the edges before proceeding to tighten the screws.
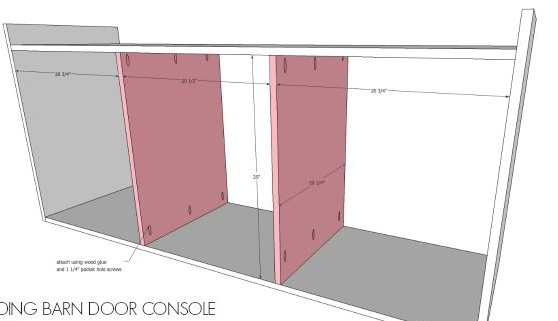
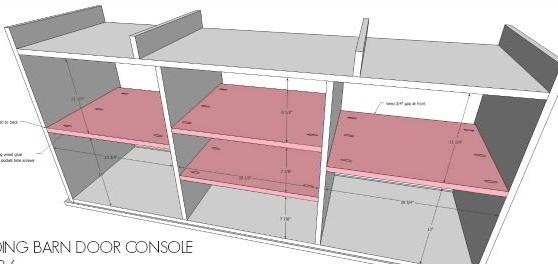
Fix the central partitions and screw the central legs. Join the worktop blanks into one monolithic panel. Make sure they fit snugly against each other. Fix the tabletop panel to the plywood frame base. Use glue for this.
Considering that the countertops themselves are assembled with screws, and the glue is applied evenly over the entire plane of the base, there is no particular sense in attaching the countertop. Unless in the event that you are not completely sure about the quality of the glue you use.
Wait until the glue has hardened well, and proceed to install the shelves. You can fasten them with metal corners or screws through pocket holes. It all depends on how much weight is supposed to be stored on the shelves. Ceramic dishes, for example, may be too heavy for screws, and the corners will be just right.
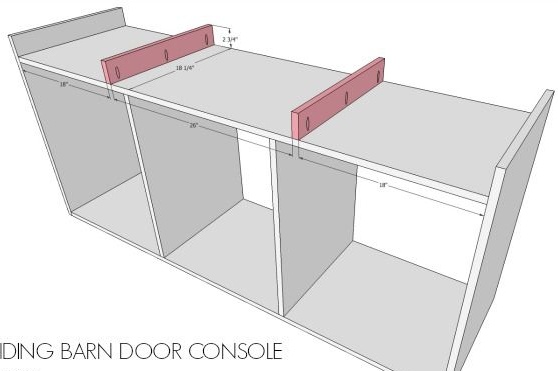
Fix the decorative pads of the front facade frame, the lower panel, its side parts, and also the upper panel under the countertop.
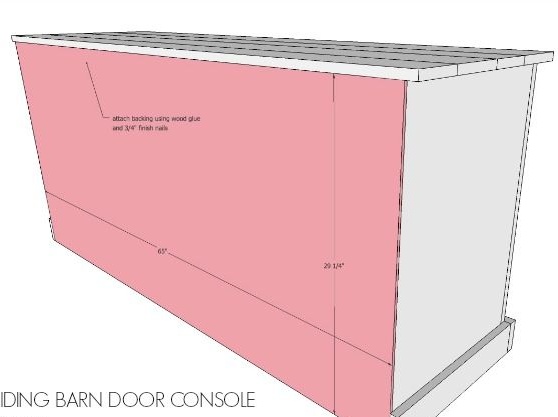
Assemble the door panels in the same way as the countertop and allow them to dry completely. In the meantime, glue seizes, screw the back wall of the dresser. It will not be visible, so you can use screws or just nails.

Step Three: Paintwork
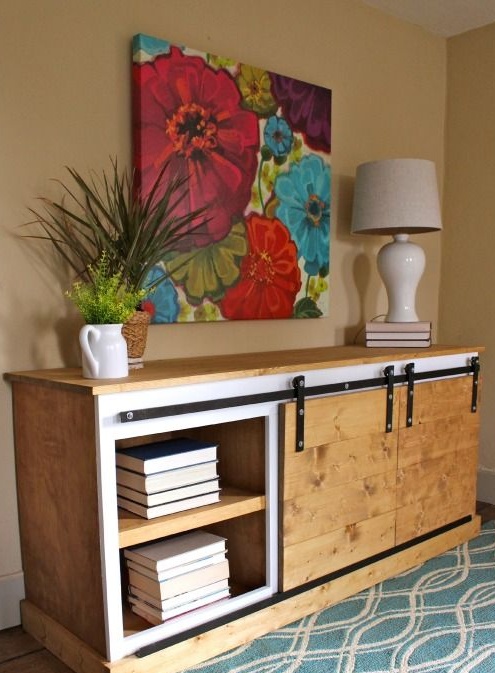
The front panel in the form of a decorative frame according to the author’s idea is painted in a snow-white shade. Choose for this resistant paint with a dense coating. For example, alkyd enamel or high quality oil paint. Paint the frame by pre-gluing masking tape on adjacent areas. Apply paint in two or three coats.
Processing the elements of a chest of drawers made of natural wood is much more interesting, because you need to preserve the natural texture of the tree and emphasize its rich shade.
For these purposes, three products will be perfect for you at once: varnish (clear or tinted), decorative toner oil and protective impregnation, type 3 in 1 (primer + antiseptic + toner).
If everything is clear with the varnish, then a few words should be said about oil and impregnation. Decorative oil is applied to the wood in several layers with a clean, lint-free cloth. Essentially, you need to grate the tree with oil so that it penetrates the wood as deep as possible. Industrial oil perfectly protects the tree from moisture and dust, gives it a velvet noble shine.
Impregnation works in a similar way. It is applied with a brush or roller and penetrates the upper layers of wood. The effect you get is similar to the same effect from the oils. Impregnation also gives the wood a beautiful shine and protects it from moisture and dust.
The advantage of the last two tools is that they do not create a dense coating and you can update it if you wish at any time without resorting to polishing.
Inside the chest of drawers should be varnished or impregnated with a waterproof coating so that wet cleaning can be carried out regularly.
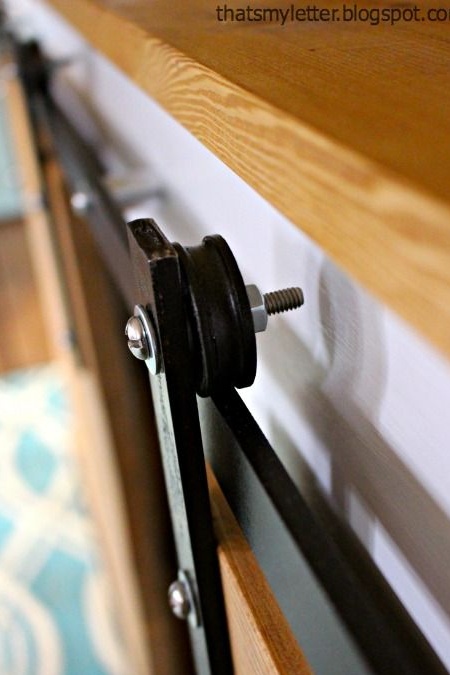
Step Four: Installing the Sliding Door System
Carry out calculations and determine at what level the doors will be located. Make notes and proceed with the installation of the components of the sliding system.
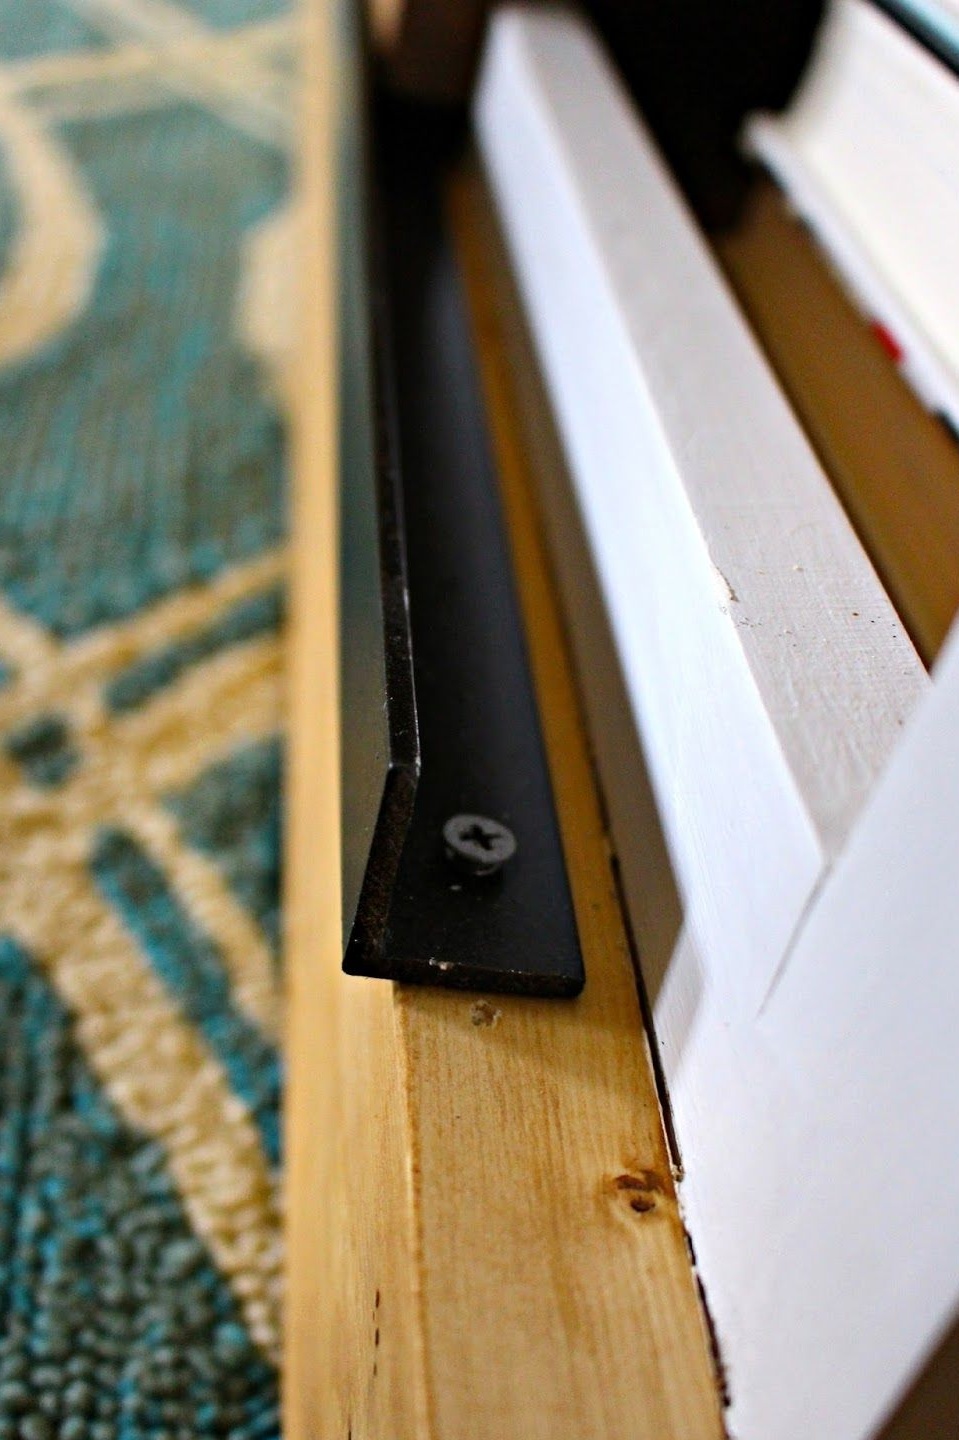
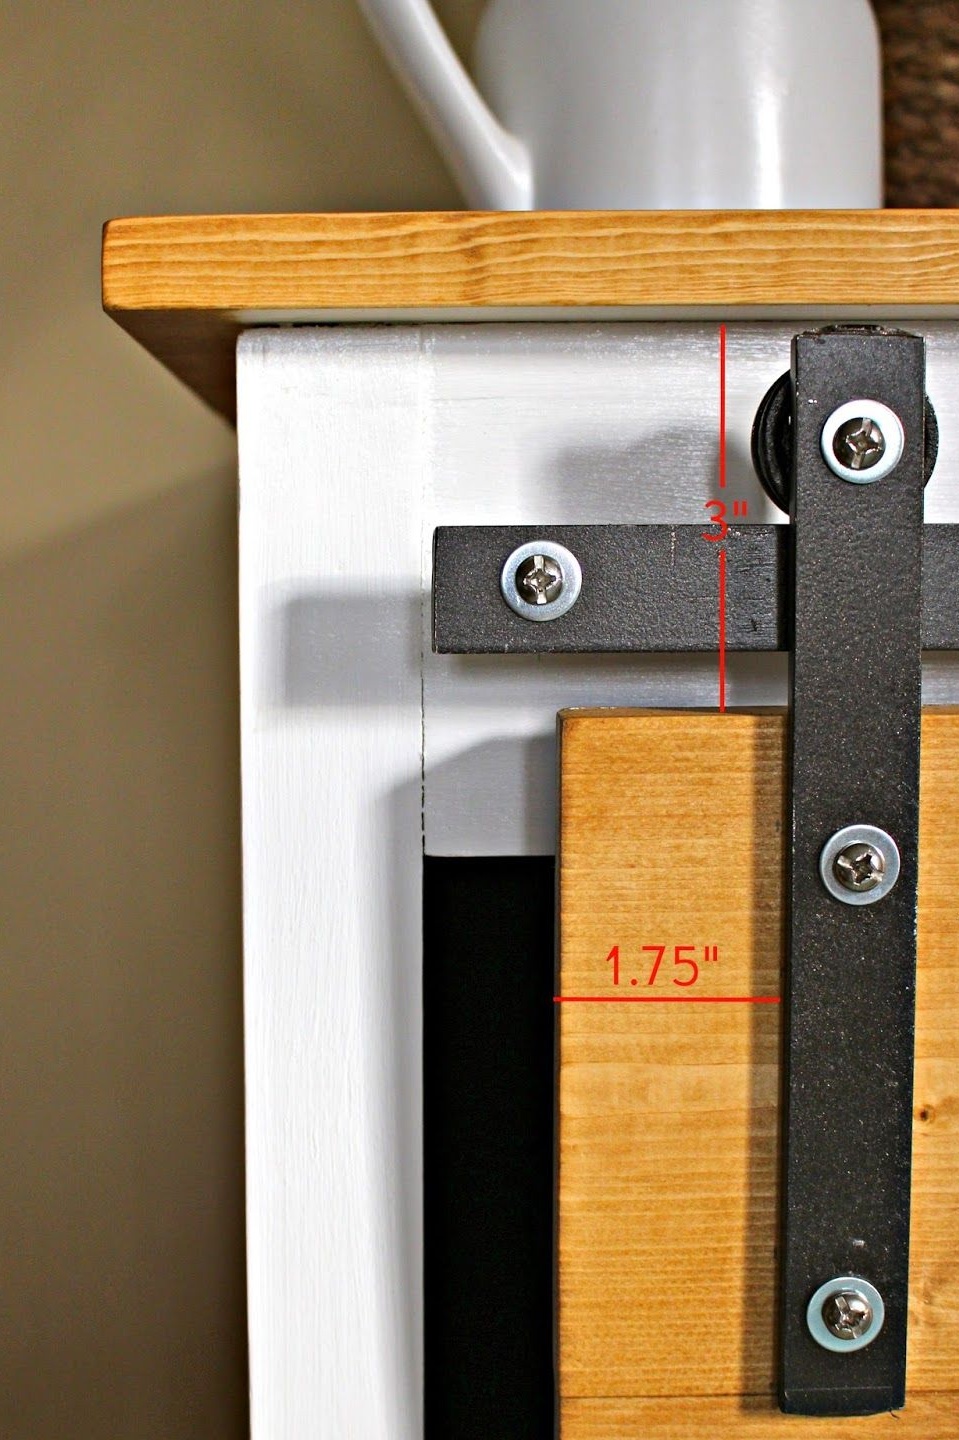
To do this, fix the bottom of the metal corner. It is located according to the plan on the edge of the lower decorative trim. Use ordinary wood screws, as they will not be visible.
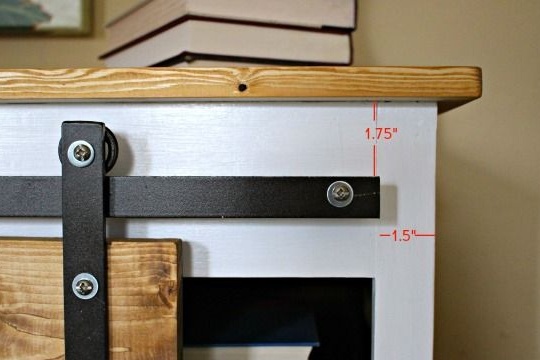
Using long bolts and decorative pads, fix the metal strip for the rollers at a given height. Use washers.
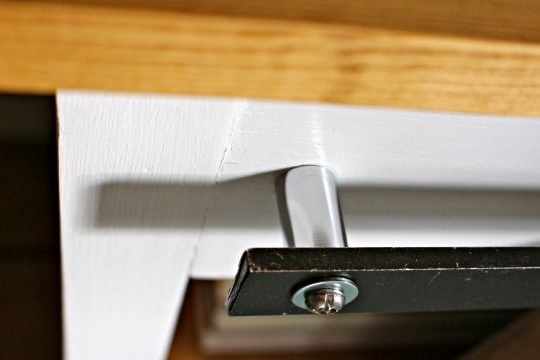
Fasten the flat mounts with the rollers pre-mounted on them to the doors. Slide them onto the plate with rollers and check for smooth running.
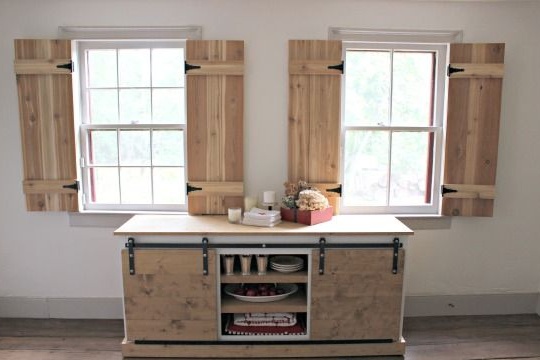
That's all, the chest of drawers with sliding doors is ready!