Sometimes homemade toys made from the simplest and simplest materials are in no way inferior to their purchased store-bought counterparts. Moreover, making them, you get the opportunity to take into account the individual tastes of your child. And in order to combine business with pleasure, bring your child to work. He is probably wondering what parents are so passionate about.
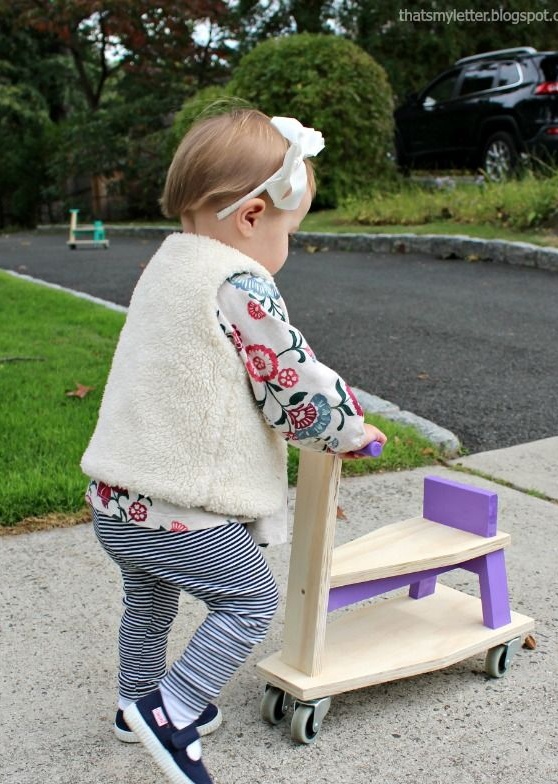
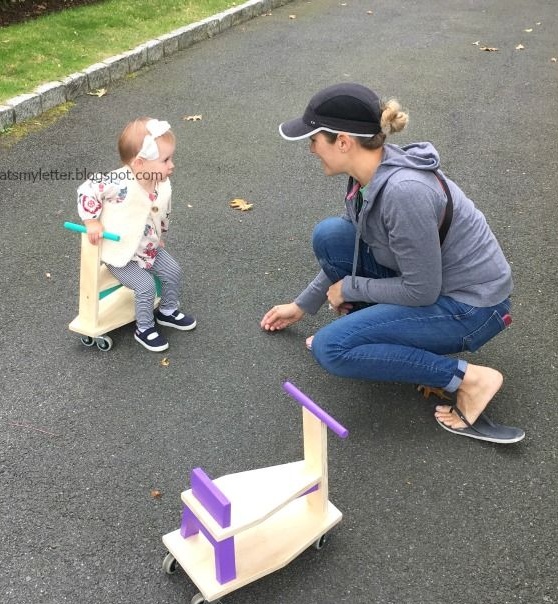
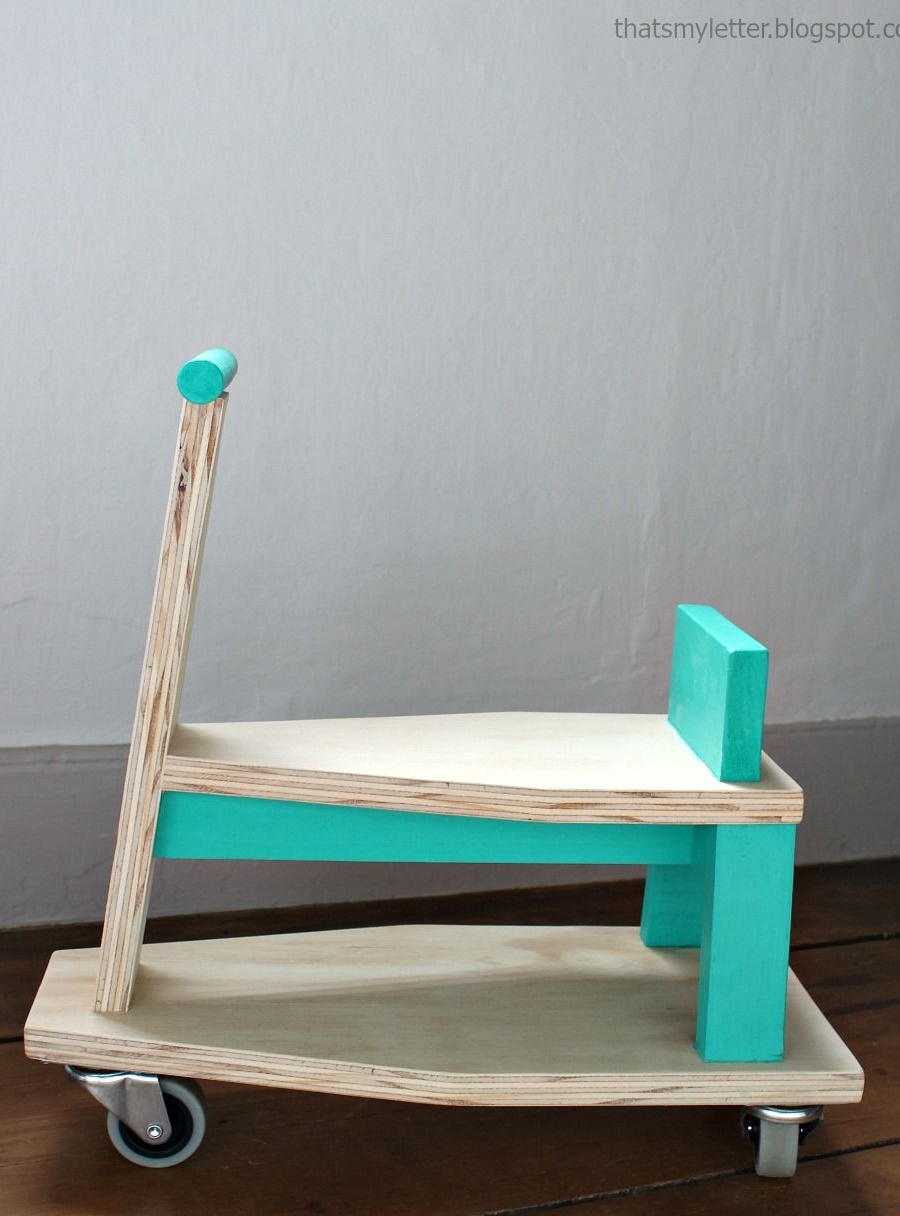
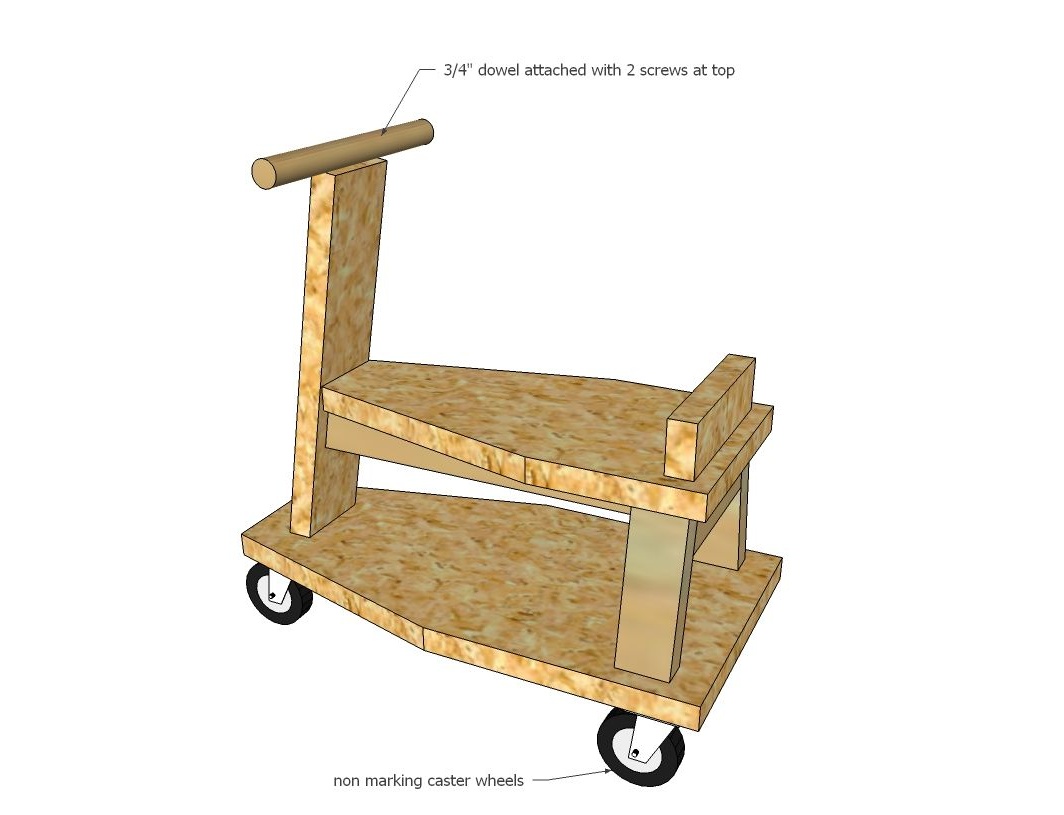
This wooden scooter was invented by the author on the eve of Christmas. Purchased gifts were completely fed up, and I wanted something original. It is compact and noiseless. In addition, it is equipped with rubber wheels. On such a scooter, you can safely travel through the expanses of a house and even an apartment, along wooden floors and laminate. But this is much better than playing computer games, agree?
The scooter is great for children aged one to three. Rights for older kids will have to be slightly changed.
Submitted by the author model has been successfully tested by enthusiasts in the USA. From the comments it follows that, for the sake of safety, the rear wheels should be positioned slightly wider relative to each other so that the scooter resembles a three-wheeled bike. But the front wheels should be as close as possible to the front edge so that the scooter does not topple forward during the active game. With such improvements, a wooden scooter is completely safe even for the smallest and most active kids.
To make a wooden scooter do it yourself you will need:
Materials:
- a board made of natural wood or plywood trim (but not too thin);
- a segment of a cylindrical pole for the manufacture of the steering wheel;
- durable metal wheels with rubber coating of suitable diameter (the larger, the faster the ride);
- glue for woodwork;
- self-tapping screws;
- paint;
- resistant varnish for woodwork.
Instruments:
- jigsaw;
- a grinder or sandpaper of varying degrees of graininess;
- electric drill;
- a screwdriver or Phillips screwdriver;
- paint brushes;
- construction tape and ruler;
- a pencil.
Step one: decide on the design and size of the scooter
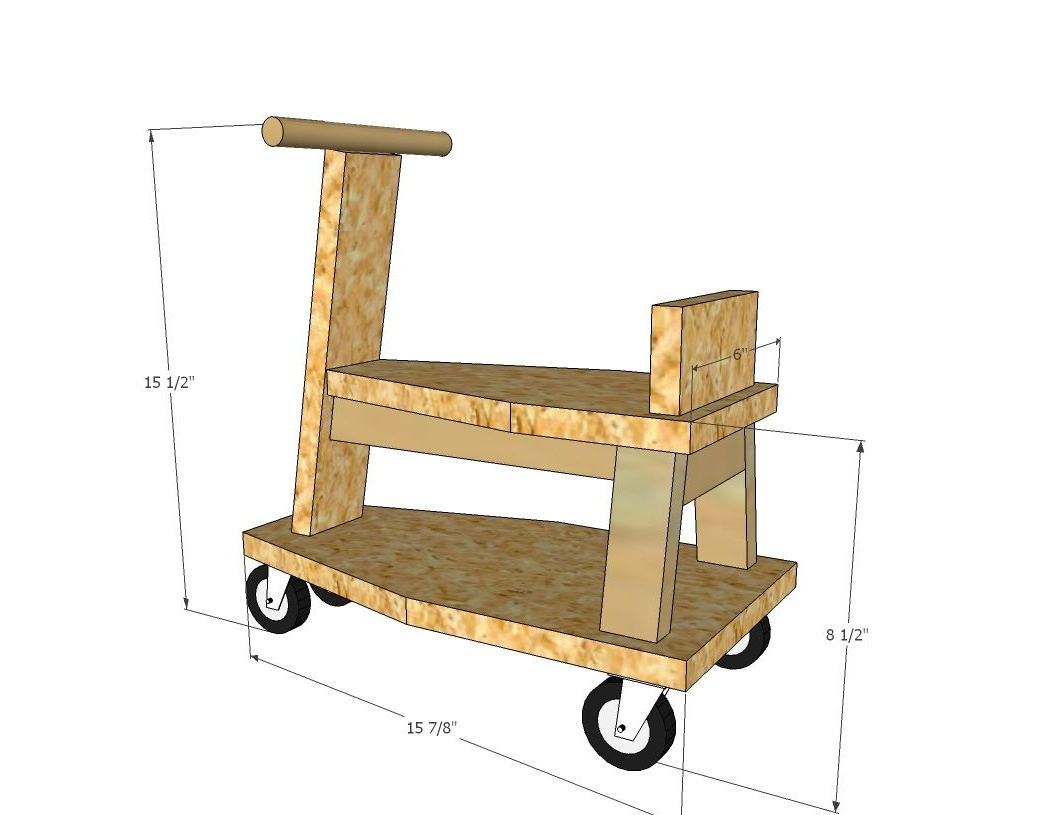
With the dimensions, everything is simple. The older your child, the more overall the scooter will be. A small unit is too uncomfortable and even dangerous, while too large can become an obstacle for the rest of the inhabitants of your home.
According to those who have already tried out a wooden scooter bike, it makes sense to slightly expand the lower base backwards. This will add stability to the transport, as some parents have complained several times that the scooter has the ability to tip over to one side.
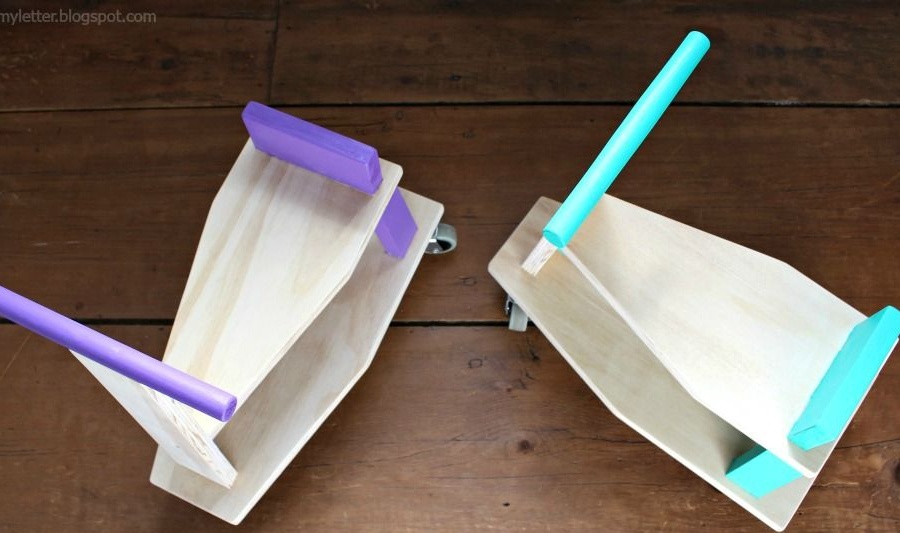
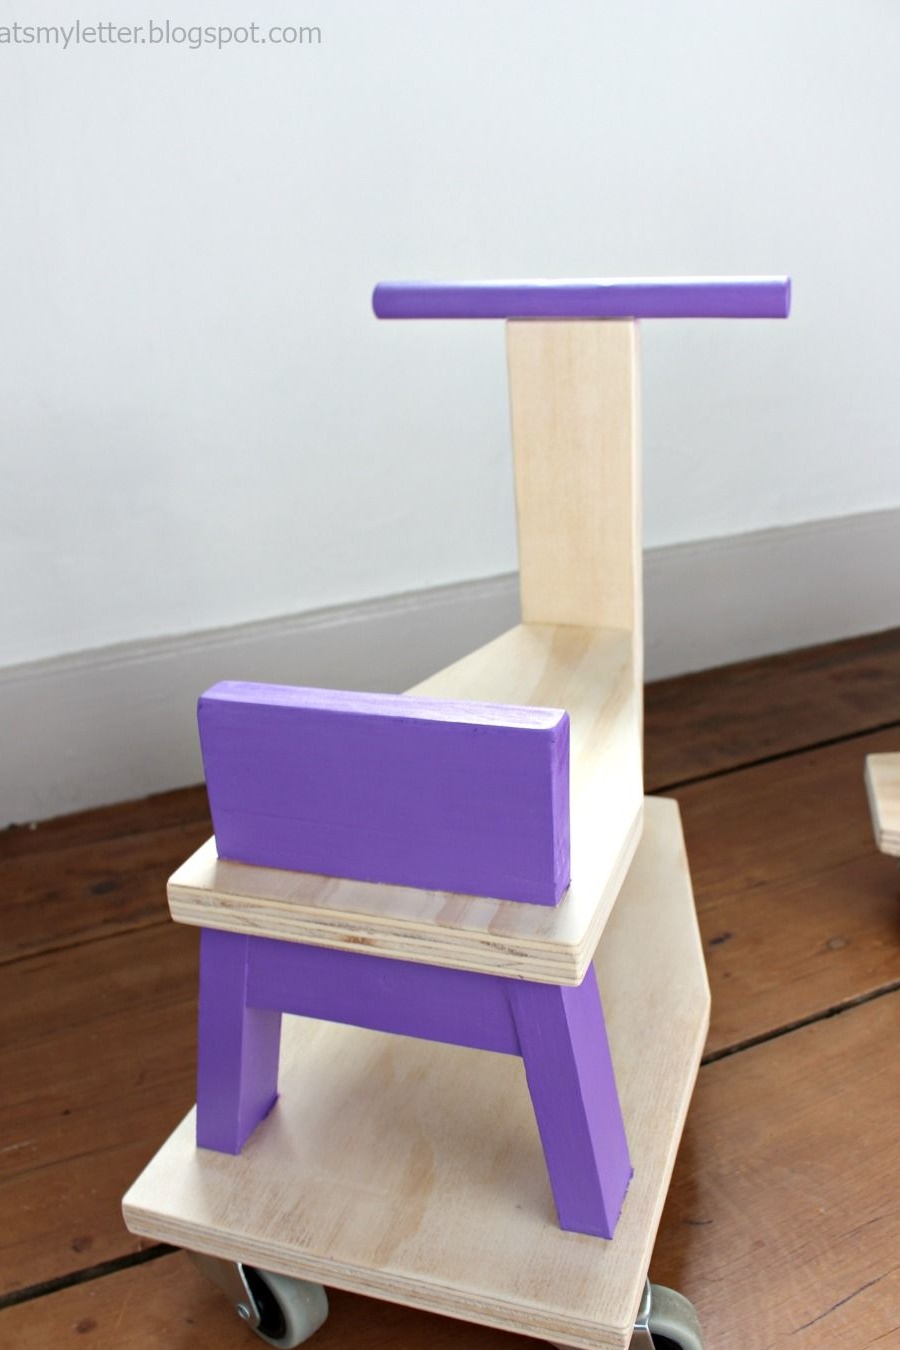
Also determine the height of the steering wheel. His stand is on the idea a little tilted to the center of the structure for ease of driving.
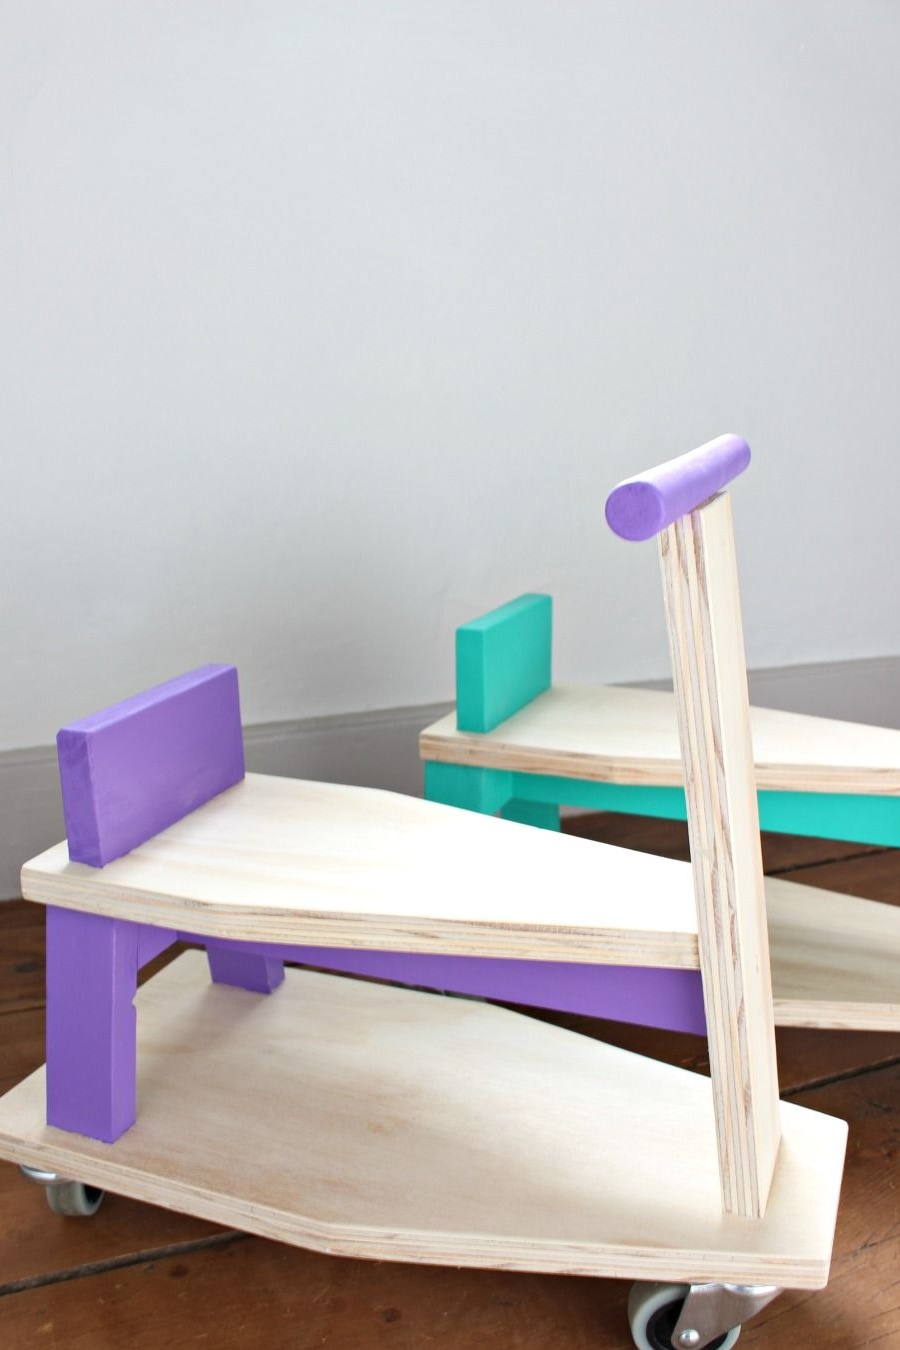
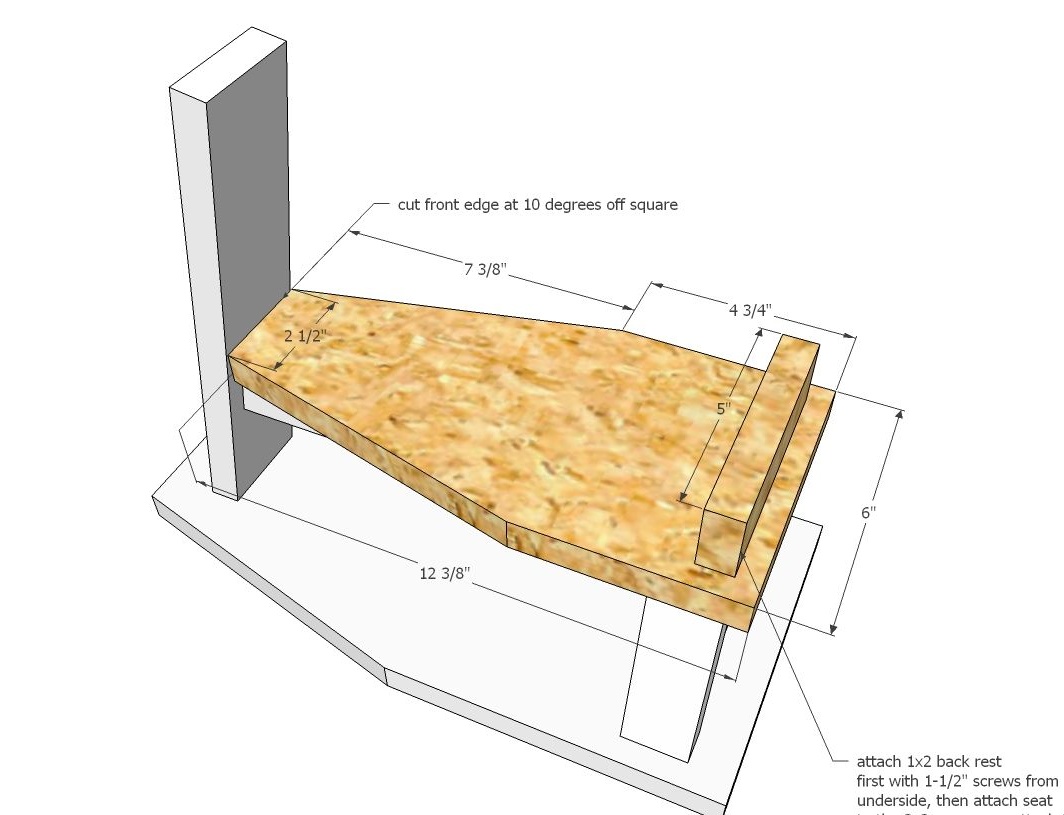
The seat consists of a base and back. Initially, it has a solid wooden surface, but here you can show a little enthusiasm and arrange a soft seat with a textile top. Read about it below. The same goes for the back. The soft back is much more comfortable than solid wooden. It is better to arrange a slight back tilt so that the child does not beat against it during the game.
Ahead, the author installed two wheels at once. You can try to limit yourself to one, so the scooter will become more maneuverable, and the broadening of the base at its rear will provide the necessary stability.
Step two: mark up and prepare the details of the wooden scooter
Transfer all your sizes to plywood. For this project, you can successfully use pieces of plywood left over from previous work. You could make part of the details from natural wood if you wish, their dimensions allow this.
Draw two curly details on the plywood: the lower base is larger and the seat is smaller. Moreover, the lower base may have recesses on the sides so that the child does not rub against it with his feet. Choose the form that seems most suitable to you.
Mark out all the other parts and cut them with a jigsaw. Separately prepare the cylindrical part for the steering wheel.
Sand two workpieces carefully with a belt or orbital sander. Carefully process the edges of the plywood parts. Round the corners of the lower base and the seat.
Already at this stage, you can paint the details in your chosen color. Otherwise, later you will have to use masking tape in order not to stain adjacent parts.
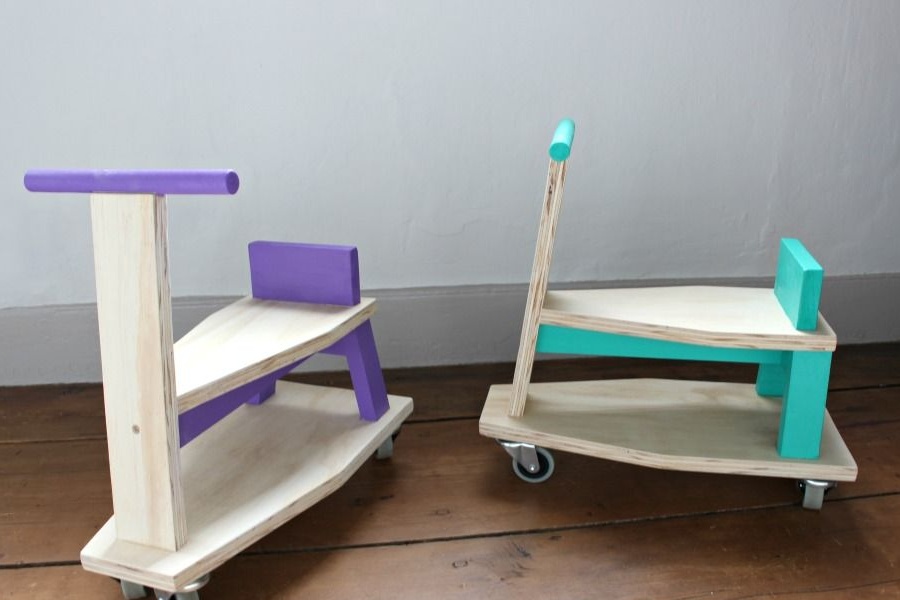
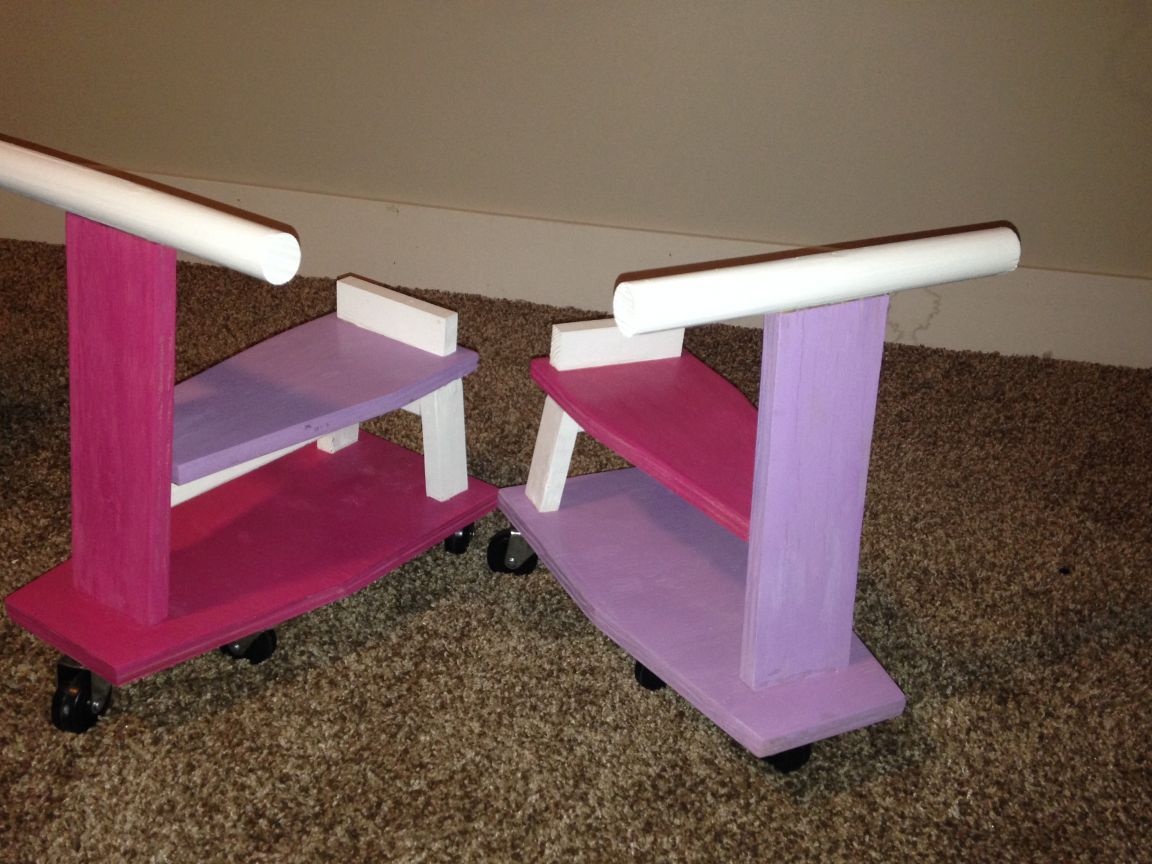
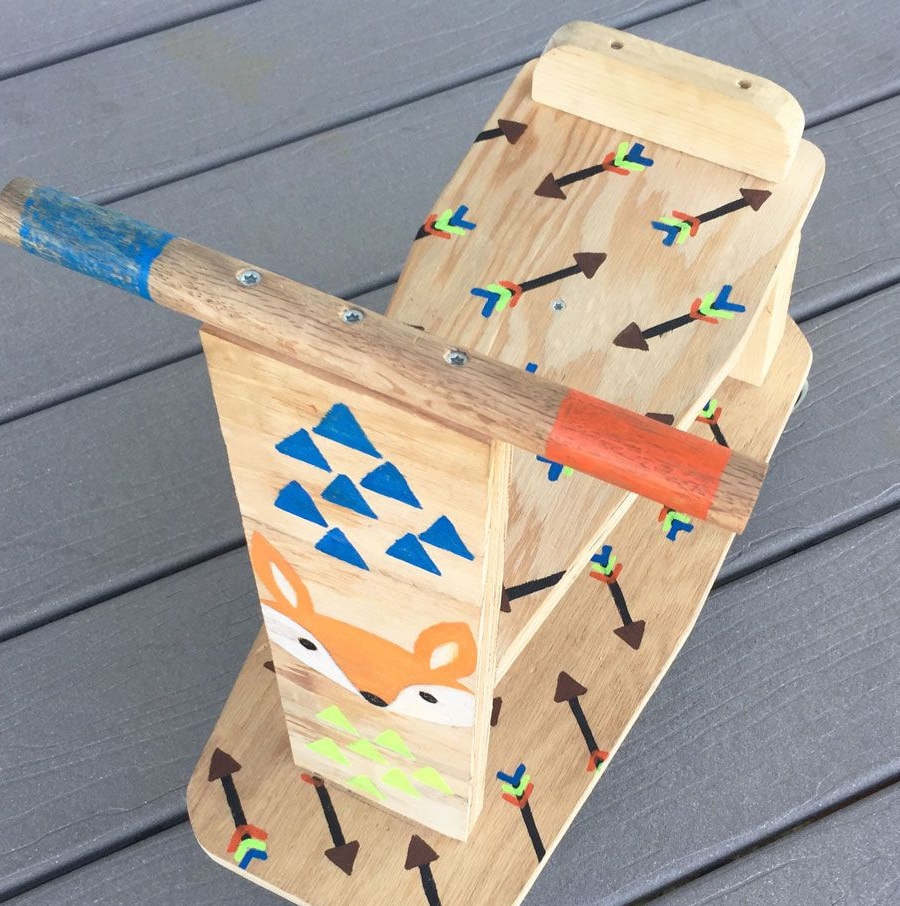
The author used one tone for each scooter. True, there are unlimited possibilities. For example, you can easily paint the transport with patterns that have some meaning for your child. So, a scooter will be able to claim to become his favorite fun.
In pair with the paint, select a varnish that works well with it. This means that the paint and varnish must have the same solvent or the solvents must not conflict with each other.
Choose only resistant varnishes that form a hard coating after they harden. The dried varnish should not stick to fingers and collect dust and dirt. Furniture and high-quality parquet varnishes possess such properties. And since the scooter is made in the spirit of green homemade, select a matte effect. So the tree will look more natural.
Apply the paint in several layers and repeat the same procedure with varnish. Three or four layers of varnish will be enough.

Step Three: Assembling a Wooden Scooter-Bicycle
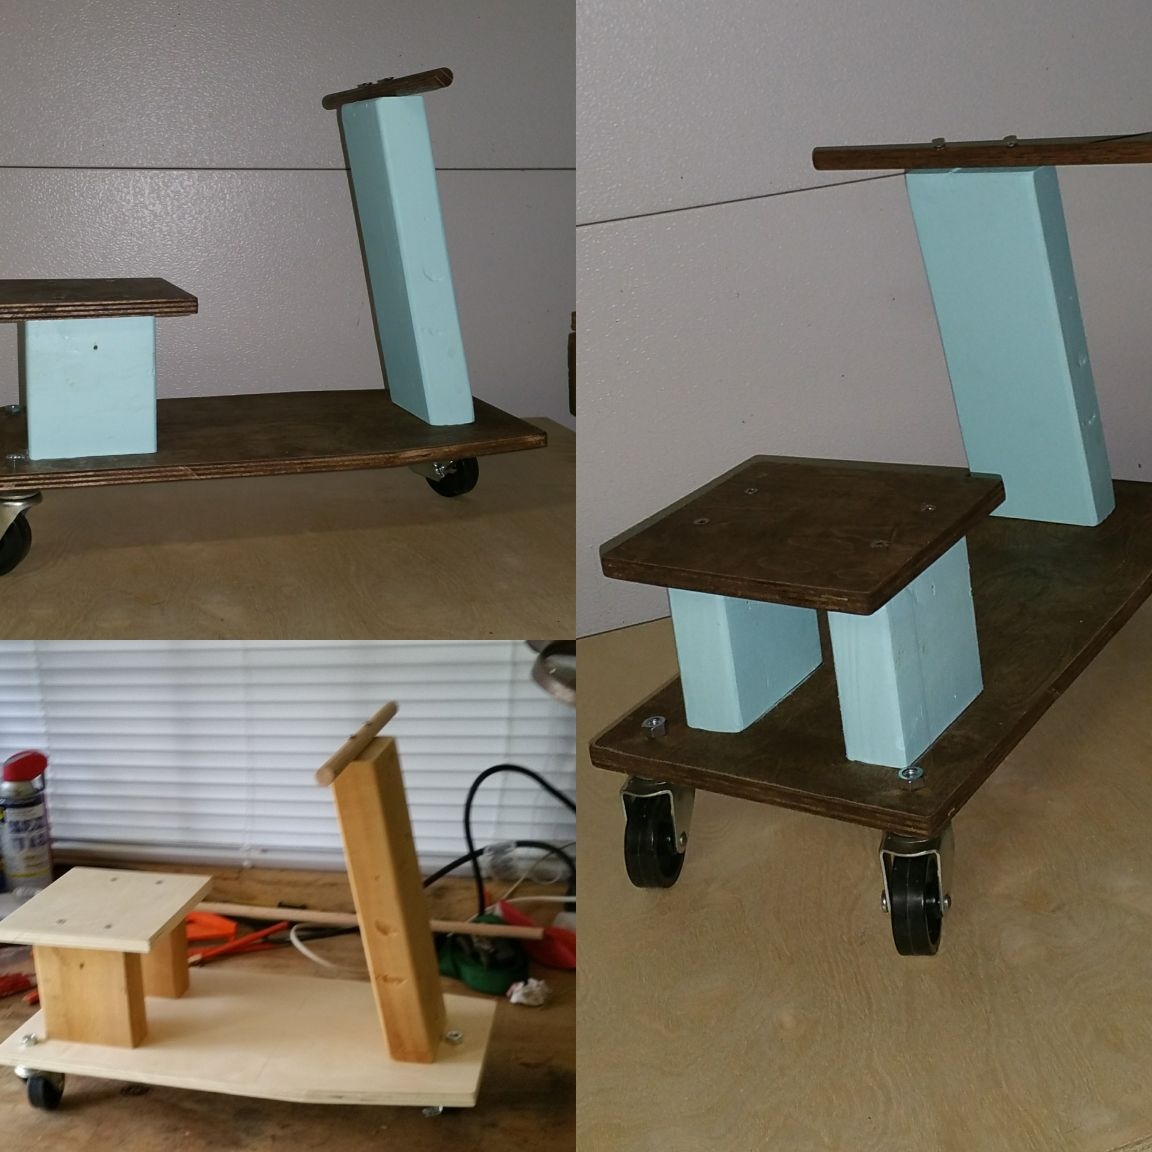
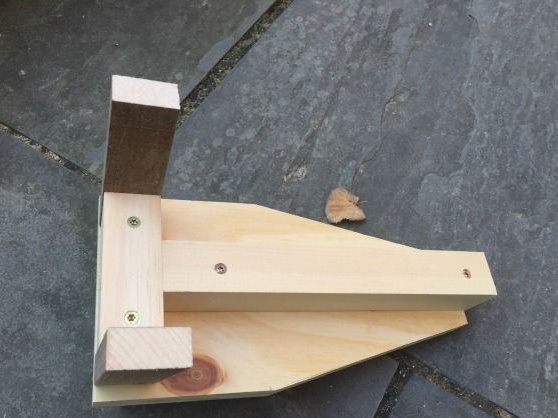
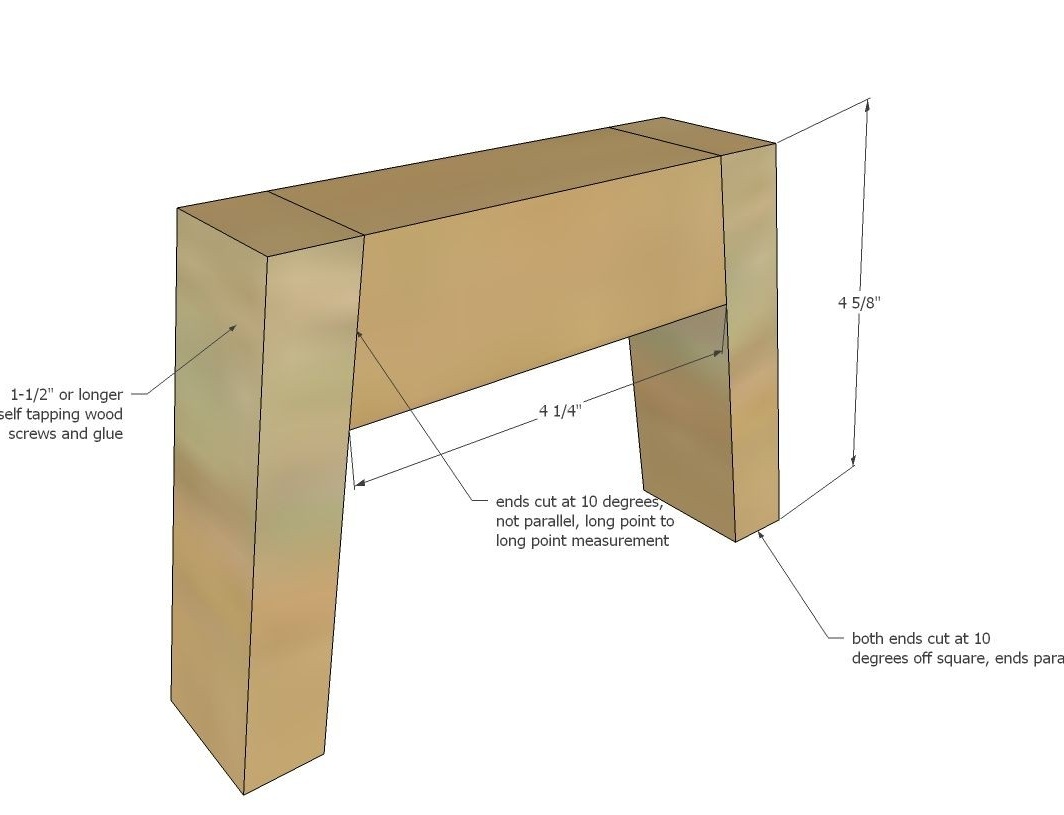
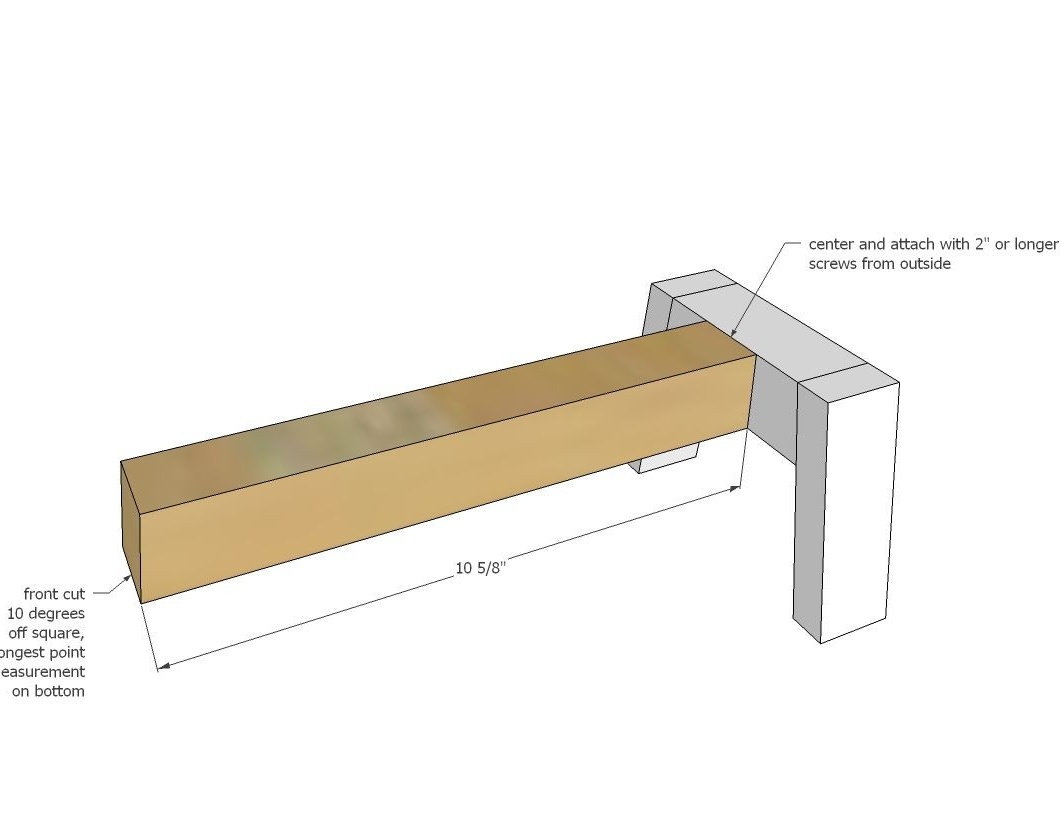
Start assembly from the seat. Connect the plywood base and T-piece to the uprights. To prevent the tree from cracking, drill holes for the screws with an electric drill. With a wider drill, make small indentations under the heads of the screws so that they go flush.
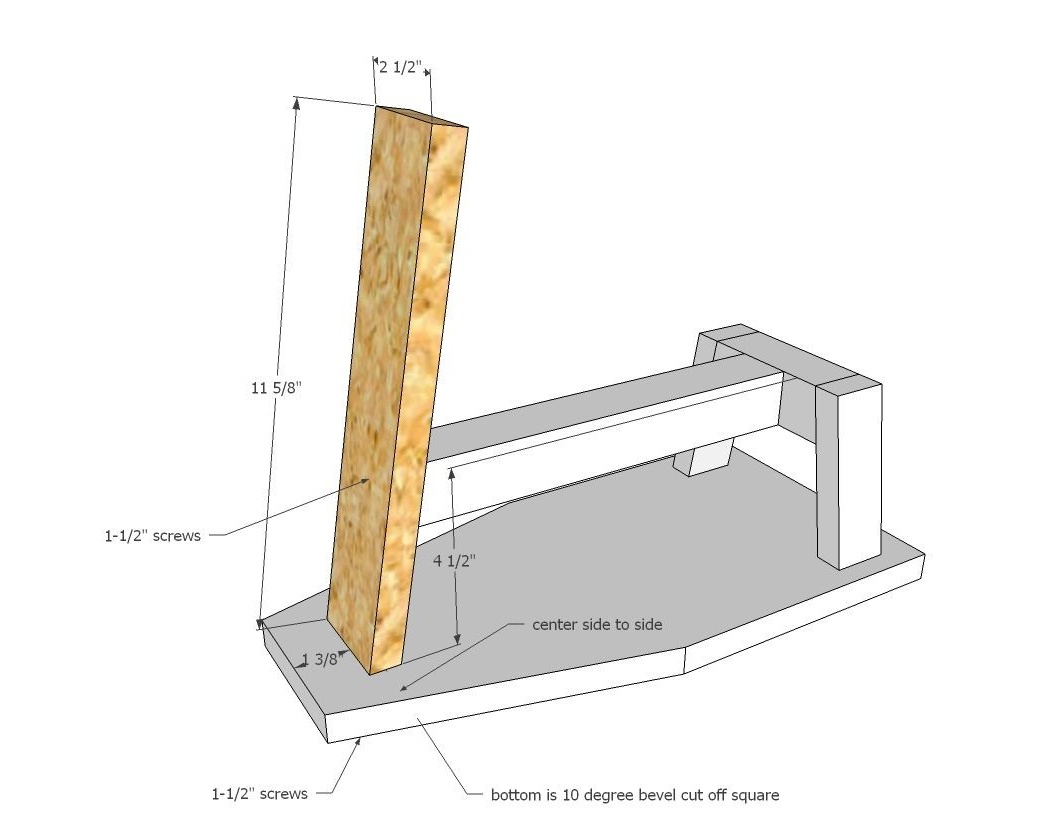
Attach the backrest to the seat on the back. Lock the front steering column with the horizontal pole. Place the resulting structure on the lower base strictly in the center and glue it, firmly pressing it with your hands for several seconds.
When the glue hardens, turn the workpiece upside down and screw the screws into the pre-drilled holes.
When joining all wood and plywood parts, use wood glue. It will provide strong grip and structural strength. Quickly remove excess glue with a damp cloth before it begins to set. Otherwise, grinding will have to be repeated.
Attach the wheels to the bottom of the scooter and outline the places of their attachment to the base. Drill holes and securely fasten the wheels with self-tapping screws. Check the design for slipping.
Step Four: Arrange a Soft Base
To do this, you will need not too soft foam rubber, a little batting and a suitable dense fabric.
Try on the foam and cut it so that it fills the entire seat plane in its shape. Wrap the foam in one or two layers of batting so that the finished seat is softer. Prepare a piece of fabric with allowances for attachment to the back of the seat base.
Lay the filler on the plywood, place the fabric on top, bend the allowances on the back of the seat and fix with metal staples using a furniture stapler in several places. Turn over the scooter and continue to bend the edges and fix them with brackets around the perimeter.
In order for the work to look neat, and the fabric does not detach, in the process of fixing, bend the edges a couple of centimeters inward. If this is not enough for you, cut out two parts in the shape of the sidewalls of the seat and stick them on the reverse side of it, covering all textile work.
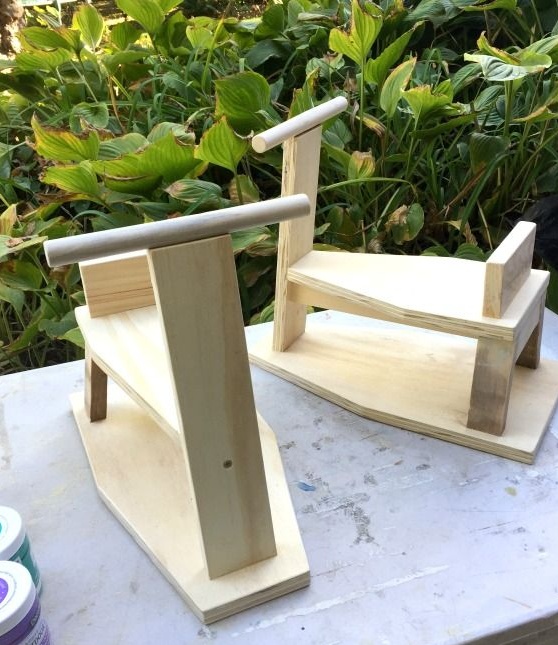
Scooter is ready! However, some craftsmen call their creation a wooden bicycle. And finally, a few more photos of assembled wooden scooters in different colors.