If your home is cramped, do not rush to get upset. Firstly, you are not the only one. And secondly, today a lot of ways to save living space and its rational use have been invented. Entire technologies have been created on this score, and among them there will certainly be the right solutions for your specific case.
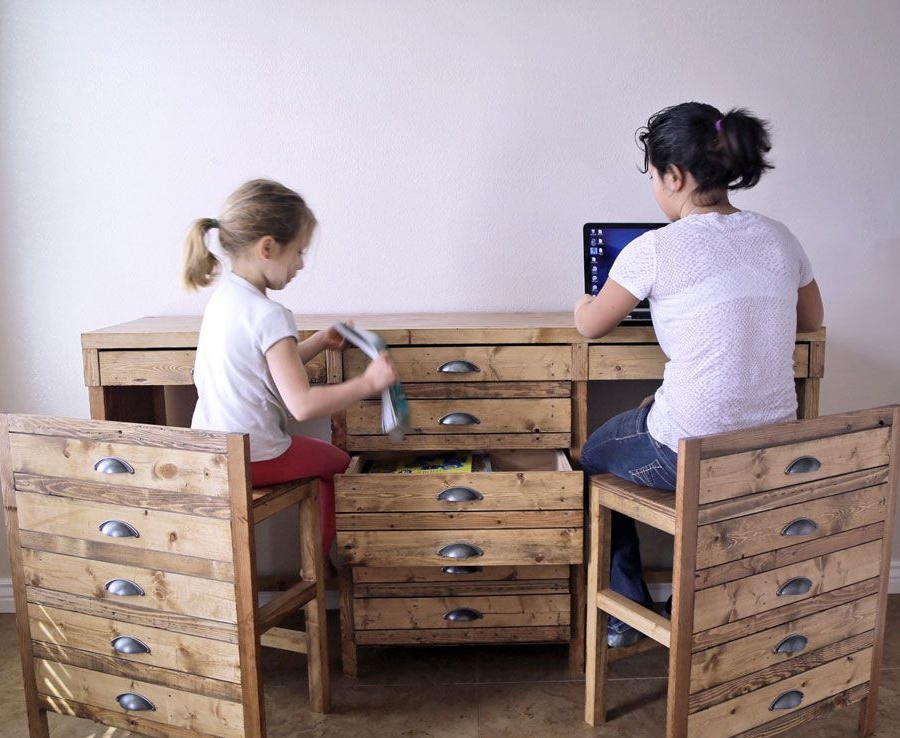
The folding desktop presented in this master class not only saves space in the house, but creates a sense of order. Agree, the more items of furniture scattered around, the more little things fall into the field of view - the more disorder and chaos reigns in the home.
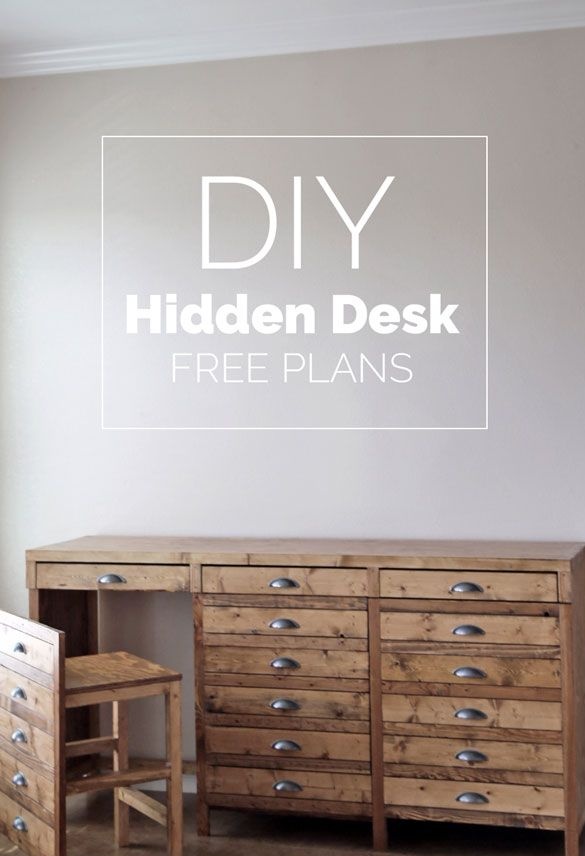
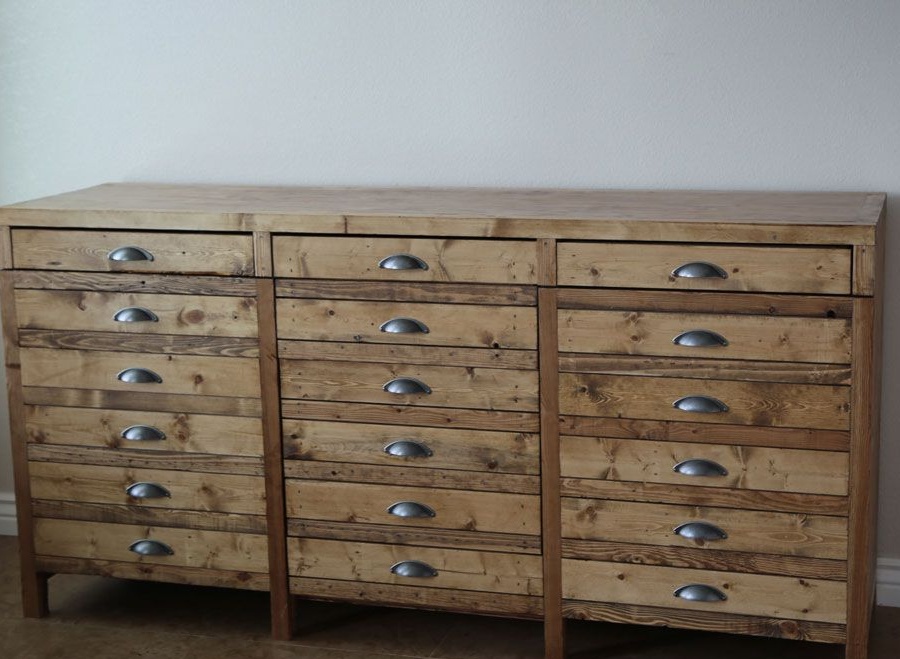
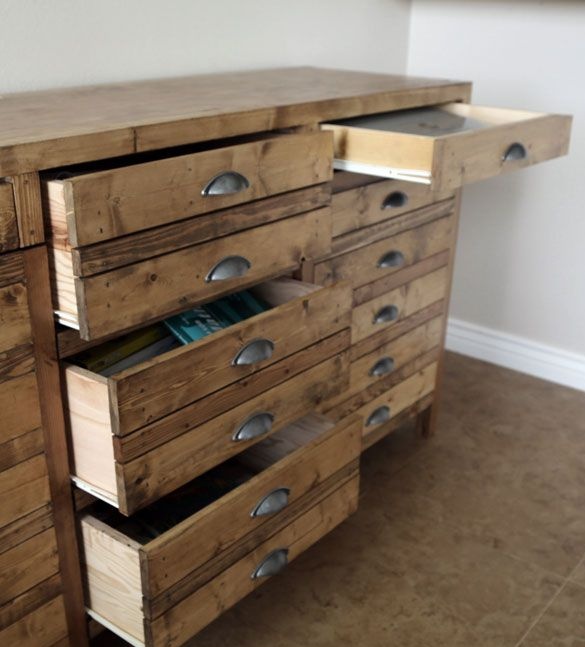
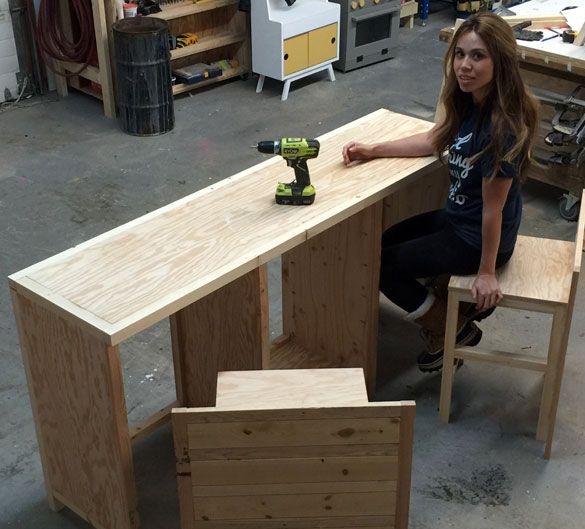
But this designer table imitates a solid chest of drawers made of natural wood. When folded, when the chairs are pulled back, it takes up very little space and looks neat. So this is a wonderful solution for a true connoisseur of order and cleanliness in the house.
For work you will need:
Materials:
- boards with a thickness of 30 - 40 mm for the manufacture of backs of chairs and facades of drawers;
- bars with a cross section of 30 x 30 or 40 x 40 mm for the manufacture of a table frame and chairs;
- strong plywood of sufficient thickness for the manufacture of table partitions, countertops, shelves and seats;
- glue for wood;
- any suitable toner: alcohol stain, decorative oil or varnish-toner;
- varnish for woodwork;
- furniture screws or screws;
- metal handles for boxes.
Instruments:
- jigsaw for working with plywood parts;
- miter saw, circular or hacksaw for wood for sawing boards and bars;
- electric drill;
- screwdriver;
- a vise with a device for drilling inclined pocket holes for screws;
- grinder;
- sandpaper;
- brushes or cloth for soaking wood with oil;
- construction tape measure;
- square;
- a pencil.
Step One: Sizing the Table and Chairs
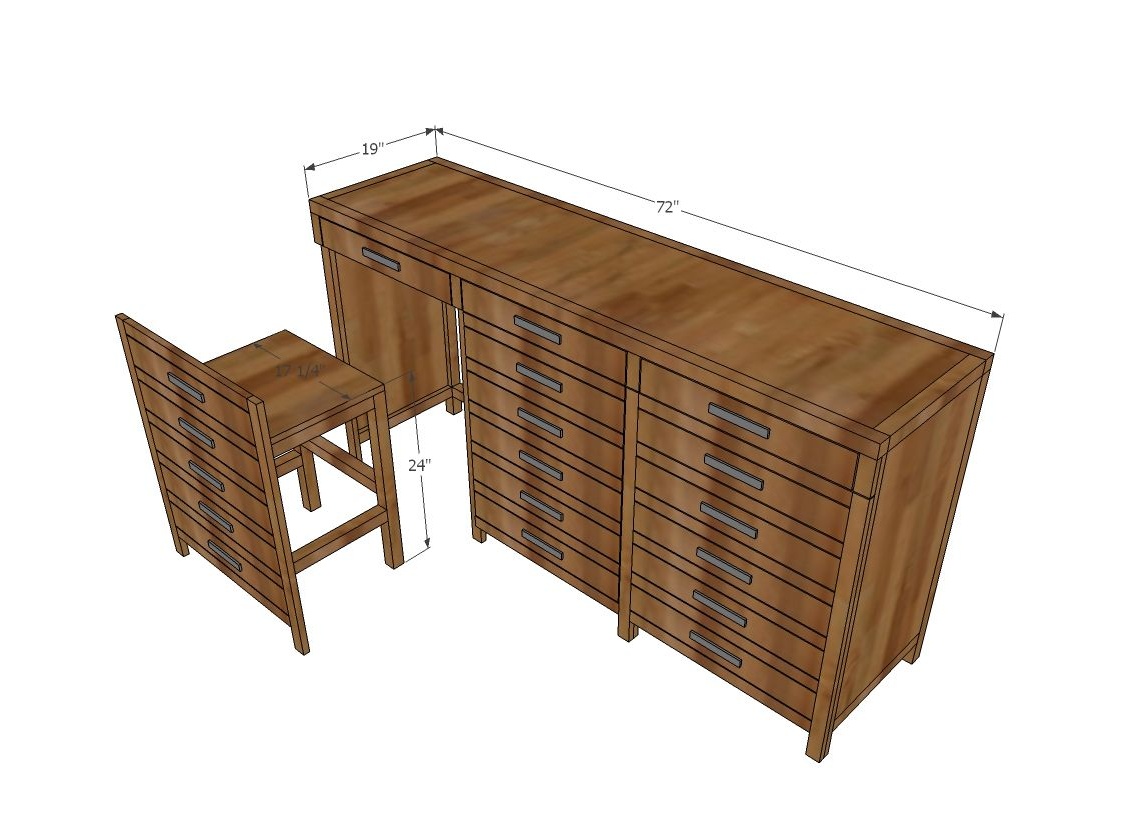
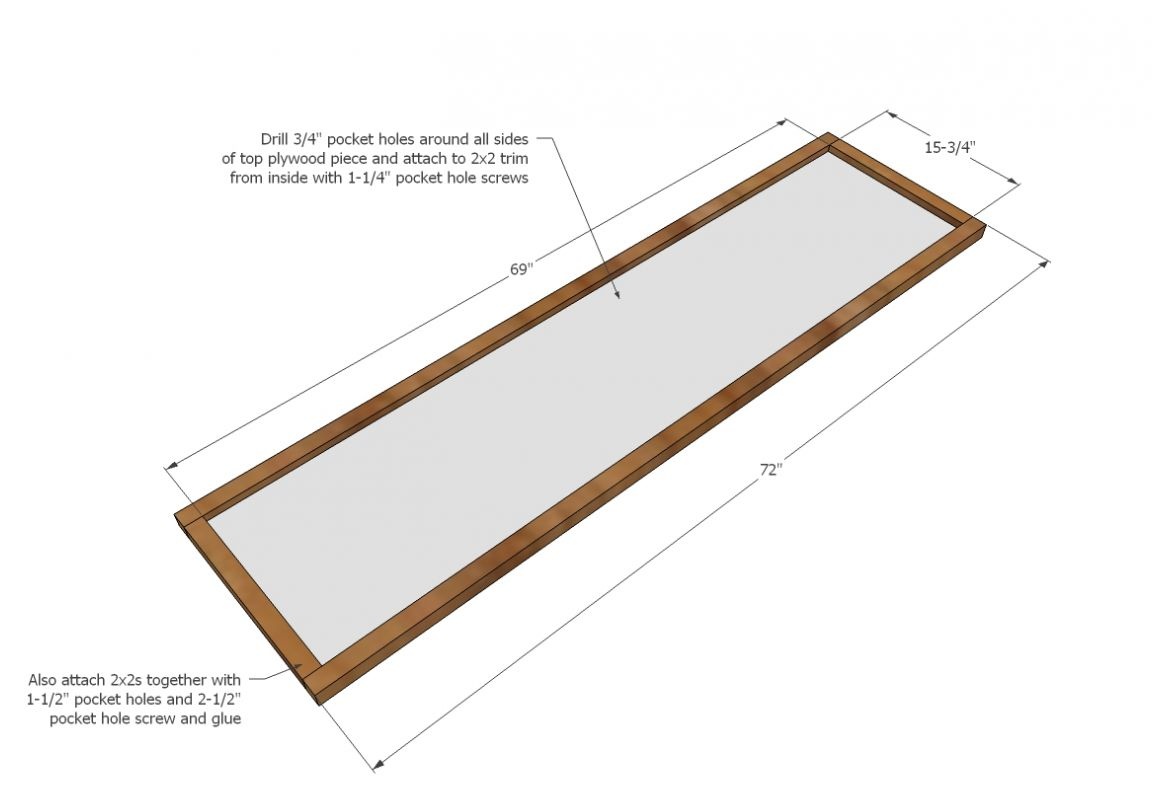
Thanks to the author of this workshop, you have in your hands a ready-made sketch and a detailed diagram of all three products: a table and two chairs.
Since all sizes are indicated in inches, and conversion to centimeters usually gives small errors, consider only the general sizes. The parameters of individual parts are best recounted so as not to become completely confused during the work.
The table is 1800 mm long and approximately 470 mm wide. Table height - 900 mm. If you are not the owner of too high growth, the height of the table should be reduced to at least 800 mm.
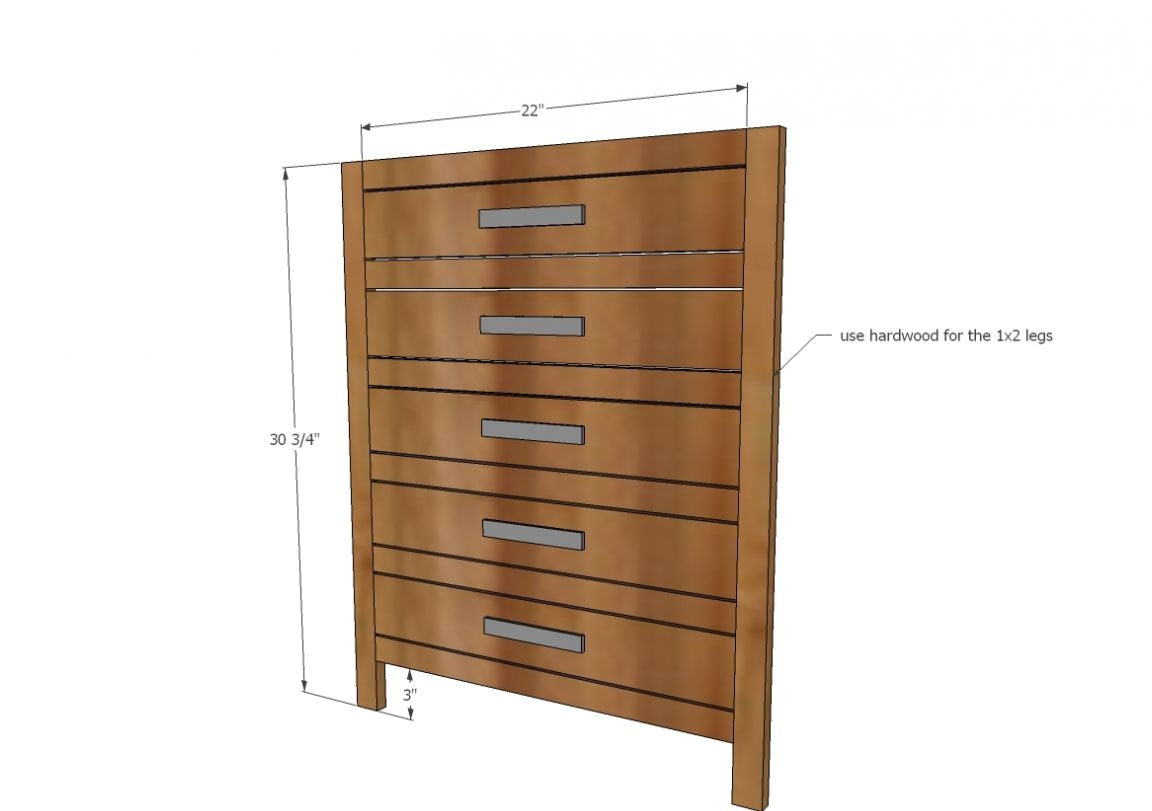
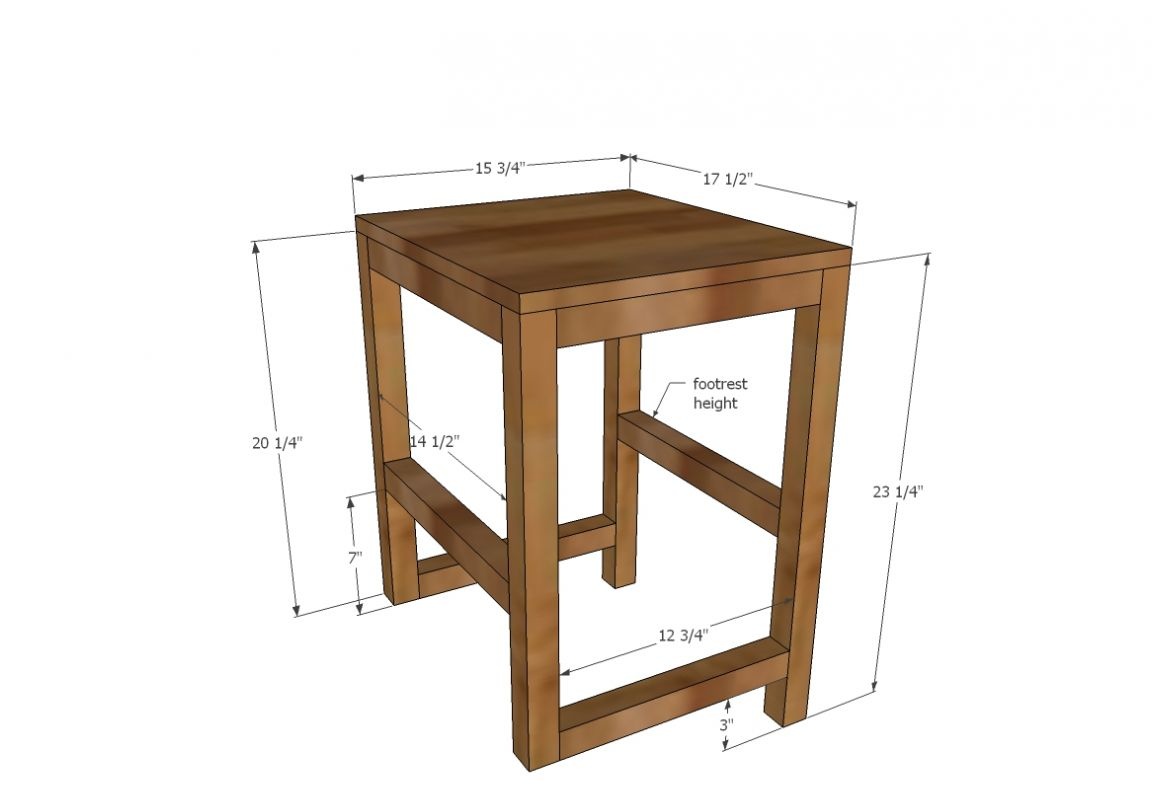
Each side of the seat is 430 mm. The height of the chair from the base of the legs to the seat is 600 mm, and the height of the back of the chair is 770 mm.
And finally, the dimensions of the drawers. The height of the small drawers is approximately 80 mm, and the height of the large ones is a little over 220 mm. Their width and depth are the same - 520 and 450 mm respectively.
Also note that the dimensions of the parts are affected by the cross section of the bar you have chosen. The thicker the bar - the smaller the part, since they are all flush mounted in the frame.
Step two: manufacturing of parts and their processing
The author used strong plywood and boards of different widths: approximately 50 and 120 mm. It is convenient to make furniture elements with a large area from plywood. But natural wood went to the facade of the product. He also picked up wooden blocks of suitable section. The thicker the bars and boards, the more monumental and massive the table with chairs will look and the harder they will turn out. Using plywood can reduce the weight of the structure, which is very convenient.
Despite the many solid plywood elements, the headset is assembled from a large number of parts. Carefully study the diagrams and write them all down on paper. Indicate the dimensions of each part there. So you determine the amount of materials that you need, which is especially true for plywood. It will also help to avoid mistakes in the process of marking and manufacturing elements of the table and chairs.
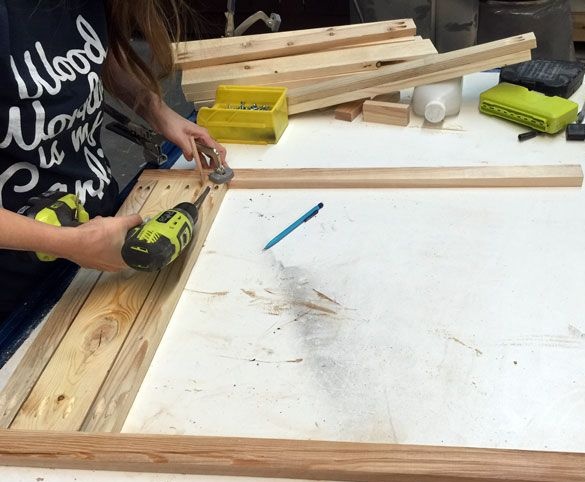
Lay out parts from plywood, boards and bars. Do not be lazy and use a construction square to ensure that all corners are perfectly straight and even.
Saw frame parts, facade elements of drawers and chair backs, as well as plywood parts. Lastly check your list - what if you forgot?
Now it's the turn of the grinder. The edges of all elements made by their plywood should be sanded. The same applies to natural wood stitches. Grind all planes here as well. Sand frame workpieces. At the end, they will all be painted, so grinding is desirable and will not be superfluous, even if the frame is not always visible.
Step Three: Assembling the Table
To connect all the details, the author used furniture screws. She pre-designated the mounting locations of the parts and drilled slanted or diagonal pocket holes that allow all the elements to be fixed butt. If you wish. The place of drilling is usually chosen for a reason, and first of all, where it will not be visible after the final assembly of the product.
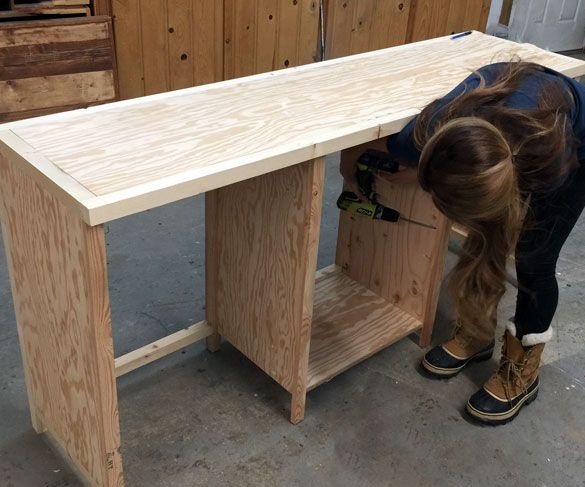
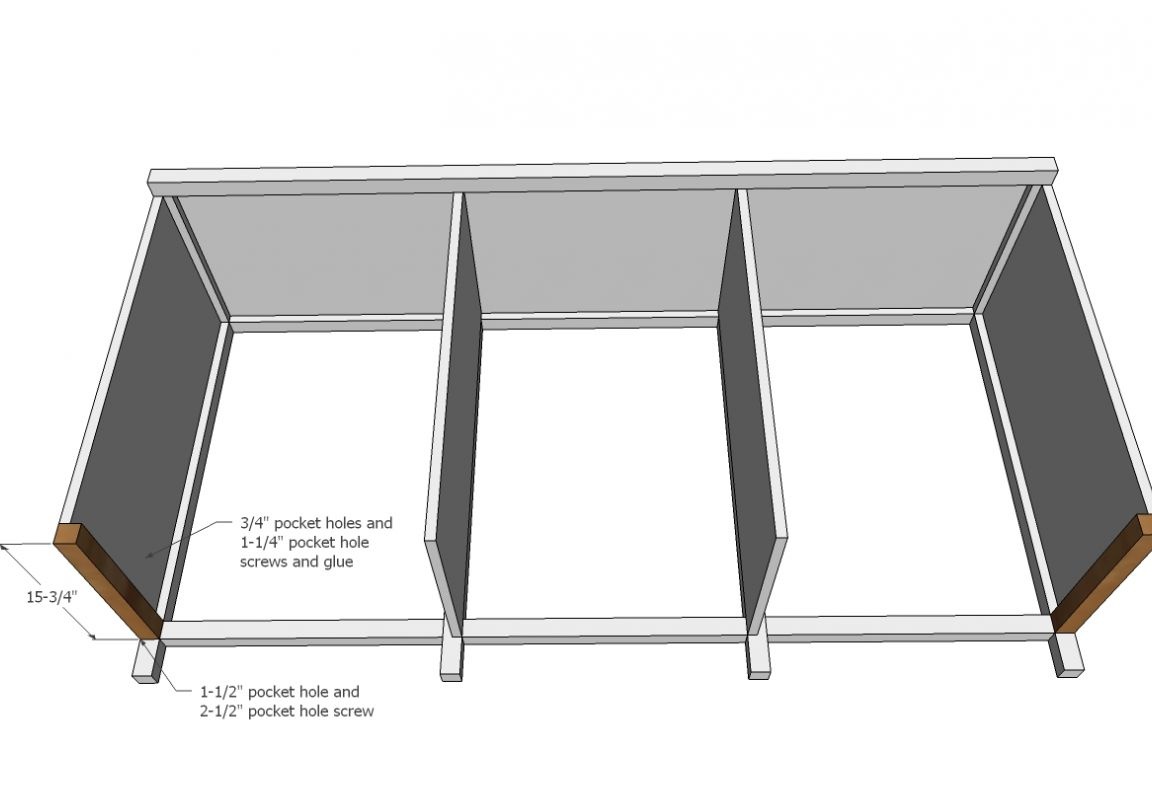
Assemble the countertop. For this, connect the frame parts and fasten between them a plywood sheet cut to size. Use wood glue in all joints. Put a small amount of it on the edges of the parts and only then connect them with screws.
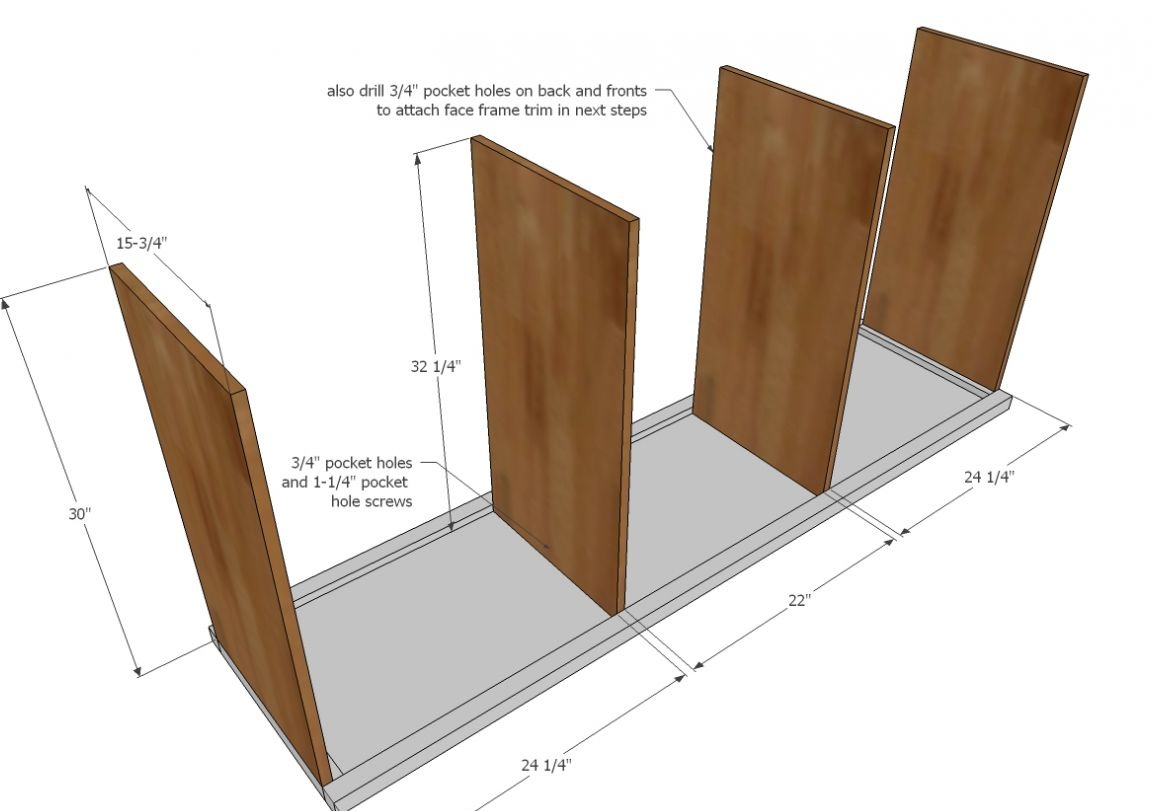
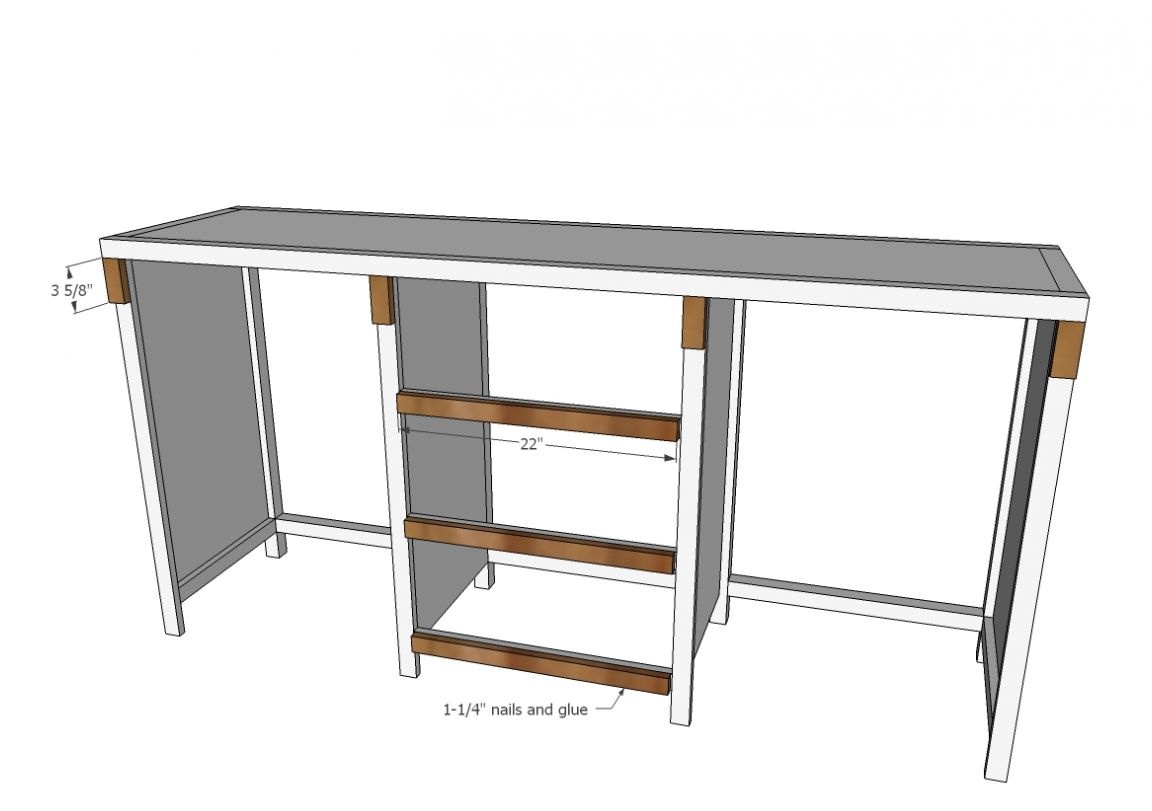
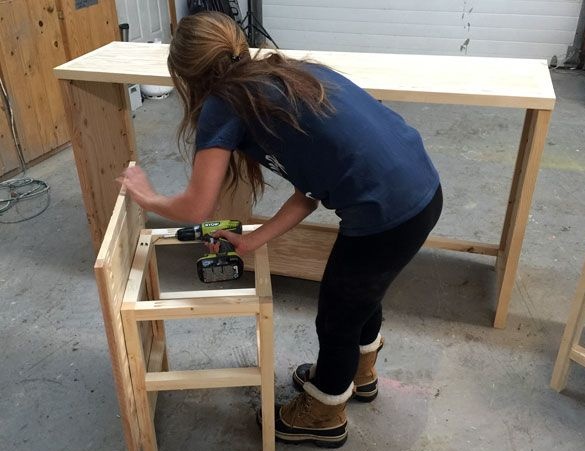
Fix the sidewalls and the vertical partitions for drawers and chairs on the countertop as shown in the diagram. Note that the partitions are longer than the sidewalls by the size of the cross section of your bar.
Screw the frame parts to the back of the table. This will add a little strength to your design and it will become more convenient to work further. Vertical racks protrude beyond the borders of plywood partitions. This is because the author has provided table legs in advance.
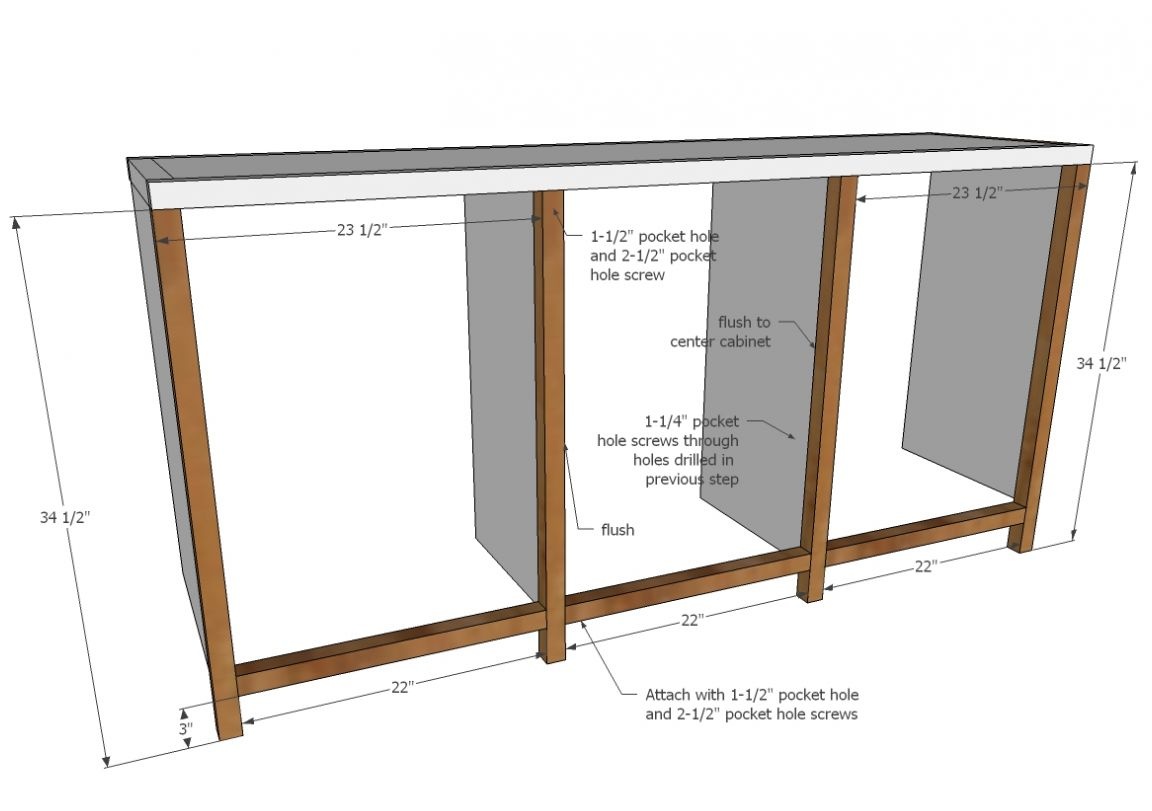
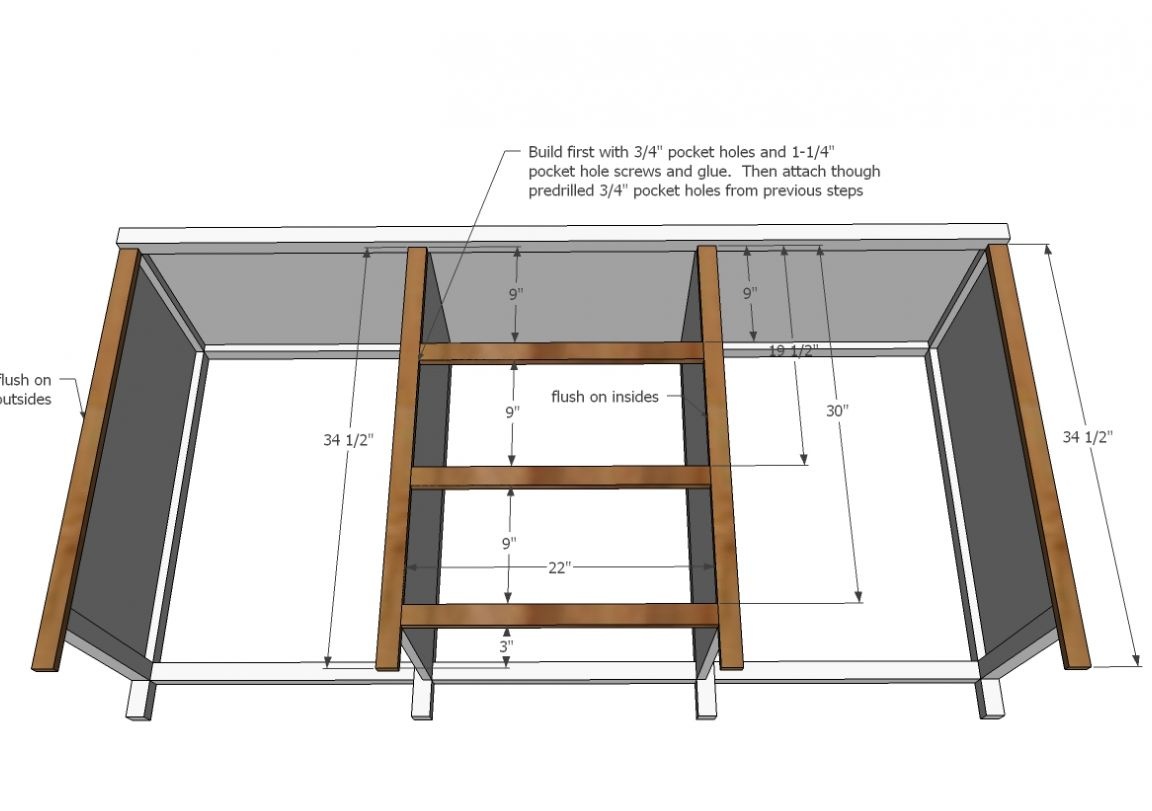
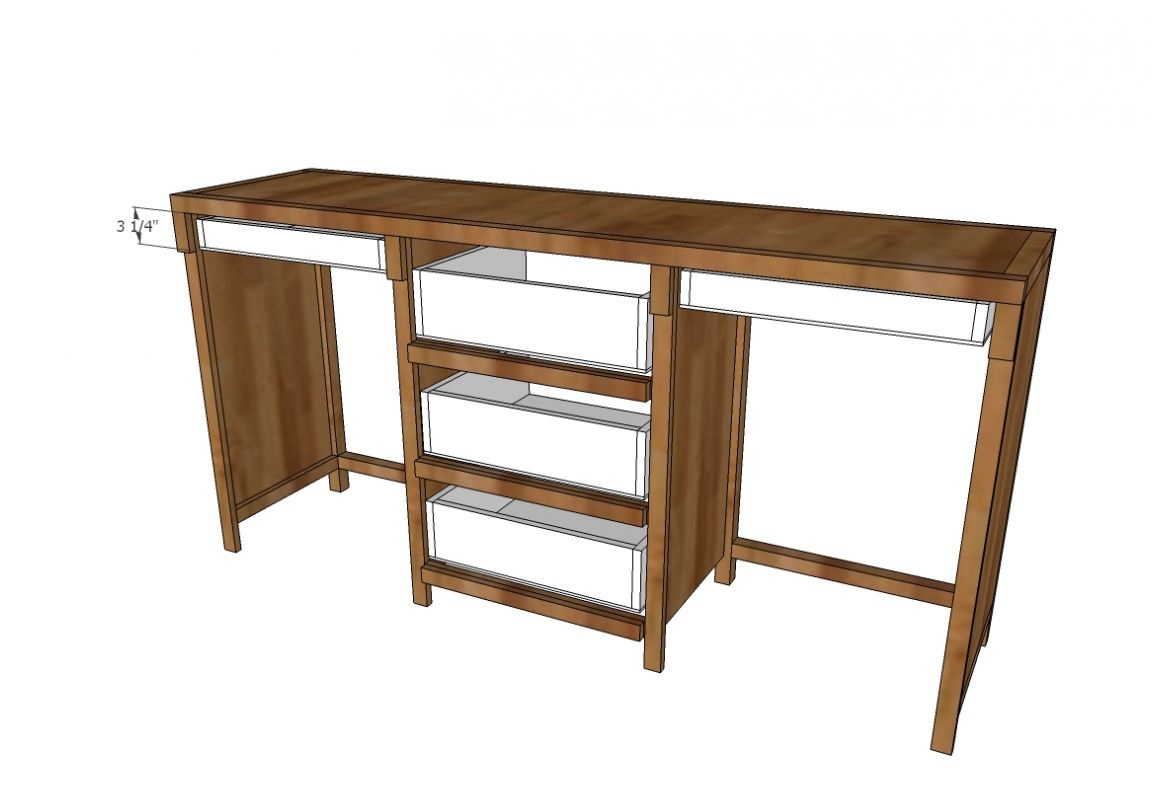
Fasten the lower bars under the sidewalls and proceed to screw the facade elements of the frame. At the top, under the worktop, on each vertical stand, fix the small slats in the height of the drawers. They will serve as side parts of the frame of these boxes.
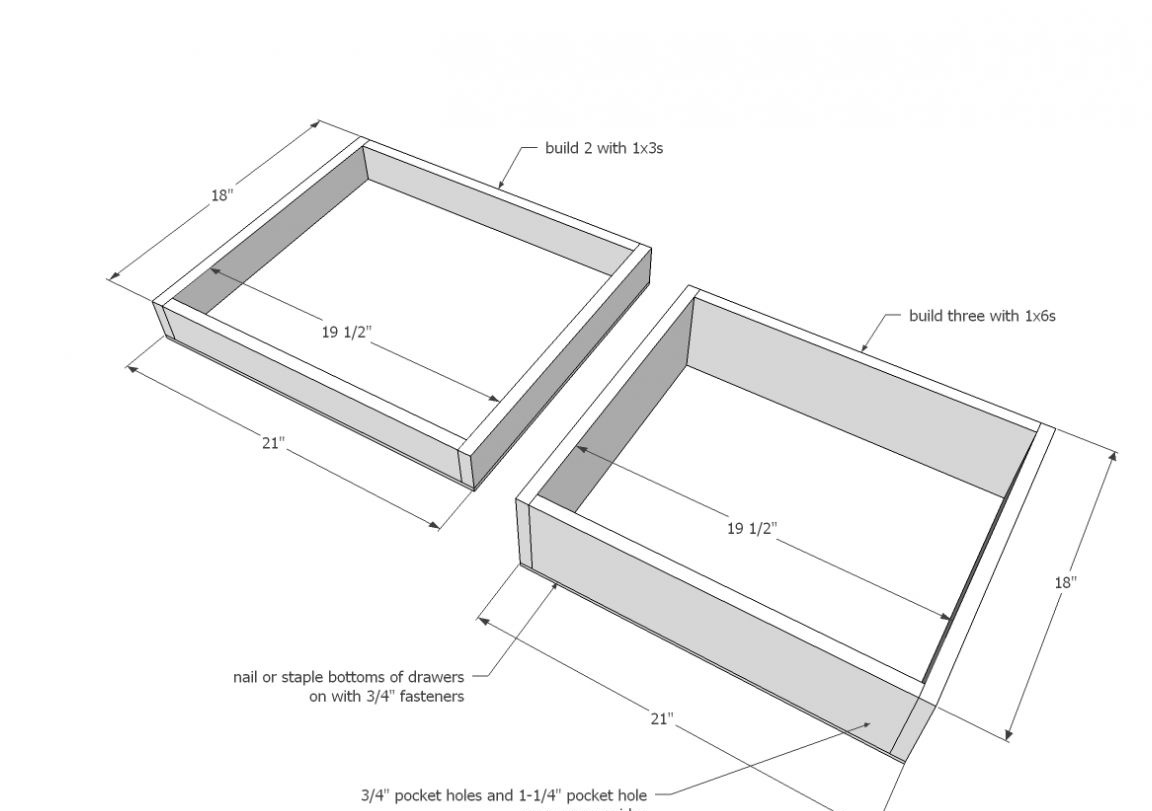
Assemble three large and two small drawers. Their width is 1 cm less than the width of the table opening. This will allow the drawers to slide easily along the sliding fittings. You can use the same pocket holes with screws, or you can use nails - of your choice.
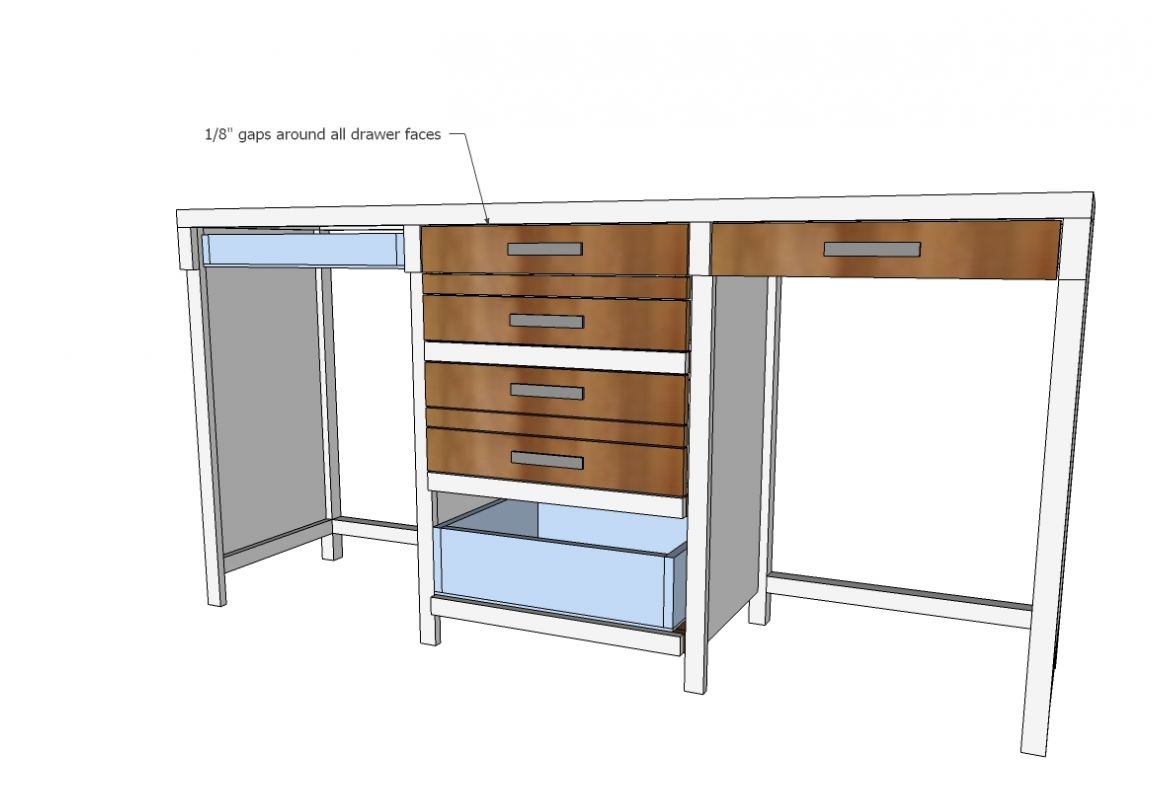
Attach the facade parts to the front panel of each drawer.For a small box - this is one solid piece. And for the big three of them: one narrow board and two wider. Place the assembled drawers in the table top and start making chairs.
Step Four: Build Chairs
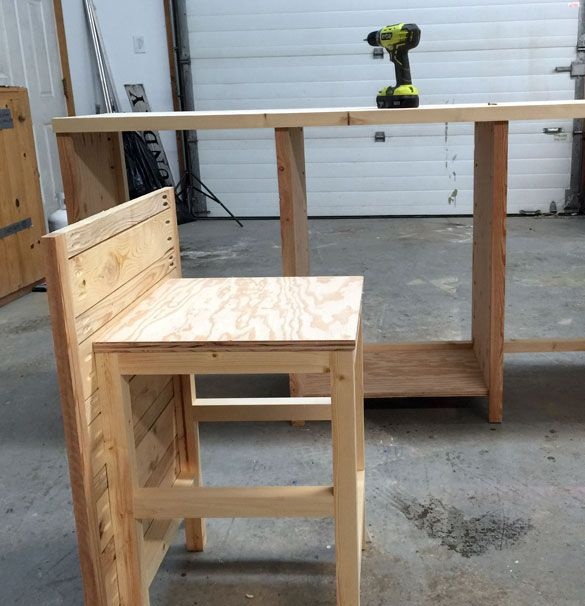
Assemble two sets of parts for each of the chairs and get down to assembly. Start by making a frame. Connect the bars with screws and hidden pocket connections as shown in the photo.
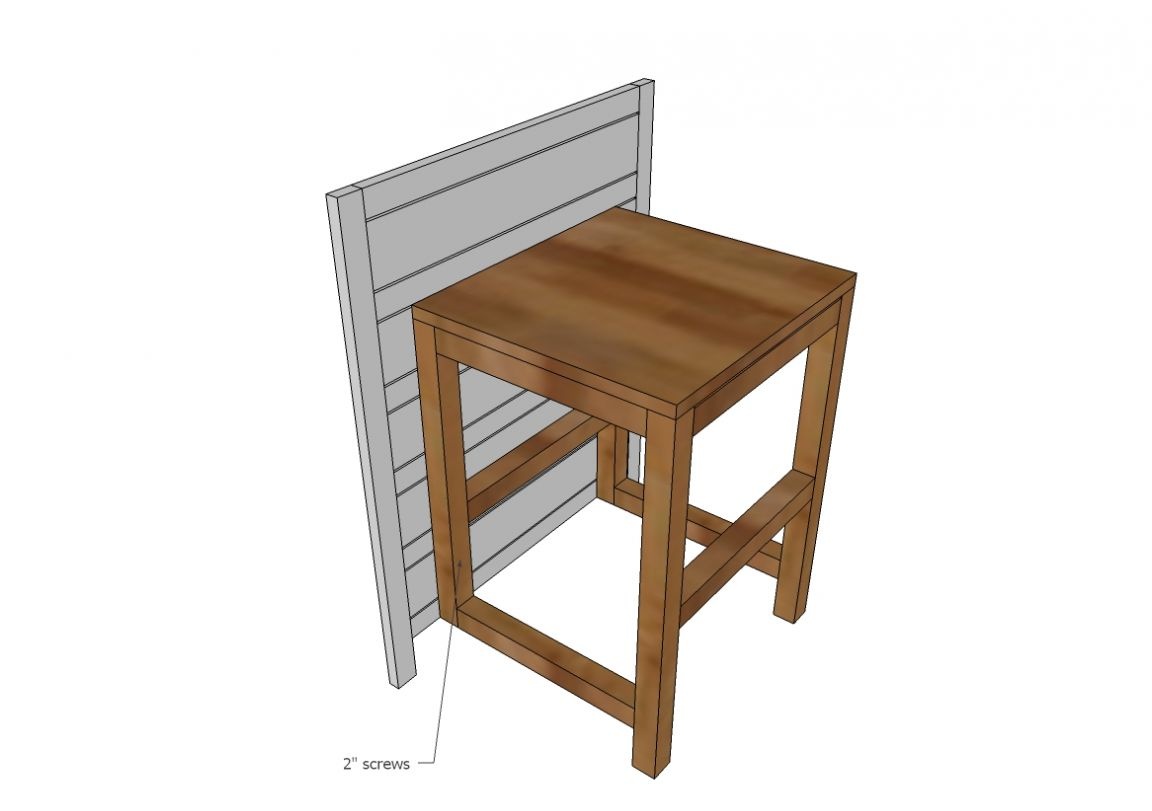
Also assemble the backrest frame. Fill it with decorative stitches and slats simulating drawers. Do not forget to use glue in the process. Connect the frame and backrest, and then lock the plywood seat.

Step Five: Finishing and Woodworking
Inspect the assembly table and chairs. If any defects are present, use a grinder to eliminate them.
Tone wood. For this you will find a wide selection of materials of all types and colors. Three types of materials are usually used for tinting a natural tree: alcohol stain, decorative oil, and varnish. The latter is tinted, and not just transparent.
After staining, the tree must be varnished. This will prevent it from mechanical damage and moisture. Decorative oil itself is self-sufficient and will cope with moisture in two ways. However, mechanical damage during operation cannot be avoided. Therefore, after processing the tree with oil, it can also be varnished.
Finally, lacquer-toner is an ideal tool like 2 in 1. It effectively tones wood and forms a durable protective coating. Choose only profile furniture varnishes of increased strength.

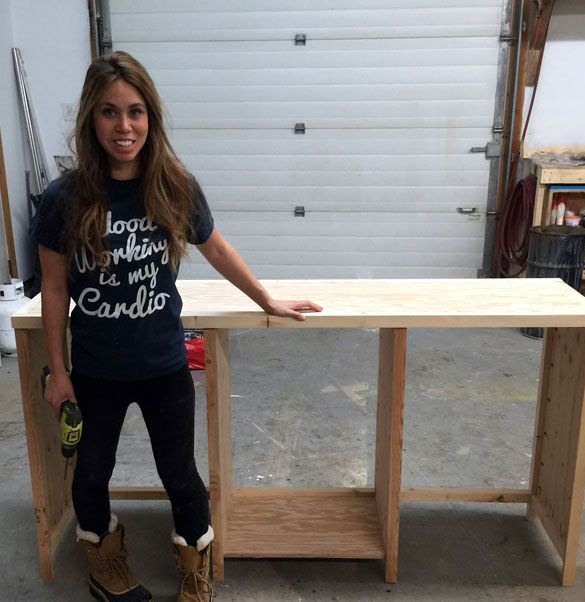
The table with hidden chairs is ready to go!