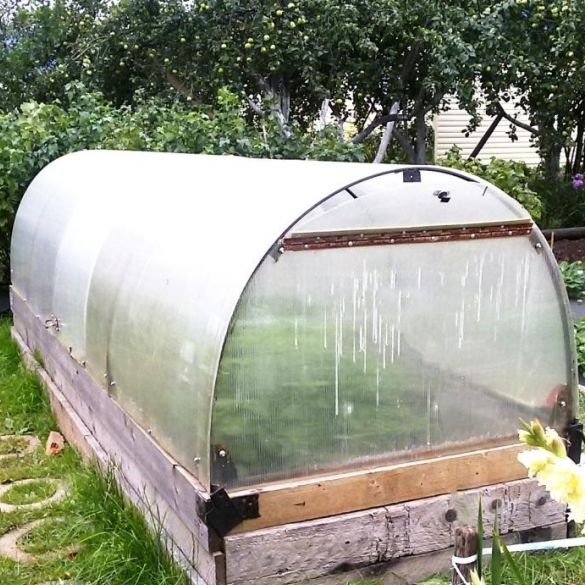
Garden endscountry season. Harvested, processed or put away for storage. Until winter, there is relatively free time to prepare for the early spring of the next season. It's time to make or upgrade a small greenhouse for seedlings, radishes or herbs.
It is a convenient and functional building. Takes up little space. And due to the planting of seedlings in the greenhouse, for intensive growth, you can get strong and hardened plants for planting in open ground and an early full-fledged crop.
The greenhouse is the simplest and most necessary building on the site. And building a greenhouse with your own hands is quite affordable and affordable for any gardener and gardener. In addition, this will significantly save on the purchase of a finished greenhouse design.
Unlike polycarbonate greenhouses for sale, to simplify the design and reduce heat loss in cold weather, to provide care for plants, their watering, weeding and ventilation, the entire arched roof easily opens on both sides or can be removed completely.
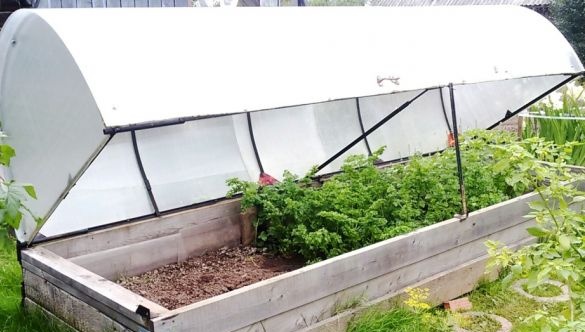
The proposed version of the greenhouse is made of polycarbonate, made on the basis of a previously existing greenhouse closed with plastic wrap along installed plastic arcs. therefore
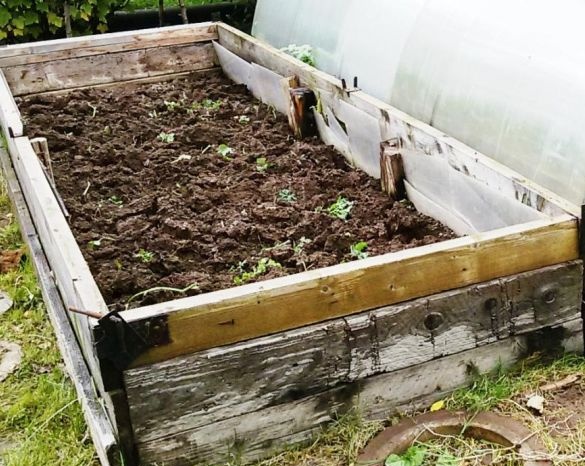
1. At the heart of the greenhouse is a box with dimensions of 3.5 x 1.2 m, knocked together from boards and bars. For a snug fit on the opening upper part of the greenhouse, we update the upper contour of the box with a 40 x 150 mm board, to a box height of about 400 mm. At the same time, we strive to ensure that the upper part of the contour boards is in the same plane, without steps and significant curvature.
2. To install the top of the greenhouse.
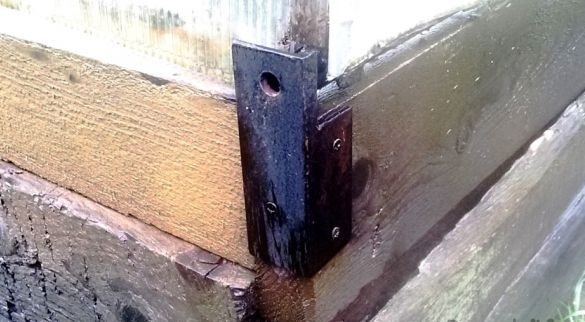
- From the steel profile of the square 50 x 50 mm, we cut 4 workpieces 180 mm long.
- At a distance of 20 mm from the end of the square, in the middle of the side, we drill a hole with a diameter of 12 mm. On two blanks - on the left side of the square, on the other two - on the right (mirror). This end of the square will be the top of the hinge.
- Next to the hole, on the adjacent side of the square, cut out the discharge in the form of a rectangle of 40 x 40 mm (photo below).
- We drill on the edges of the square 2 holes with a diameter of 5 mm for mounting screws.
- We fix the processed squares in the corners of the greenhouse, from the outside, according to the photo.In this case, the cut out part of the squares should be located on the long side of the greenhouse, and the lower part of the cutout should be 5-10 mm below the edge of the box.
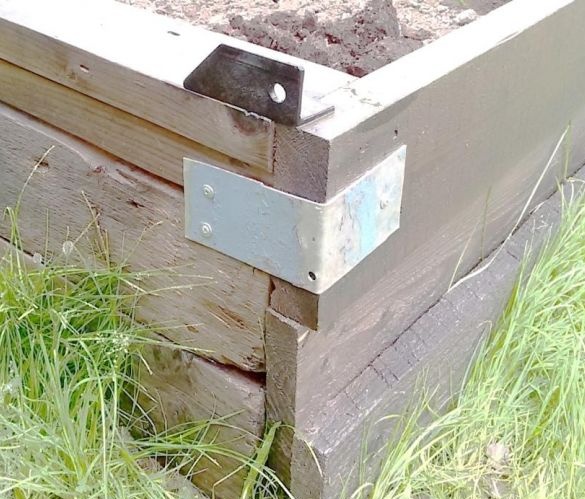
- In the case of updating the upper contour of the box (on the short side of the greenhouse) with a wide board or bar, another option is possible to make a similar hinge from a 50 x 50 mm square (photo below).
3. for the top of the greenhouse.
For the manufacture of the skeleton of the arched roof of the greenhouse, you can use various materials - metal or plastic water pipes, a thin-walled profile pipe of square section, a steel or non-ferrous metal bar.
In this case, a steel strip of 4 x 25 mm was available.
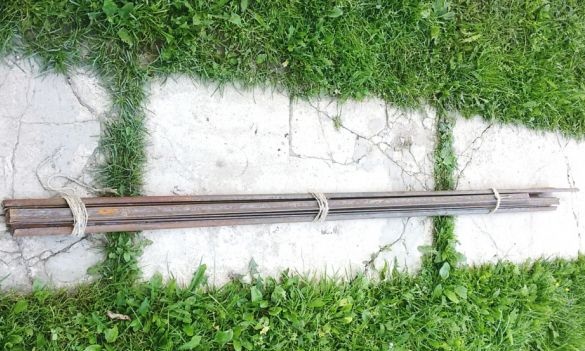
The use of a steel strip gave some advantages - the absence of problems when bending the arc (as opposed to bending pipes), a simple and reliable welding connection is possible, and the structure is lightweight.
The disadvantage is the lower stiffness of the arch, actually insignificant, because tested and tested in snowy winter (completely swept with snow), melted and snowed in spring. There are no residual deformations.
In addition, 1/2 "water pipes and screws for fixing polycarbonate sheets will be required.
To shelter the greenhouse we acquire 6 meters of polycarbonate with a thickness of 4-5 mm.
4. .
- Cut two steel water pipes with a diameter of 1/2 ". The length of the pipes is determined by the actual distance between the fixed halves of the hinges at the corners of the greenhouse. The size is measured along the long side of the greenhouse and decreases by 10 mm. The pipes made will be the second half of the hinges of the greenhouse roof. If there is a shortage of pipe , it can be assembled from a strip and three pipe sections of 200-300 mm (at the edges for the hinge and in the middle under the rest).
- Cut off a steel bar with a diameter of 10 mm and a length of 180 mm. On a third of the length of the bar, with a file, we cut the discharge to a depth ¾ of the diameter, bend the bar 90 degrees along it and boil it. So we produce 4 axis hinges.
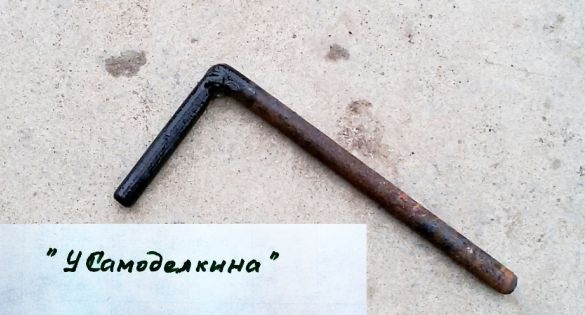
- We collect the hinges. We install the manufactured pipes between the fixed halves of the hinges and insert the axis of the hinges into them. We measure the actual distance between the pipes and cut off these two steel strips for assembling the frame of the base of the roof.
- We grab the assembled elements for welding into the frame of the base of the greenhouse roof. Transverse stripes in the base frame are oriented vertically with a larger plane, as they will be attached to the side wall of the roof of polycarbonate.
- To increase the rigidity of the structure, an additional spacer plate is installed in the middle of the frame.
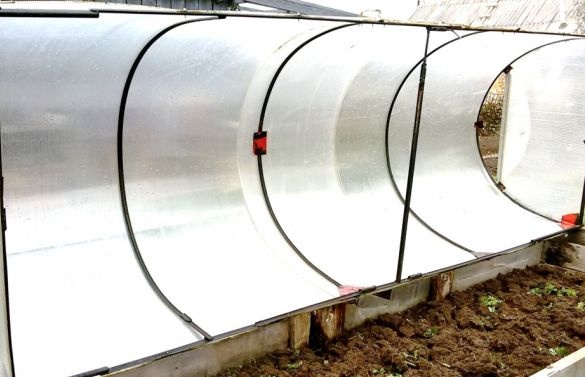
- After welding the base, all 4 joints must be freely assembled with a free-standing frame. We remove the base and weld it completely.
- Cut off, if necessary we weld together, five strips 2.3 m long. Of these stripes, we bend five identical arcs according to the markup or pattern. With a base width of 1200 mm, the height of the arched roof will be about 800 mm.
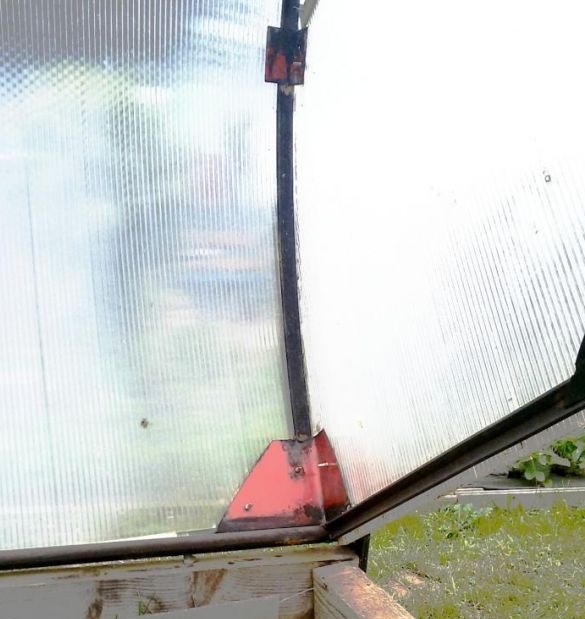
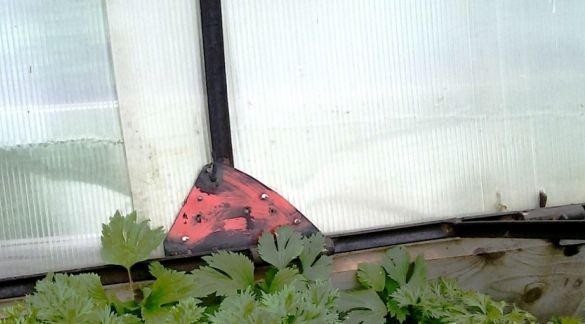
- We distribute the arcs at an equal distance (875 mm) and weld them perpendicular to the plane of the base. To increase the rigidity of the structure and to provide platforms for fastening polycarbonate sheets, scarves from steel plates 1.0-1.5 mm thick are welded at the nodal points (a cut out cover from an empty barrel is used).
- We weld additional platforms on the base and side arches of the roof for fastening polycarbonate.
5.
- Install the skeleton of the roof in the greenhouse, collect all 4 hinges.
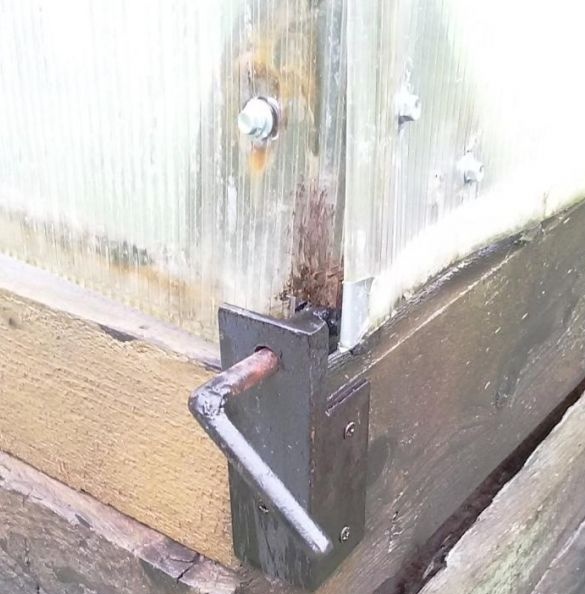
- In the middle of the long sides of the greenhouse, to maintain the base frame in a certain position when opening the roof and when closed. The lunette is made of a square of 50 x 50 mm bent from a strip 4-5 mm thick. It cuts a groove along the diameter of the base pipe, then the upper half of the groove expands at an angle of 20-30 degrees and works as a catcher when closing the roof.
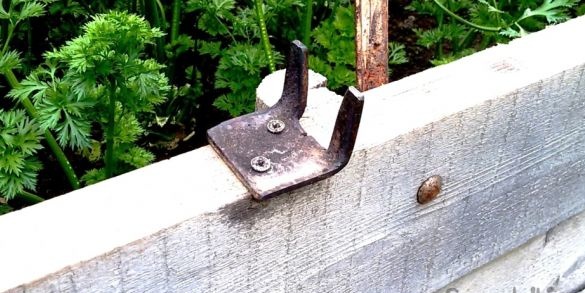
- Near the rest In this case, the emphasis is assembled from the strip used in the construction (lower part) and the C-shaped perforated profile used to assemble adjustable shelving (upper part). From below the emphasis is mounted freely on the furniture screw and has the ability to turn on its side with the greenhouse closed. Length adjustment is carried out by moving the rod into the desired hole on the bar.
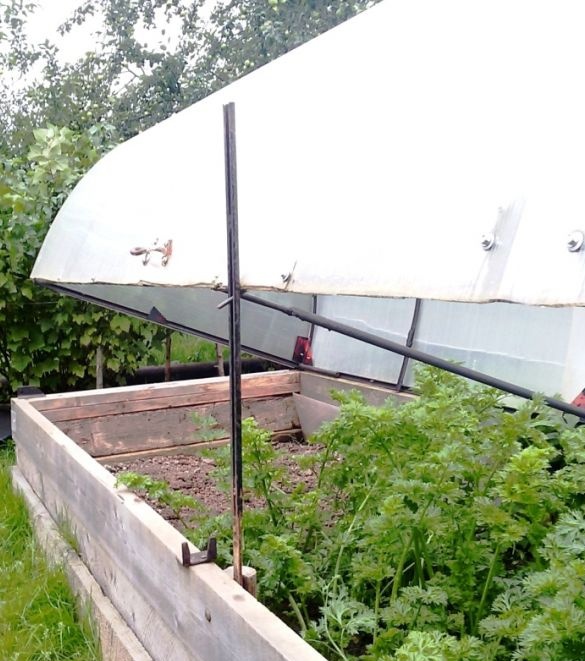
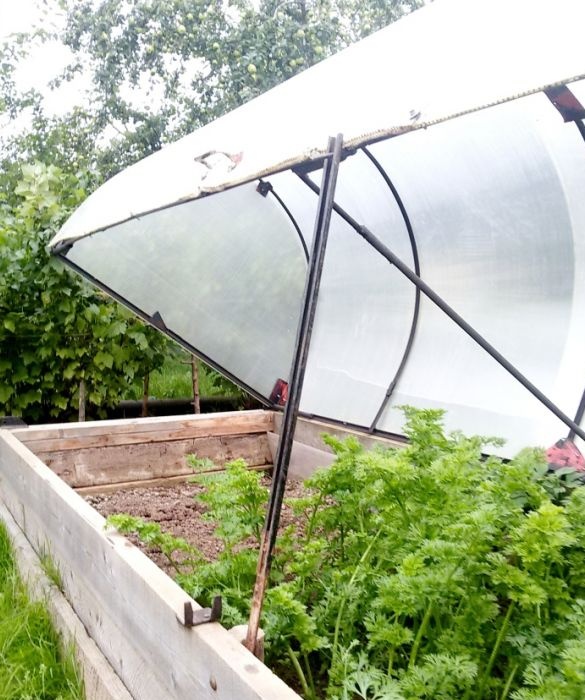
6. For protection against corrosion (bituminous varnish) and dry.
7. Sheets of polycarbonate with a length of 2.4 m, with an overlap we fasten with screws to the sites available on the skeleton. On the resulting contour of the roof, cut out the side walls and fasten them to the skeleton. In this case, the edges of the arched part of the roof fall below the cut of the greenhouse, and the lower ends of the side walls lie on the greenhouse. Polycarbonate residues were used to warm the greenhouse by installing them in the ground inside the greenhouse.
8. For ventilation.
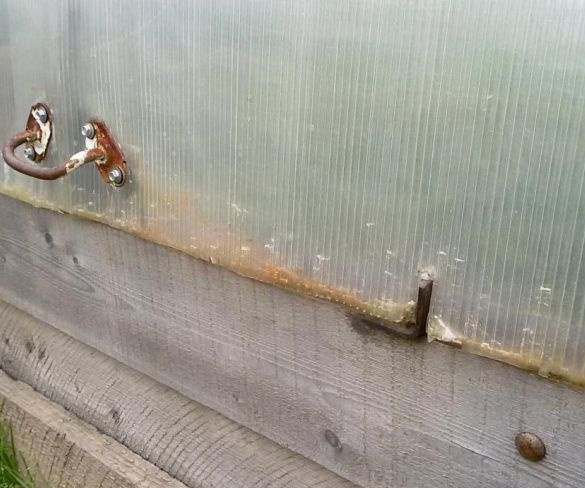
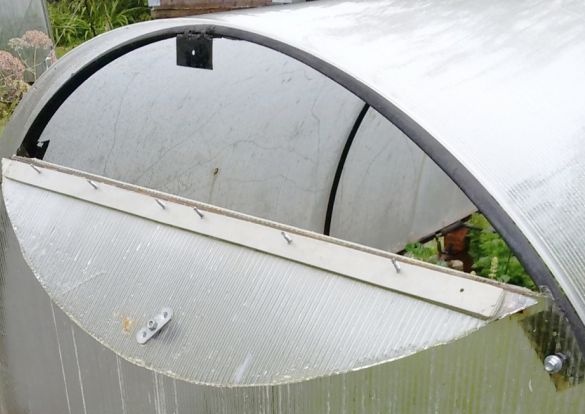
In the side wall of the roof, at a height of 200-300 mm from the top, we make a through horizontal cut with a knife. We put the piano hinge of the desired length on the cut and fasten it with screws. At the same time, on the back of the polycarbonate, for reinforcement, we lay a strip of plastic. We unscrew the screw from the upper platform, open the window, using this platform we make constipation.
9. For convenience of opening the roof, on both sides of the hinged part, door handles are fixed to the middle scarves.
