Equipping a place for washing is perhaps the most difficult stage on the way to repairing a kitchen. As a rule, any homeowner has two basic requirements on this issue. Firstly, the cabinet should be aesthetically pleasing. Secondly, washing should be practical. First of all, this means that the hostess can easily maintain order in this area. And if the kitchen cabinet has a convenient storage system, then it will not be priced!
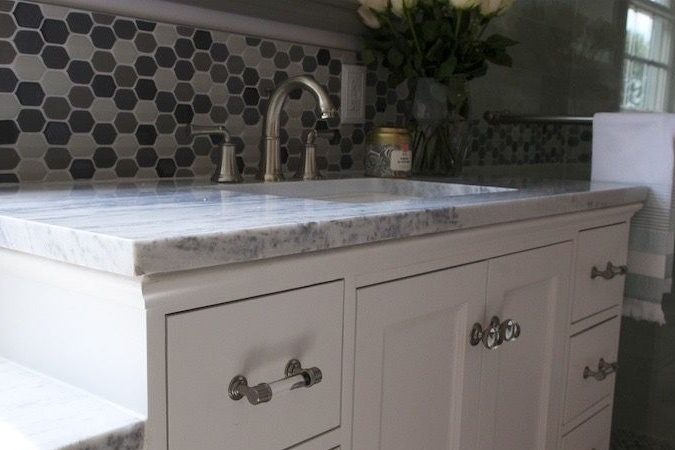
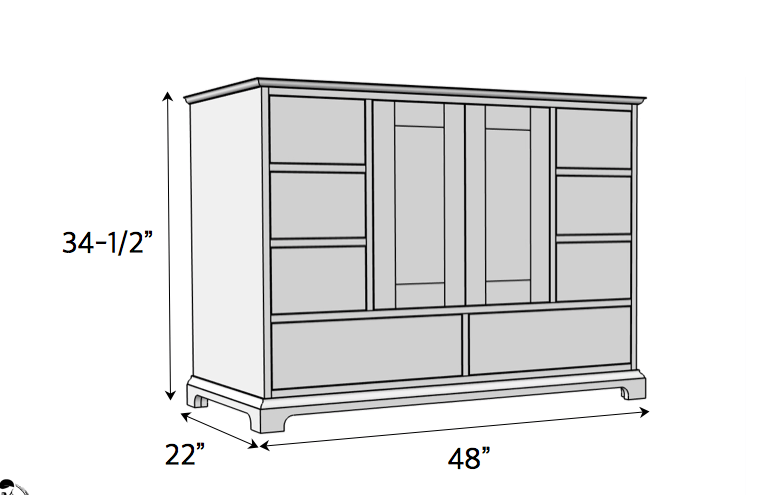
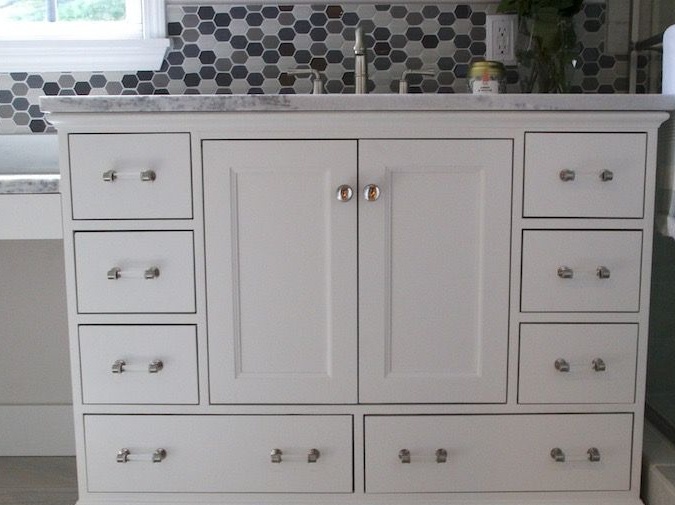
The author of this master class also set out to equip the cabinet for a sink in his kitchen. It should be made in the style - traditional for America of the end of the last century. In addition, the cabinet will have a practical marble countertop and many drawers for storing everything you need. In the center there is a compartment for placing plumbing fillings.
To make such a sink for a kitchen sink do it yourself, you will need:
Materials:
- a wooden bar with a cross section of 20 x 20 mm or 25 x 25 mm for the manufacture of frame parts;
- thin plywood for the central door of the sink;
- plywood is thicker as the main material for the construction of pedestals;
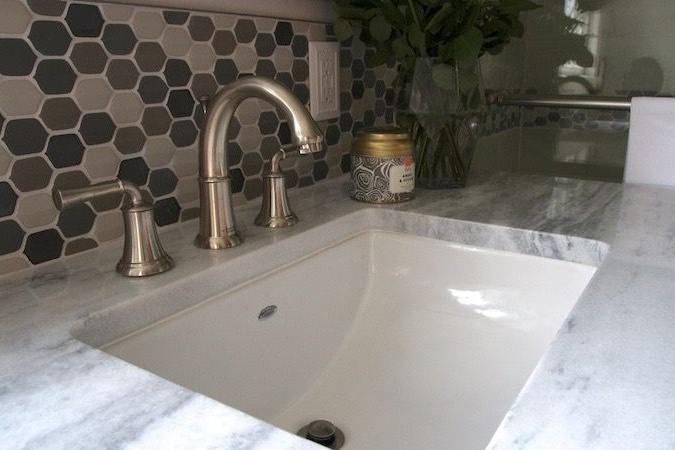
- finished marble countertop with a cutout for a metal or acrylic sink;
- actually a metal or acrylic sink of suitable dimensions;
- handles for drawers and hinges for doors;
- wood screws and furniture screws;
- glue for working with wood materials;
- paint white or milky shade;
- resistant moisture resistant varnish for woodwork.
Instruments:
- jigsaw;
- a grinder or sandpaper for processing the edges of plywood;
- electric drill;
- screwdriver;
- paint brushes and roller with a tray for paint;
- construction tape and square for marking the details of the sink;
- a pencil.
First step: marking and manufacturing of frame parts from plywood and bars
The dimensions of the cabinets for a kitchen sink are a purely individual matter. However, the most important parameter is the washing height. It is believed that the maximum comfortable height of all kitchen work surfaces is 80 cm. This, of course, is the average value for a person with average height. However, it should not exceed 85 cm, otherwise the hands get very tired during the process, and the water from the tap does not drain into the sink, but flows through the elbows.
The size of your cabinet also directly depends on the selected sink and marble countertops. Before you begin work on making a cabinet, get these two things.This is easier than looking for a sink and countertop under a ready-made cabinet, which is a pity to throw out and redo laziness.
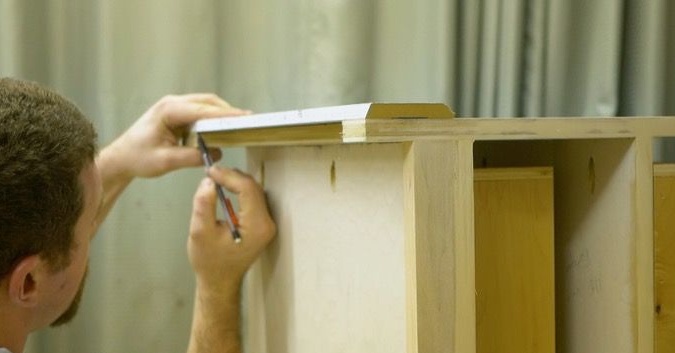
Determine the overall dimensions of the cabinet and, given the thickness of the plywood, calculate the dimensions of each part. Write down all the data obtained in this way so as not to carry out the calculations repeatedly in the process. Mark and cut the parts using a jigsaw. In order to observe perfectly right angles, use a construction square.
Step two: preparing the kitchen cabinet for assembly
Choose dense, durable plywood that does not crumble during cutting and does not flake even in the supermarket. It should emit a very decent smell without a pronounced toxic darling. The thickness of the plywood used must not be less than 15 mm. And it is better thicker - it is convenient to work with such plywood also because you have to drill pocket holes for self-tapping screws. And they should be located inside the sheet and not pass through.
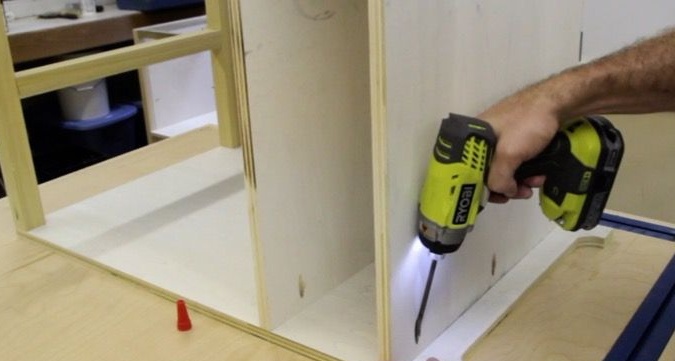
The author really used pocket joints on self-tapping screws. For greater structural strength, combine them with glue over the entire joint surface. Be sure to remove excess glue with a damp cloth and sand it after drying. This is necessary for high-quality painting. Prepare all the details of the cabinet, assemble them and figure out in which places the fasteners should be placed. Make notes and drill pocket holes for self-tapping screws with an electric drill.
If you use ordinary plywood without coating, then already at this stage you should varnish all the surfaces of the plywood parts, which at the end of assembly will be inside the cabinet. It is much easier to do now. Use waterproof varnishes in a couple of layers. However, do not rush to choose water-based varnishes. They are for varnishing of furniture not suitable because they do not have sufficient abrasion and mechanical damage. The author used a special plywood with a finished coating, so he managed to skip this stage.
Step Three: Assembling the Kitchen Cabinet Frame
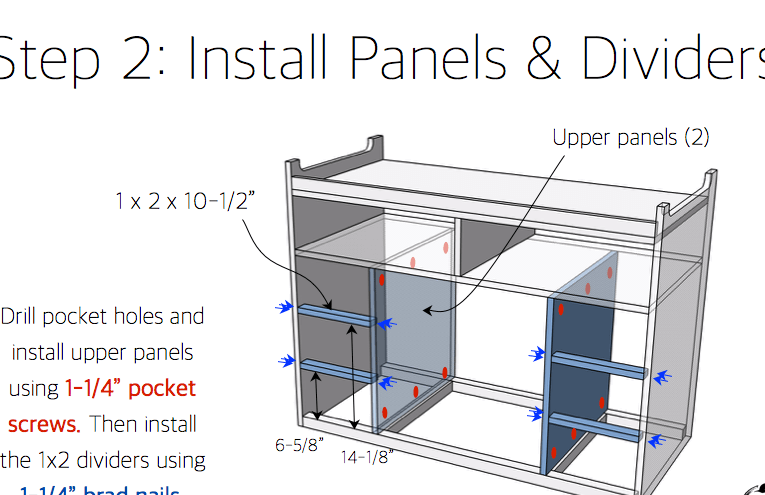
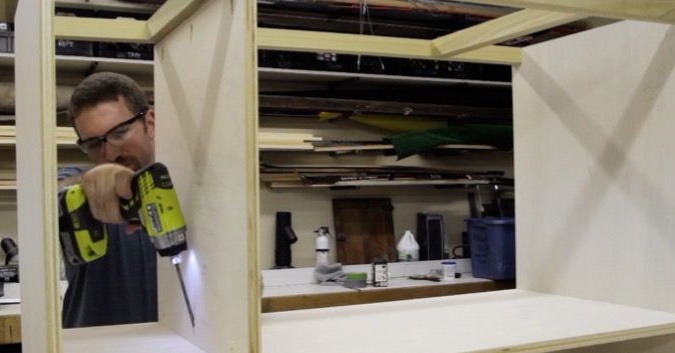
Start by assembling the frame. Connect the wooden parts of the base under the sink and secure with the obtained frame the side walls of the cabinet. Fix also the intermediate shelf and the bottom of the cabinet. Do not forget to use glue. Install the central partition between the cells for the lower drawers at an equal distance from the walls of the cabinet.
Now the frame is quite stable, and you can do the internal filling. Fix the vertical partitions that separate the central plumbing compartment from the drawer areas. Set the slats between the drawer slots.
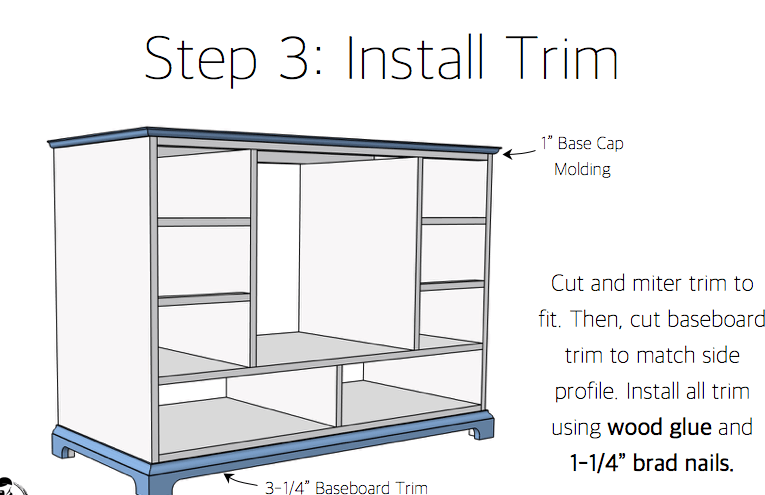
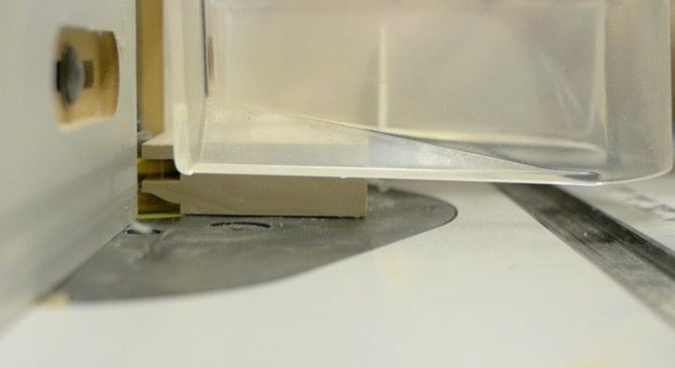
The base of the cabinet, according to the author’s idea, is expanded at the very bottom. To achieve this, he used a prepared wooden profile machined on a milling machine. Pads are made of it, which form a frame for the base of the cabinet. Saw the profile into parts of the required length, attach them to the pedestal and mark the cutouts for the legs as shown in the photo below. Cut the excess with a jigsaw, apply glue to the plane of the parts to be joined and carefully fix them on the cabinet body. There is enough glue, but if you are not sure about its quality, you can additionally use small cloves.

Step Four: Subsequent Assembly
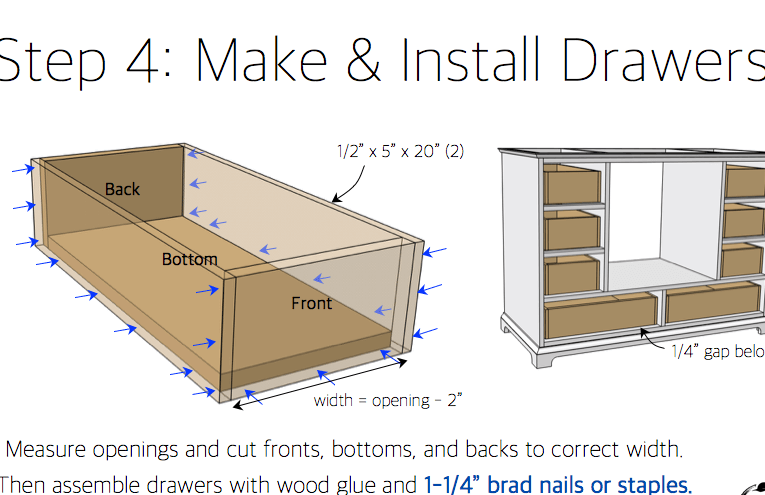
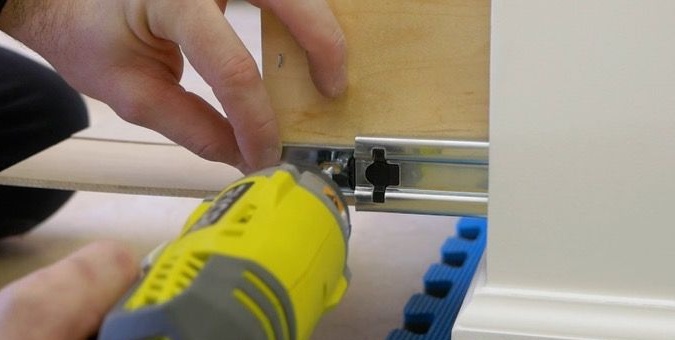
Make drawers from plywood. Schematically, the box is shown in the image below. It has a significantly lower height compared to the cell. It is also narrower since you will need a little space for installing retractable metal-plastic fittings. Collect all the boxes. Fasten the fittings and place the drawers in the cells.
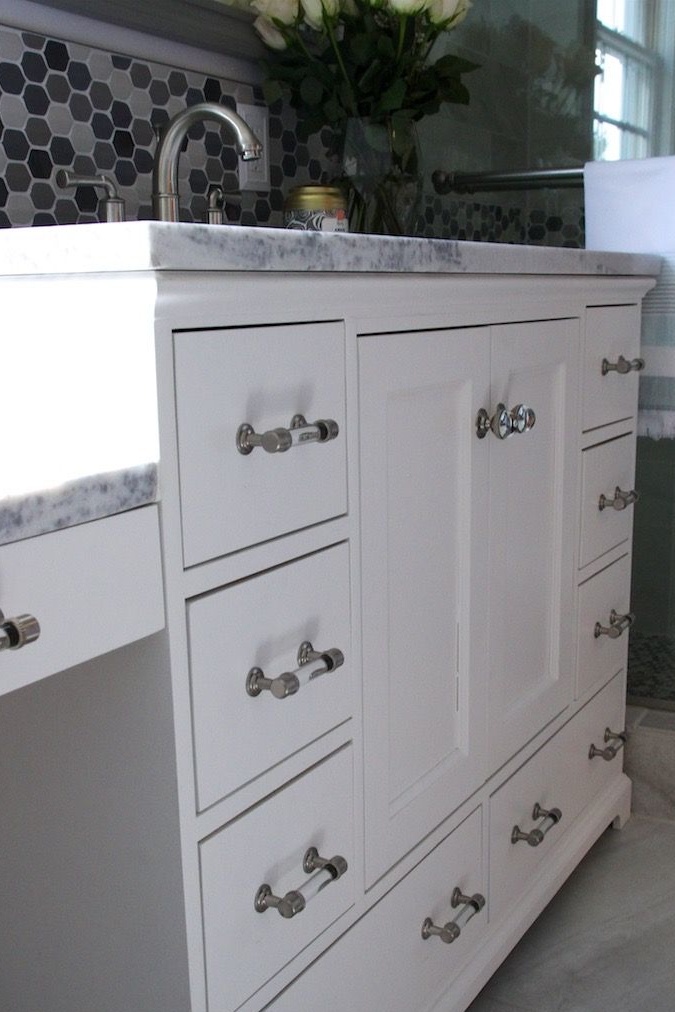
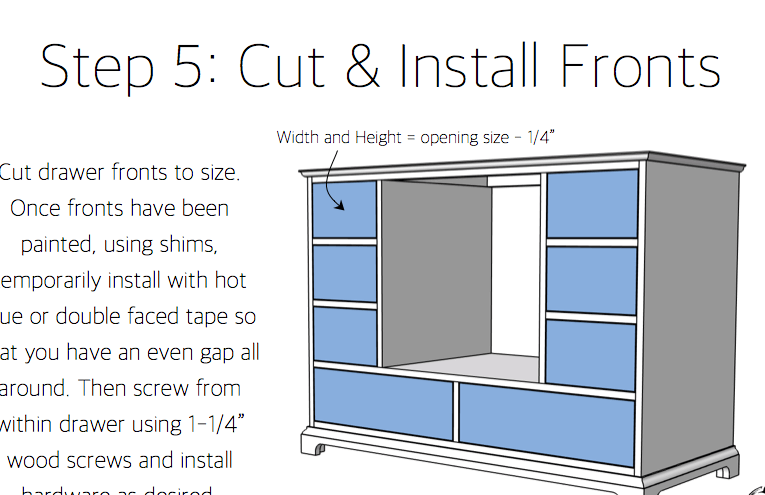
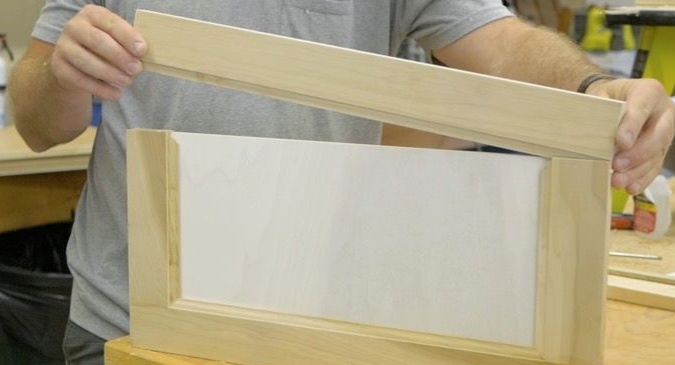
Separately prepare decorative front covers for drawers. Fix them with glue. Also make panel doors of the central compartment for plumbing.The author did all the work from scratch using his faithful milling machine. If you do not have such an opportunity, door frames can be ordered in a carpentry workshop and buy a finished profile in a large supermarket.
Cut the prepared elements with grooves for thin plywood to size. Connect any three parts, place a sheet of thin plywood inside and fix the remaining part of the frame on top. During the assembly of the doors, squeeze a little glue evenly into the groove in order to eliminate all the cracks. Hang the doors on the hinges. Install the sink and marble countertops of your choice. Use suitable glue and silicone sealant for this.


Step Five: Painting the Kitchen Cabinet
To protect elements that do not need painting, you will need masking tape. Prepare the paint as well. The paint you choose should be moisture resistant and form a hard coating that does not scratch with your fingernail. The script provides for a white or milky color, but you can use any.
Apply several coats of paint with a brush or roller until you achieve a uniform coating with a uniform tone. Although alkyd, nitro paints and some oil paints do not need compulsory varnishing, it is still worth varnishing. Do not forget that this is a piece of kitchen furniture and it will be mercilessly operated.
Therefore, choose the right type of varnish and apply it in several layers. If possible, sandwich. At least in those areas that are most susceptible to wear.
Step Six: Final Touch
Mark with a pencil the places where the handles are mounted on the drawers. Pre-drill the holes for the screws. Fasten the handles. Also hang the doors of the central cabinet if you do not dare to do this before painting. Remove masking tape. Your kitchen sink cabinet is ready to use! It remains to connect the plumbing.