

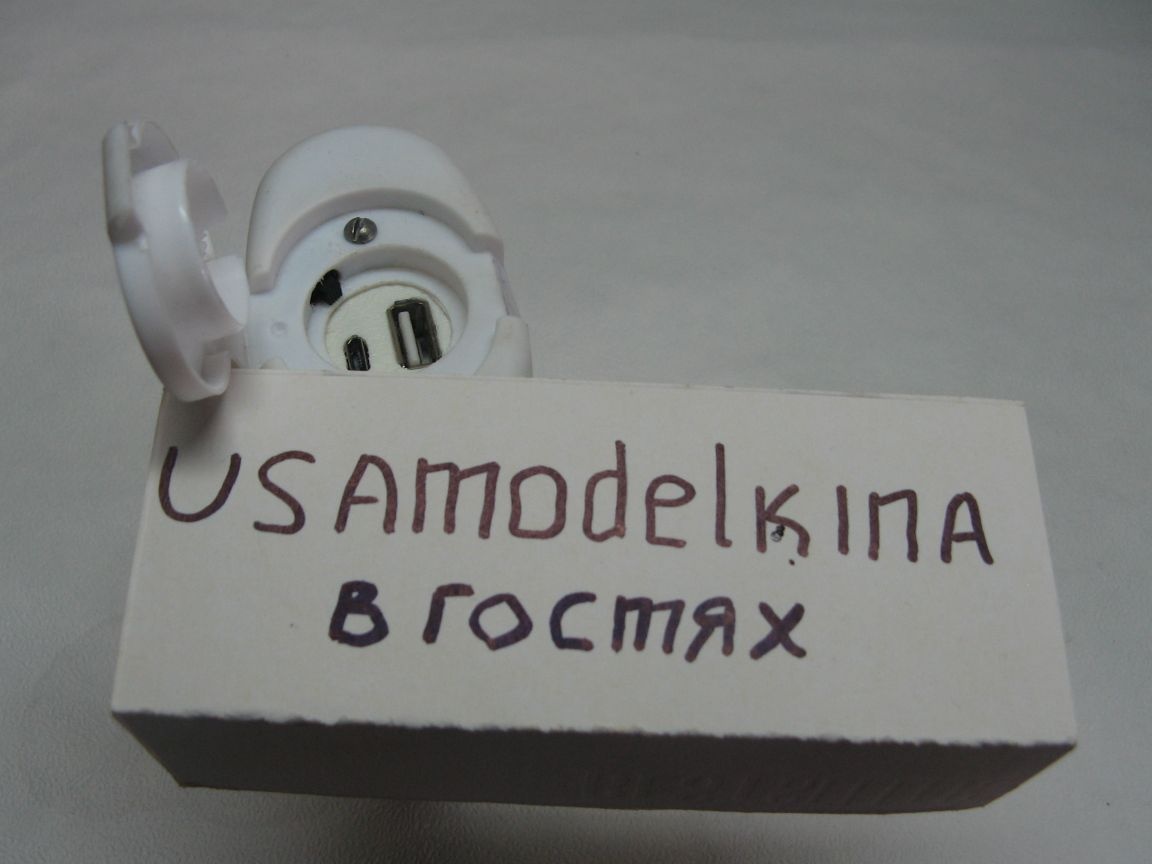
When traveling, there are situations when the phone, tablet, player is discharged at the most inopportune moment. The market is full of power bank of any capacity and size.
But it’s more fun to use things made do it yourself.
Once a flashlight made a power bank, but it was made from a large flashlight and it is inconvenient to take it on a trip.
For the power bank design, we need:
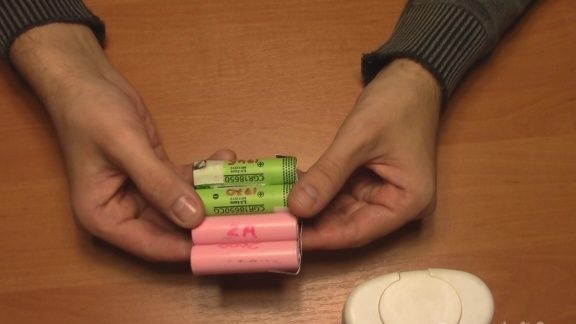
- batteries of a standard size 18650;
- a box of wet wipes;
- boost converter;
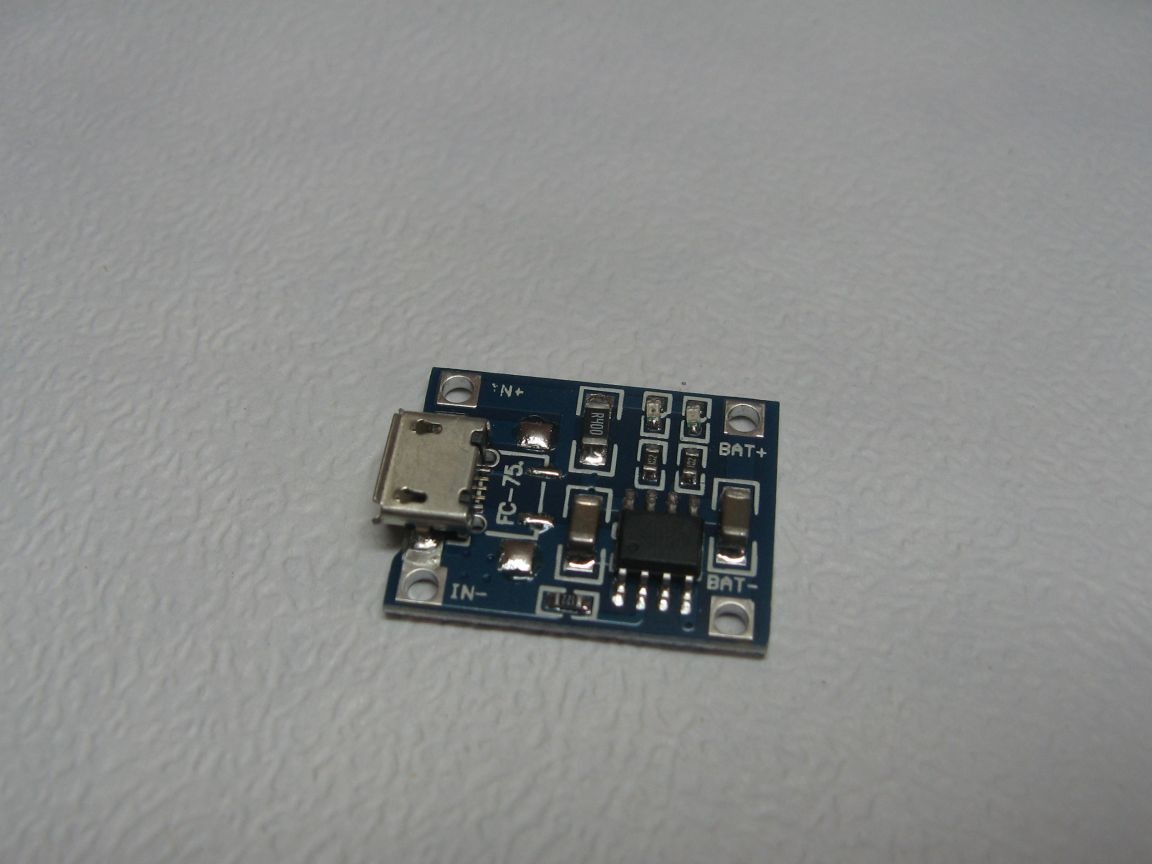
- charge controller for Li-ion;
- BMS board;
- wires;
- microswitch;
- instruments.
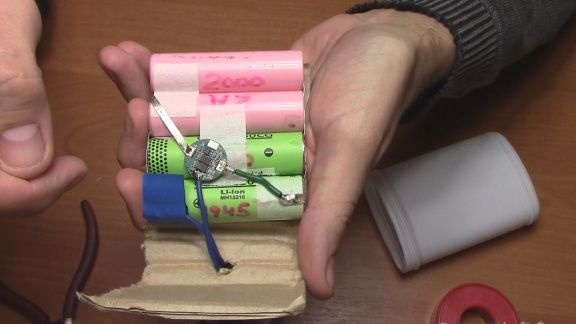
The first step is to take the 18650 batteries and connect them in parallel. I had spot welding on hand, I welded long plates in pairs and soldered them together.
Also installed a protection board from a protected battery. The whole thing was wrapped in cardboard. Handicraft of course, but isolation from the boards is provided, and all this is inside the case.
The case turned out to be very successful. One more lies and waits in the wings.
The finished board from China serves as a boosting converter, since it is not expensive.
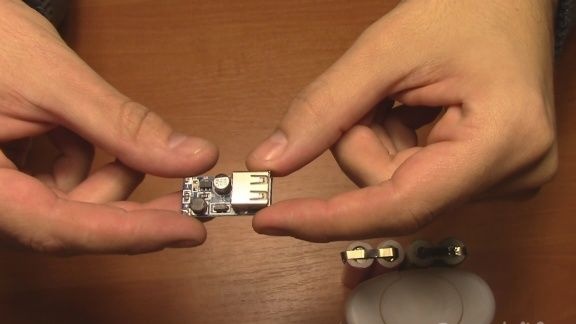
Our batteries will also be charged with a finished board from China. Since the board provides a charge current of about 1 ampere, our bunch of batteries takes time to charge. This must be considered before the trip. The board has a micro USB connector on board. Now most devices use this connector.
Next, you need a piece of plastic of a suitable color. In it we mark and cut holes for our boards. We also mark and drill holes for fastening screws.
Both boards are hot-melt adhesive.
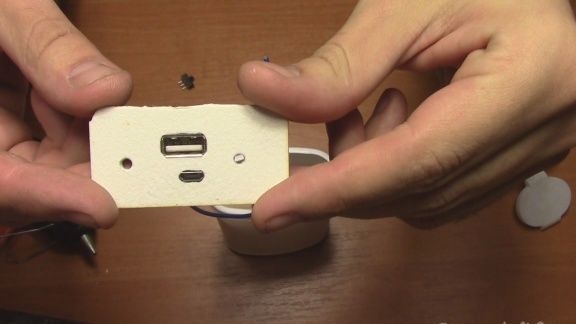
On the box lid we mark and drill holes for the screws. We also make a cutout for the switch.
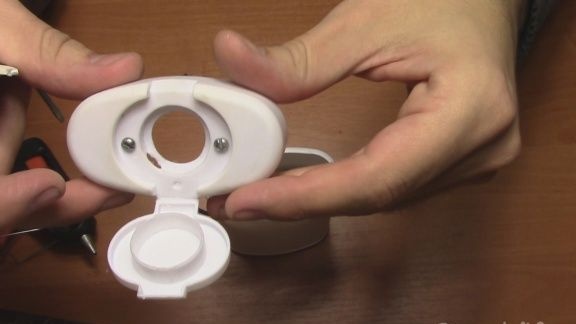
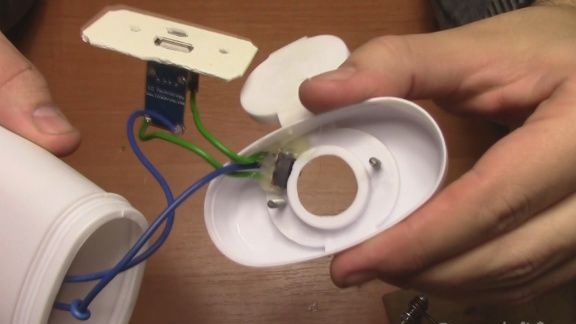
We fix the switch to thermo glue. The switch switches the plus from the batteries.
We have a common minus, it is blue. Plus goes to the switch, a green wire. In one position, plus the battery goes to the charge controller board. In this position, the power bank is in charge mode. In the second position, the wire goes to the boost converter. In this case, our device is charging from the power bank.
Everything is put together and ready to use.During charging through the matte case, the LEDs are clearly visible both during charging and during operation of the converter.
Detailed assembly instructions can, as always, be seen in the video: