

In this article we will consider one unusual type of generators that operate on water. It is water here that is the generator of the very energy that, after accumulation, forms a spark of several thousand volts. Unfortunately, the current strength is not high here, so such a generator is hardly suitable as a classic power source. But as various experiments, it can just be used without problems.
Everything is made from improvised materials, in particular from cans. The main problem here is very fine tuning, so it’s possible to make it work homemade not everyone will succeed. Understanding the principle of the generator, you can use better materials, thereby simplifying setup and increasing power.
Materials and tools for homemade:
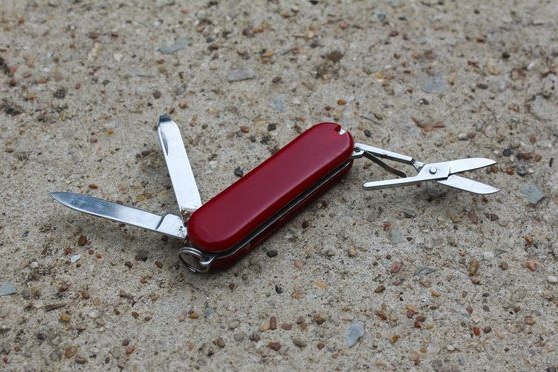
- Swiss knife (or other cutting tool);
- 4 cans of soup;
- a pair of steel hangers (or insulated wire);
- adhesive tape;
- a plastic container for water;
- a couple of boards and other junk.
Generator manufacturing process:
Step one. Making a reservoir for water collection
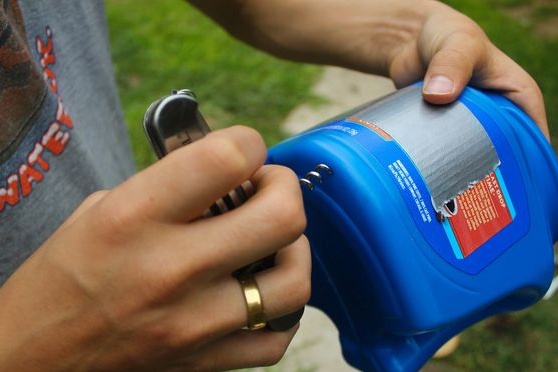
At the very top of the structure, a container is installed in which water is poured. This container can be made from a plastic container, canister and so on. The author makes two holes in the container. Water should run through them in a uniform flow.
The container is placed on the board, and the board is placed on top of two large cans of paint as a support.
Step Two Add inductors
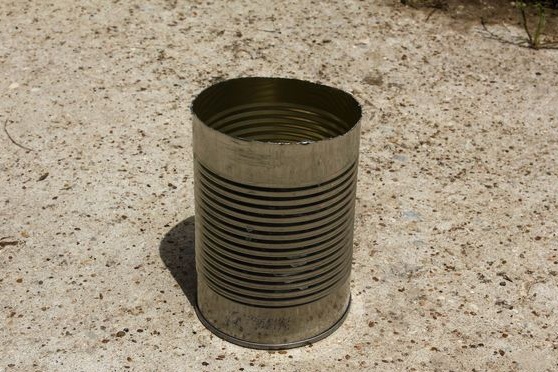
At this stage, it will be necessary to make and install inductors. These devices will generate and store energy. They can be made from cans, cans of coffee, drinks and so on. In total, four banks will be needed for such purposes.
In two banks, you will need to remove the bottom, as a stream of water will have to pass through them. Well, the other two banks are placed lower, there will be accumulated water flowing out.
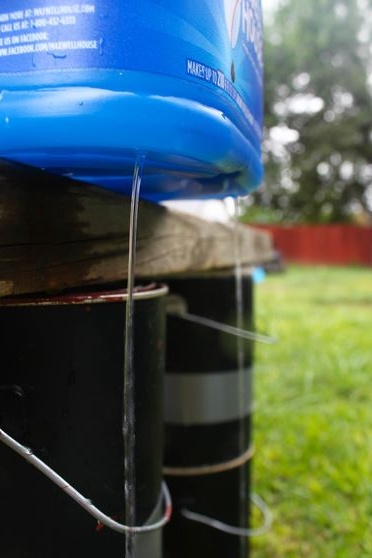
Further, the inductors can be installed, there should be two jokes under each stream of water.In order for everything to work, water must pass at a minimum distance from the surface of the can, but should not touch it. In this regard, it is very important that the water jet is uniform. If the spray is sprayed and has an insufficient length, then the holes in the upper vessel must be increased and smooth out irregularities.
Next, the author winds up two cans with adhesive tape to the base, and sets the other two to the very bottom of the structure.
Step Three Make wires
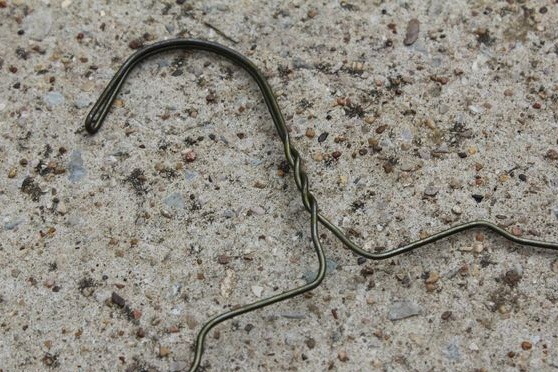
Since the author does everything from improvised materials, he decided to save on wires. As them, he decided to use metal hangers. To attach the cans, the hanger must be bent so that the kk is indicated in the photo.
Step Four We assemble an electric circuit
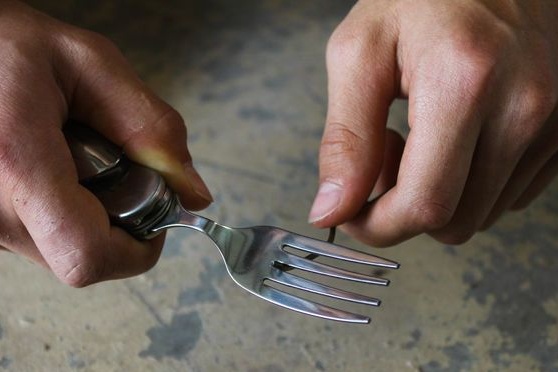
The electric circuit is connected "cross to cross". For convenient connection of wires at the ends of the wire you will need to make hooks. Since the author did not have pliers at hand, he decided to use a plug for these purposes.

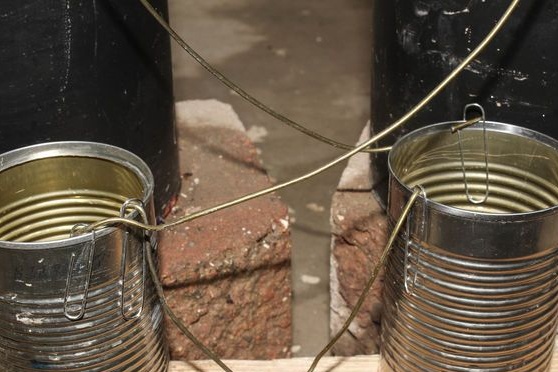
To fix the wires, the author used ordinary paper clips and scotch tape. First, the wires are fixed with staples, and then the staples can be glued with tape so that they do not move.
Step Five Spark wires and final assembly phase
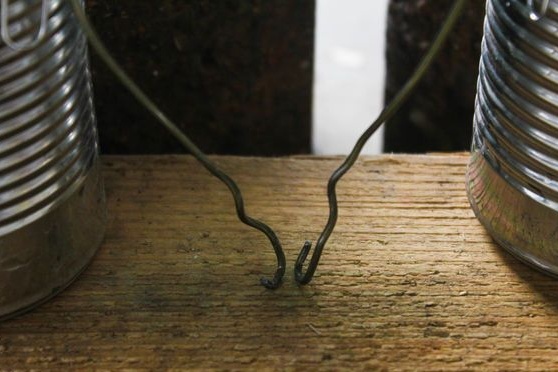
The author also makes spark wires from hangers. They need to be fastened with paper clips and tape, and a small gap between the opposite ends. Here, when the device is running, a spark will skip.
It is very important that the lower banks are dry and on a dry, non-conductive surface, otherwise nothing will work. The main difficulty here is to achieve dryness by working with water.
Step Six Testing homemade
Water is poured into the upper tank and after some time, caviar should slip between the contacts below. If it is not visible, then the gap between the water flow and the banks is too large, or the banks are grounded somewhere.
According to some other masters who also assembled similar cars, they managed to connect neon lamps to them and they easily glowed.