
If you want to make a truly inspirational lamp and do not know how, take a look at this project. Such homemade will always create a positive atmosphere in your home, regardless of the time of year. It is assembled very simply, consumes little energy, and for the manufacture it is necessary few materials and tools. You can make several similar fixtures and decorate a room with them, or even you can make one big in the form of a tree, there’s already someone who has enough imagination.
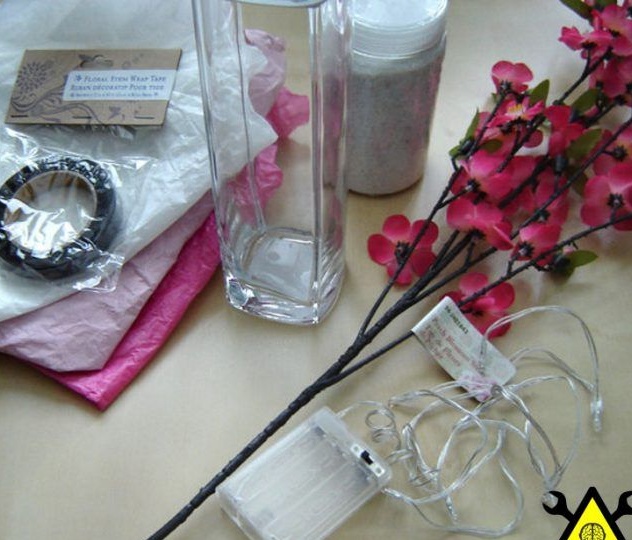
Materials and tools for homemade:
- a garland with white LEDs;
- tissue paper in white and pink;
- floral ribbon for wrapping (brown);
- dry branch;
- a vase that is not a pity to perforate to supply a power wire;
- small pebbles, sand or gravel;
- glue or glue stick PVA;
- flexible couplers;
- cutting disc / scissors.
We proceed to the assembly of the lamp:
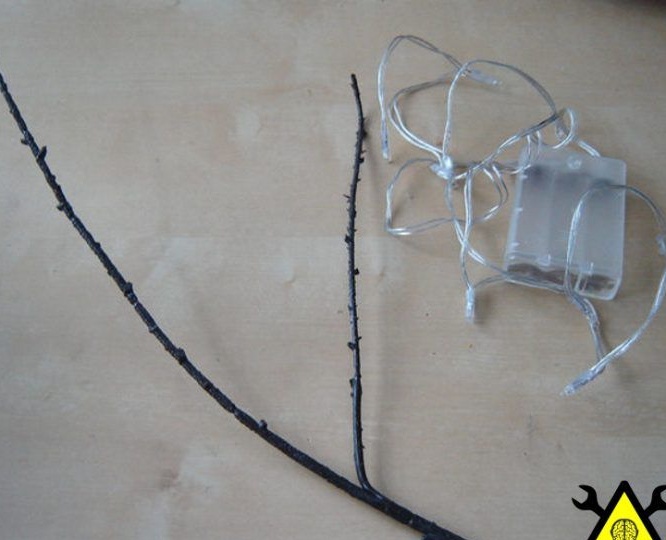
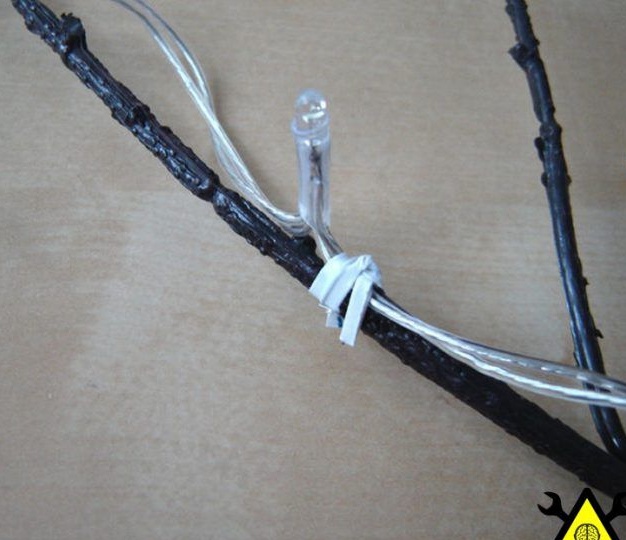
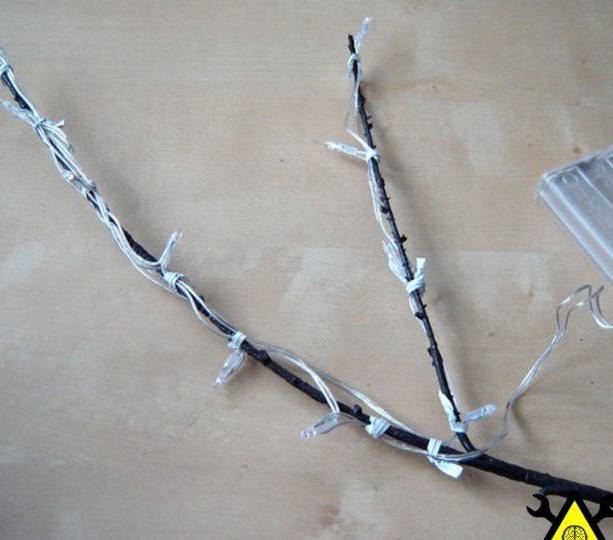
Step one. We mount a garland
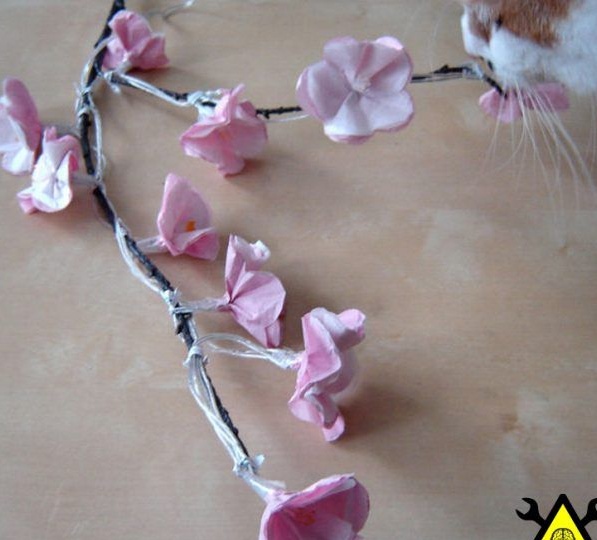
Self-assembly begins with the installation of LEDs on a branch. You need to start installing the garland from the bottom, fixing it with flexible ties. LEDs should be placed as evenly as possible throughout the branch.
Step Two Prepare Tissue Paper
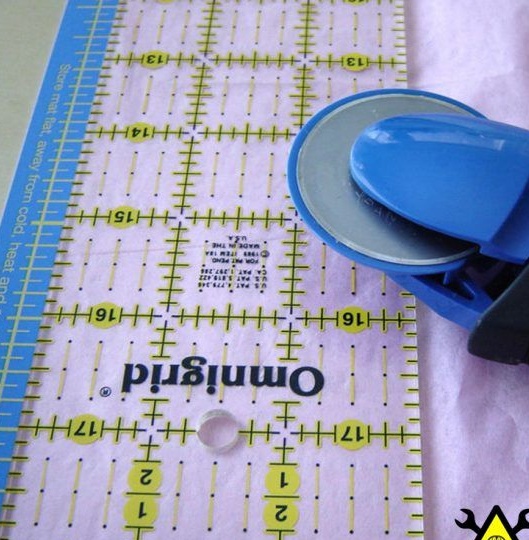
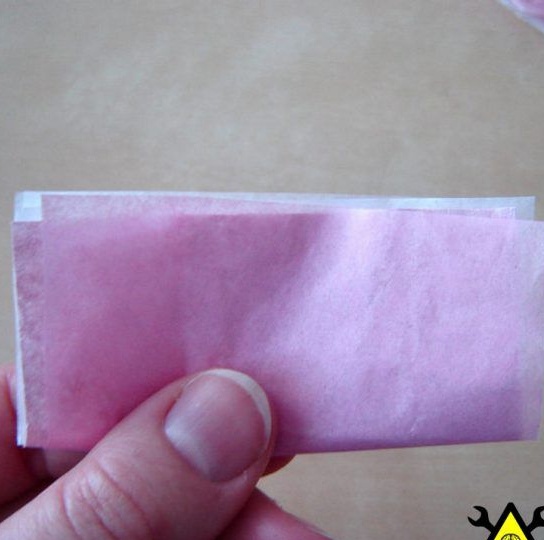
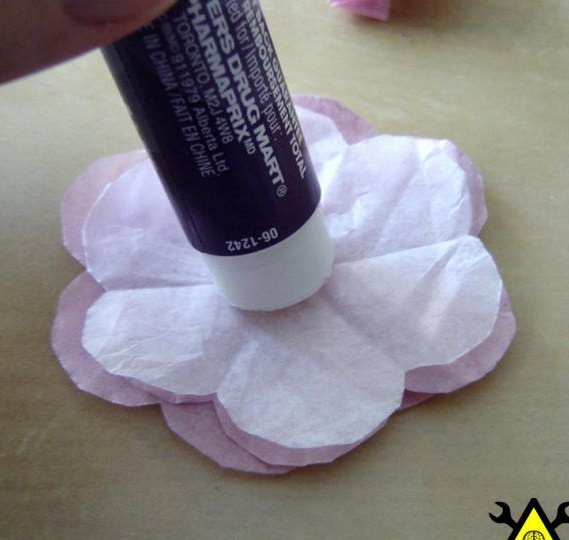
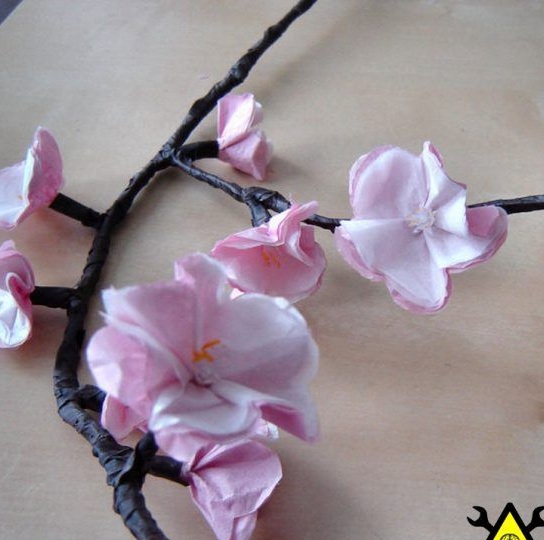
The author used tissue paper to make buds. In total, they are made of four layers of paper, two white and two pink. First, the paper is cut into squares measuring 7.5X7.5 cm.
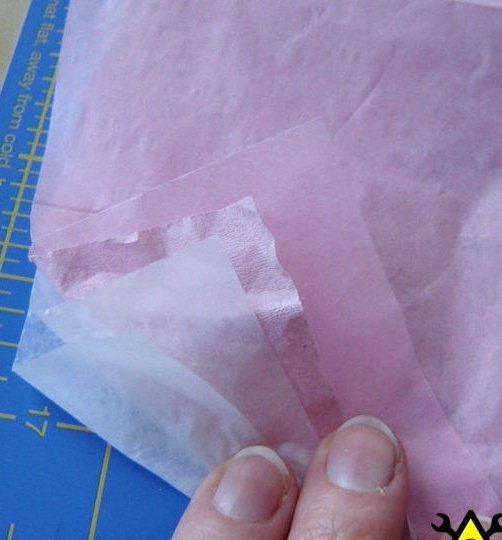
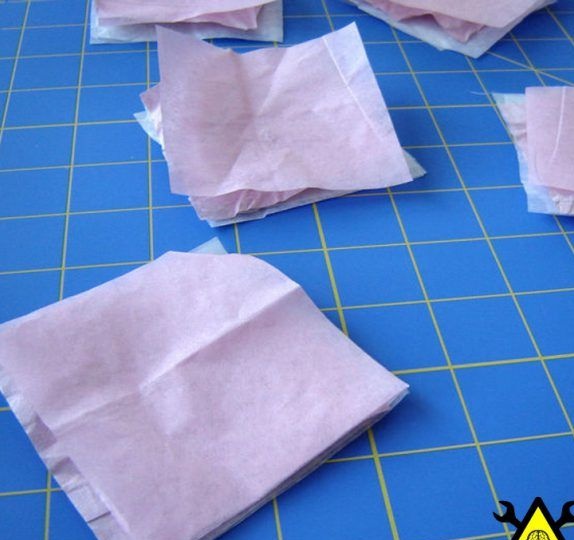
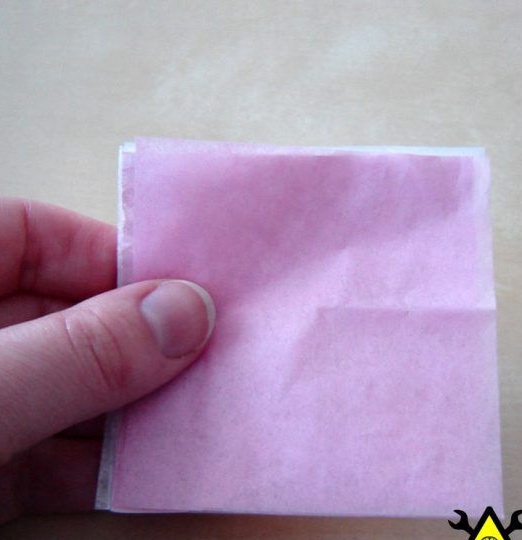
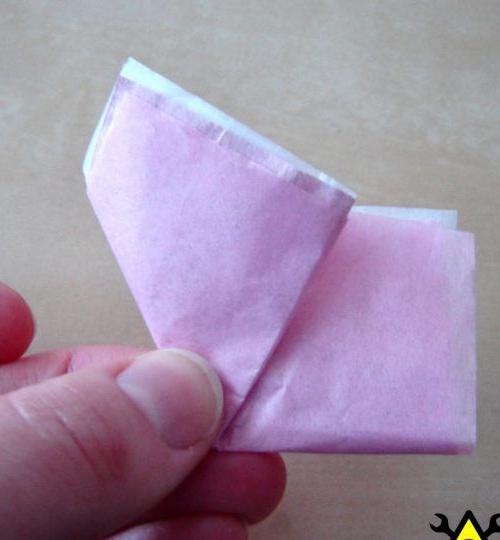
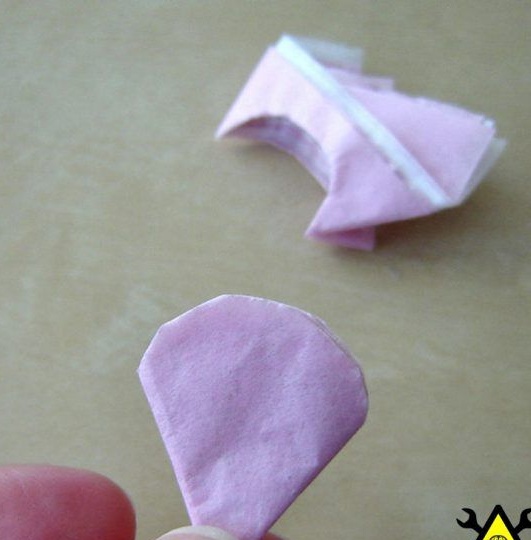
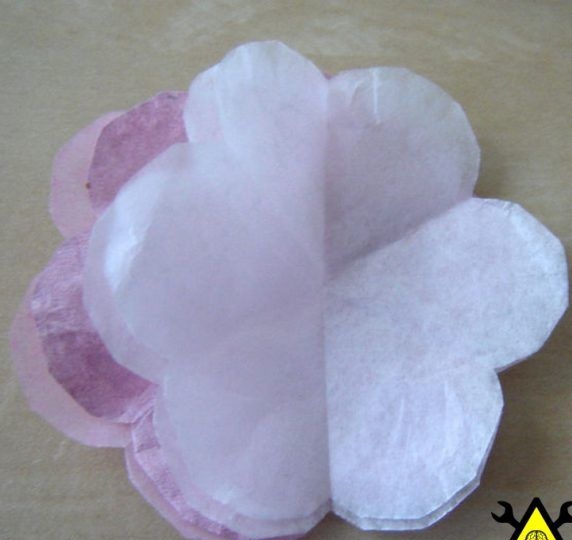
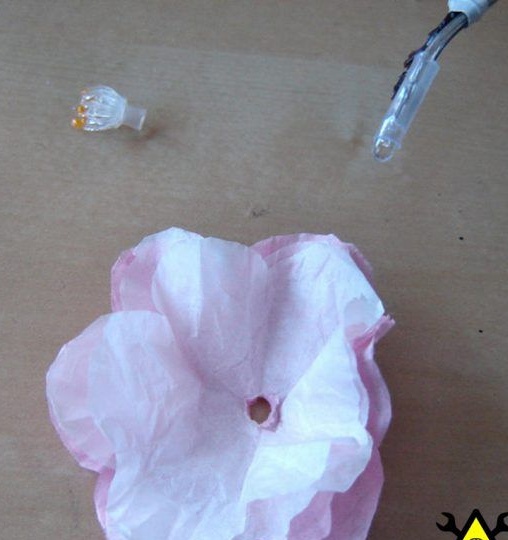
Now you can proceed directly to the manufacture of buds. Four squares of paper need to be put together. Then the rectangle collapses into a cone and the edges are aligned. Now you need scissors, they need to round the formed cone. In conclusion, four layers of paper stick together in the center. In the center of the bud a hole is made for the LED.


Step Three Installation of LEDs in the buds
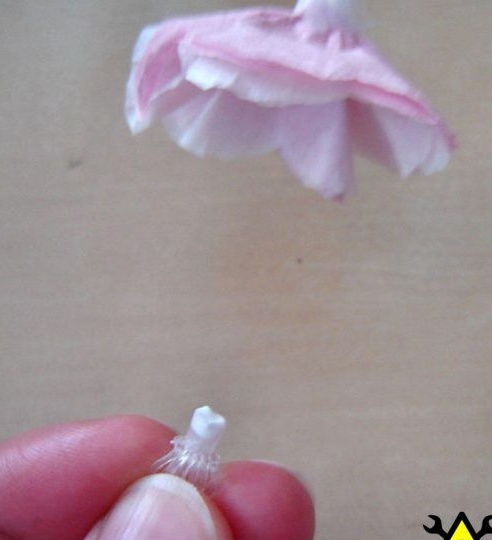
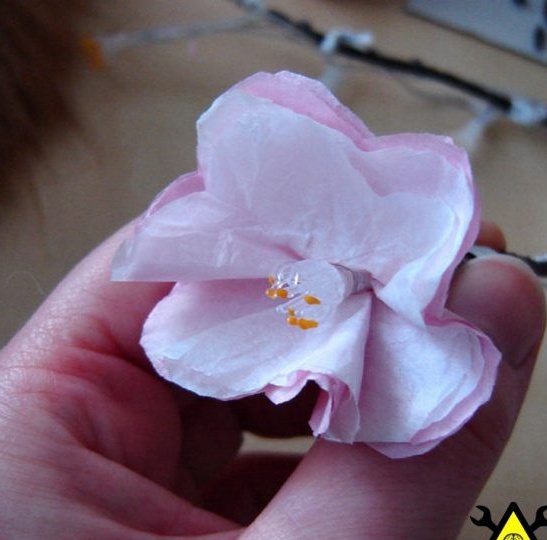
It is important for the luminaire that the LED diffuses light well. To do this, grind its surface with sandpaper or drip onto the glue lens. The author found at home a couple of artificial flowers, from which he extracted a core with stamens. This detail perfectly diffused the light of the LEDs and made the flowers much more realistic.

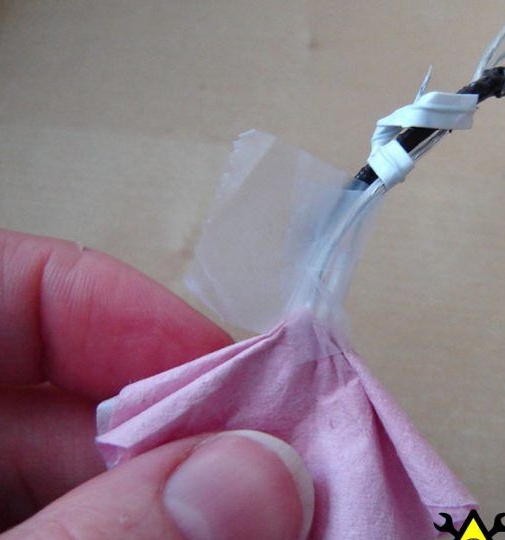
Step FourAttaching buds to a branch
The bud is attached to the branch with a transparent tape. Next, you can stick transparent stamens. To make the flowers realistic, after hardening the glue the edges need to be tattered a little.
Step Five Dressing
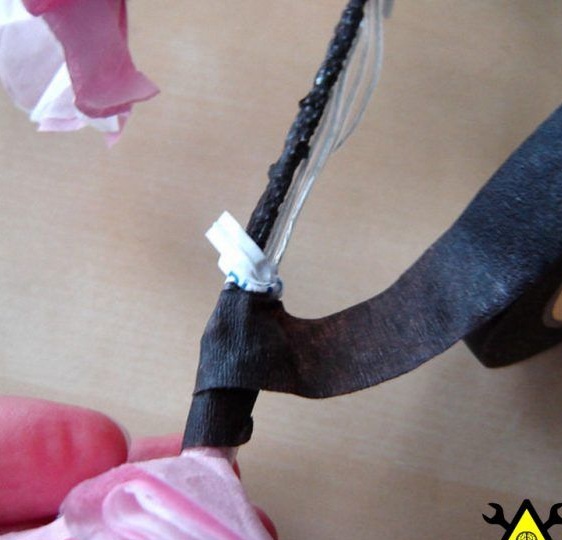
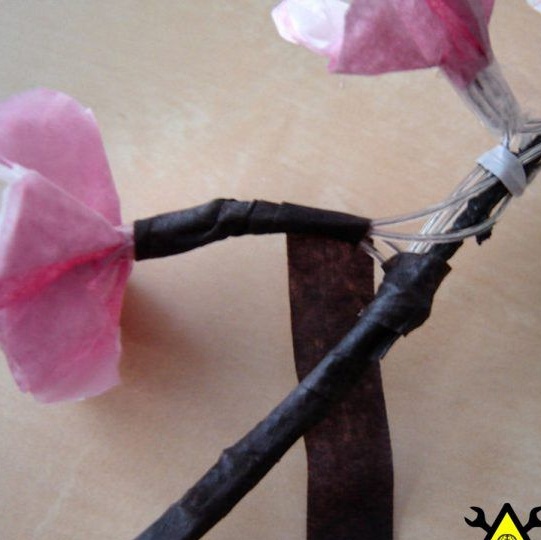
To hide the wires of the garland, you will need a floral ribbon in black. She needs to carefully wrap all the branches. You need to start this from the most extreme branches, gradually moving down. It is important to lay the garland well, but it is not too tight to wind the wires.
Final stage
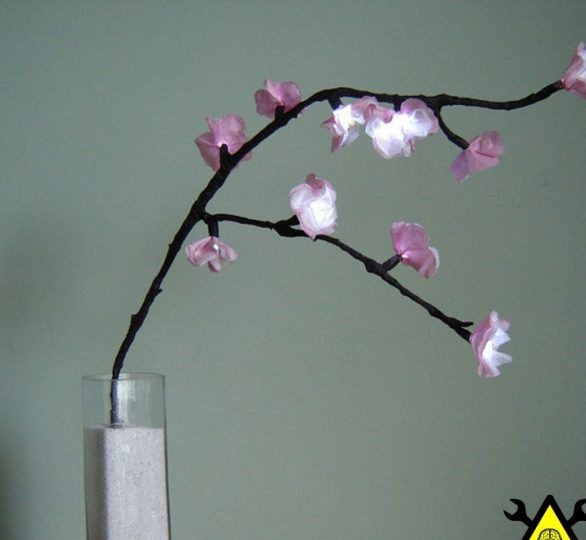
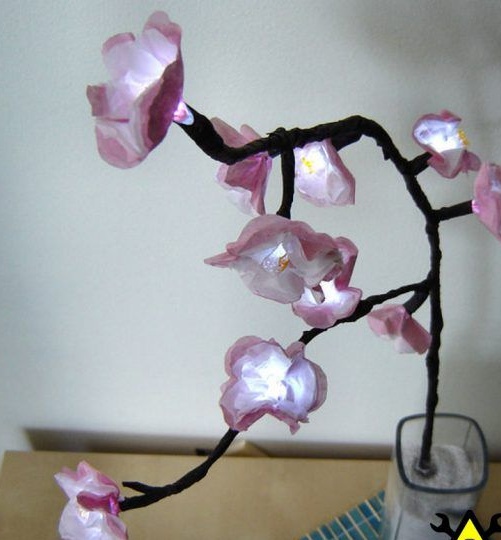
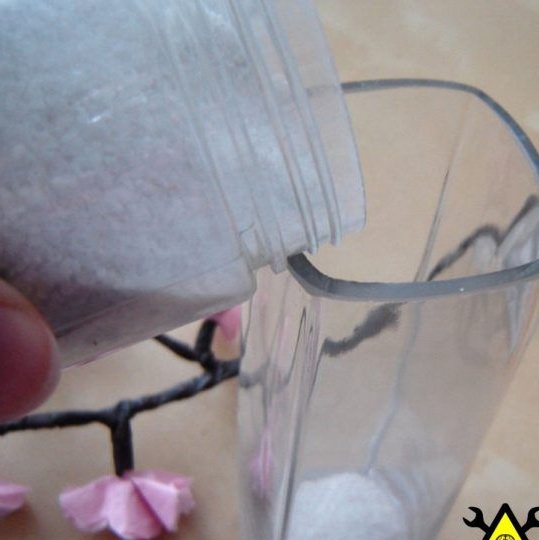
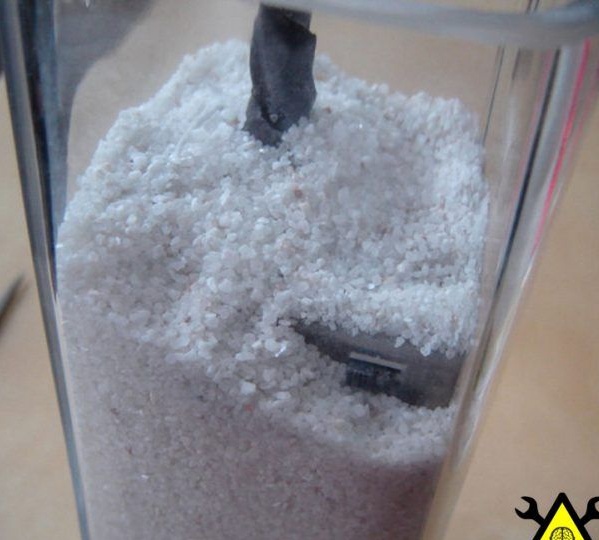
The final step will be to connect the garland to a power source and install it in a vase. If the garland works from the network, then in the vase it will be necessary to drill a hole in order to discreetly remove the wire. If the garland is powered by batteries, then the unit with them is installed in a vase and filled with small pebbles or sand. But with this approach, it will be necessary to change the batteries from time to time, which is not very nice. Well, a twig is also inserted in the sand or pebbles.
When using batteries, you still need to bring out the switch.
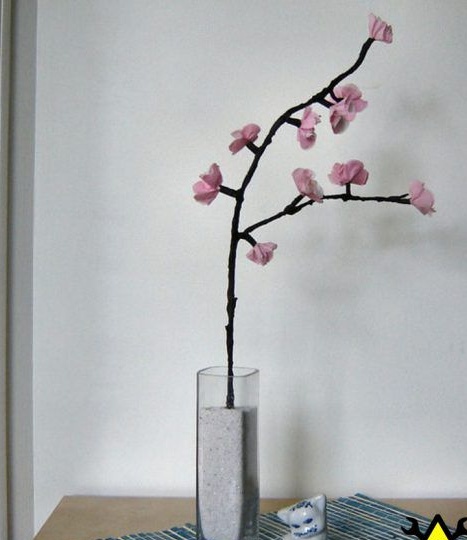
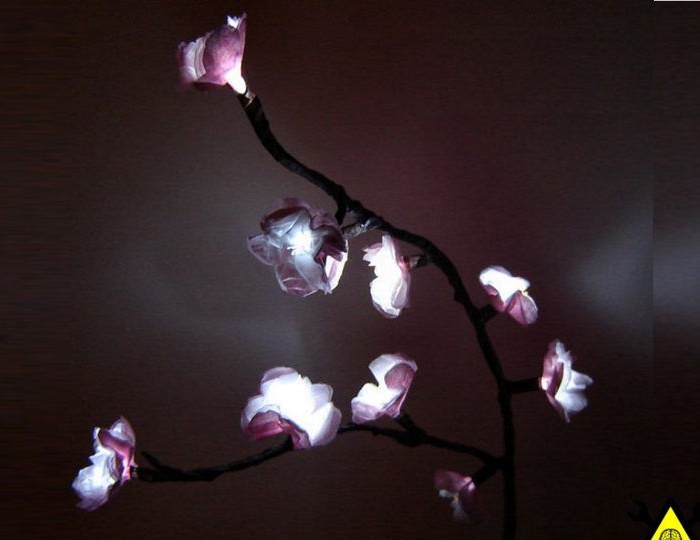
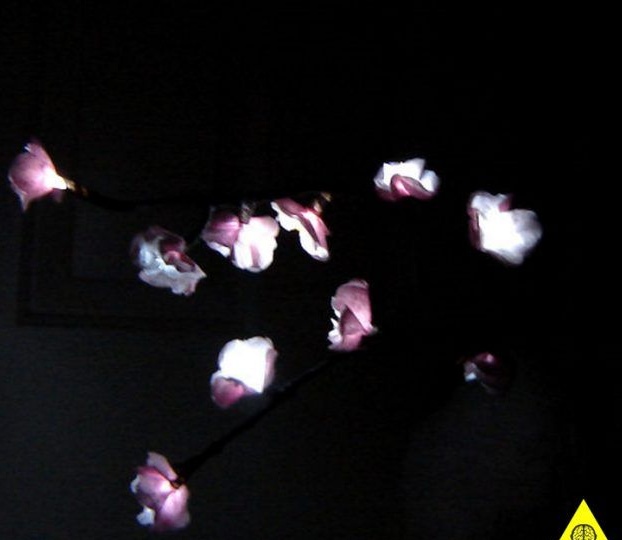
That's all, the lamp is ready. As can be noted, everything is going quickly, and its external image is impressive.