Modular furniture created for those who appreciate the dynamics and strive to change the world around them. It allows you to modify storage systems in the blink of an eye and turn them into the most convenient and comfortable designs. As a rule, all these are simple products that can be easily made. do it yourself in conditions home workshop.
The most popular items in the modular furniture section are, perhaps, all kinds of shelves and racks, designed to systematize all home trash and little things dear to the heart. They are used to store clothes, dishes, hygiene items, tools, souvenirs, books and all sorts of other things. Such furniture is extremely versatile.
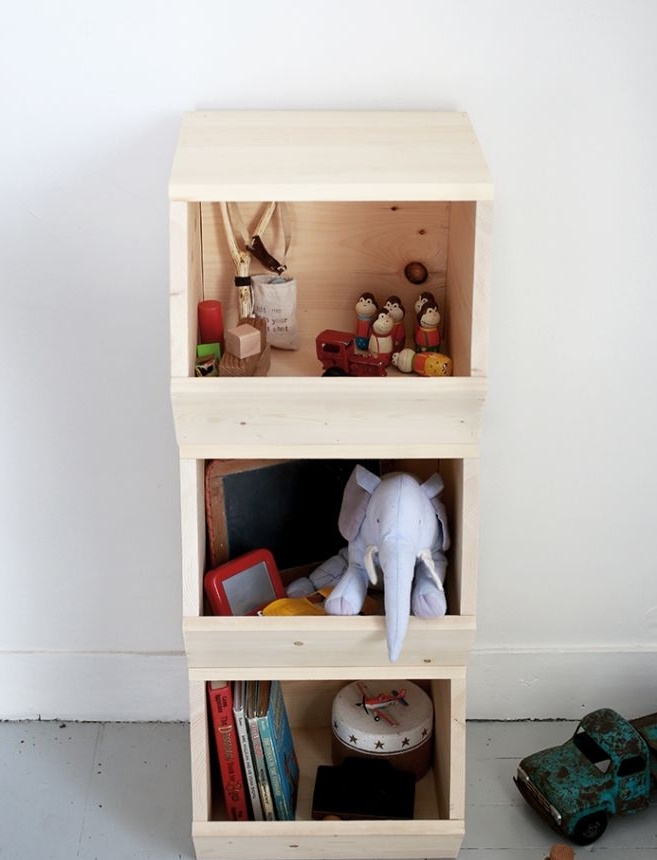
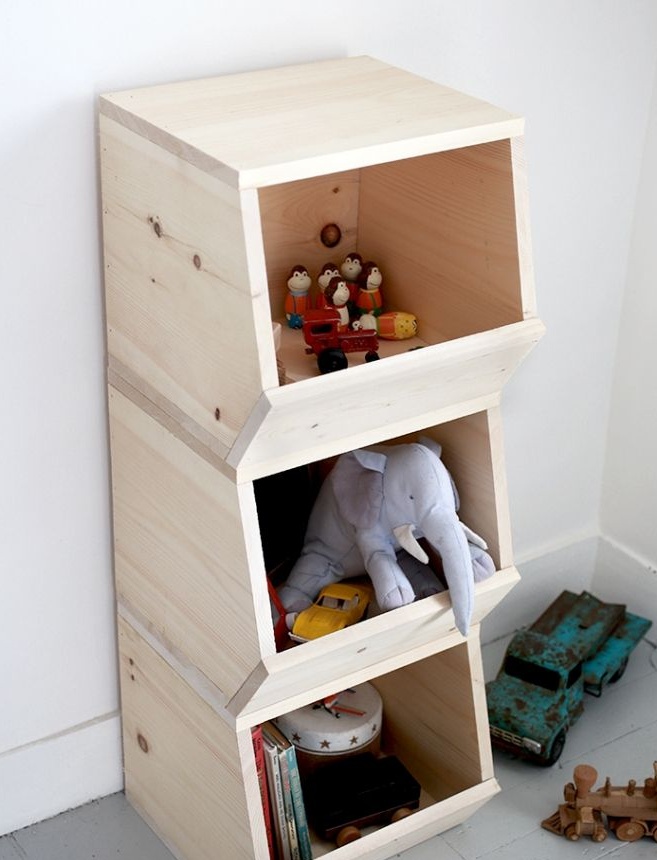
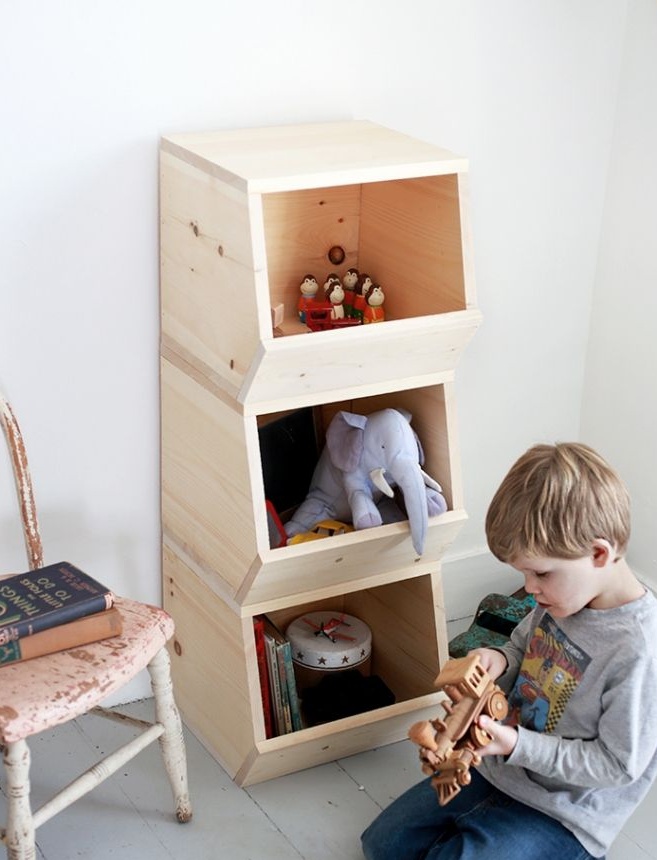
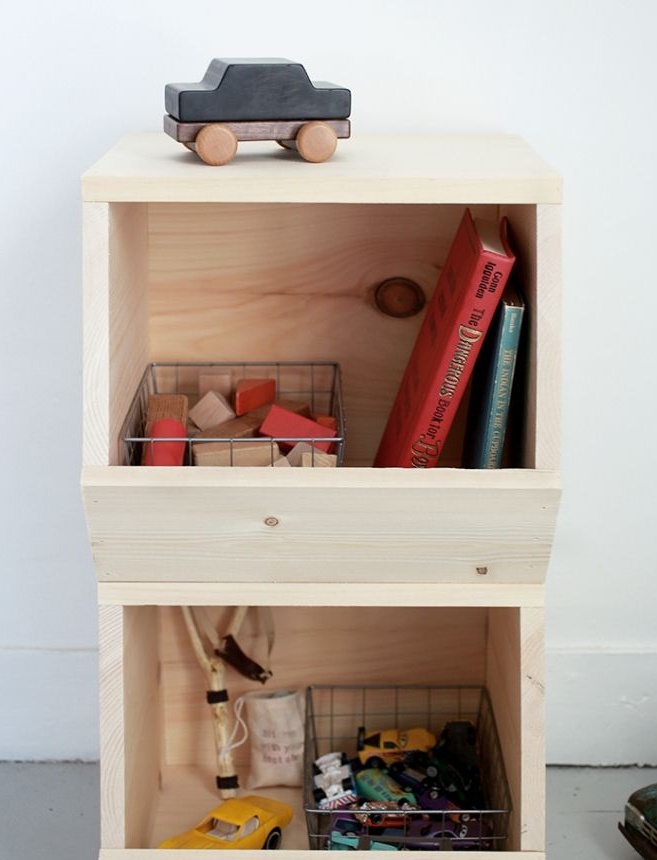
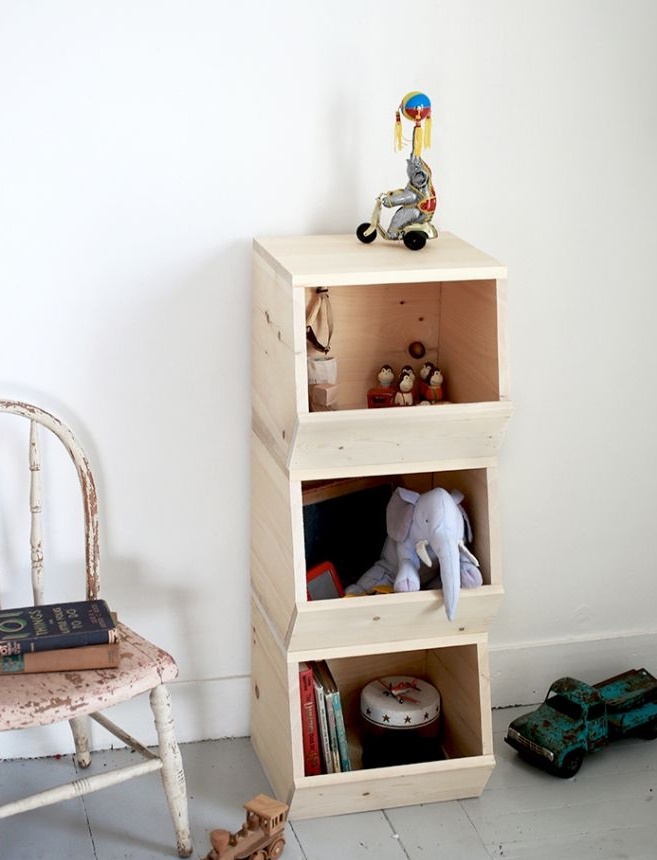
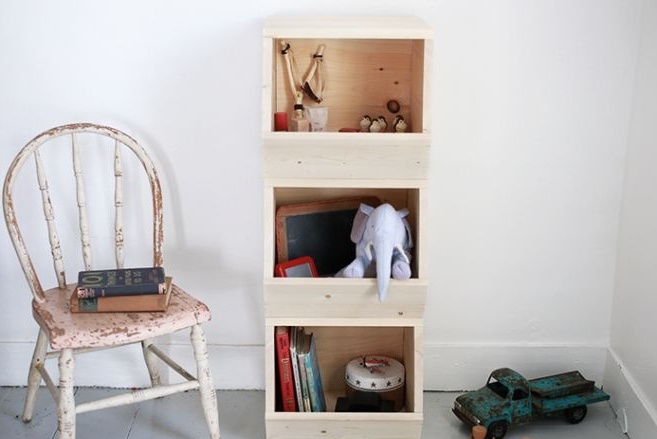
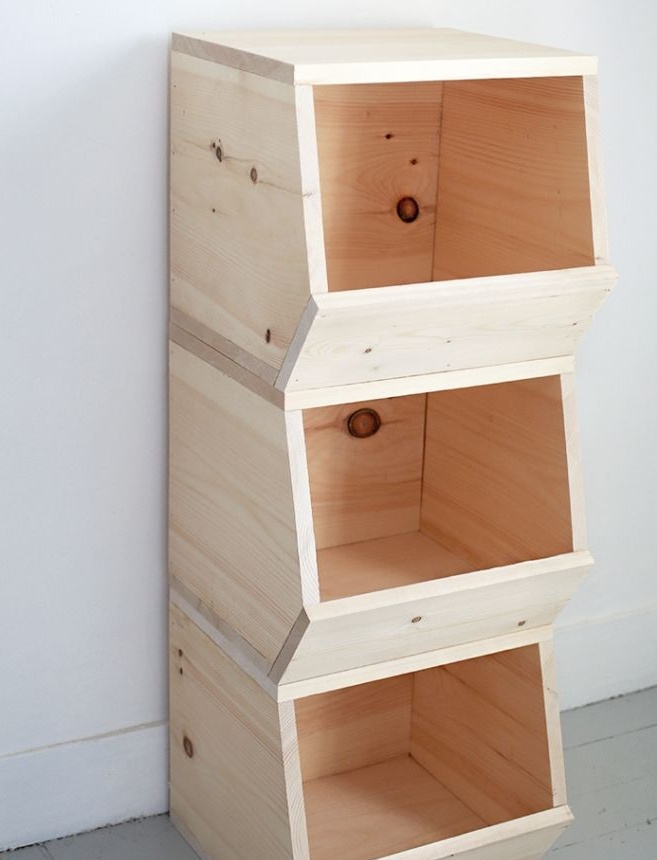
In this master class, the author suggests you make a simple mobile chest of drawers. It has an open design and, above all, is designed to store things that are not a sin to demonstrate to yourself and others. The author uses it in a nursery to keep toys in order. However, the dresser is indeed universal. With the same success, it is perfect for storing clothes, shoes and dishes.
It is also an excellent solution for those who have recently moved and have not yet managed to acquire new furniture. This modular shelving allows you to keep all your things in perfect order until better times. And in order to make it yourself you will need:
Materials:
- wide pine board or durable plywood;
- glue for woodwork;
- small nails;
- natural or mineral oil, drying oil or varnish.
Instruments:
- jigsaw or circular;
- grinder;
- electric drill;
- carpentry hammer or pneumatic nail gun;
- paint brushes or soft, lint-free cloth for oil wood processing;
- construction tape measure;
- square and ruler;
- paper or cardboard for the template;
- a pencil.
Step One: Decide on the Dimensions and Materials Used
The author essentially used natural wood to make a modular chest of drawers. The product was intended for the children's room in advance, so the choice of material from the tree began, the tree ended.
In order to follow her example, you will have to sweat a bit, because for work you will need very wide boards. On sale, they are not found as often as we would like. And this material is not too much in demand.It is better to use some types of wood in the form of boards of 10 - 12 cm so that they do not lead during the operation.
Since the design of the chest of drawers is frameless, you need to make one-piece parts. It will not be too easy to pick them up from boards of smaller width, and similar designs are significantly inferior in strength.
Therefore, in the absence of wide boards, use plywood. If you care about the environmental friendliness of the material, choose the plywood for the manufacture of which the manufacturer preferred adhesives based on natural ingredients. In the Western world, such plywood is especially popular.
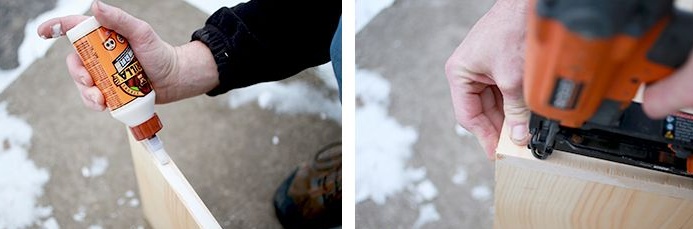
Use nails to make the chest of drawers look neat, because the screw caps will spoil the picture. However, you can use decorative plastic linings for screws and screws.
And so that the connection on the nails does not become worthless over time, use glue. It will add the necessary strength to the structure. Nails will help fix such an adhesive joint on the go and you don’t have to resort to clamps and wait until the glue hardens.
Determine the size of each chest of drawers and decide how many of these you will need to make. It all depends on the things you want to store here. If you plan to frequently rearrange the modules, consider their weight, otherwise it will become difficult to use the chest of drawers.
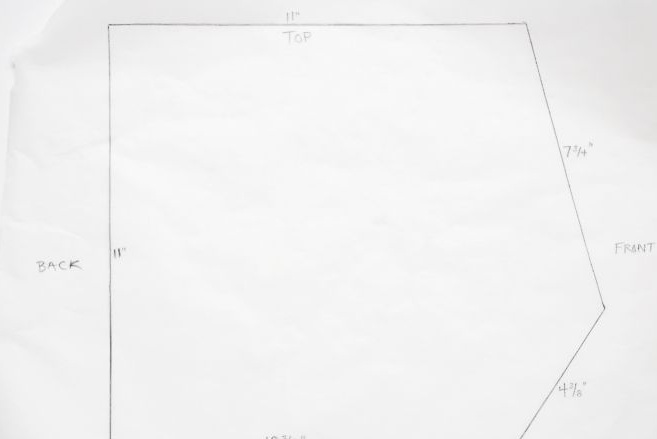
Step Two: Making Paper Templates and Dresser Parts
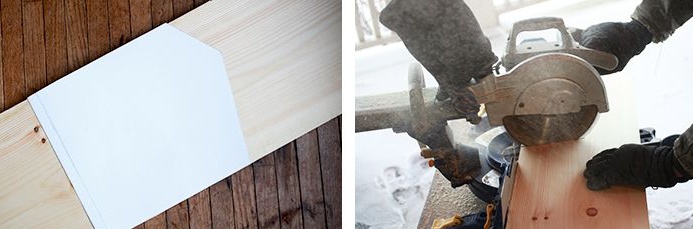
All chest of drawers are absolutely identical in size and have the same shape. And in order to make them so identical, spend a little time on the manufacture of paper patterns or patterns, as they are also called. For these purposes, you can use newspapers, plain office paper, stapled with tape or wrapping cardboard. The main thing is that all notes are visible.
Draw on paper every detail of the module. To ensure that the corners are even and straight or have a certain degree, use a building angle. Cut the paper parts thus obtained and transfer the drawing to the material. Arrange them so that after sawing you have as few scraps as possible. Circle the patterns and cut out the details of the required shape and size. To do this, you can use a jigsaw or a circular saw.
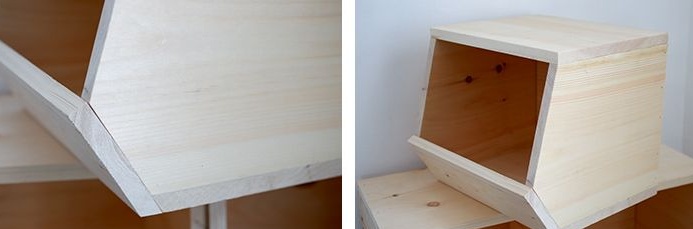
Please note that one of the longitudinal faces of the lower front panel, like the bottom itself, has an inclined slice. This is necessary so that the bottom of the module is flat. Such chamfers are removed on a milling machine. And sometimes boards with diagonal faces can be found in the construction supermarket.
Before you start assembling, make sure that the side of the parts that appears inside the module is well polished. It will be impossible to do this later. If the surface of the wood is uneven, sand it thoroughly.
Step Three: Build Modules
Assemble the chest of drawers using glue and nails. The author used a pneumatic nail gun instead of the good old hammer. A very necessary and convenient thing in the household, to be sure.
Put a little glue in the places where the parts come into contact, press them and fix with nails, fixing the connection. Remove excess adhesive immediately with a damp cloth. Wait until the glue has hardened well. Collect in this way all the modules.
Grind their outer surface carefully so that the parts merge into one single structure. Pay special attention to the edges of the product.
Step Four: Dresser Wood Processing
Natural wood is a very, very vulnerable material. Especially when it comes to the operation of natural wood furniture. The wood is porous, which means that moisture and dirt easily penetrate into its upper layer or settle on the surface. Also, the tree is subject to mechanical damage.The less dense a tree species you have chosen - the more relevant this statement. Therefore, natural wood needs proper protection.
The author intended to use only those materials for wood processing that preserve her natural shade and texture. However, even this list is very rich. You can choose natural or mineral oils, as well as drying oil or varnish. All of them in no way alter the appearance of wood, but only emphasize its natural shade.
The most suitable natural oil for processing wooden products is linseed. It evaporates from the surface of the products without creating a greasy film and forming a thin moisture-proof coating. Typically, linseed oil is applied in several layers while it is able to be absorbed. To facilitate the task, the oil is heated. However, be careful with this, as it tends to ignite at too high temperatures. Heating up to 60-80aboutC will be enough.
Previously, so that the greatest possible amount of oil penetrated as deep as possible, masters mixed it with a solvent. The working algorithm is not simple enough: as soon as the oil ceases to penetrate deep into the wood, 25% of the solvent (of the volume of the oil itself) should be added. With each new layer, the amount of solvent in relation to the oil is gradually increased. You can also add some natural wax or paraffin to the top coat of oil and solvent.
Processing with mineral oils and their mixtures is not much different from the technology described above. The same applies to drying oil, because it just consists of oils.
Varnishing wooden furniture is, of course, a more reliable way to protect it from adverse effects. Choose matte varnishes if you want to achieve the most natural effect. In addition, pay attention to the fact that the varnish has a sufficiently strong and resistant coating. Furniture lacquers have similar properties. Polyurethane and nitro-lacquers are also suitable - for lack of others.