In the old days of furniture business, masters perfectly mastered the techniques that allowed them to assemble furniture without a single nail. As a rule, they used glue in the process. Yes, and cooked it right there, within the walls of his workshop.
Such furniture, contrary to modern ideas, was very strong and served people for decades. In extreme cases, if a breakdown occurs, the same master dismantled the product, cleaned the old glue and updated the glue connection, after which the furniture continued to delight its owner.
Even in our time, all the simple secrets about how do it yourself make furniture without a single nail, still not lost, but accessible to everyone. True, detailed projects on the topic on the network are not enough.
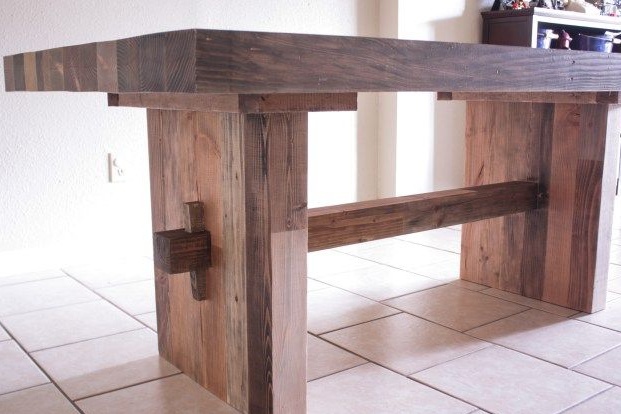
The author of this workshop will tell you how to assemble a dining table out of timber using only wood glue. Out of habit, in some areas, he still used self-tapping screws, but doing without them is not difficult. And having done this, you will get the valuable, already long-forgotten experience of our ancestors.
The author will also tell you in detail how he tones and structures a natural tree in home conditions. This dining table has become for him a kind of testing ground. That is why he decided to share his interesting experience.
In order to assemble the table without using nails and screws, you will need:
Materials:
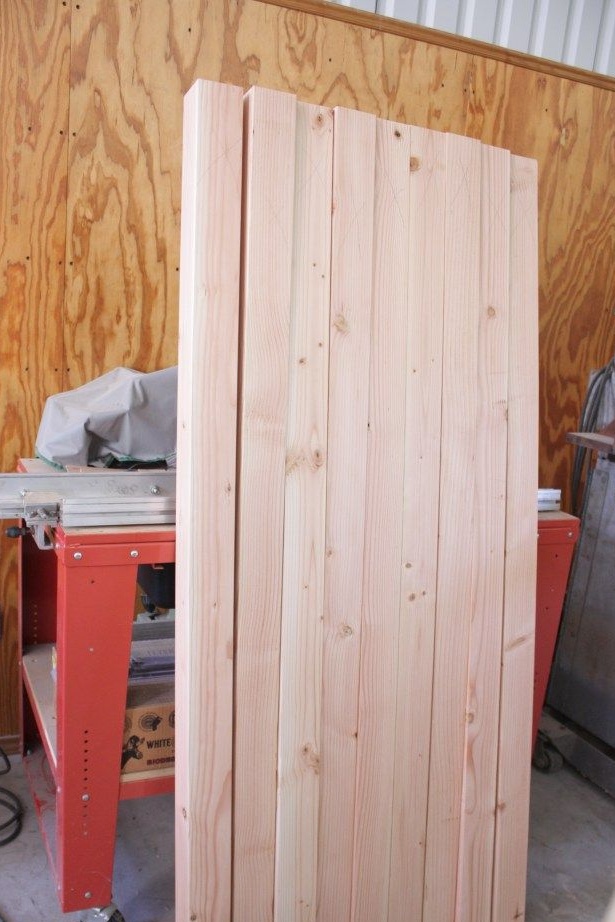
- natural timber of any kind of wood with which you are accustomed to work with a section of 50-60 mm;
- proven glue for woodwork;
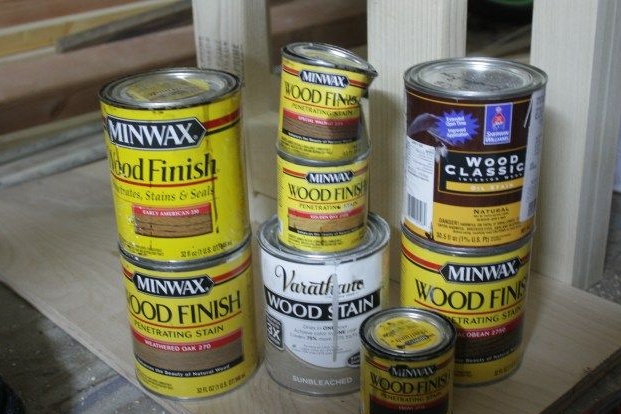
- protective and decorative toner oils in suitable shades (can be replaced with an alcohol-based stain);
- polyurethane varnish on wood;
- screws, nails or wooden spikes for fixing grooves under the table legs.
Instruments:
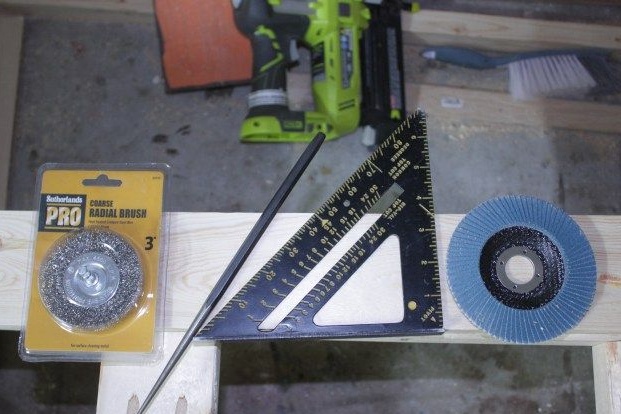
- orbital sander with wire, grinding blade and flat nozzle for grinding natural wood;
- a screwdriver or a Phillips screwdriver. if you use screws;
- carpentry hammer, if you use nails in the process;
- bit;
- a drilling machine, router or a hand drill for the manufacture of grooves;
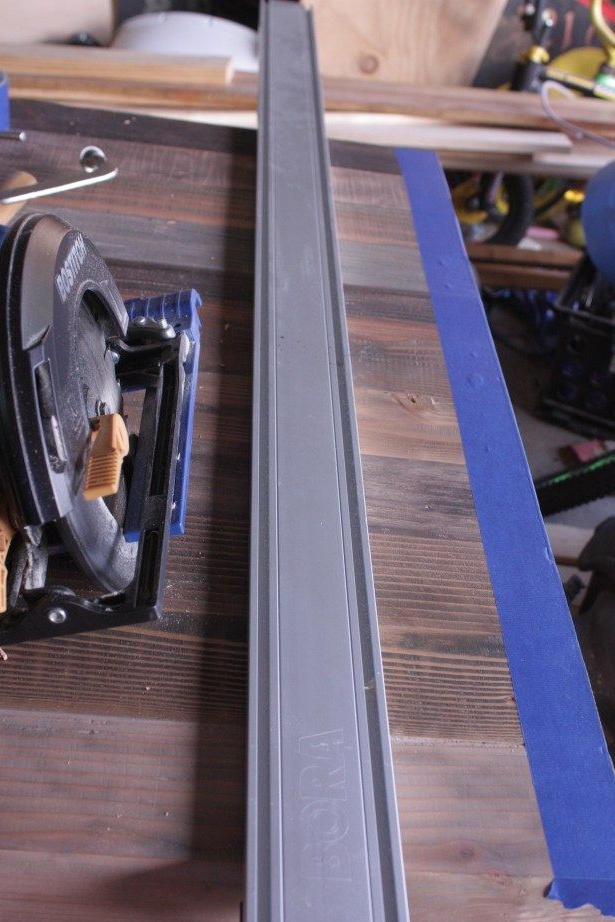
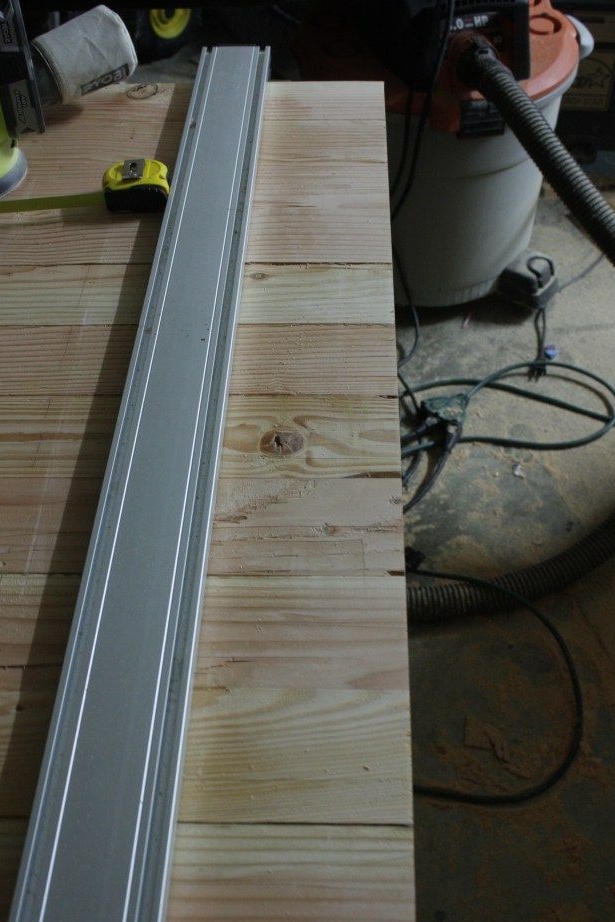
- miter saw, circular or hacksaw on wood;
- sandpaper: coarse and fine-grained;
- clamps;
- a paint brush for stain or a soft, lint-free cloth for protective and decorative oil, as well as a brush for varnish;
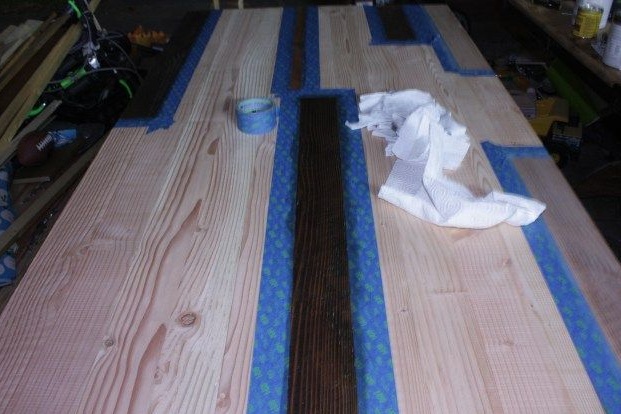
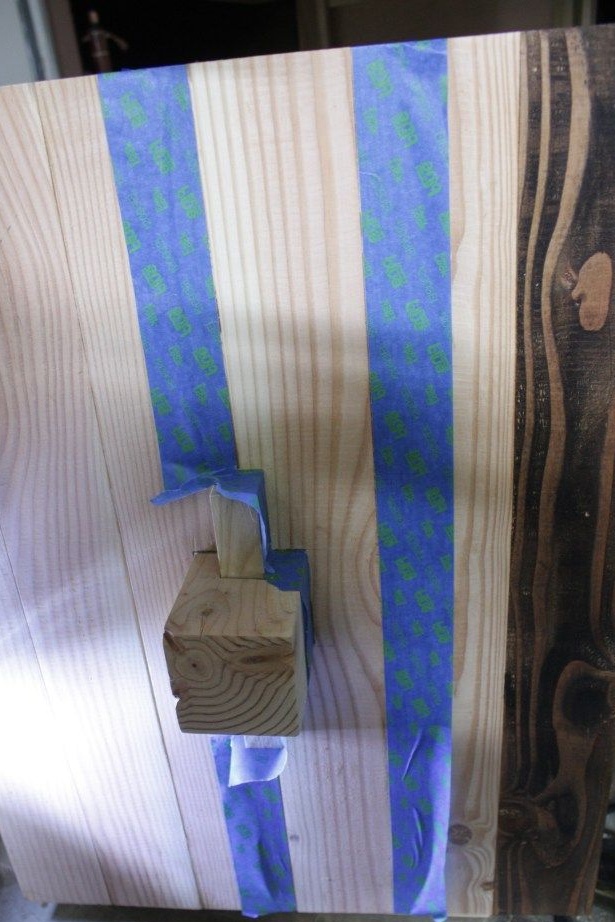
- masking tape.
Step One: Choosing Materials and Tools
First, decide which tools you will use in the process.If anything, this project allows you to train skills in working with hand tools, such as a planer, jointer, chisel, hand drill and a number of others.
The same applies to protective and decorative wood processing. You can use purchased branded wood tinting oils or alcohol-based stains. Both that and another will allow you to receive remarkable results, and you will definitely be satisfied.
But you can do otherwise - to make butter with your own hands from natural ingredients. Water and alcohol stains can also be done on their own. This process is very, very interesting.
If you plan to use hand tools, choose wood that is more malleable for processing species, such as pine. If you have a modern carpentry workshop at your disposal - feel free to use wear-resistant ash, acacia, maple or oak. Hardwood can be arranged in order to get a richer texture at the exit.
And finally, glue. The market has a wide selection of modern adhesive compositions, and choosing the right one is easy. But you can even make glue yourself. Do not forget about it.
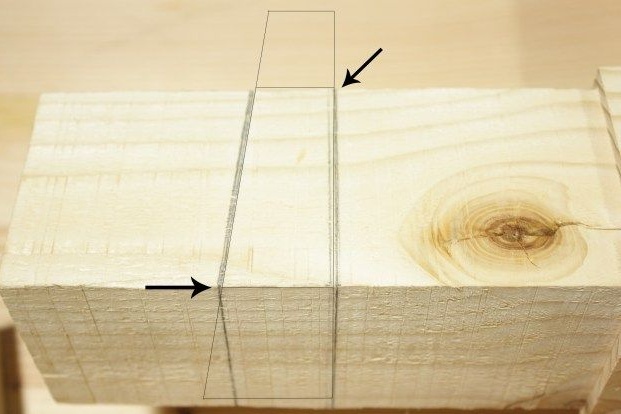
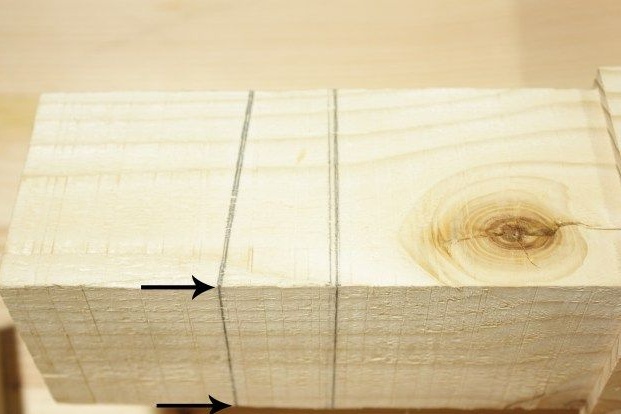
Step two: determine the dimensions, markup and cut the beam
Carefully calculate the size of your future dining table and each of its details separately. For the manufacture of countertops, you can use the bars along the length of the countertop itself, as well as short segments. After gluing, the use of small parts will not affect its strength in any way, if you are confident in the quality of your glue.
The table is assembled from a timber fitted to one size, so it is convenient to work with such material. You need to make sure that the beam is planed on the thicknesser and has the same section. Otherwise, plan using planers or hand tools such as a planer and jointer.
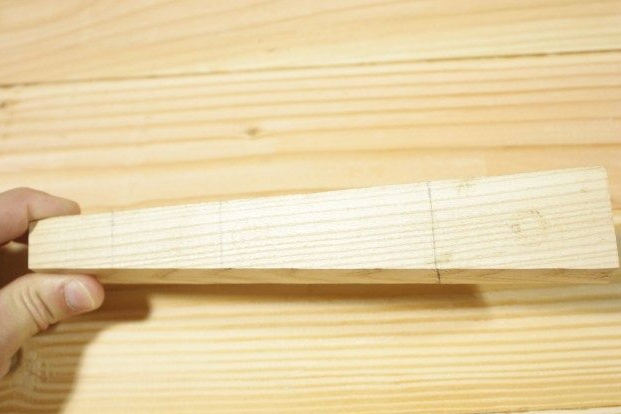
Mark out the details and saw the timber to a predetermined size. You can use an ordinary hand saw in wood or, for example, a miter saw - the only difference is the time that you will need to process the parts.
If you do not plan to use metal consumables to connect the parts, prepare and try the wooden pins in advance. They can be made using a sharp knife. The main thing is that they all have the same size - for the diameter of your drill. In the process of joining parts, the pins, evenly coated with glue, are placed in the fitted hole, resembling the connection by means of nails.
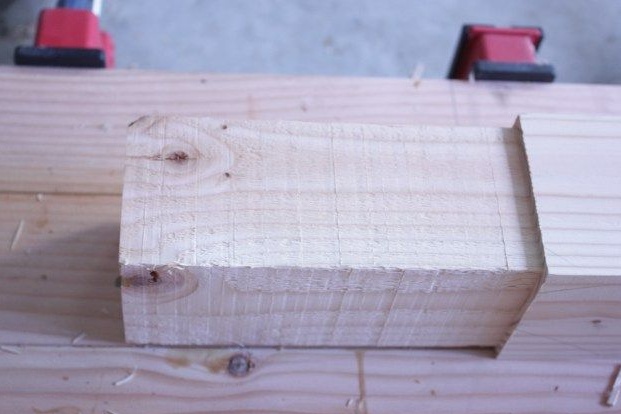
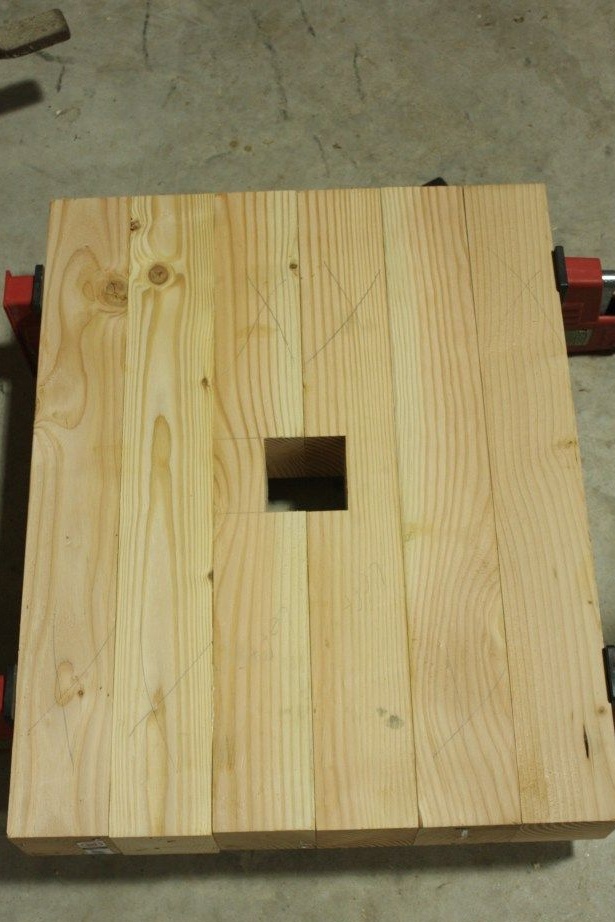
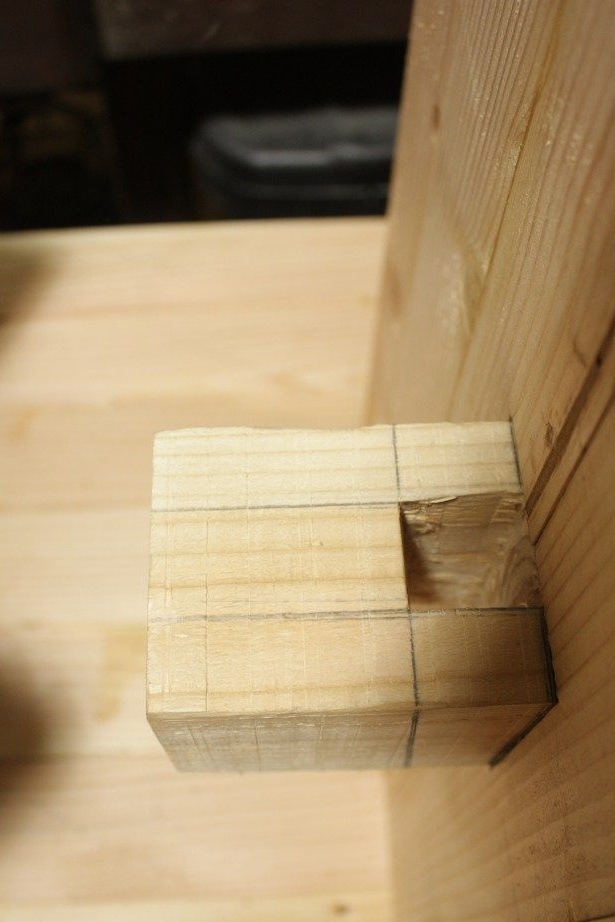
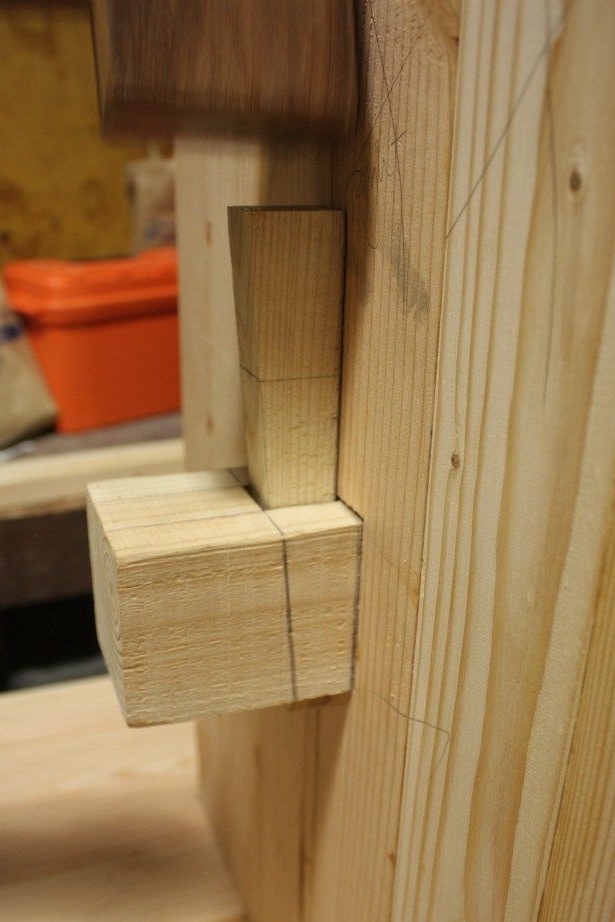
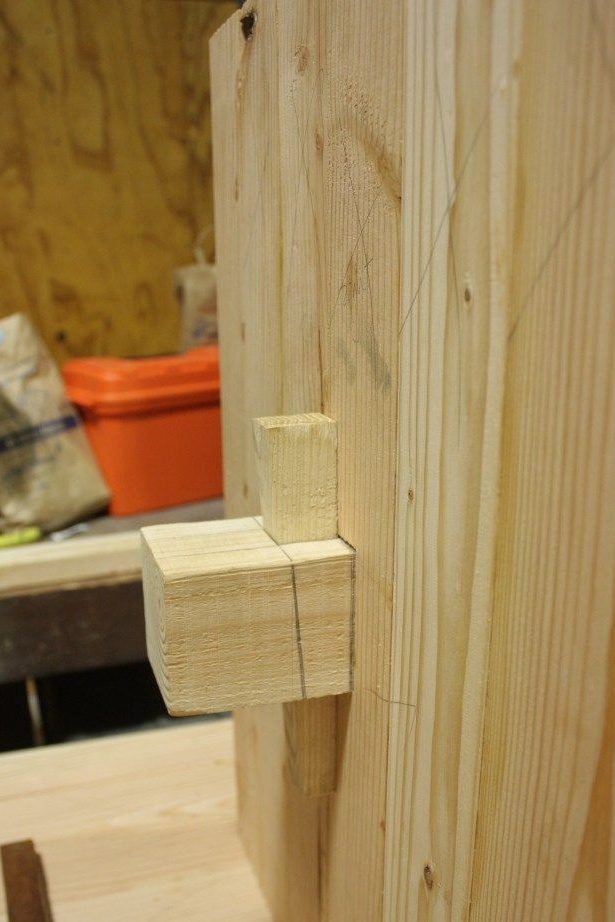
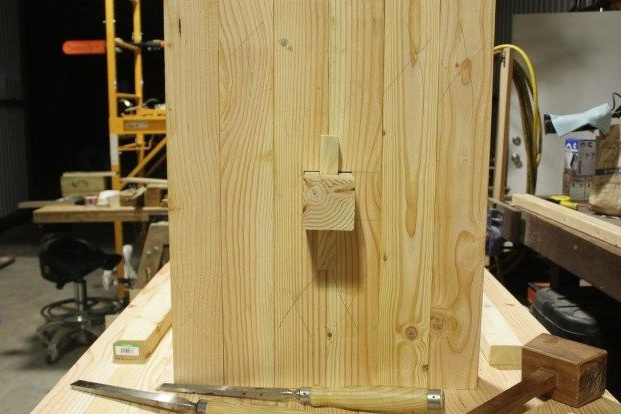
Prepare the bottom jumper of the table. You need to remove the excess so that it freely enters the hole made in the legs and is fixed there with a wooden lock. You will also need a wooden lock itself in the amount of a pair of pieces.
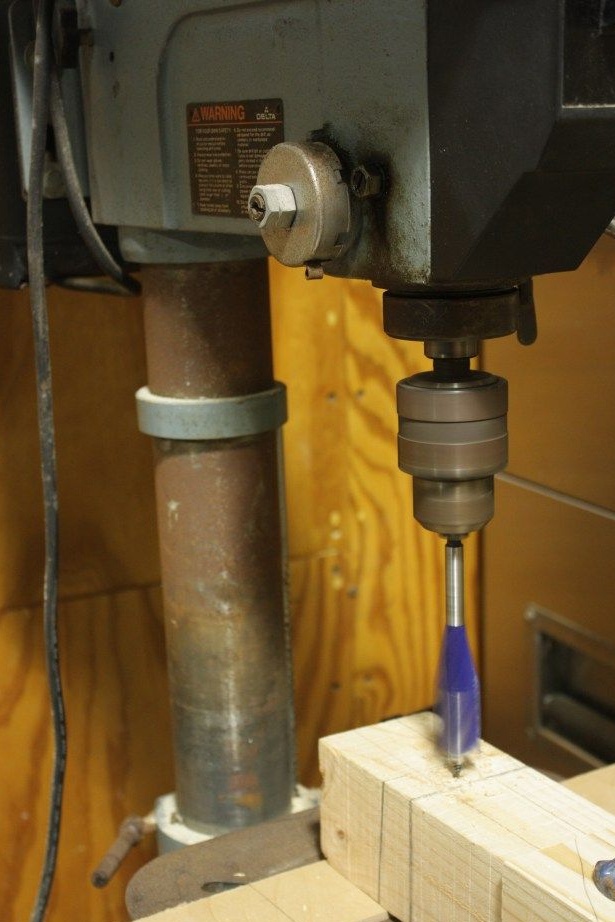
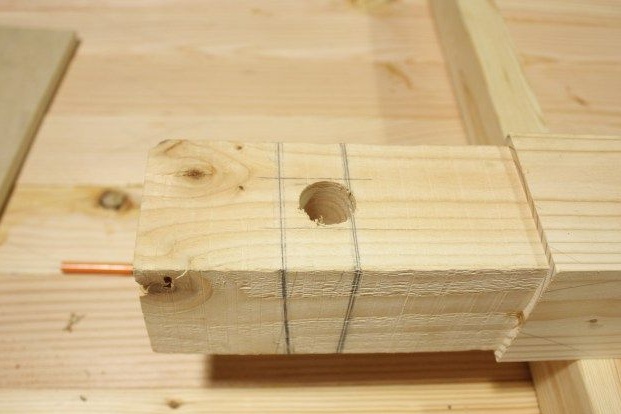
In the two central bars of the legs, make holes for the lower jumper as shown in the photo. You can use any tool that is familiar to you for cutting segments, and after that - remove excess with a chisel and hammer. Grind the walls of the hole and adjust it so that the jumper freely but tightly fits in the groove.


Step Three: Assembling the Table
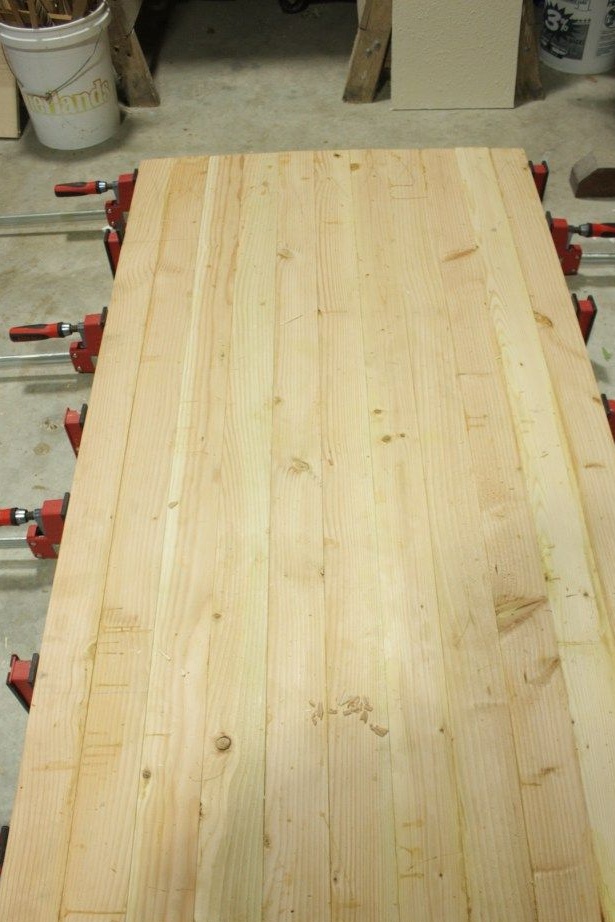
Glue the countertop first. Apply glue evenly on the edge of the parts, assemble from as planned and place in clamps until the glue hardens. Remove it with excess. So, it will be easier for you to grind the workpiece under the countertop.
In the same way, glue the panel of the legs with the central groove under the lower jumper. Be sure to use clamps. They will allow you to make an adhesive joint already, and the workpiece will turn into a solid monolith and will be much less prone to cracking.
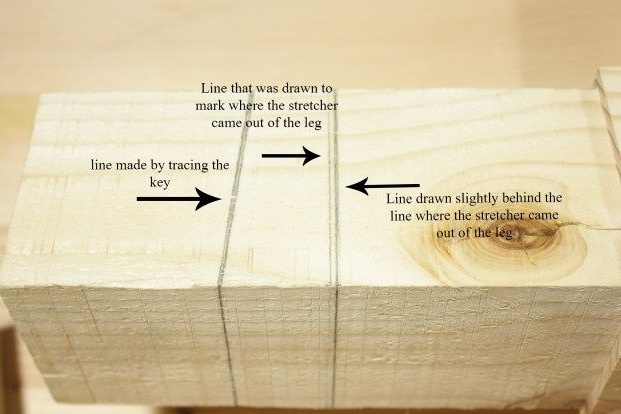
After the glued panels have dried thoroughly, align their edges using a circular or hacksaw. In the second case, pay particular attention to the markup. Use the square in order to draw a strictly perpendicular line, as well as the construction level.
Make a hole under the wooden lock on the bottom jumper of the table. The author used a drilling machine and a wood milling cutter for this. Align the walls of the groove with a chisel and carefully grind them, fitting them to the shape of the castle.
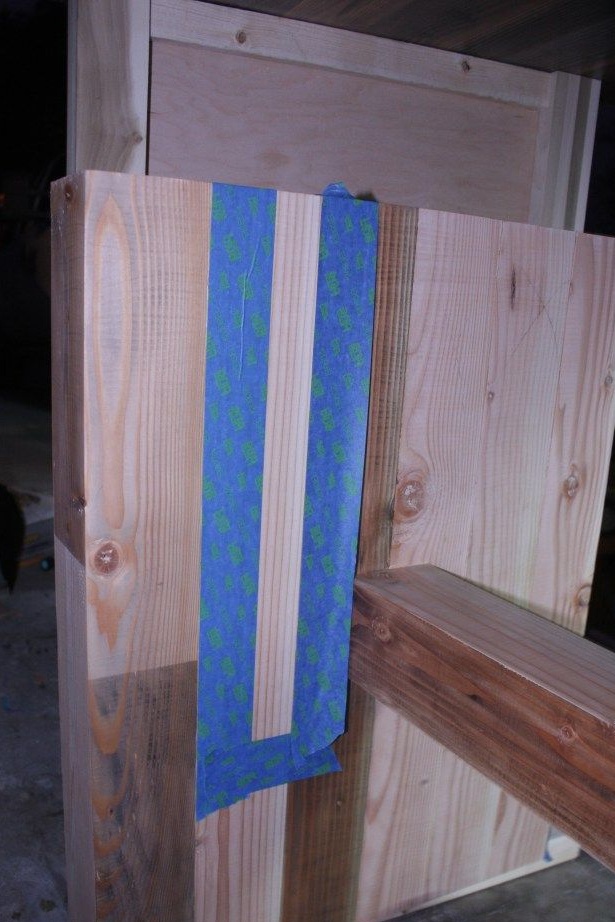
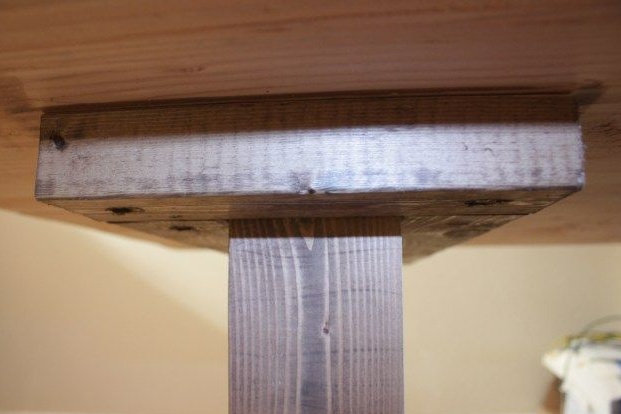
Finally, fix the slats, which play the role of grooves for the legs of the table, on the back of the countertop. The author used self-tapping screws for this, you can use wooden pins, nails or follow his example.
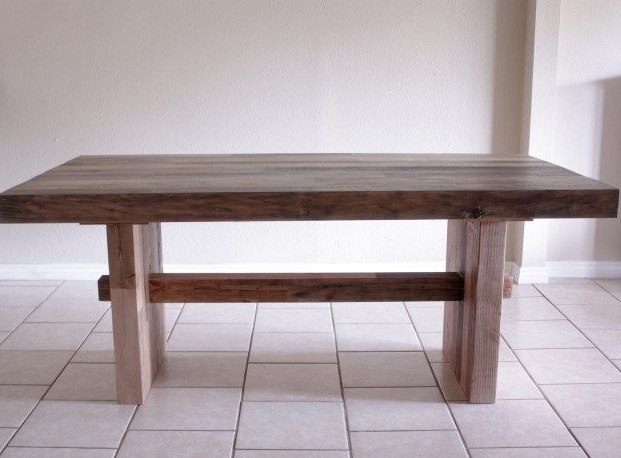
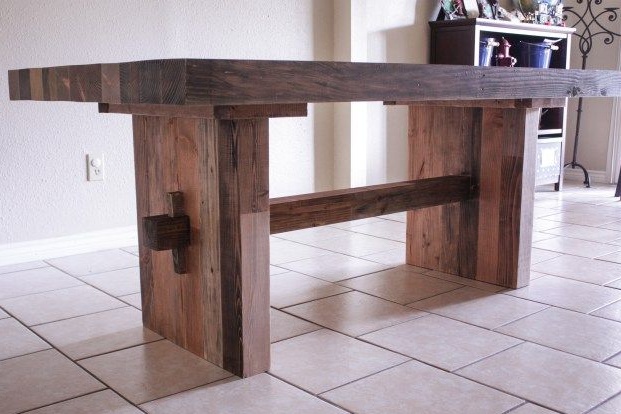
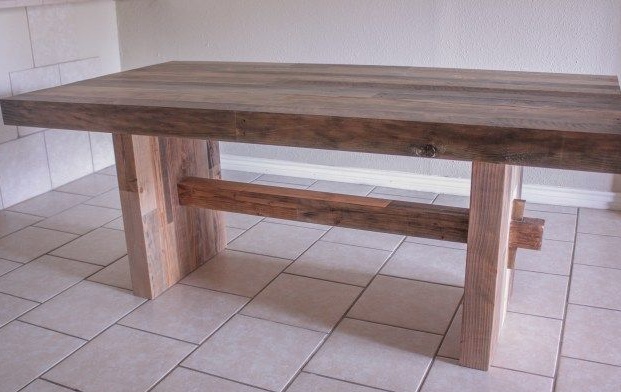
Install the leg panels vertically, place the lower jumper in the grooves and secure them with wooden locks. Install the countertop on top. As you might have guessed, it lies on its legs under its own weight, partially fixed in place thanks to the grooves of the slats. The author himself is delighted with this idea.


Step Four: Wood Structuring and Processing
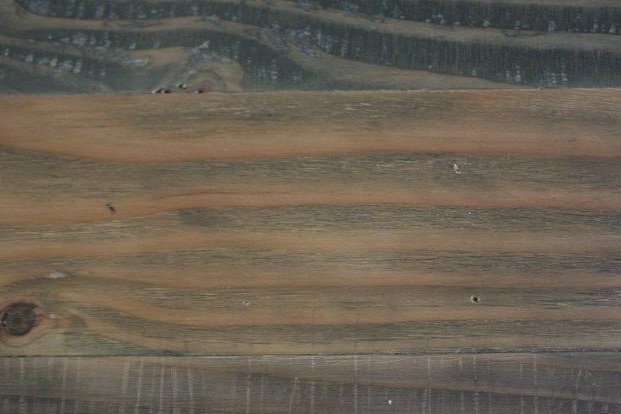
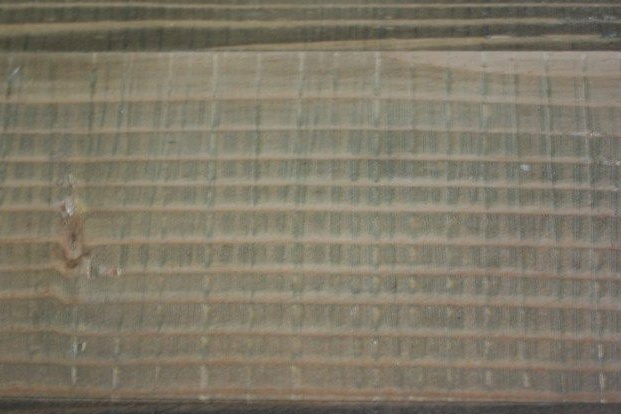
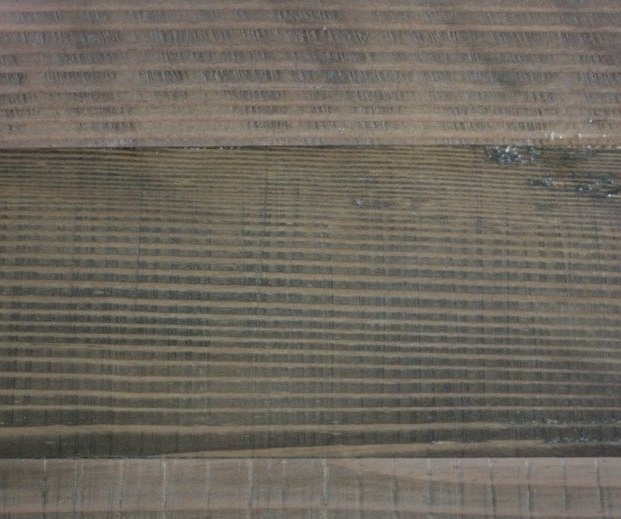
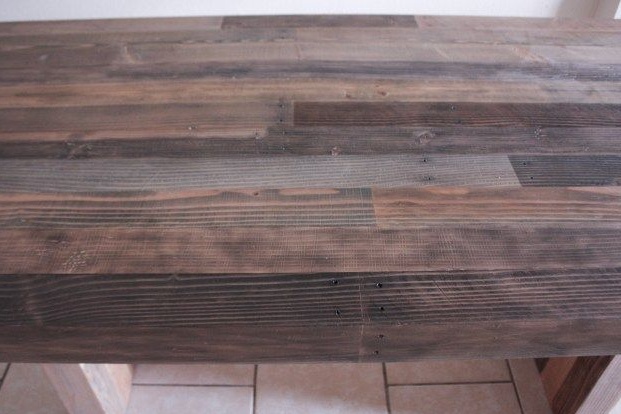
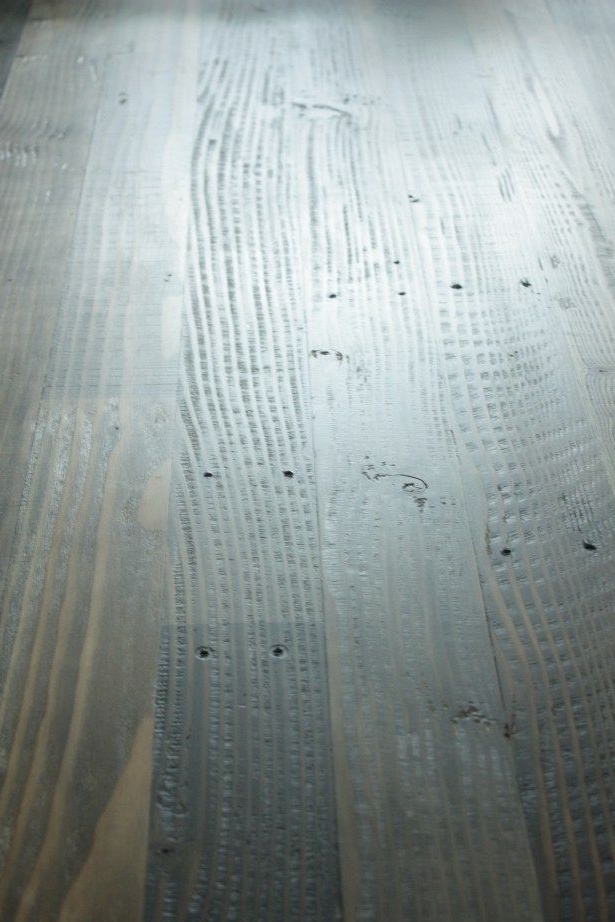
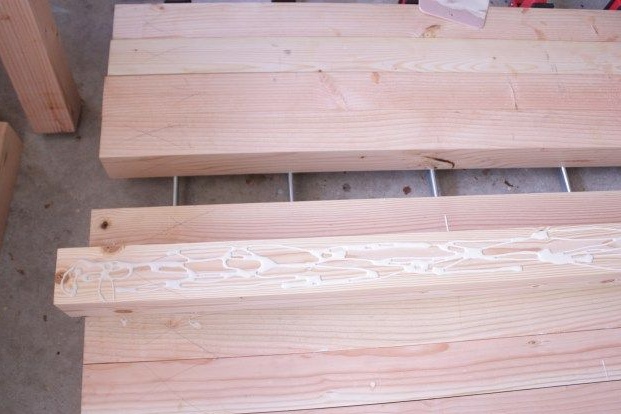
The author conducted a large-scale experiment in order to learn how to structure a natural tree at home. In addition to the petal nozzle and the usual flat grinding wheel, he very successfully tried the wire nozzle for his grinder.
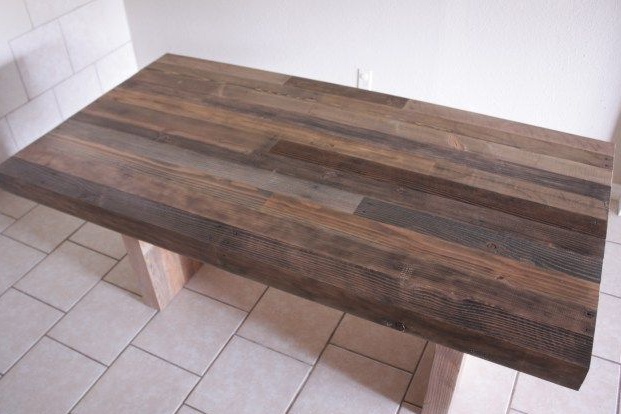
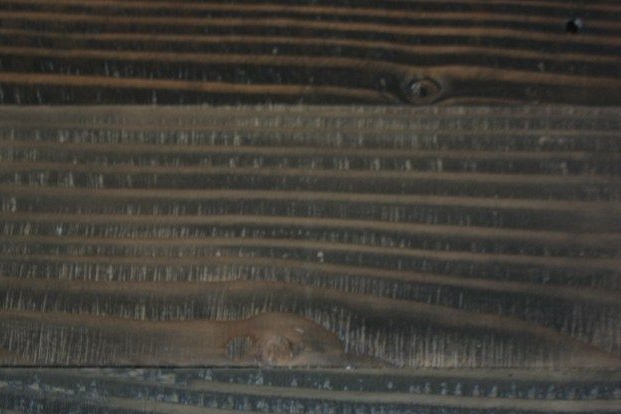
The essence of the treatment was that he pre-tinted the wood with protective and decorative oil, and after that he carried out artistic polishing. Part of the wood with the toner was thus removed, which allowed him to get the original texture. He used several shades, coloring certain sections of the table separately.
He tried many methods of grinding and their combinations on tinted training boards, until he achieved the effect that fully satisfied him. Judge the results of the experiment yourself.
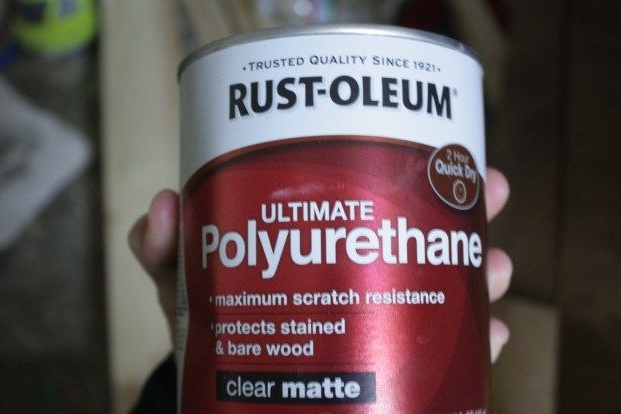
To protect the tint and the outer layer of the tree, the author used a polyurethane varnish with a semi-matt effect. Apply the varnish in several layers in order to achieve a more durable coating and let the surface dry completely.