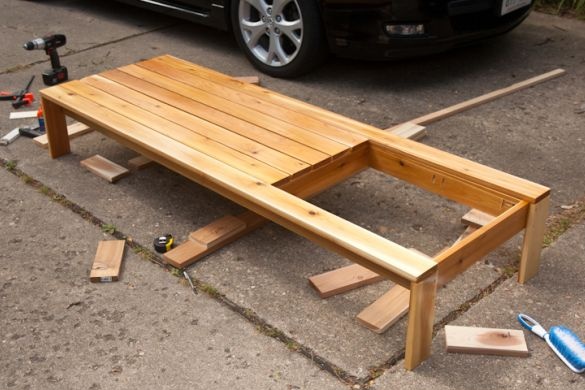
Not so long ago, a deck chair was considered exotic, and only wealthy people could afford it. We saw sun loungers in colorful magazines and American films, but even with a great desire, an attempt to buy something like this would have turned out to be a failure - there were simply no sun loungers for sale.
Well, sooner or later everything passes, and the information revolution generously presents us with new opportunities. Now anyone can find a manual on the Internet on how to make a deck chair do it yourself. However, such plans are often difficult to implement, especially for a novice. They require the use of a large number of expensive tools, and therefore for many remain unfeasible.
This workshop is a pleasant exception to the rule. The chaise lounge presented by the author has a simple design and an understandable system for folding and adjusting the backrest. If you approach the issue of choosing materials correctly, you will need a very modest arsenal of power tools and, in extreme cases, you could borrow any of them from friends and acquaintances.
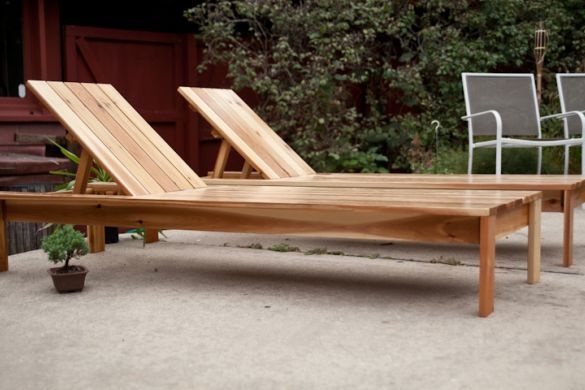
In addition, given the fact that the deck chair is made of natural wood, it can easily be used also at home, instead of a couch or chair in the living room. It quickly develops and unfolds, has a completely finished appearance. A beautiful textile mattress will complement the image, and a deck chair will fit perfectly into the interior of your home.
In order to make a deck chair with your own hands, you will need:
Materials:
- pine board with a thickness of 20 - 30 mm;
- slats with a cross section of 30 x 30 or 40 x 40 mm for the manufacture of a backrest folding system;
- natural or mineral oil for processing wood, drying oil or varnish for woodwork;
- screws and small nails;
- glue for gluing wood materials;
- metal one-piece loops for fixing the back: two more and a smaller pair;
- a finished mattress with ties for fixing it or fabric, batting, foam rubber and threads for its manufacture.
Instruments:
- miter saw, circular or hacksaw on wood;
- a grinder, if you are using old or unpolished boards;
- a screwdriver or a Phillips screwdriver;
- electric drill;
- clamp with a device for drilling pocket inclined holes (optional, but greatly facilitates the work);
- paint brushes;
- building tape measure and square;
- a pencil.
Step one: create a sketch and layout of the deck chair
The model of the product is simply necessary if it itself consists of a large number of parts. It will not allow you to get confused in their innumerable list and significantly accelerate the whole process of work. In addition, you will see the entire list of parts and their exact size. Well, how without this?
But everything is preceded by a sketch. This sketch on a piece of paper by hand gives birth to an idea and lays down the basic outlines of the image of a future product. It should start with it.
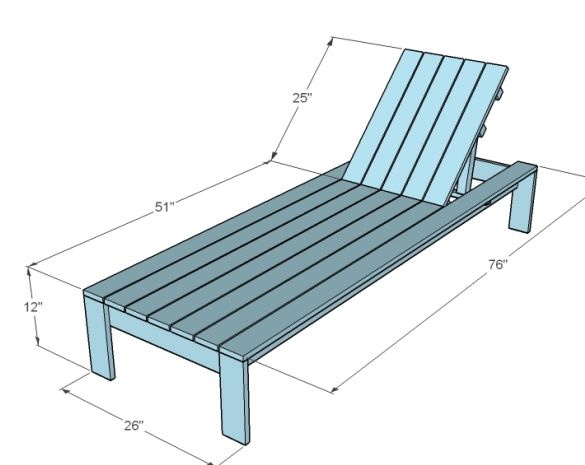
In your case, the computer model of the deck chair is already ready and you can safely take as a basis all the dimensions indicated in this master class. But first write on paper the entire list of parts that you have to make. Indicate their sizes opposite and only after that start work.
Step Two: Parts Manufacturing
The detailing you have collected should be transferred to the material in the form of marking. Use a pencil to do this to easily correct creeping errors. Use also a construction square. Especially if you plan to resort to using a hacksaw to saw boards. It will allow you to mark angles at 45 and 90about, and accuracy is never superfluous.
So, mark the parts and proceed to their manufacture. Saw the boards into blanks of the length indicated on your list. You will need:
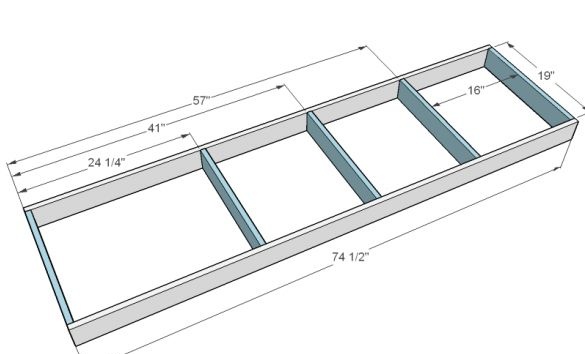
- two longitudinal parts of the frame with a length of 1850 mm;
- five transverse frame parts with a length of 470 mm;
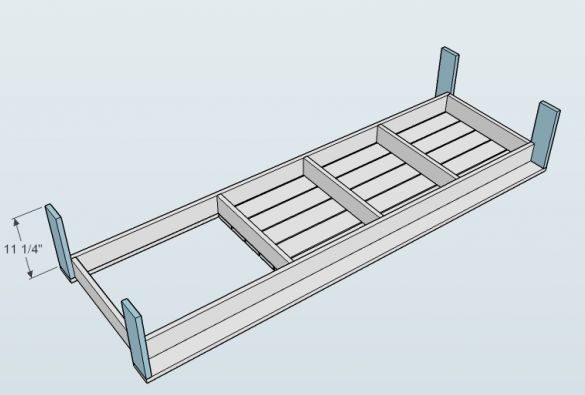
- four blanks for legs 280 mm long;
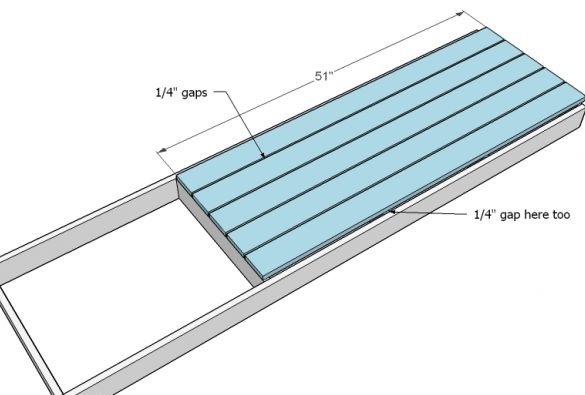
- four - five boards for the base of the deck chair 1270 mm long;
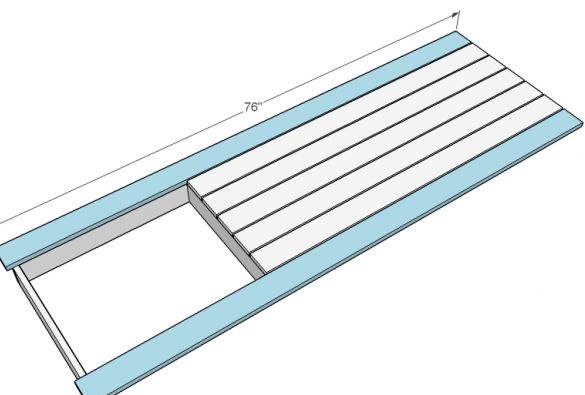
- two side long boards for the base of the deck chair 190 mm long;
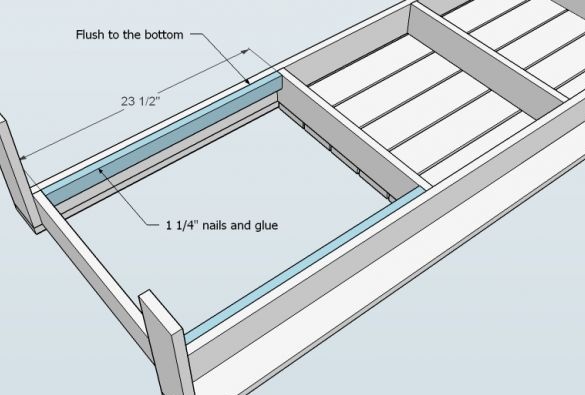
- two small rails for supporting the backrest when folded 580 mm long;
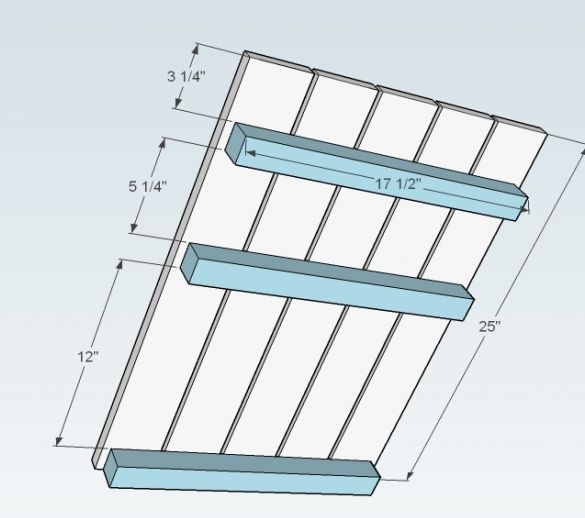
- three bars for the manufacture of backs with a length of 43 mm;
- four to five boards for the base of the back;
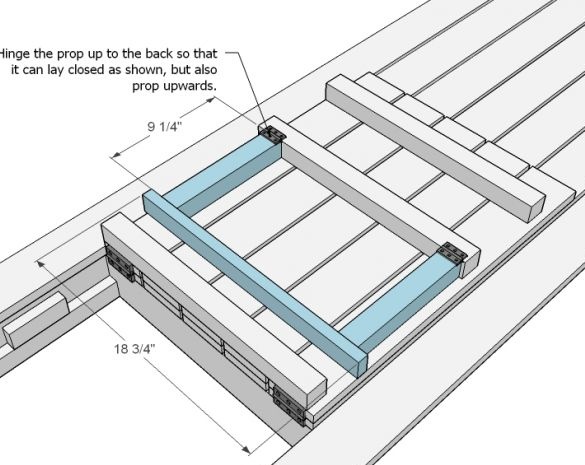
- two slats for a folding backrest system with a length of 230 mm;
- one horizontal rail for the folding backrest system with a length of 460 mm;
- Six small pieces of rail for the folding back system - three on each side.
All indicated dimensions should be clarified, since the author indicated them in inches. They also depend on the thickness of the boards you use. To find out the sizes in your case, always start with the general values and gradually move on to the smaller details.
Step Three: Assembling a Lounger
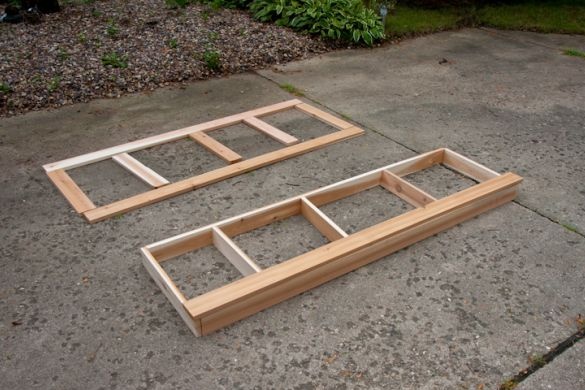
Start by assembling the deck chair frame. Remember that it is customary to assemble any frame with the help of screws. This ensures the relative strength of the entire structure. However, it often happens that screws alone are not enough. Then glue is also used. Such combined connections serve very well and do not require repair for a long time.
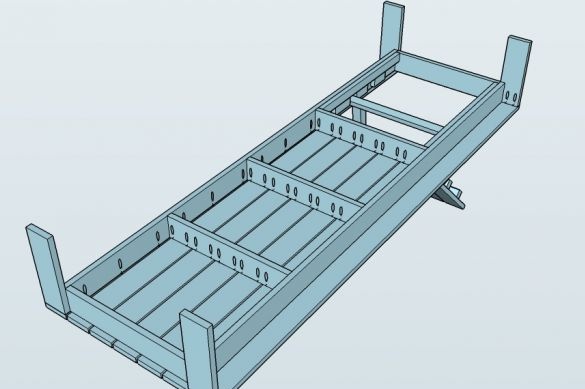
On each detail, the author made inclined pocket holes for self-tapping screws or furniture screws. To do this, he used a clamp with a special device for drilling such holes.
Assemble the deck chair frame with glue and screws and fix the legs. Fasten the base parts to the frame with small studs. In parallel, fabricate the back panel.
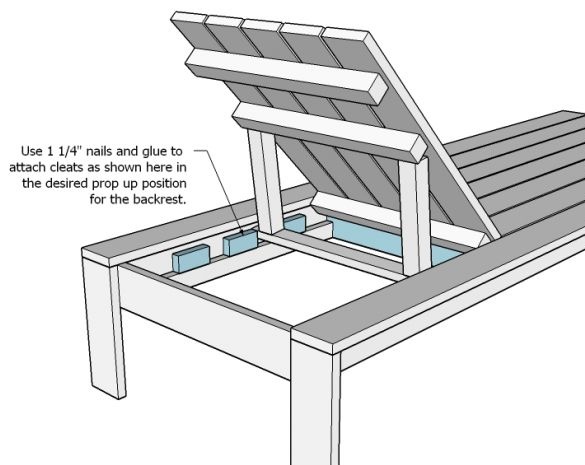
Inside the hole for the backrest, screw on the two support rails on the sides, on which the back rests when folded and on which the pieces of the rail (teeth) are attached to adjust the inclination of the back. Lock the teeth themselves.
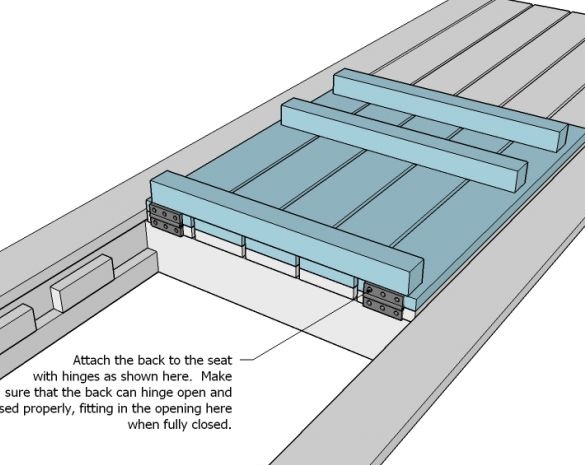
Connect the back to the frame using a pair of integral metal loops. Also make a U-shaped part for the back and fasten it in place with loops, which is smaller. Check backrest adjustment.
Step Four: Wood Protection
Any furniture sooner or later be subject to wet cleaning. Untreated wood hardly tolerates such processing, and the result is often zero. Therefore, the tree must be treated with suitable paints and varnishes.
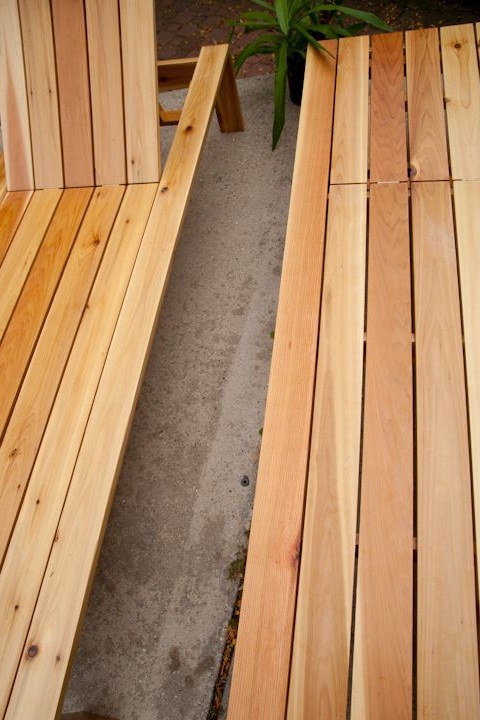
The author decided to leave the wood unpainted so that it could be seen that it was made of natural wood.In this case, the most reasonable option is to varnish the chaise lounge with a matte or semi-gloss transparent varnish.
Since furniture is usually used very intensively, you should choose a varnish that will give the most durable and wear-resistant coating. For example, profile furniture varnish. Apply it on the surface of the tree in several layers and let each one dry thoroughly.
Step Five: Pick Textiles
In general, this model a deck chair looks pretty simple and in order to give it the proper shine and chic, you need to choose a mattress. It is possible that it will be easier to make it yourself.
You will need a piece of foam in the size of the future mattress, a fabric of a suitable color, durable threads for the sewing machine and batting to give the mattress additional volume and softness.
Wrap the foam rubber with batting in one or two layers and attach a piece of fabric to take off the dimensions of the mattress cover. Cover the fabric and sew around the perimeter of the cover, leaving one of the narrow sides un sewn. Place the filler in the case and sew it by hand with a blind seam.
The cover can be quilted or grabbed in several places with decorative buttons. This will prevent the foam from sliding down during operation, and will also add volume and texture to the mattress.

