
Sales agents on every corner invite passers-by to purchase not only plastic windows, but also interior doors. They are usually presented in a fairly wide price range, however, even the cheapest of the doors are sometimes not able to satisfy the buyer. Why is that?
Cheap interior doors, as usual, have an equally cheap appearance, and they cannot boast of special quality. More expensive models are often beyond the reach of most potential customers and hit the family budget painfully.
However, there is an alternative way - to make interior doors do it yourself. You can use natural wood, plywood, glass and even plastic, combine these materials and come up with the most original ideas for the home.
In this master class, we will focus on how to independently make doors from boards in home conditions. The project presented by the author is simple and inexpensive. You can get everything you need in a construction supermarket or the nearest carpentry workshop.
To implement this great idea you will need:
Materials:
- natural pine board;
- durable decorative metal hinges - 4-6 pcs;
- door handles - 4 pcs;
- glue for woodwork;
- protective and decorative oil;
- waterproof furniture varnish of increased strength;
- wood screws.
Instruments:
- miter saw, circular or hacksaw on wood;
- screwdriver;
- grinder;
- electric drill;
- a clip with a device for drilling inclined pocket holes using a drill;
- clamps;
- paint brushes or roller with a plastic pallet;
- building tape measure and square;
- a pencil.
First step: the choice of materials and accessories for interior doors
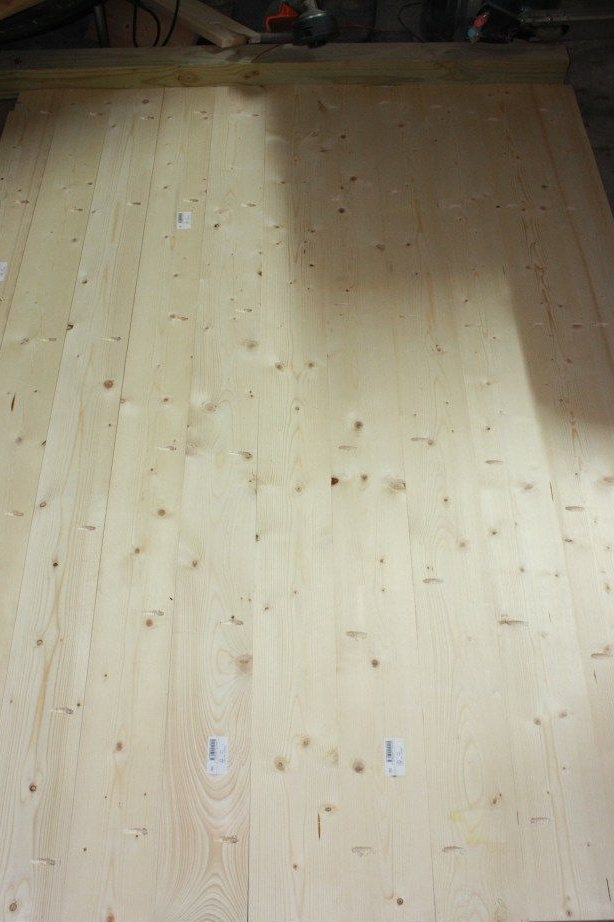
Start with the main thing - the search for pine boards. This is the most common tree species for our geographical latitudes, so the choice fell on the pine.
Choose a well-dried tree so that the door does not lead during operation. Boards should be qualitatively planed on a surface gage. First of all, this means that they are all fitted in thickness and have a perfectly flat surface.
As for the paints and varnishes, the author intentionally chose only those that helped him emphasize the natural texture of the wood.The initial preparation was a couple of shades lighter, so he used a protective and decorative oil in order to tint the wood and protect it from all sorts of adverse effects.
You can combine oil and varnish. This will allow you to significantly extend the interior doors their service life. Choose only those varnishes that have increased strength and form a hard, wear-resistant coating after drying. This is, first of all, polyurethane varnish, nitro-varnish, as well as furniture varnish based on alcohol and additional components.
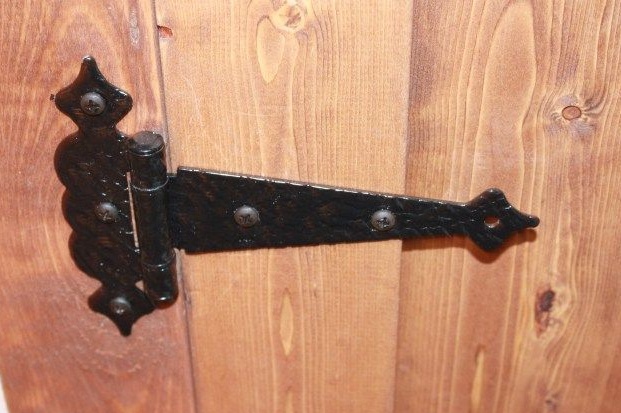
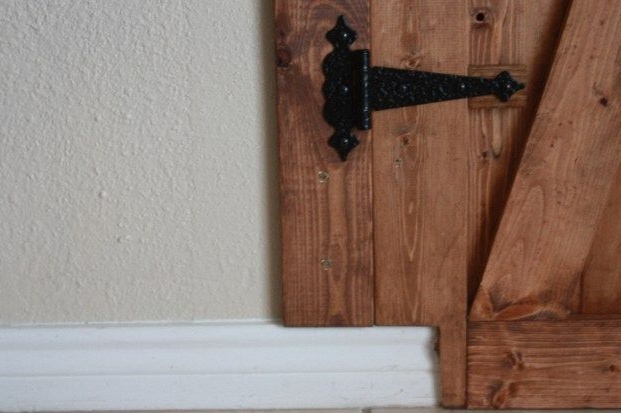
Pay attention to the choice of door hinges. They should be designed for the weight of wooden doors. The author used decorative one-piece loops made of black metal. You can purchase something similar at a construction supermarket or order in an online store.
If you use a sufficiently thick board, as well as materials made of solid wood, plan three loops for each of the door halves at once. So you evenly distribute the load of honey loops.
Step two: sketch, marking and manufacturing of parts for doors
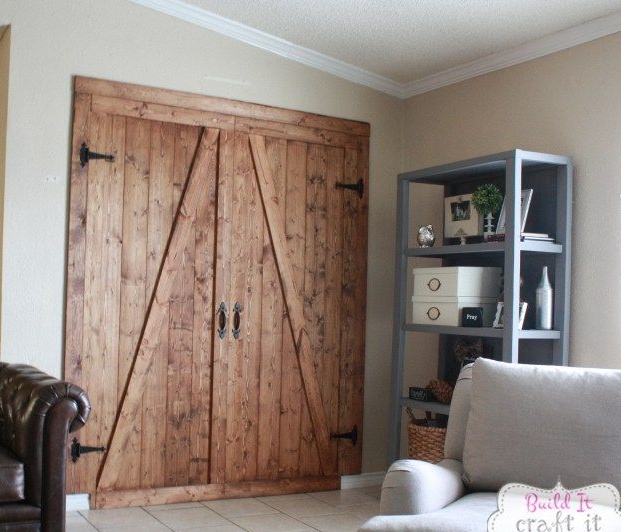
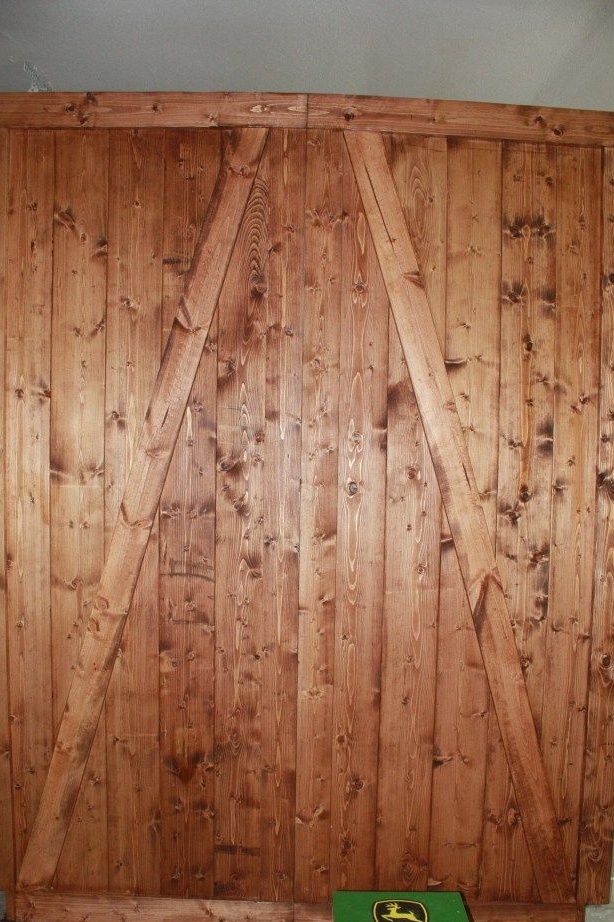
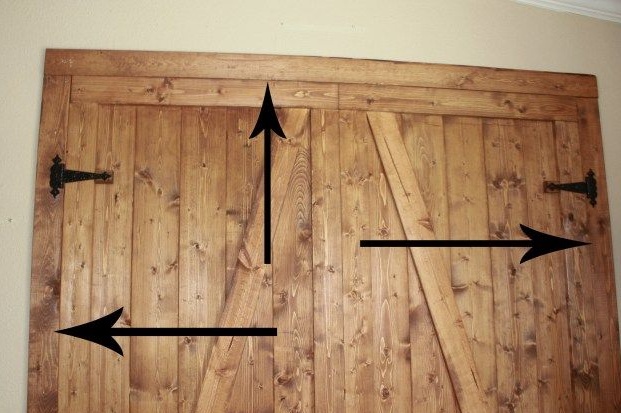
Sketch your future doors on paper. As you see, the doors conceived by the author are quite impressive in width and consist of two halves. He used decorative diagonal linings on the doors, and framed the doors themselves with a wooden frame. In addition, he made the platbands for the doorway from the same boards that went on the door.
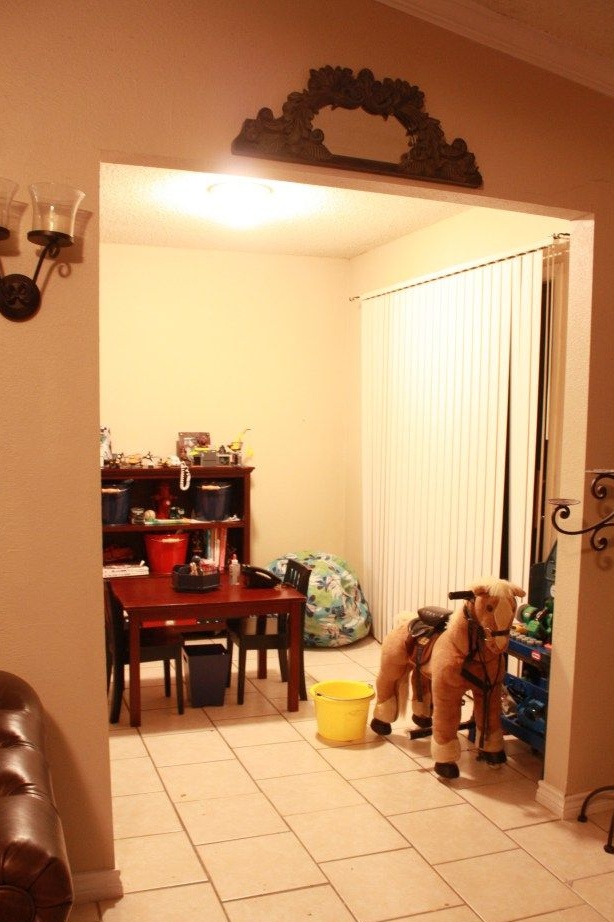
Measure the doorway in order to determine the size of the doors. As a rule, there is a groove in the opening, which contributes to the tight closing of the doors. You can easily arrange the corresponding groove on the doors when you get to fixing the door frame.
Therefore, measure the dimensions of the door body, their overall dimensions along with the groove around the perimeter, and also estimate the size of the trim parts for the doorway. After that, knowing the width of the boards, you can determine the length of the diagonal decorative strips.
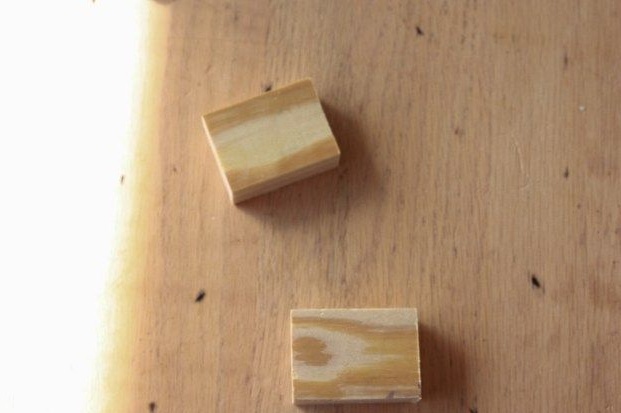
The author also made small parts for fastening arrow loops, since the width of the frame was not enough for this.
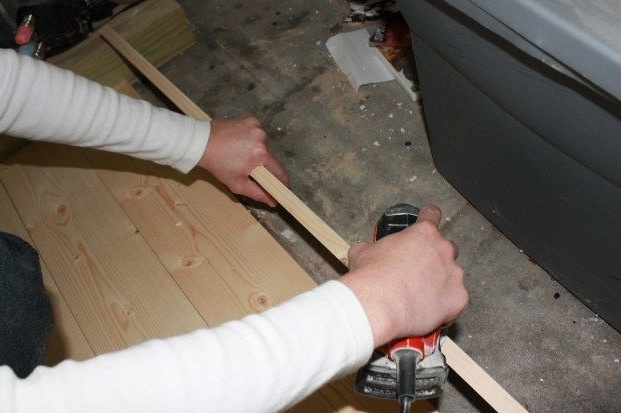
Mark the parts using a square and a pencil. Saw the boards in length in any way that is familiar to you. Saw the diagonal rails at the required angle so that they go flush with the frame.
Pre-assemble all parts on the floor to make sure everything is done correctly.
Step three: assembly of interior doors from boards
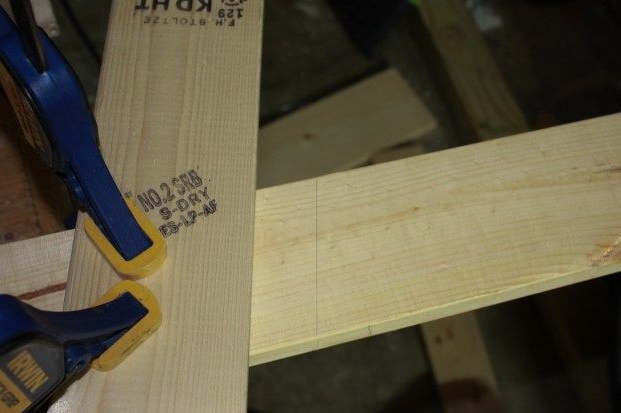
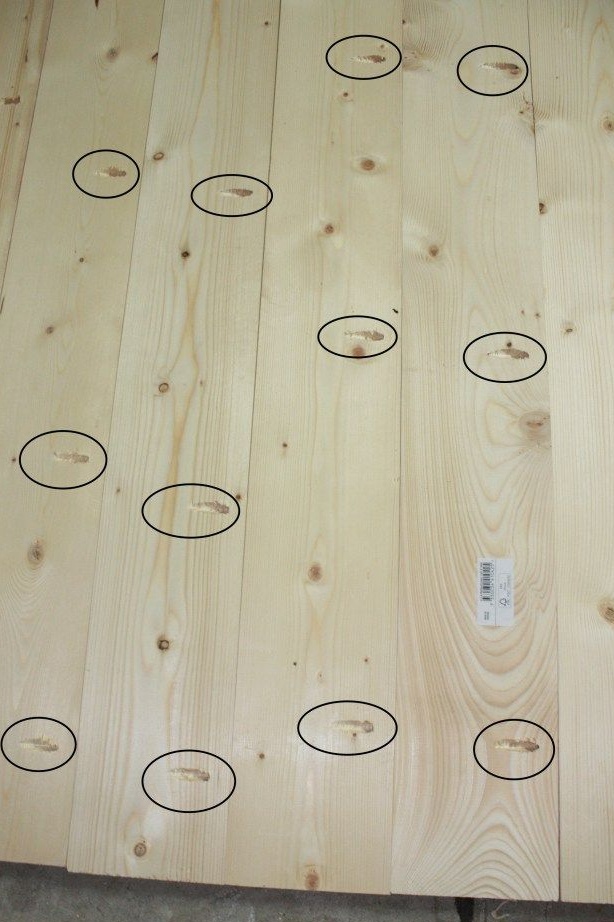
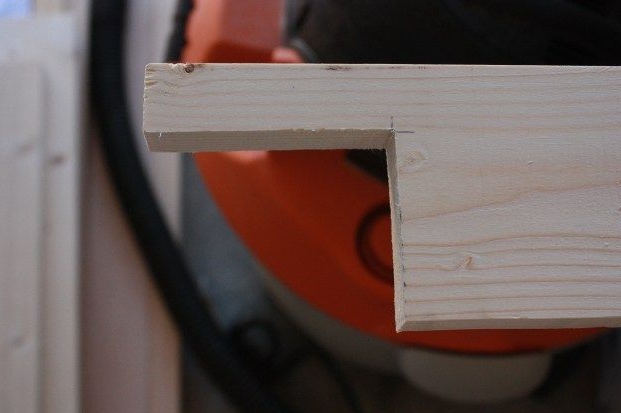
The author used a special vice with a device for drilling diagonal holes for screws. Such holes allow you to make completely invisible connections after appropriate decorative processing of products. They are filled with sealant or putty, covering the screw head and recess. After the sealant has hardened, the joint surface is ground and painted using any suitable means.
Even if you use transparent and translucent protective and decorative coatings, these secret connections are not visible on the surface of the product, and it takes on a very professional appearance.
You can drill slanted pocket holes without using a clamp, using only one drill. Each board is attached to the adjacent in three places. Therefore, mark the joints and make holes for the fasteners. Alternate them in a checkerboard pattern to distribute the load between the parts.
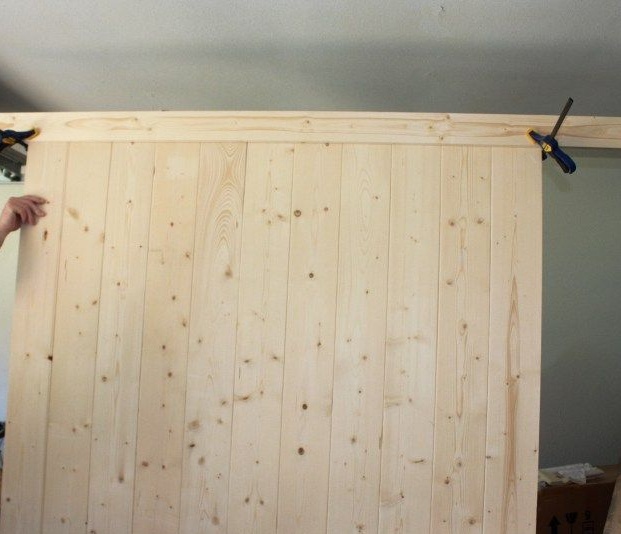
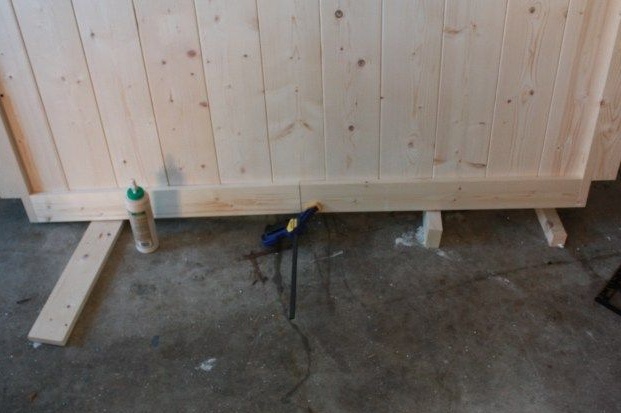
Since interior doors are a massive and large-scale thing, use glue to give the construction additional strength. Apply a little glue evenly on the edges of the parts at the places of their connection with each other, assemble the door leaf, gradually attaching each part with self-tapping screws.
Fix the frame elements according to the dimensions of the doorway and fix the decorative diagonal slats using glue. press them with clamps until the glue has completely hardened.
The author also carved holes at the bottom of the doors under the floor skirting.
Fourth step: tinting and varnishing of interior doors
In order to favorably emphasize the natural texture of wood, the author used protective and decorative toner based on oils. It allows you to simulate valuable wood species, but in addition it has exceptional protective properties.
The toner is applied using a soft, clean, lint-free cloth. Rub the composition until the wood has the desired shade, then remove the remaining oil with a dry cloth.
If you expect to regularly wet the doors, they must be varnished. Be sure to choose a waterproof varnish with a hard coating: polyurethane varnish, nitro varnish or resistant furniture varnish.
The varnish can also be matte, semi-gloss or glossy. The former gives the products the most natural appearance, while the latter has a glossy sheen. In addition, you can choose a varnish with a tinting effect, which will allow you to abandon the use of expensive decorative oil.
Step Five: accessories and installation of interior doors
Mark the hinge points on the doors. Drill small holes and fix the hinges with self-tapping screws. After that, prepare the doorway: screw the platbands.
Install the doors in the doorway by lifting them slightly above the floor. To do this, place thin slats or plywood under the doors. Screw the hinges to the platbands, remove the backing and make sure they open and close easily, and there are no gaps or backlash. Fasten the door handles.
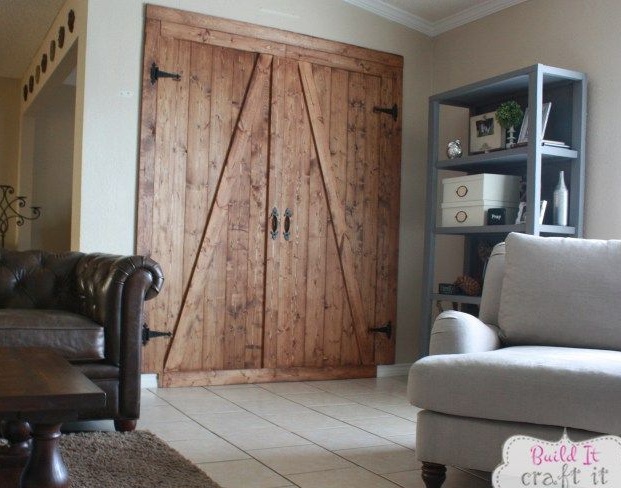
Natural wood interior doors are ready!