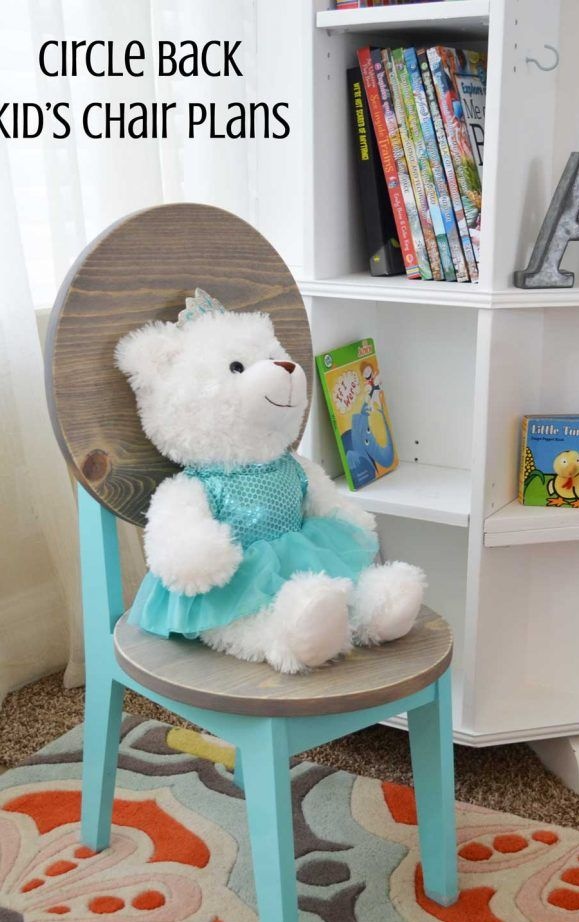
Children furniture should, no - simply must be unusual and original. None of the children are interested in the strict canons of style, boring colors and ordinary geometric shapes. The world of the child is a world of fantasy, and the parents ’ideas about the interior design of the nursery should correspond to it.
Natural wood is still the most popular and sought-after material for the manufacture of children's furniture. It is environmentally friendly and safe, although it may be an allergen. You can easily purchase material for implementing plans like this at a construction supermarket. As a rule, these are pine boards, bars and slats of different thicknesses and cross-sections.
They should be well planed and have a smooth surface. Choose only a well-dried tree, otherwise you can’t avoid problems with the man-made product: the joints will loosen and the structure will lose strength after a couple of months of operation in a warm living room.
However, let's figure out what else we need in work for the manufacture of such a wonderful children's wooden chair:
Materials:
- pine board with a thickness of at least 25 mm (30 mm);
- glue for woodwork;
- furniture screws or ordinary wood screws;
- special sealant or putty on wood to match wood;
- paint of a suitable shade, for example, turquoise;
- decorative oil-toner or primer-toner for wood "3 in 1"
- resistant furniture varnish.
Instruments:
- circular saw or jigsaw;
- grinder;
- electric drill;
- screwdriver;
- paint brushes;
- a small self-tapping screw, a metal chain and a pencil for making an impromptu compass;
- construction tape measure;
- ruler and building square;
- sandpaper as needed.
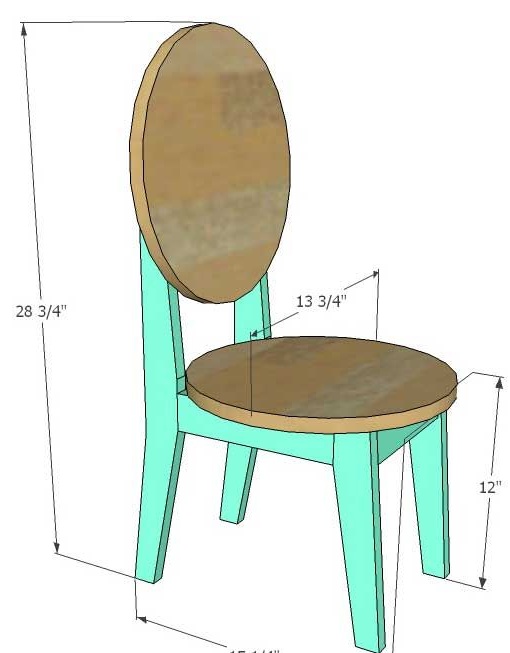
Step one: determine the parameters of the child's chair and mark the details
The sizes of a children's chair naturally depend on the age of your child. The author has specified the details of each part in inches. However, the number of such details is considerable, and the values are not integer, so when converted to centimeters, you may encounter an error.
Instead of using the indicated dimensions, take the general overall parameters of the chair as a basis, edit them to your own needs and start from this when you start marking up specific details and making them.
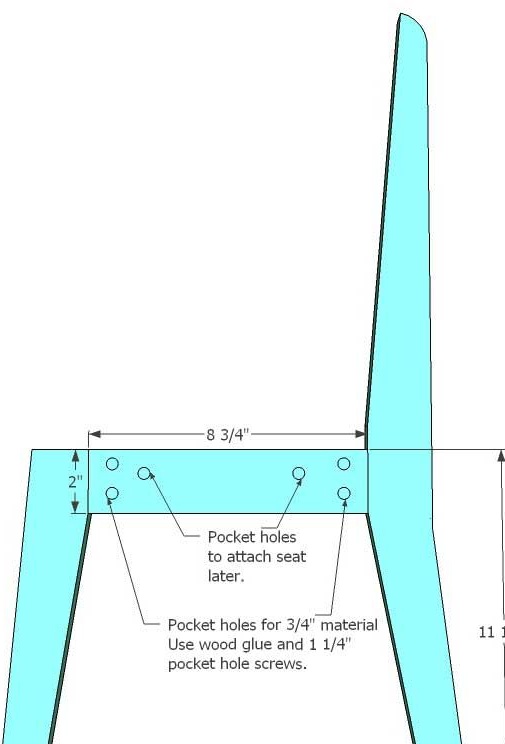
The height of the chair from this workshop is 720 mm, taking into account the back. The width of the chair is 380 mm, while the diameter of the round seat is almost 350 mm. The height of the chair to the base of the seat does not exceed 300 mm. Consider these proportions in your calculations. And this chair is designed for a child of 3 years.
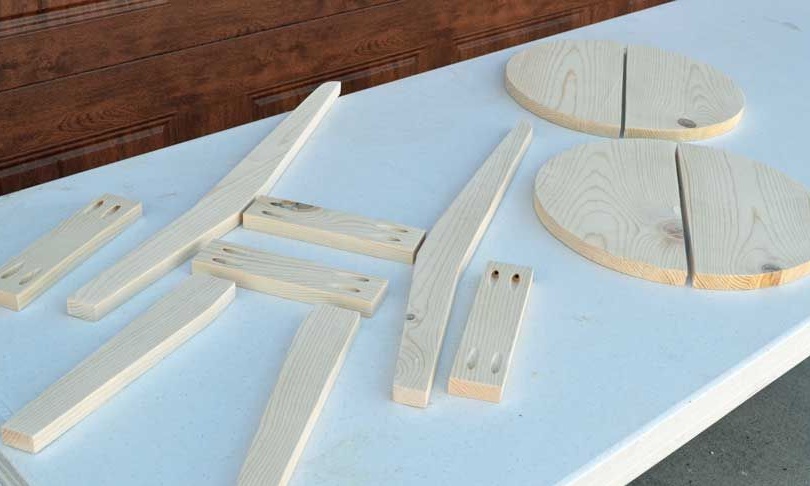
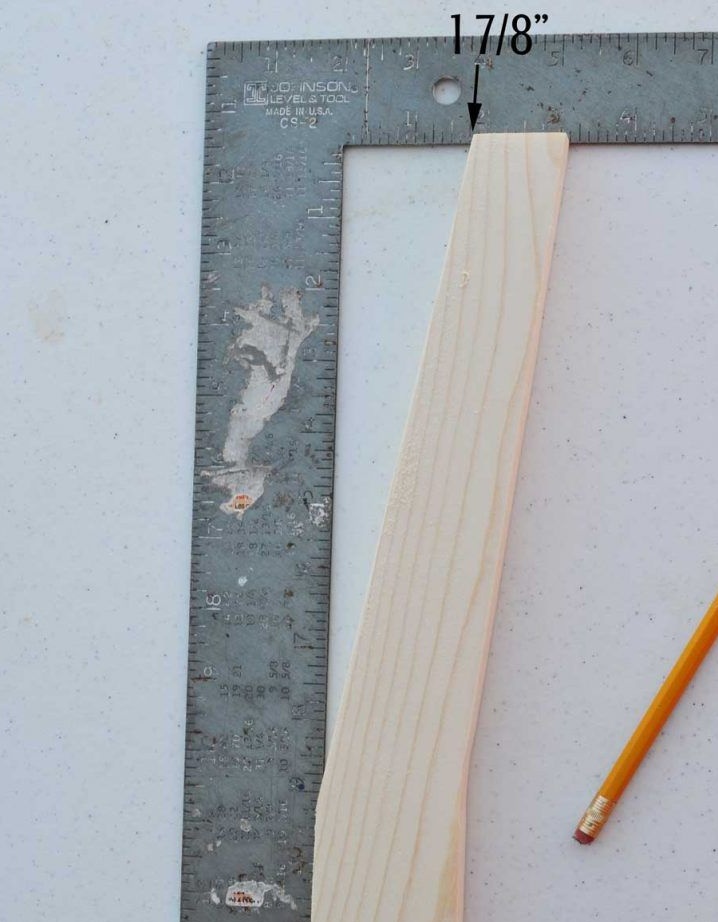
The author preferred to make all the parts in advance, before assembly. Therefore, make all the necessary markup using a pencil, a ruler and a building square to build right angles.
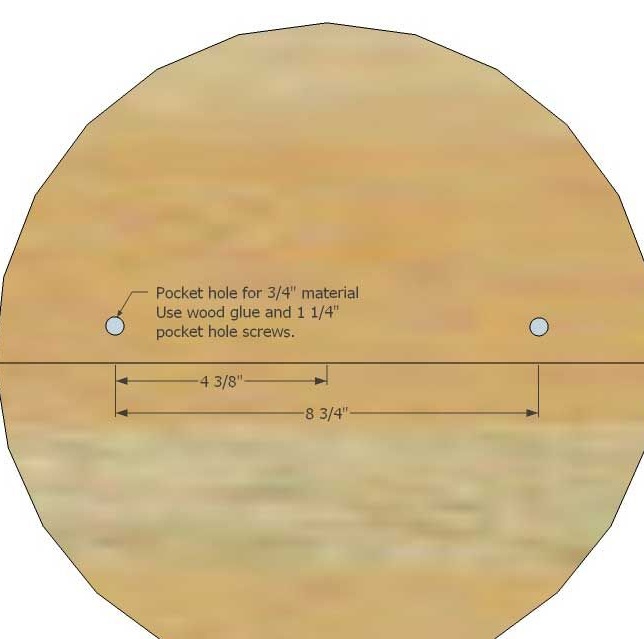
The seat consists of two identical halves. In order for it to be in perfect shape, use impromptu compasses in the process of marking parts. Determine the center of the rounded part and hammer a small clove into it or screw in a self-tapping screw, but not completely. Take a piece of metal chain with a length that corresponds to the radius of the seat, and put one end on the stud so that the chain rotates freely around its axis. Place a pencil at the opposite end and draw two identical semicircular parts.
For the manufacture of his chair, the author used only one pine board. He marked the parts in such a way that they all fit nicely on her. The cost of such a board in the USA is $ 10, but in our realities it can be obtained almost for free - for example, use used materials or purchase short boards twice as cheap as long boards.


Step two: make all the necessary parts for the chair
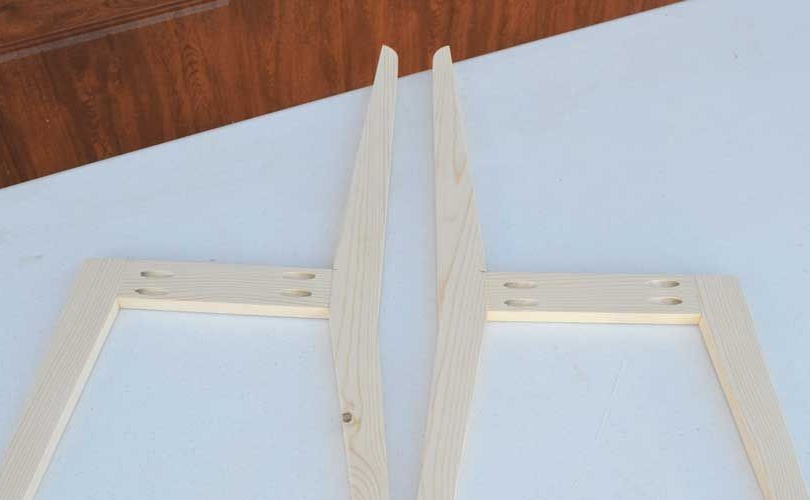
Cut out all parts according to the marking. Even if they are properly planed, every detail should still be sanded. In extreme cases, this can be done with sandpaper, or you can use a grinder or grinder with a special nozzle and a flat paper grinding wheel.
During the assembly process, the author took advantage of pocket joints so popular in the USA. The photo shows that they are drilled inclined holes into which a screw or screw is screwed. In this case, the parts are additionally fixed to each other with glue. Thus, first you apply a little glue at the junction of the joint and only then screw the screw.
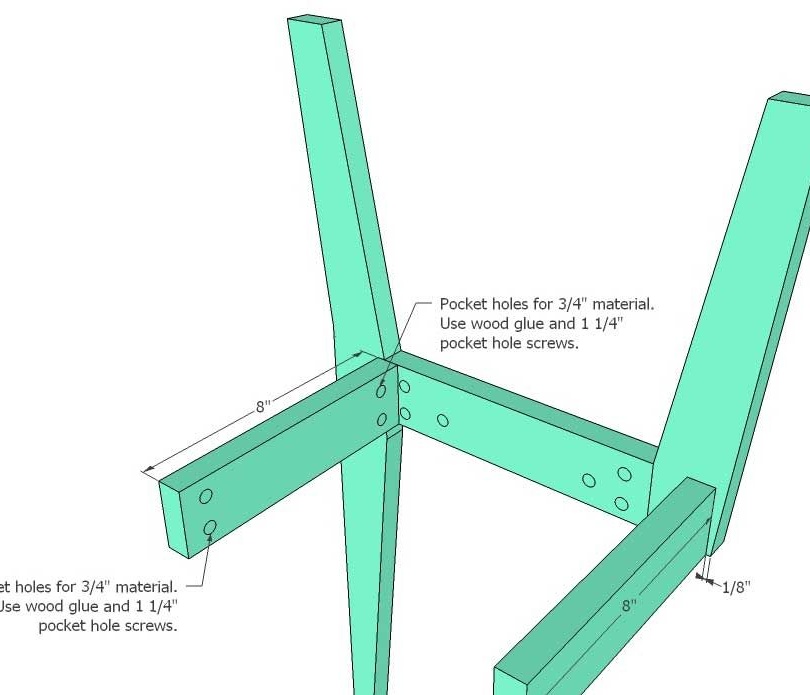
Therefore, mark the junction of the elements of the chair and drill holes for the screws at the required angle. If you do not have the necessary skill, it is not a sin to practice before proceeding with the final assembly. Please note that the seat is assembled in the same way as all other parts, in this case, joint to joint.
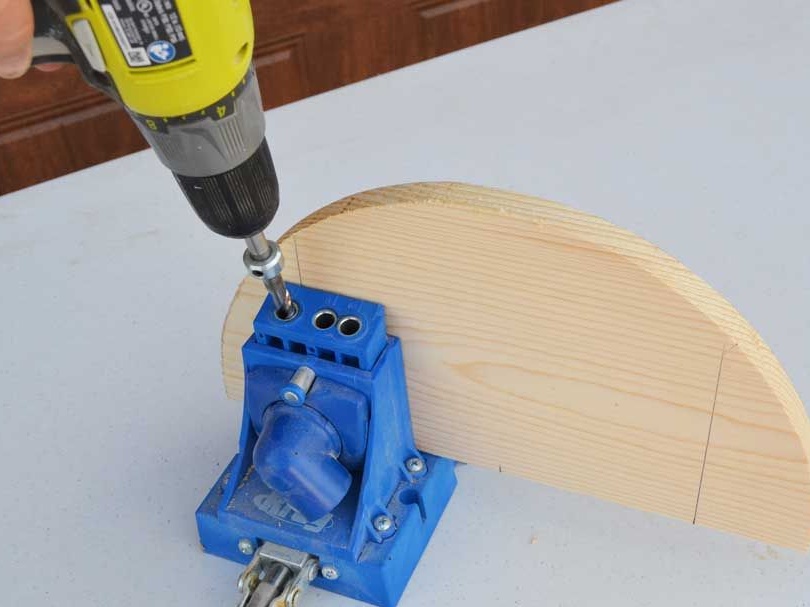
Start by assembling the seat. For drilling holes, the author used a clamp with a special device for drilling. If you wish, you can easily do without it. Use glue before connecting parts to each other.
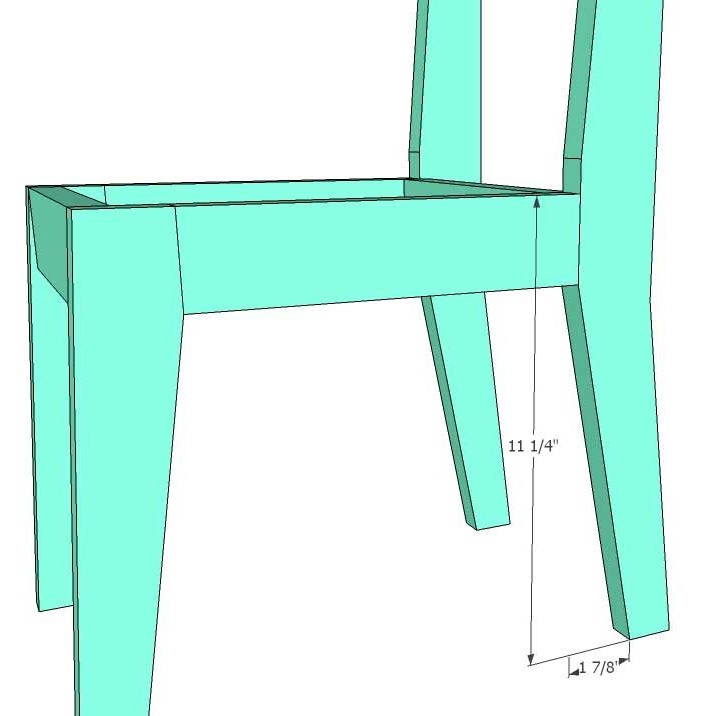
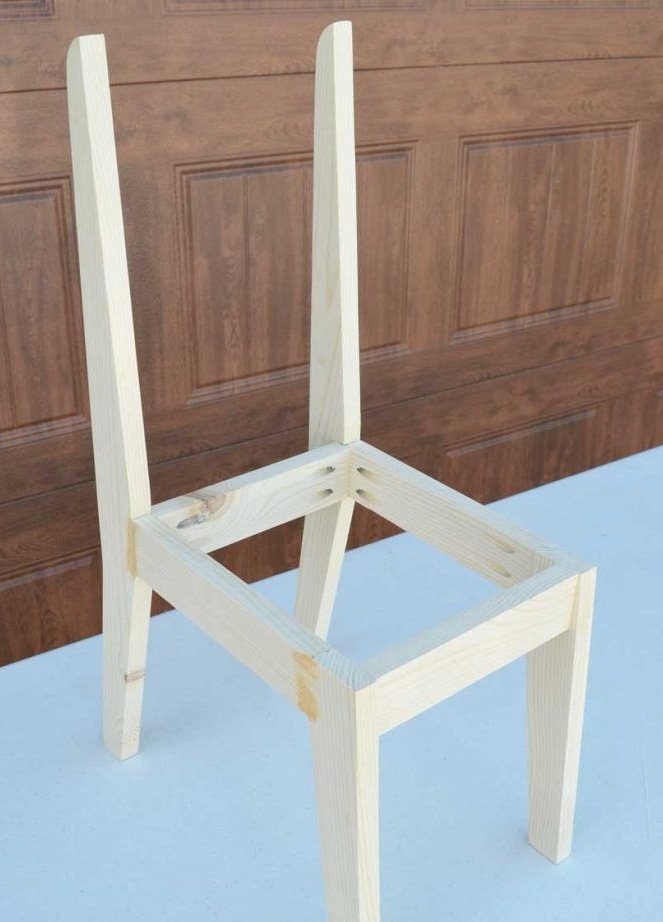
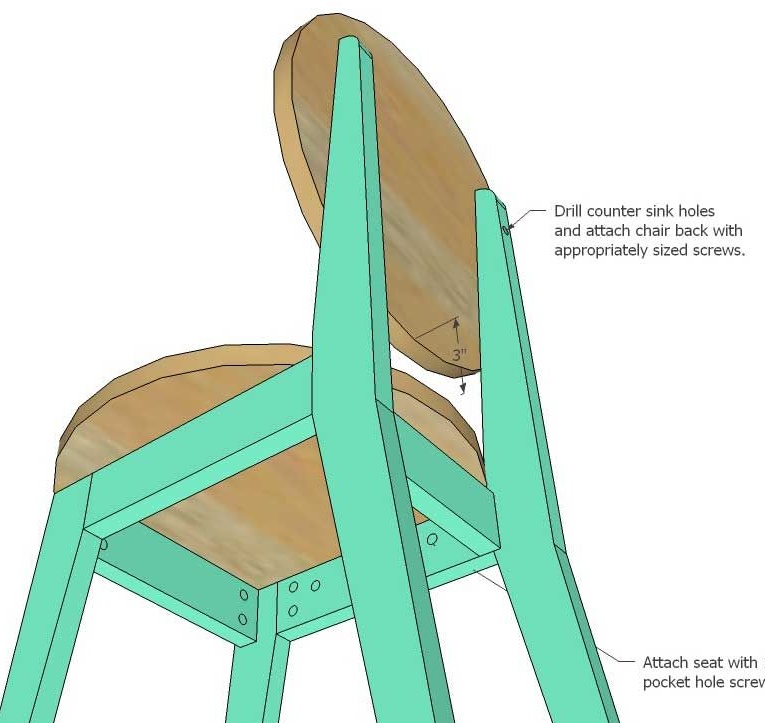
Now proceed with the assembly of the side panels with the elements of the back. Connect them together with the details of the base frame under the seat. So, you get a completely stable frame.
The matter is left to the small. Connect the backrest elements similar to the seat. Lock the back and seat in place. In the case of the latter, you can use metal corners or glue paired with self-tapping screws. It is enough to fix a back with screws.
Step Four: Painting
The back and seat, as well as the frame are painted with completely different compositions. All painting work is most conveniently carried out before the final assembly stage, otherwise the parts can be dirty.
Start by tinting the back and seat. The author used a toner primer based on oils and a number of modern components. In the domestic market, it most of all corresponds to 3-in-1 wood processing products. They are an antiseptic, toner and protective coating in one bottle. Similar means give to a tree water-repellent properties and are easily updated.To refresh the look of a long-painted product, you just need to repeat the coloring. Without grinding, washing off paint and other unpleasant procedures. Agree, it’s very convenient.
In addition, you can pick up one of the decorative toner oils. Such oils are very similar to the primer, however, some features were adopted from the paint. These are expensive, but high-quality and professional tools, the effect of which will not leave anyone indifferent.
And those and other materials can be varnished if desired. Choose a varnish that is suitable for the type. It is better to stop your choice on resistant varnishes with a hard coating, or on profile furniture varnishes. They have a very unpleasant smell in liquid form, but after drying they become absolutely safe, including for use in the manufacture of children's furniture.
Paint the frame with resistant paint in two or three layers. For this, alkyd or nitro paint is perfect for you. All work is carried out in the open air, since even these products are toxic in liquid form. Such paints do not require varnishing, but the use of varnish is not limited here. It all depends on your preference.