As I mentioned in previous publications, the last few years I have been engaged in the reconstruction of an old house that I purchased in Brest (Belarus), where I live. The house is very old, was built during the construction of the Brest Fortress. (1836-1842 gg.). At the time of my purchase, the house was in a deplorable state, because, according to the neighbors, the repair was carried out in it for the last time immediately after the Second World War. But it has a powerful granite foundation, brick walls with a thickness of about 90 cm, a ceiling height of 3.50, and a powerful, "living" rafter system ... The rest is a "paradise for the master.))))
All the work I spend alone, including design, material selection and myself construction and finish.
In order to exclude passage rooms and optimize the layout, I built an extension at the end of the house, part of which is an open terrace. The whole extension is under one single-pitched roof. Roof area - 60 m2, material - metal tile.
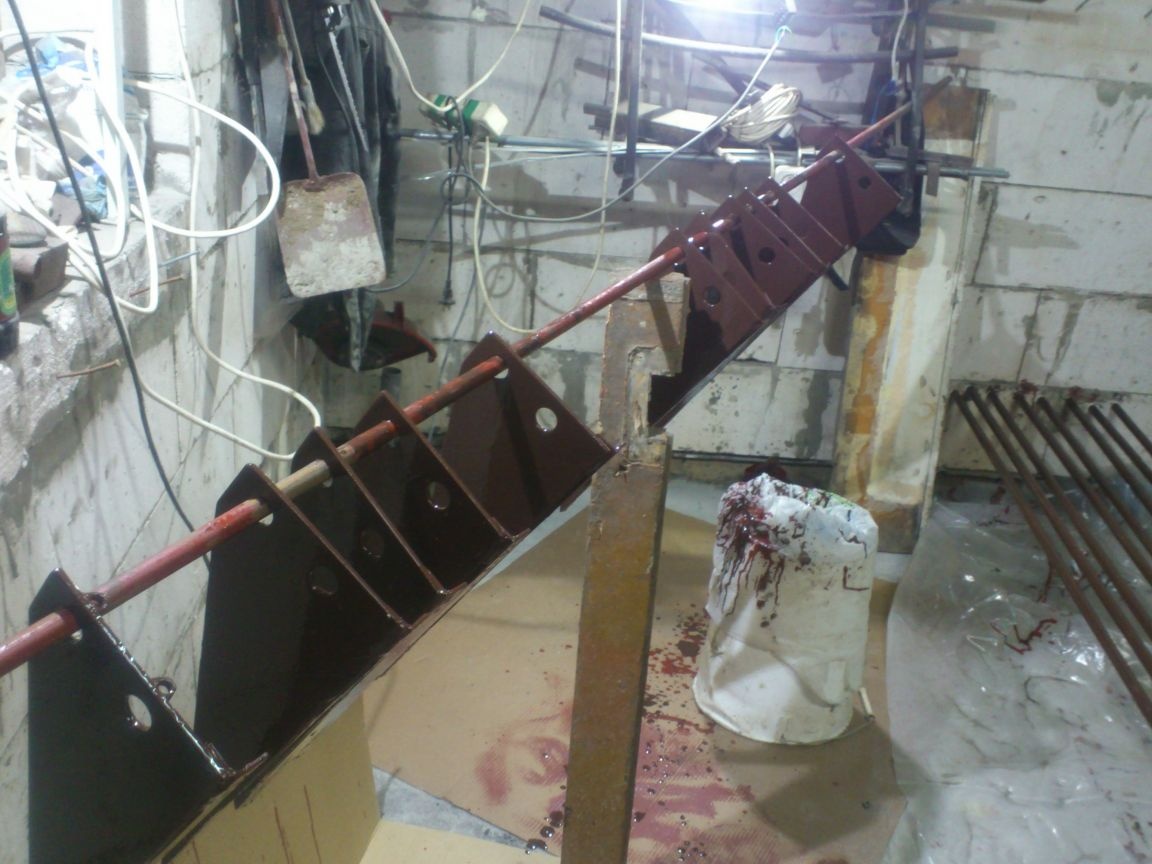
Last season I managed to cover it and immediately began frosts and snowfalls. Due to the fact that the angle of inclination of the roof is small, all the snow that accumulated on it over the winter remained lying there, despite the very slippery “Puretan.” In the spring, as soon as the sun warmed up the metal tile that appeared from under the snow (Dark color - RAL8017), the high thermal conductivity of the metal did its job: the whole layer came off like an avalanche in an avalanche, within one second !!! At the same time, the heavy layer quickly gained speed flew several meters of my land and completely, from fence to fence, heaped up the general footpath high one to one and a half meters and a length of 12 meters !!!
It’s good that no one was walking on it !!!! Could kill! I was not at the station then, but a neighbor who was walking nearby with a dog watched all this and was terrified !!!!
Based on this, I decided at all costs to make reliable snow retention this season !! And he began to study the topic.
Basically, most often we find the so-called corner snow retention. They are made from the same sheet as the roofing.
But I refused to use this type for several reasons:
Firstly, they need to be made from the same material as the roof.(They are not structurally separated from the mice. The slightest difference in color will give the “foreignness” of the structure). The material coated with "Purethane", which I used, is quite expensive. Counting the number of sheets and multiplying by the price, I realized that the cost will exceed the cost of tubular, which are more reliable! (One could buy cheaper material with the same color according to RAL, but it would be unaesthetic - different coatings have different structures, respectively, and different shades. And over time, the color difference will increase because they have different degrees of UV resistance.
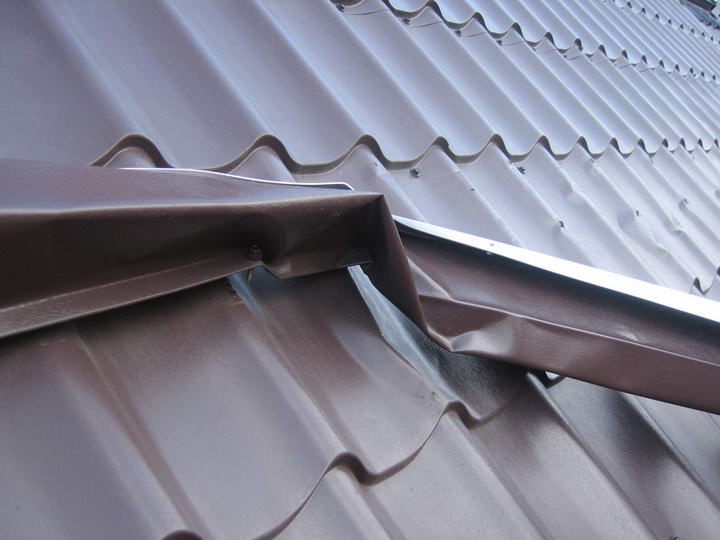
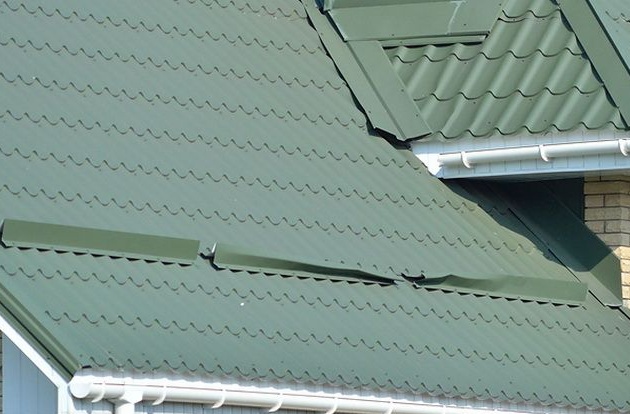
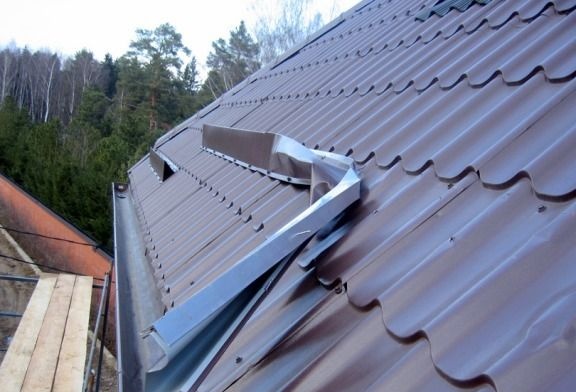
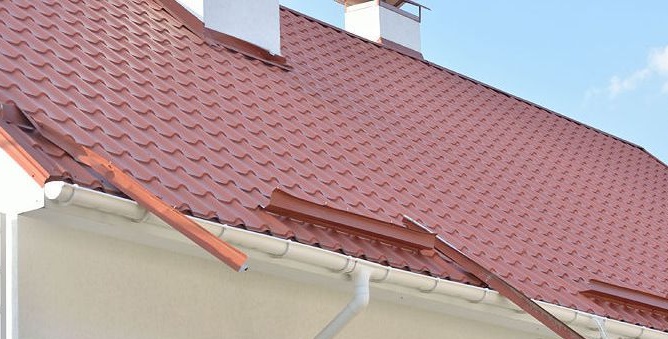
Secondly, they are rather weak, since only one side is structurally attached through the metal at the battens board, while the second is simply attached to the thin metal of the roof. Starting to pay attention to them, in my city I saw several ragged ones. I didn’t take pictures. The photos below are taken from the Internet:
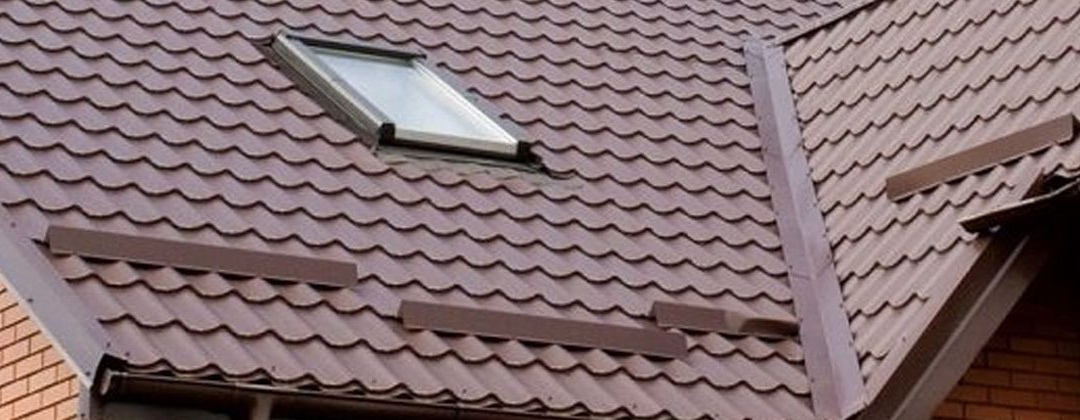
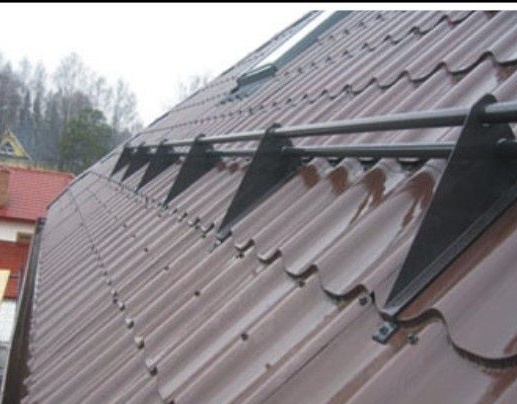
I opted for tubular-type snow arresters (photo also taken from the Internet). They are stronger and stronger, and are attached at two points precisely to the crate, and not to the roof covering:
And, like a real master, first of all, he began to consider the possibility of making them do it yourself!))))
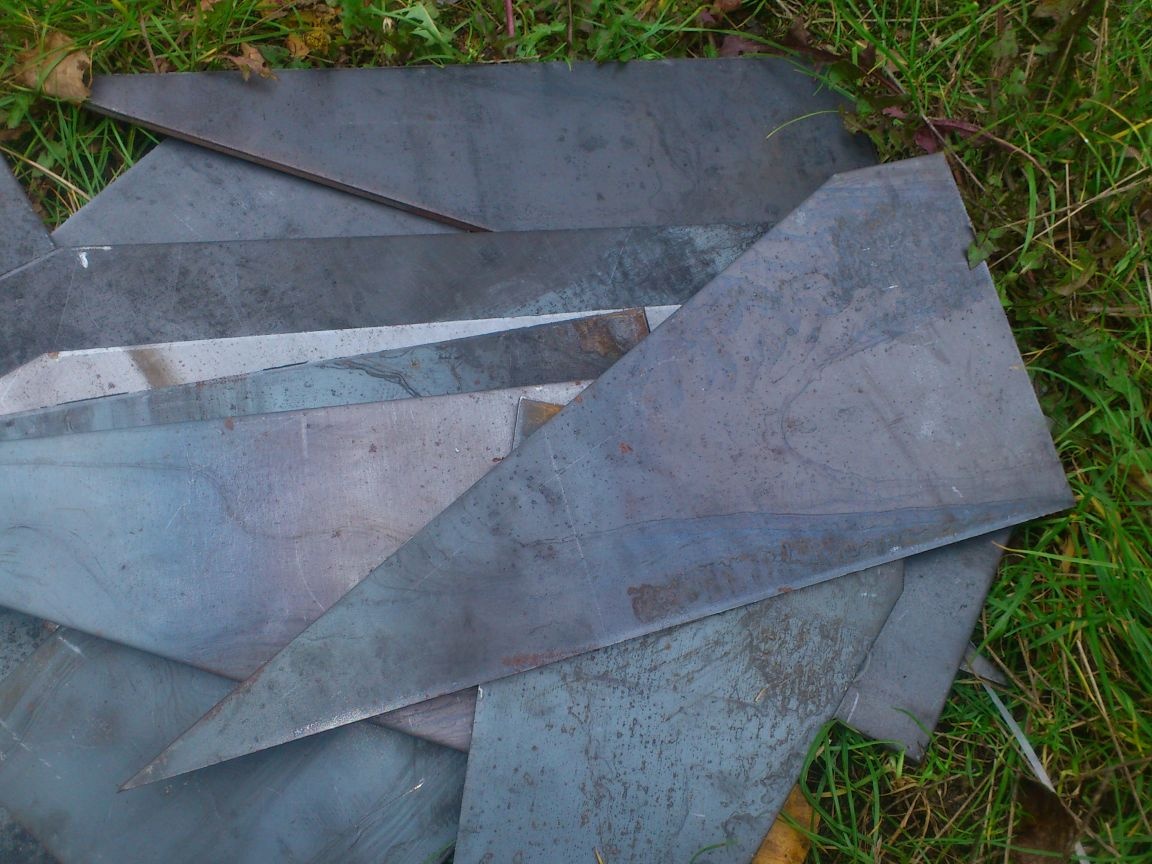
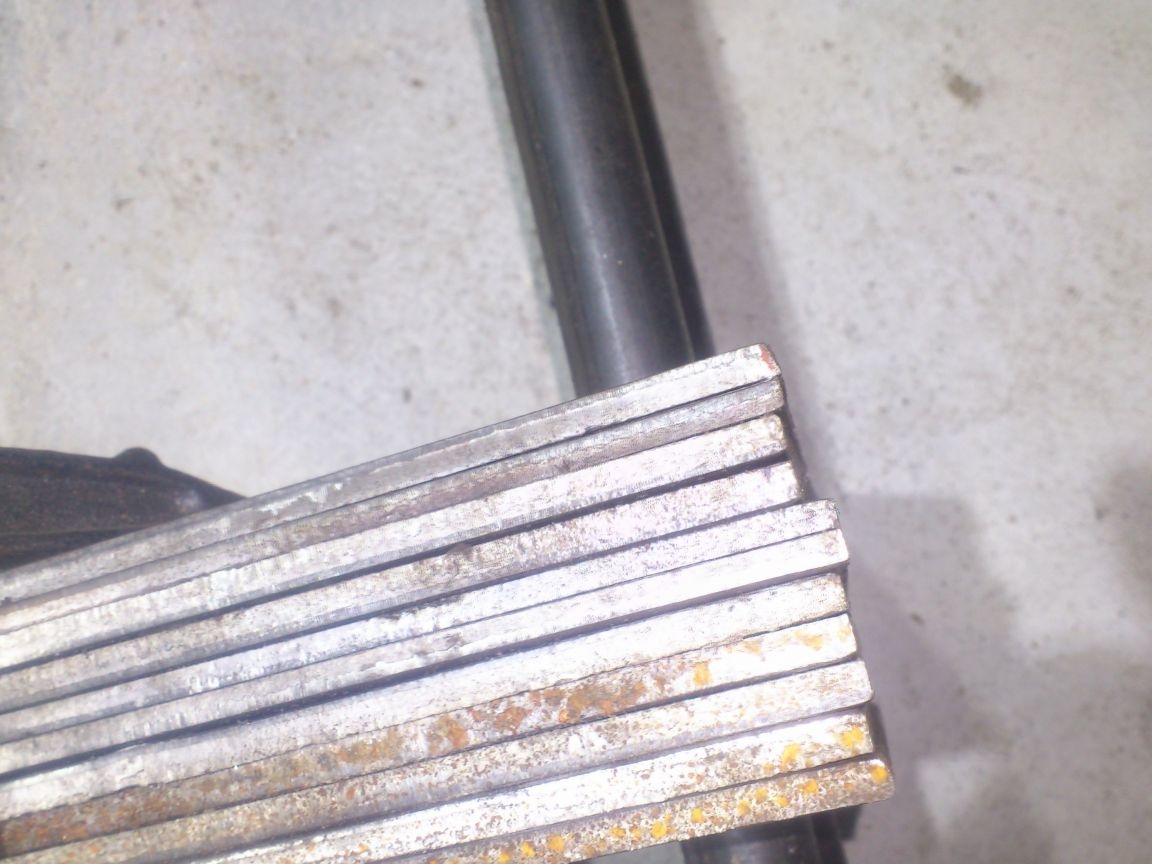
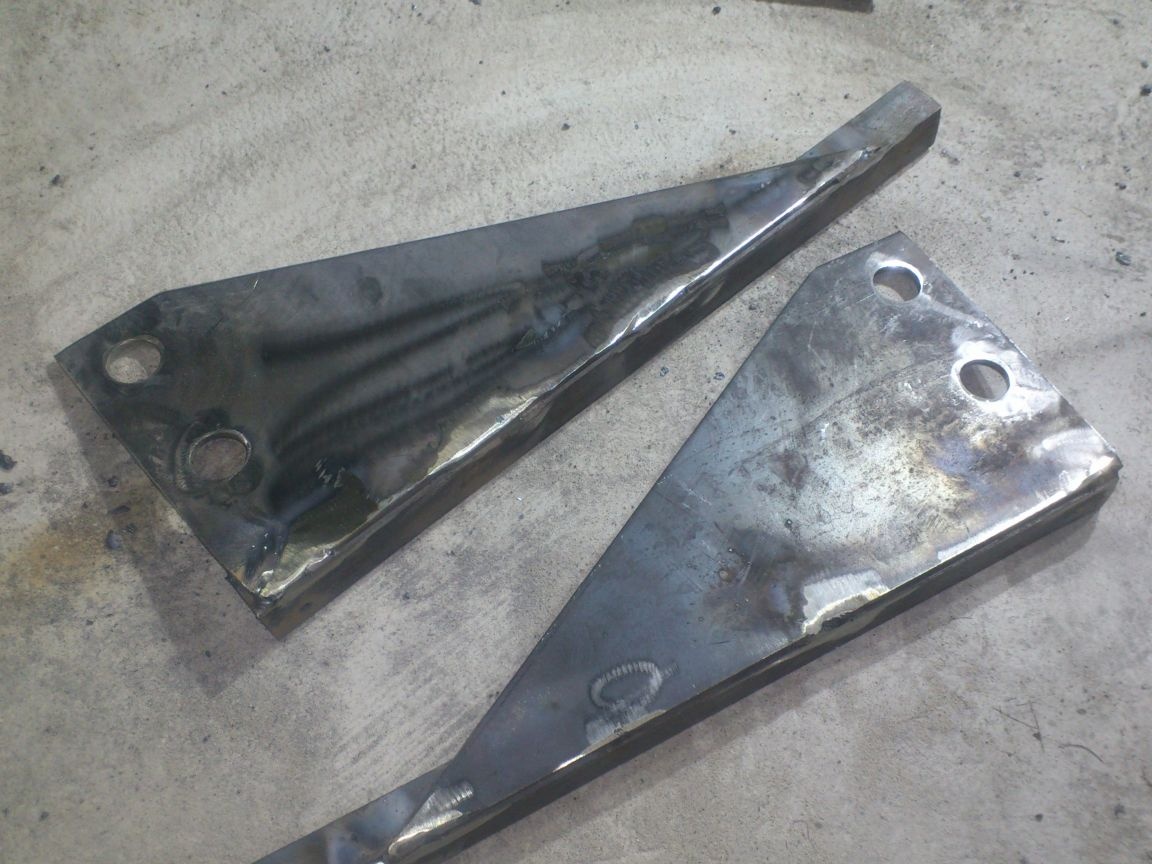
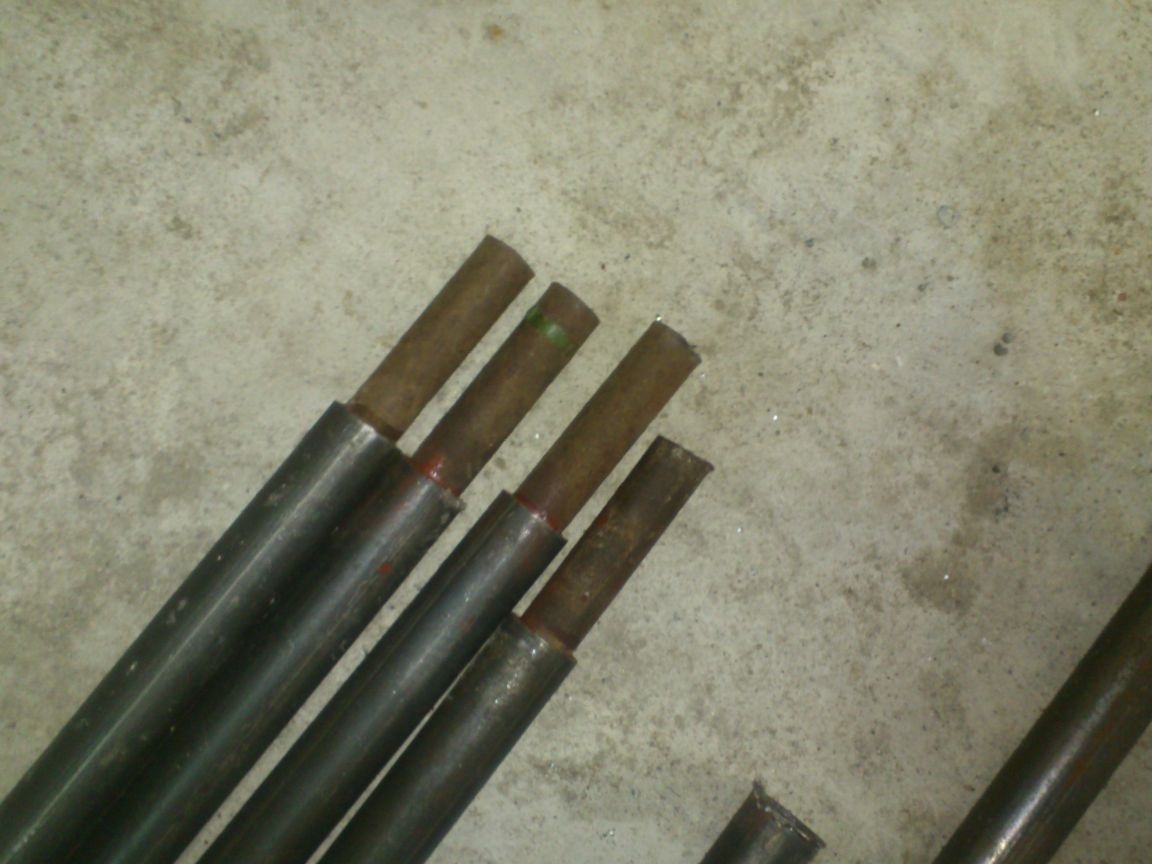
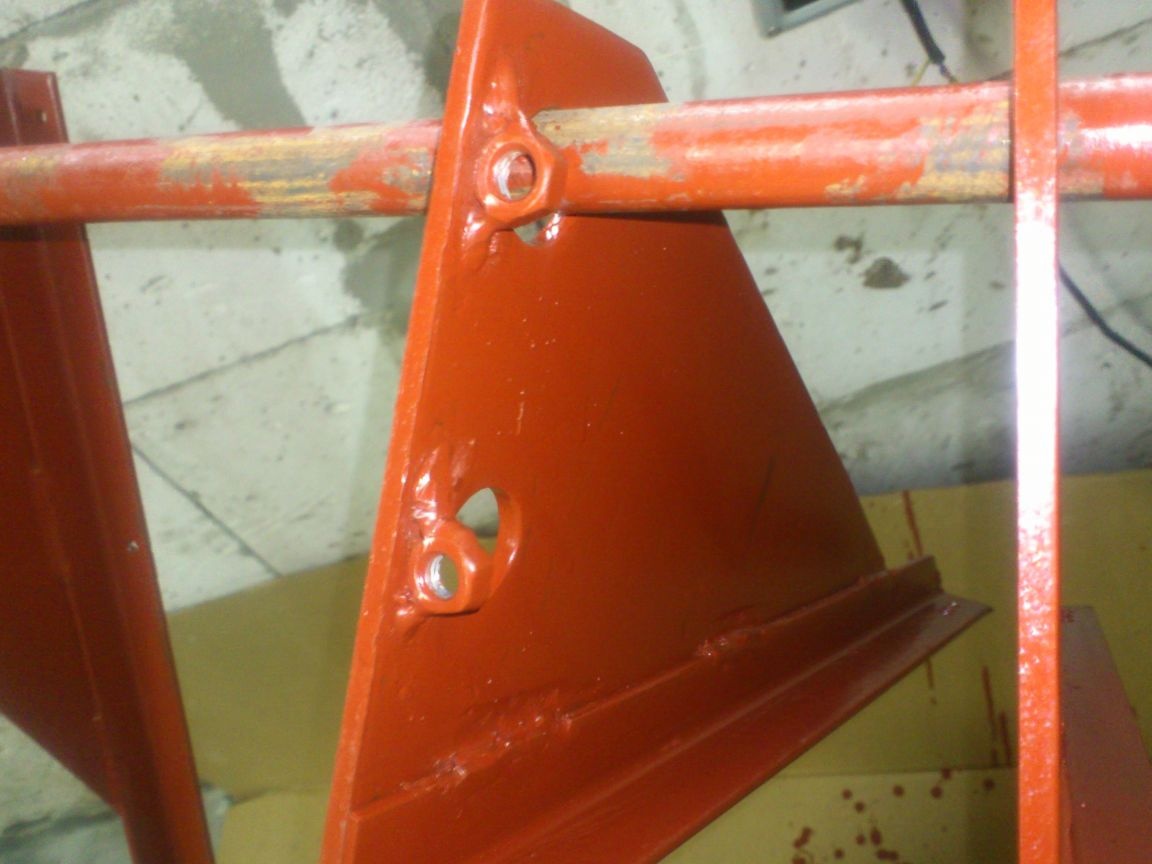
In the summer there were other topics and other concerns ... This topic "hung in the brain with a heavy load", and therefore I immediately perked up when, when I was working at a metal processing plant, I saw such scraps of them:
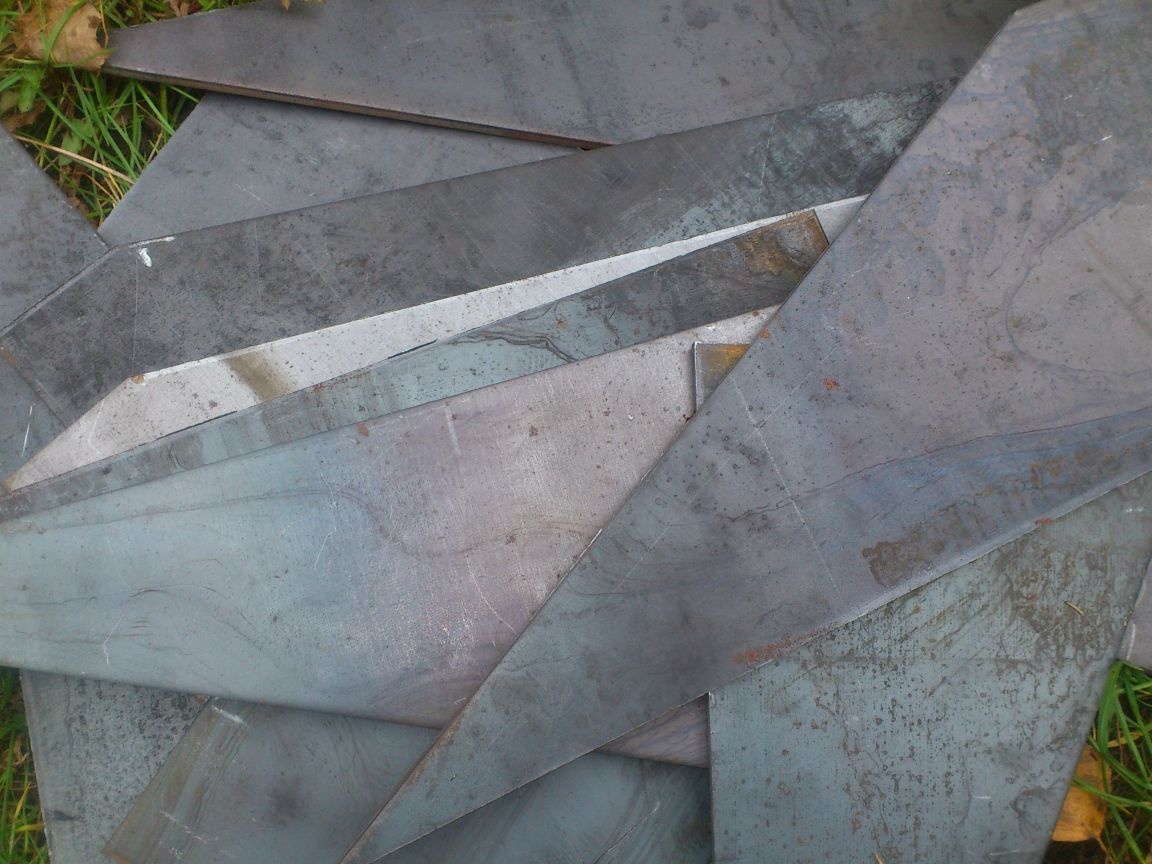
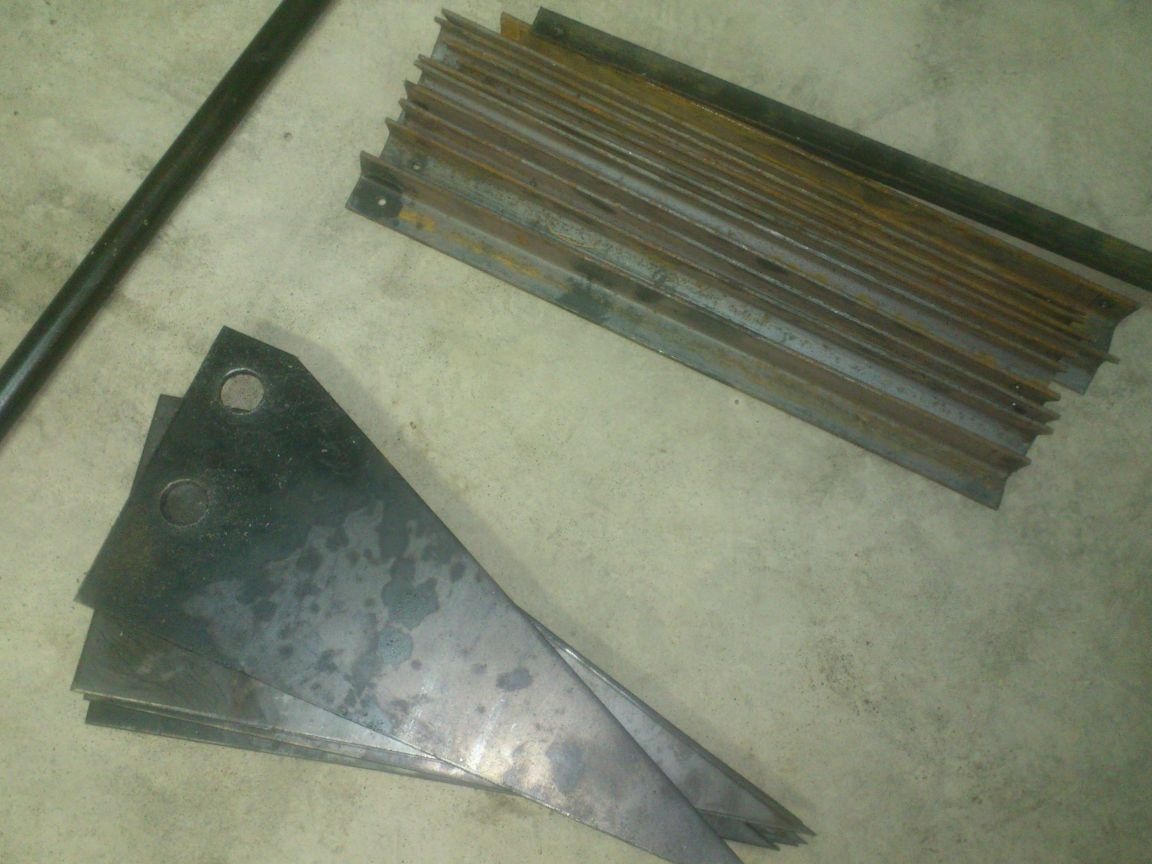
These were rectangular triangles with legs 350 and 117 mm from a sheet 5 mm thick.
350mm !!!
This is just the step of the Monterrey profile step, which my roof has !!!! I asked, and they gave me for scrap for the same weight !!! (They also had to get re-melted))))
Of course, 5mm - a bit thick ... It would be better - 2-3mm, but to the "gift horse ..." ... In short, they will be stronger ..)))
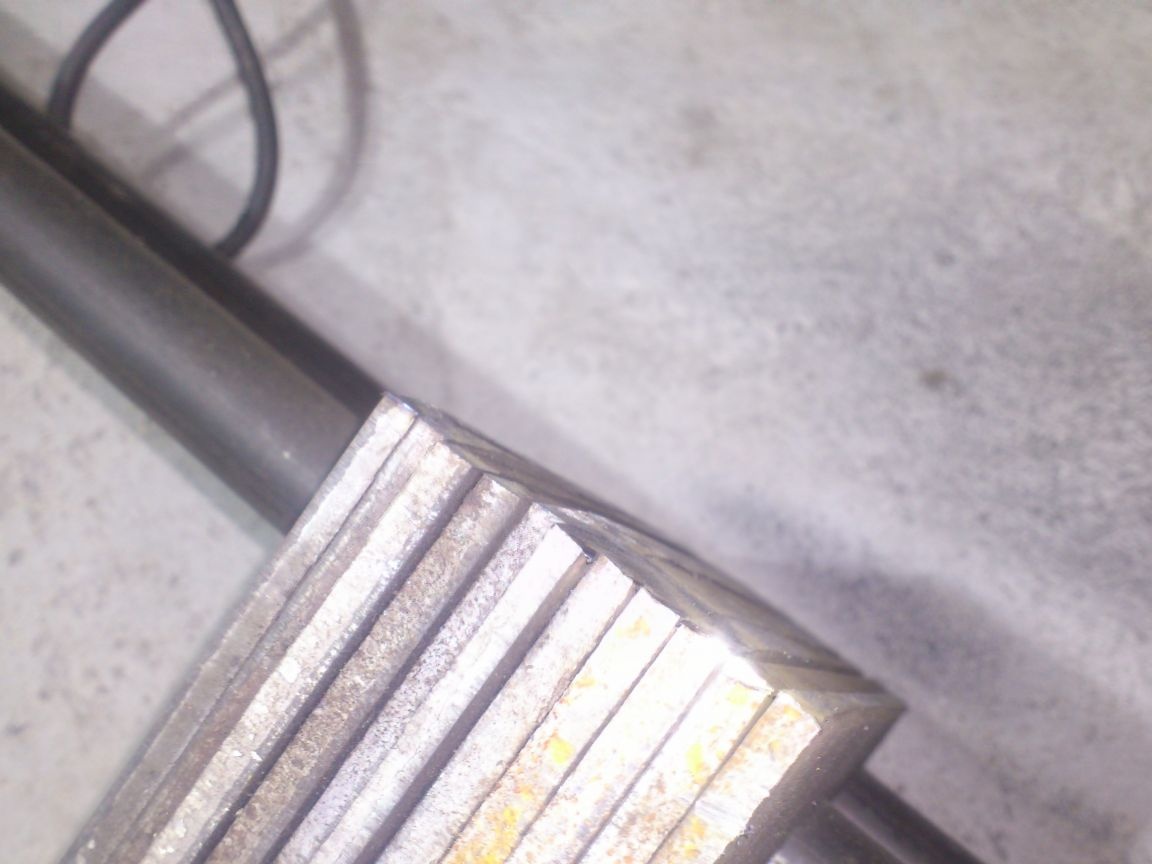
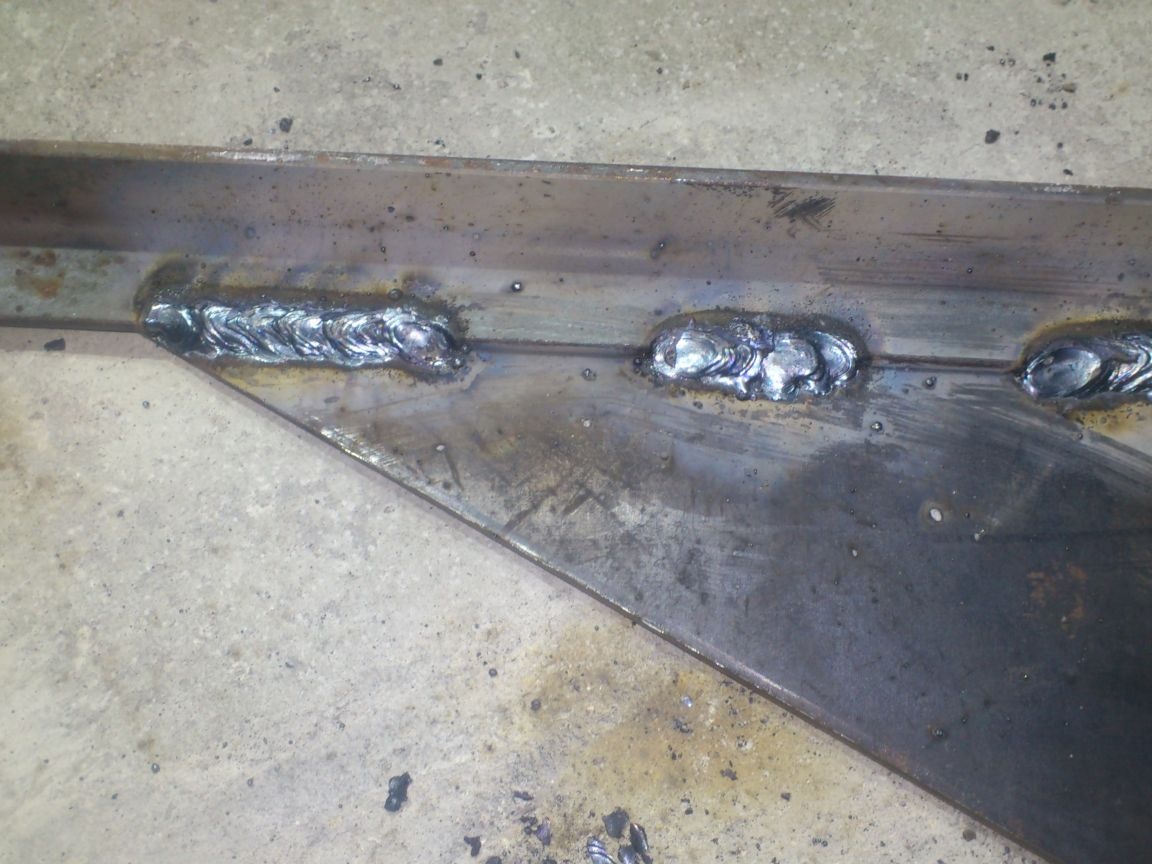
Moreover, in the same place, at the same enterprise, I exchanged scraps of corners No. 25 for scrap:
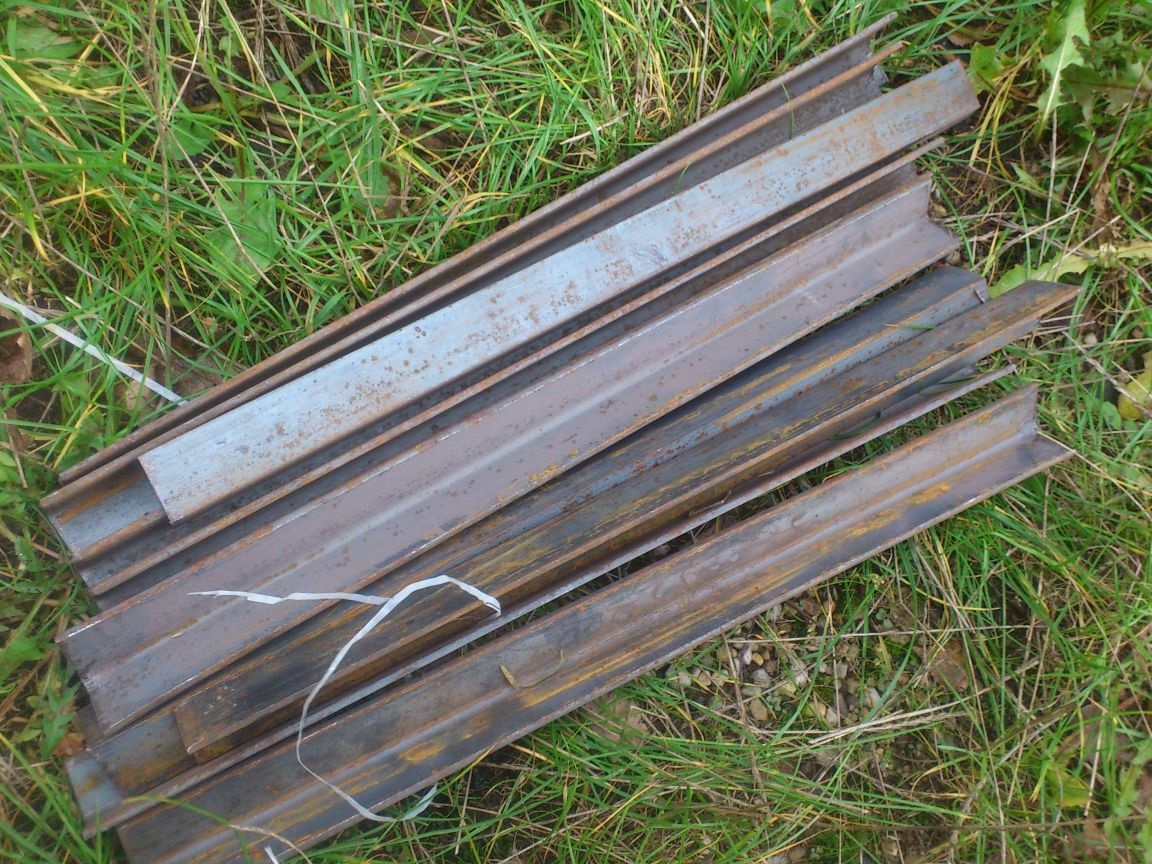
In the photo, I already trimmed them all to a size of 400 mm.
So let's get started. Here is what I needed:
1. Sheet metal.
2. Corner 25 to 25 mm.
3. Steel pipe DU15
4. Circle (metal rolling) 16mm.
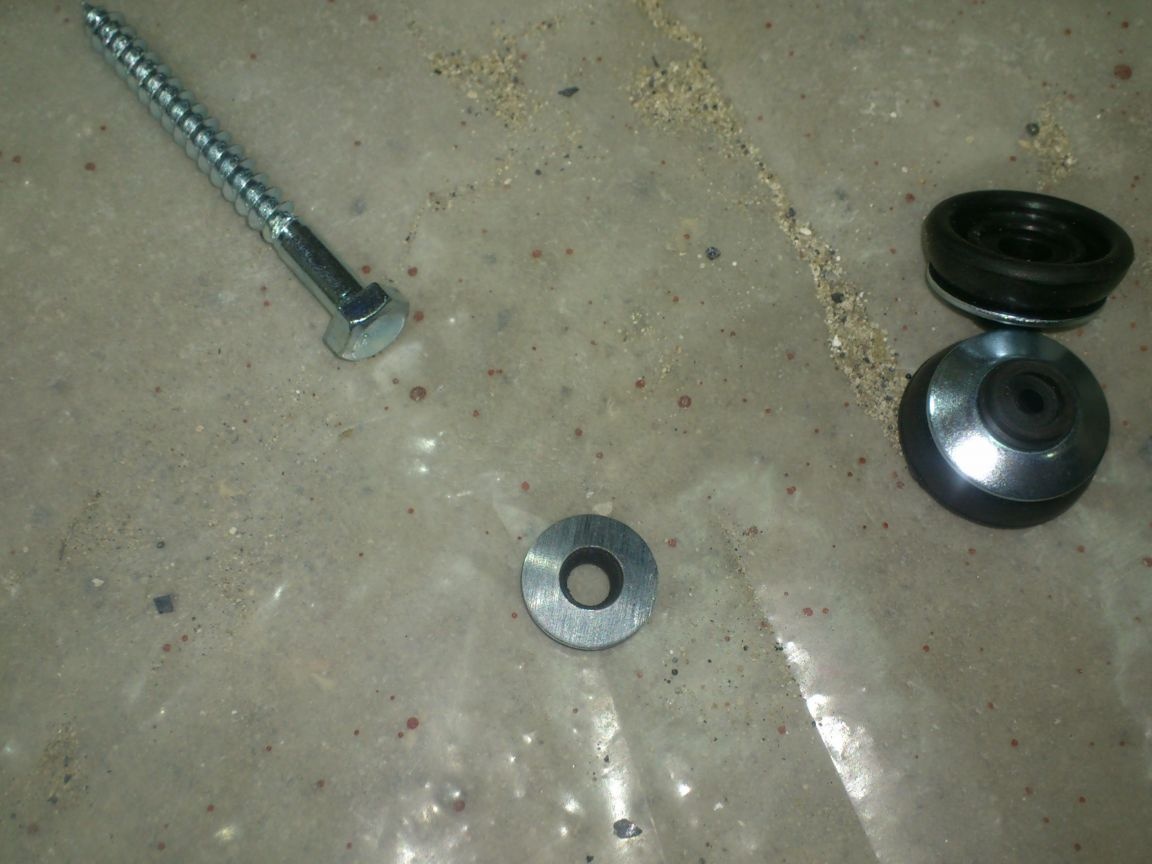
5. M8ypki with M8n 30 bolts (4 pcs each)
6. Roofing painted screws.
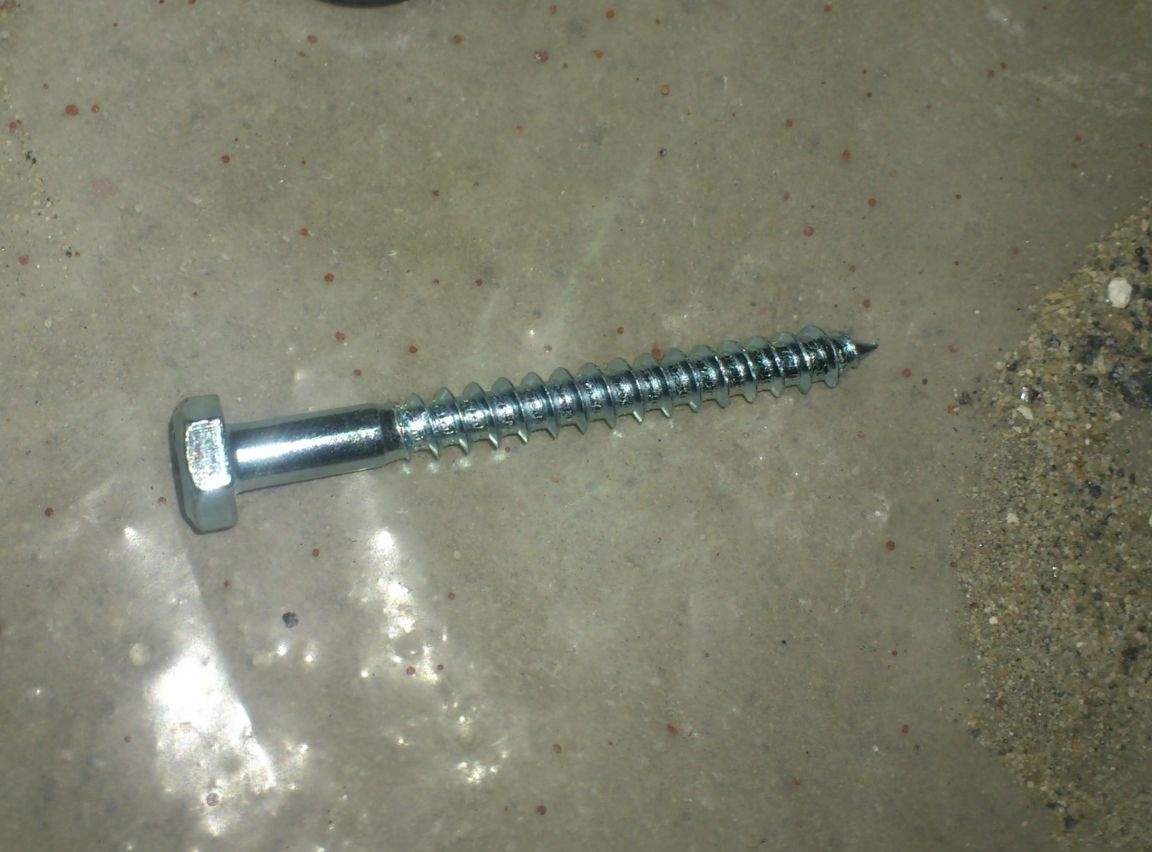
7. Turnkey wood screws 10, 40 mm long
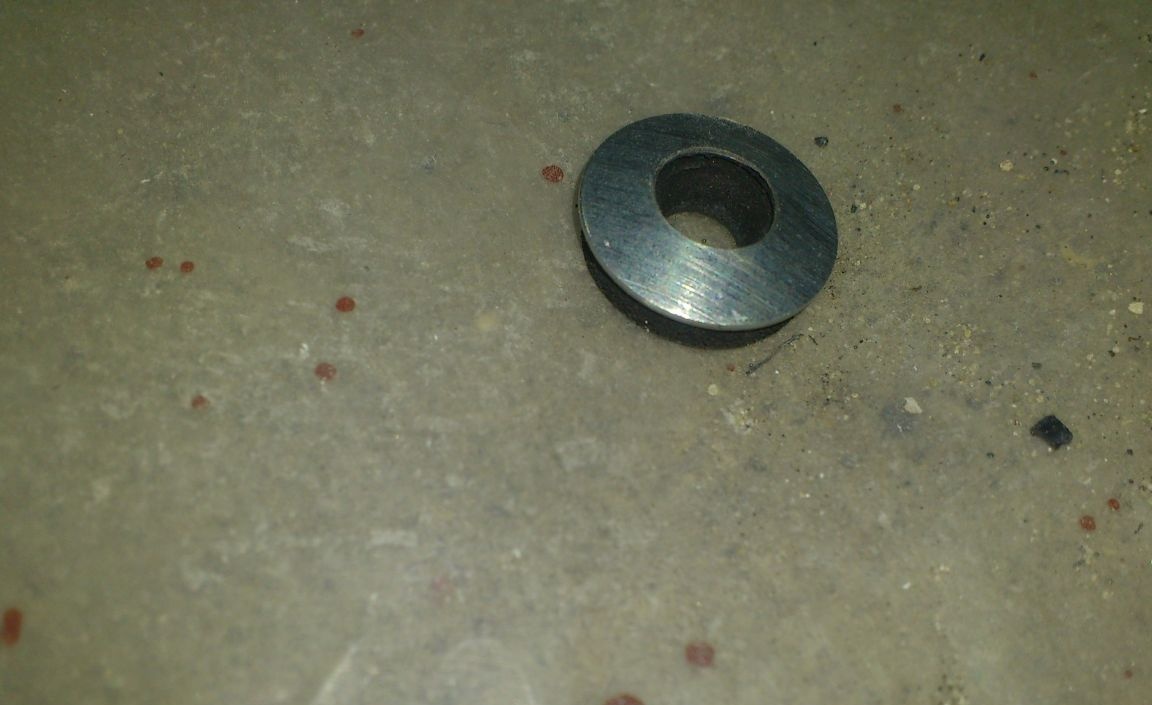
8. Roof sealing washers of different sizes.
10. Primer for metal ("Ship meerk")
11. Enamel PF-115.
12. Plastic plugs for pipes DU15
First, I cut a short leg in triangles to a length of 150 mm, making rectangular trapezoid from them:
Then in one of them I marked and drilled two holes at a distance of 70 and 80 mm from the “long leg” and about forty mm from the short one:
After that, using this workpiece as a template, I drilled similar holes in the rest. Equal to "hypotenuse" (Dimensions "danced" a little). Before drilling the second hole, I fixed the positions of the first by inserting an aluminum exhaust rivet:
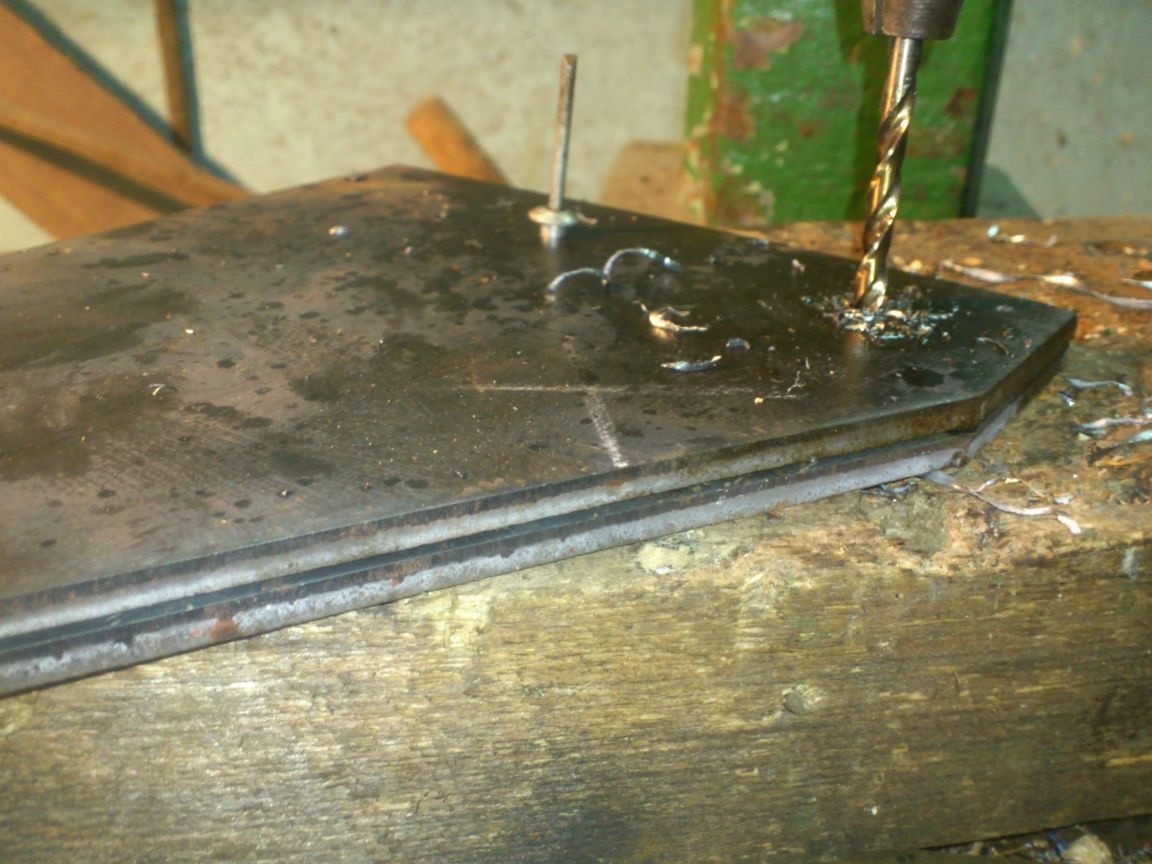
So I drilled all the blanks, making two holes in them at the same distances relative to the “hypotenuse” (Let's agree: to make it easier, I will call the sides “legs” and “hypotenuse”, although this is no longer triangles, but trapezoids)) )).
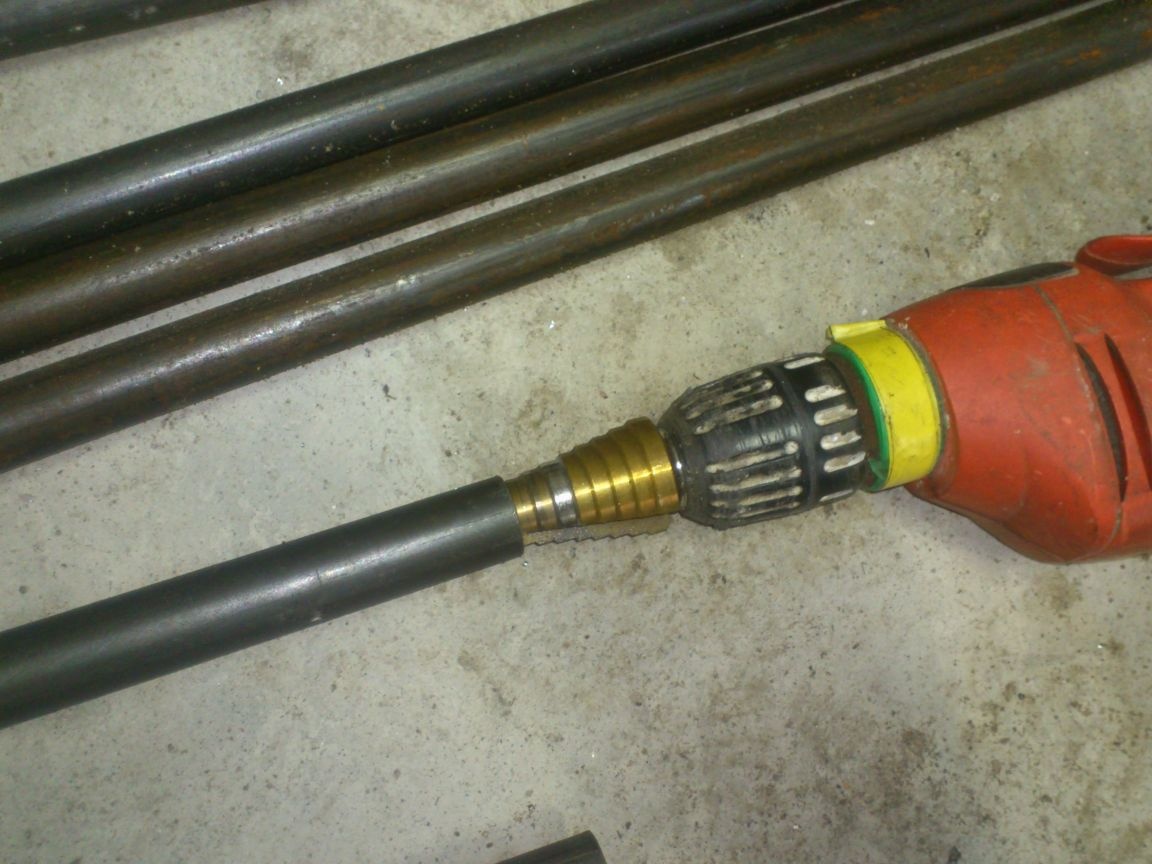
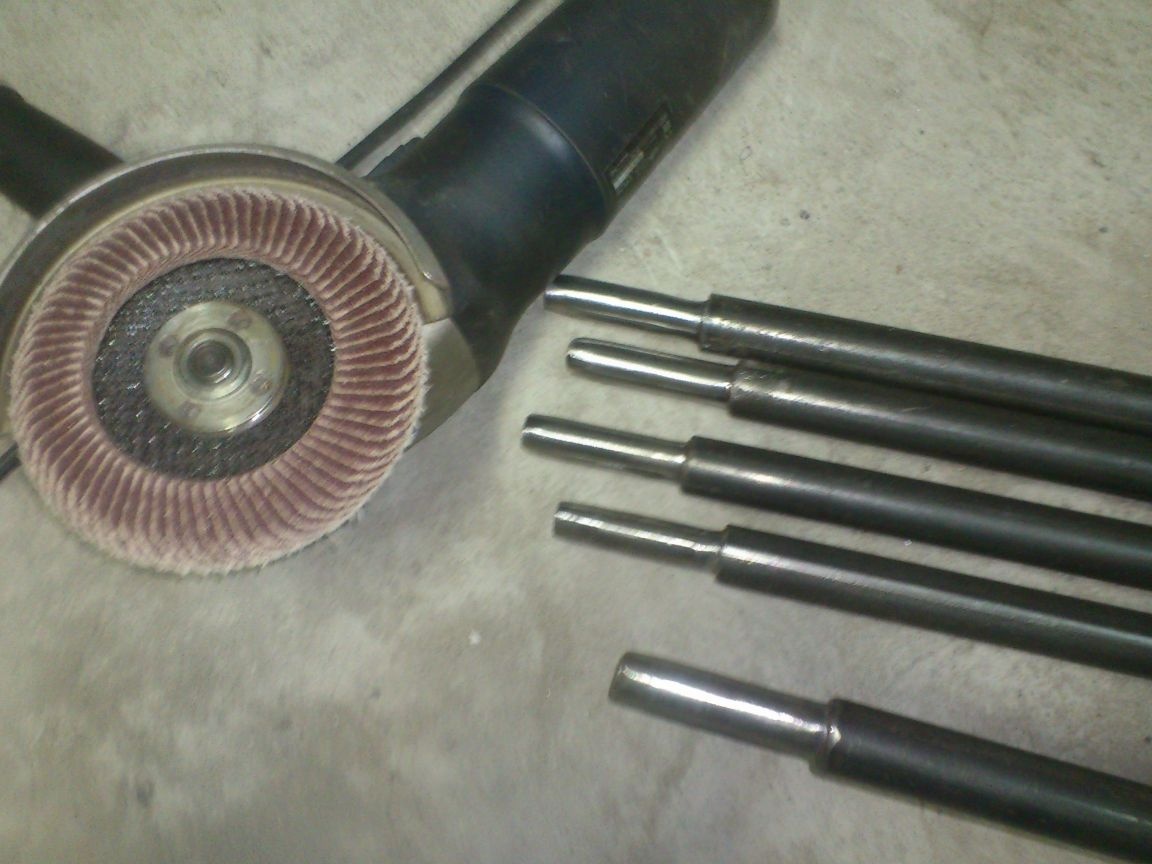
After that, I equipped the drilling machine with a step drill, and increased the diameters to 24 mm:
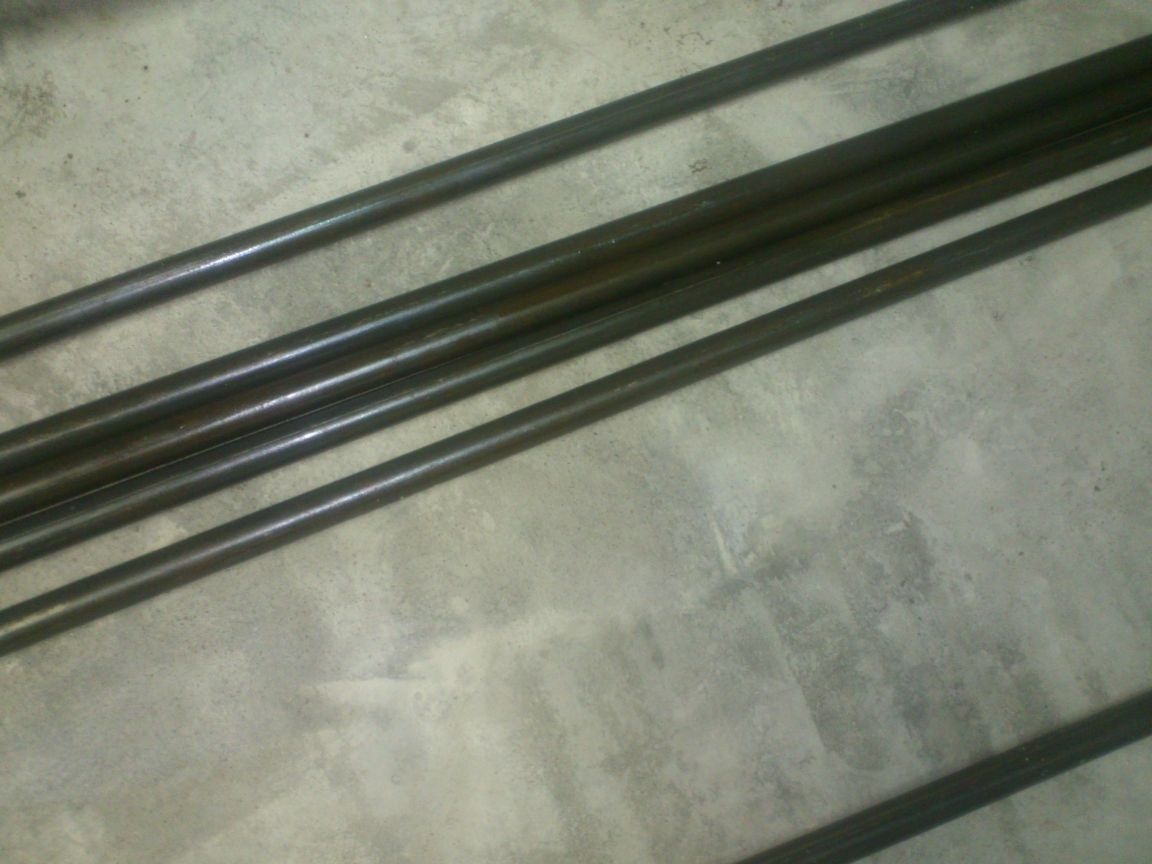
For the manufacture of the barriers themselves, DU15 pipes were purchased. For the convenience of transportation and installation, I cut them into segments of 3 meters:
So, everything is ready for me:
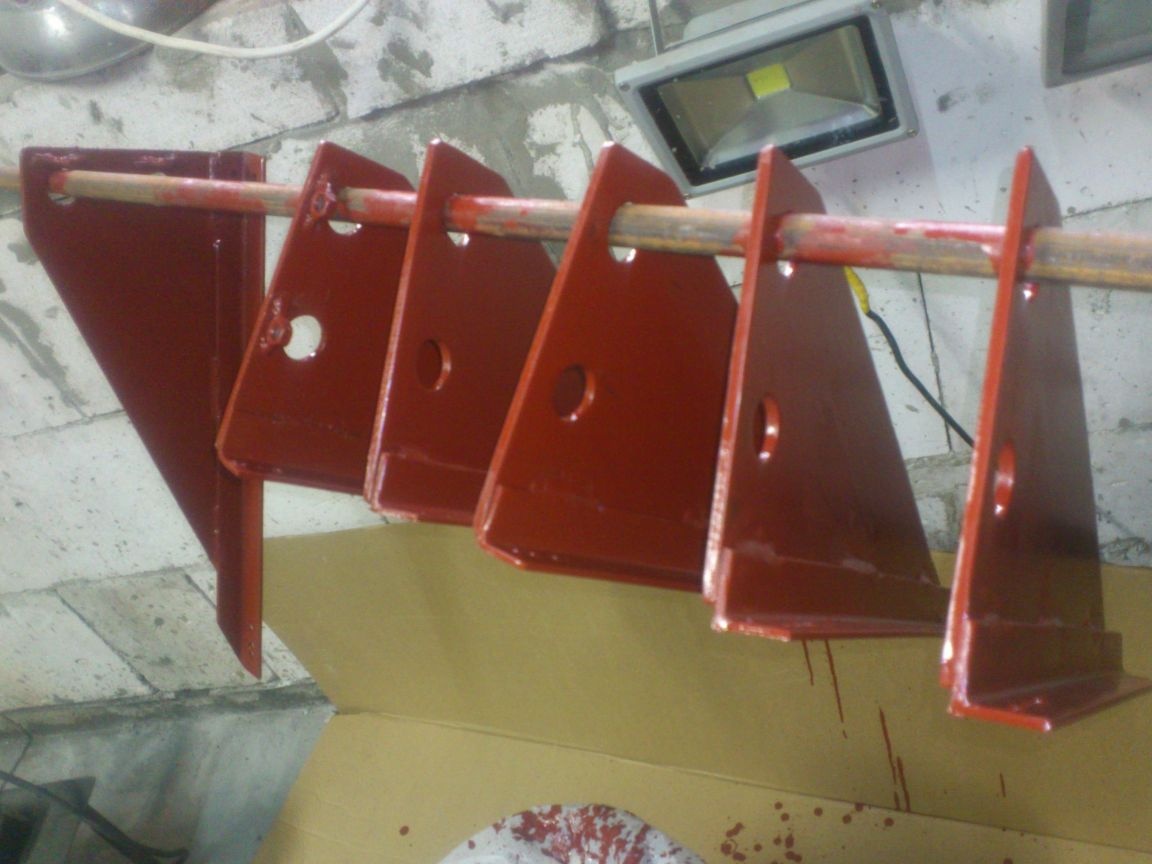
You can start making brackets. At this stage, I tried on blanks to see what I got:
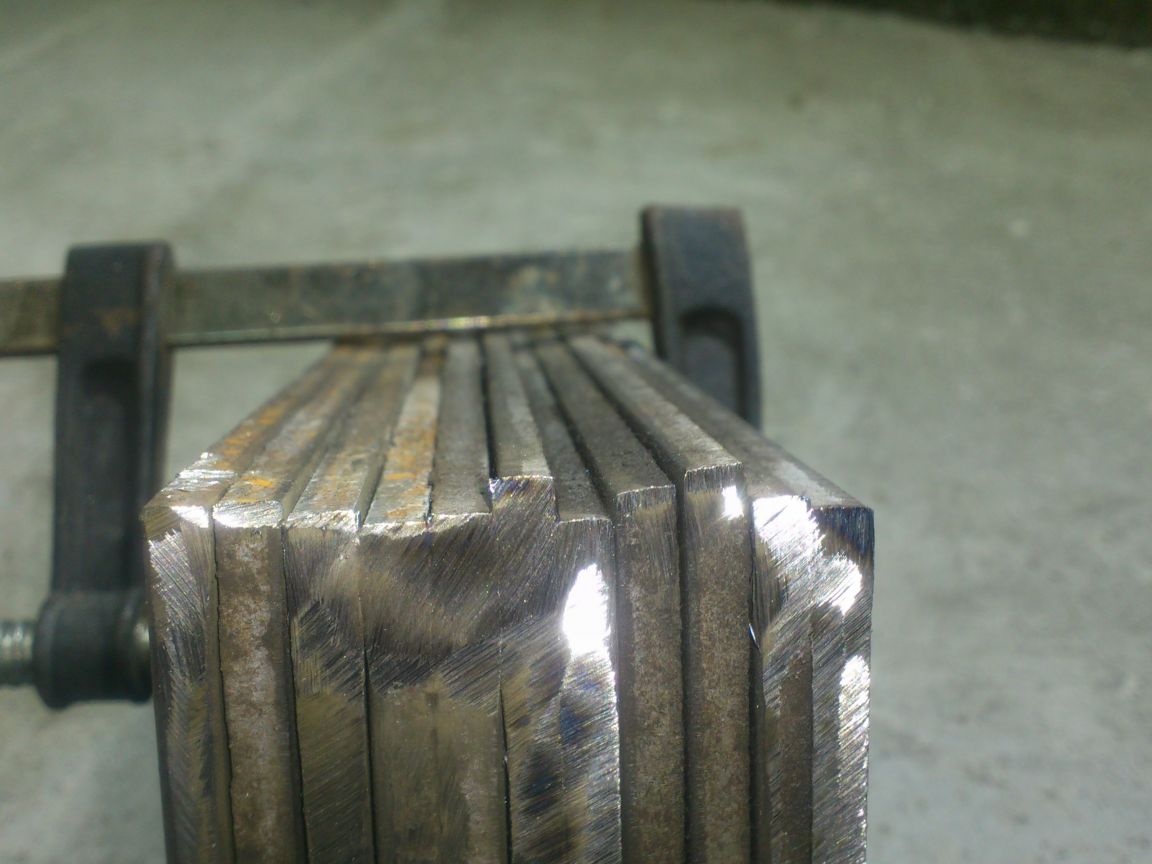
As I already said, the dimensions of my blanks danced a bit, and I need brackets of identical sizes. Here's how I “fought” this:
I still have two meter sections of pipe. I put on them the “whole pack”, aligned it on the hypotenuse and pulled it with clamps;

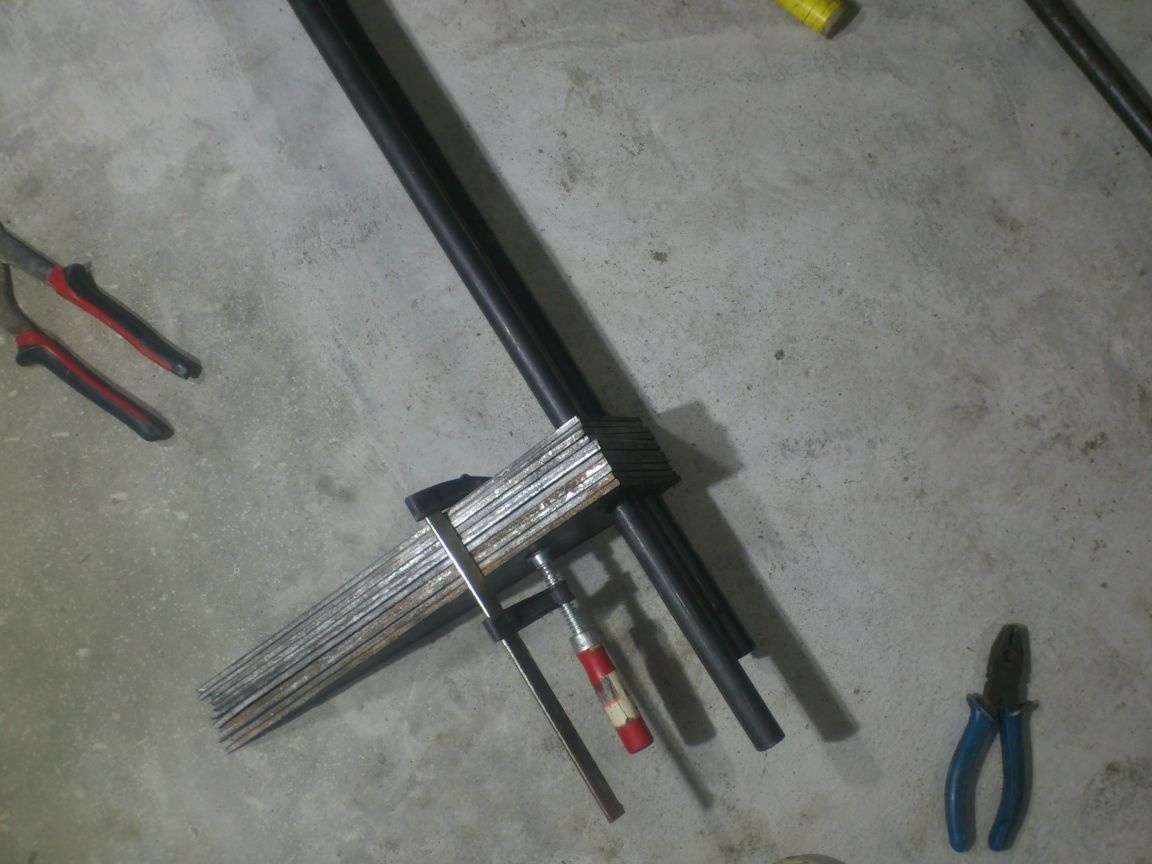
Then, using a grinder with a thick scrubbing circle, I leveled the length of the long leg (stoch short):

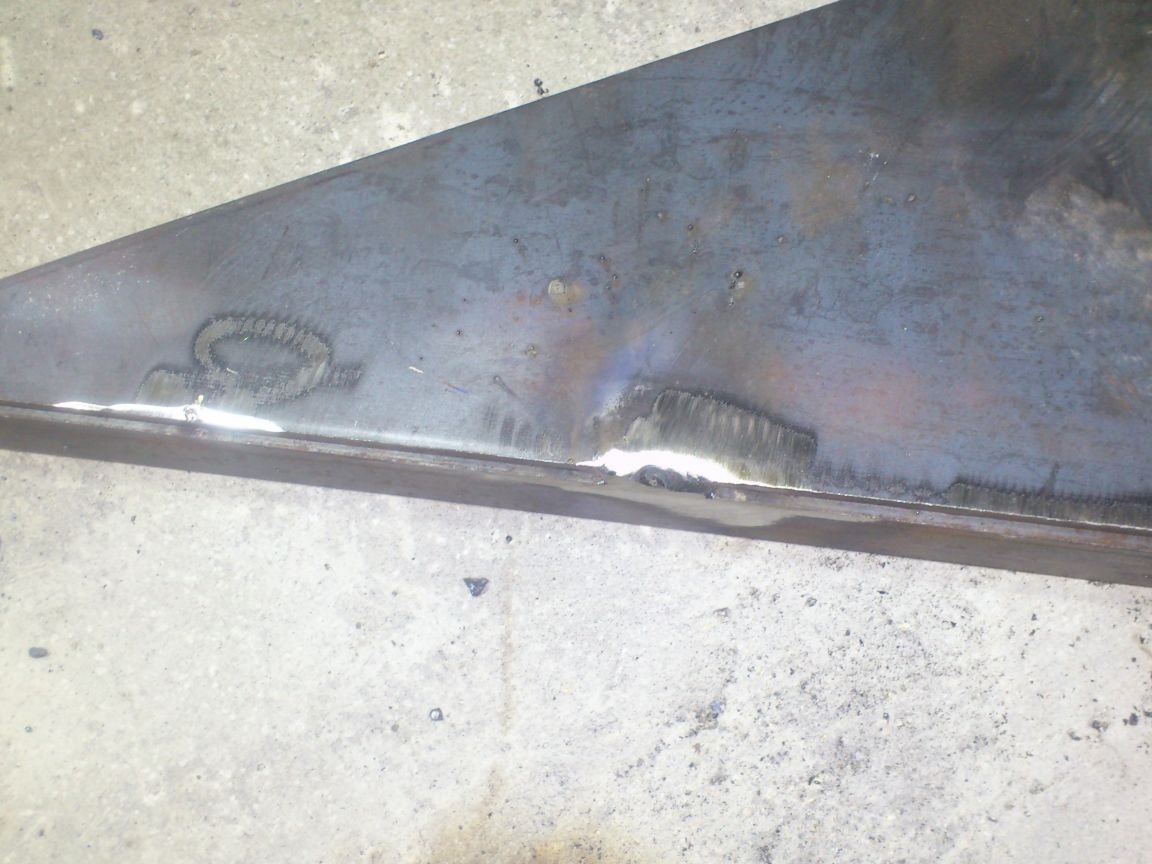
So, in two planes (hypotenuse and long leg), they are all the same. One plane remained - the length of the short leg, i.e., the height of the bracket. I did not cut them either, because they would still be welded to the corners. Then evenly))).
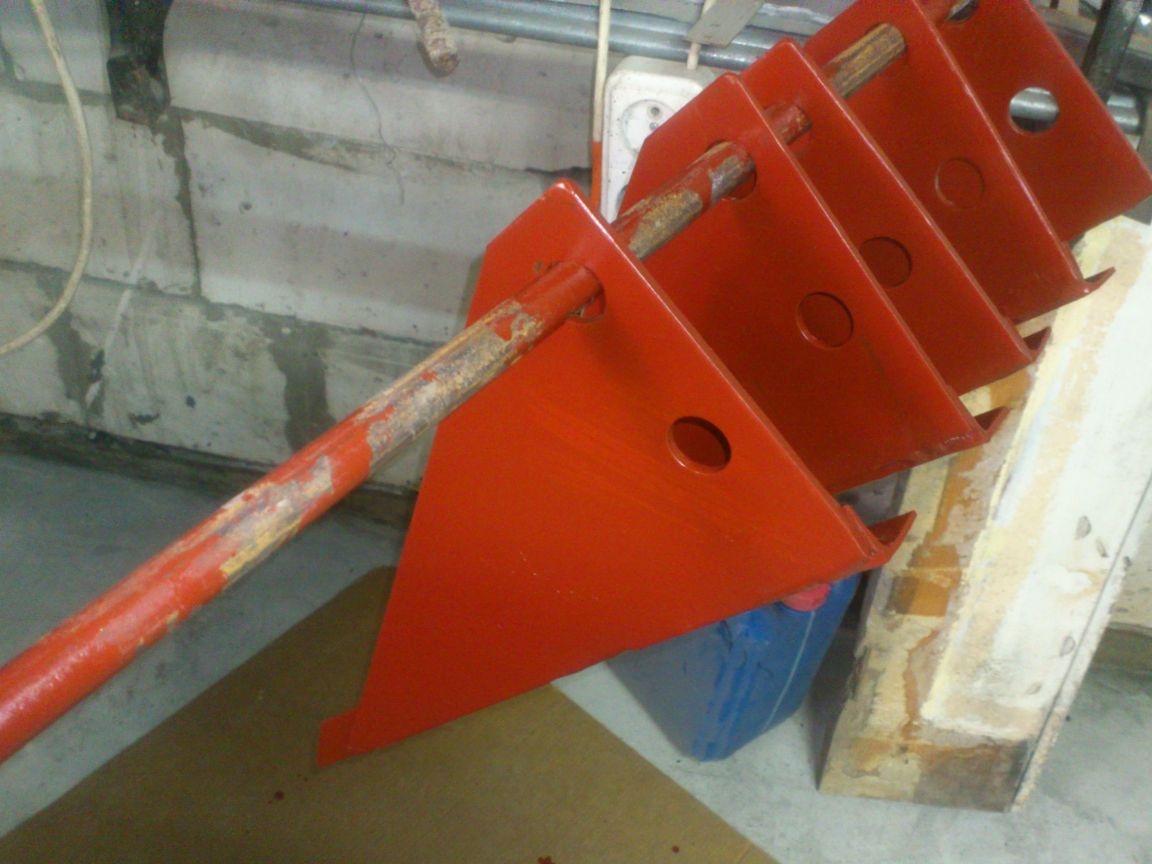
I chose the two highest, so far I have put off the rest.
After that, I cleaned the seams so as not to interfere, and using it as a template, welded a second, exactly the same size, only "mirror":
So, I have two mirror-sized “mirror” brackets.
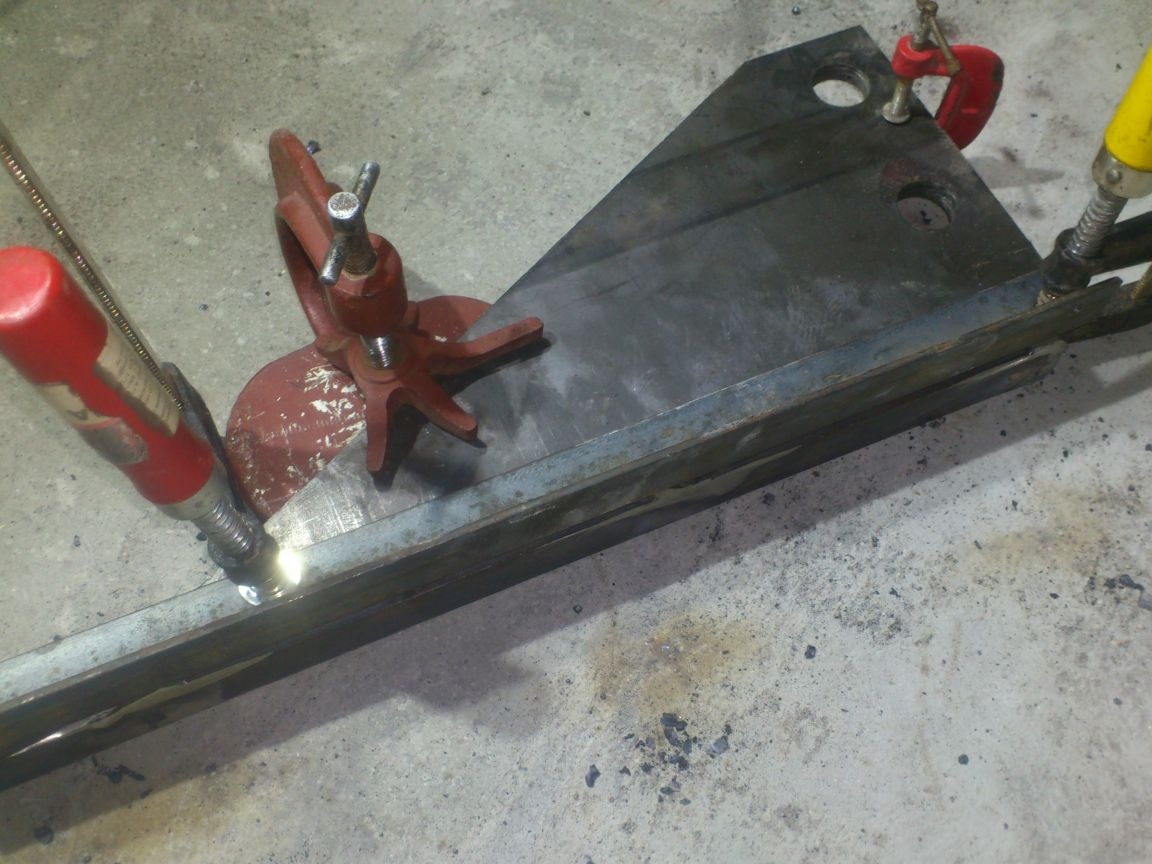
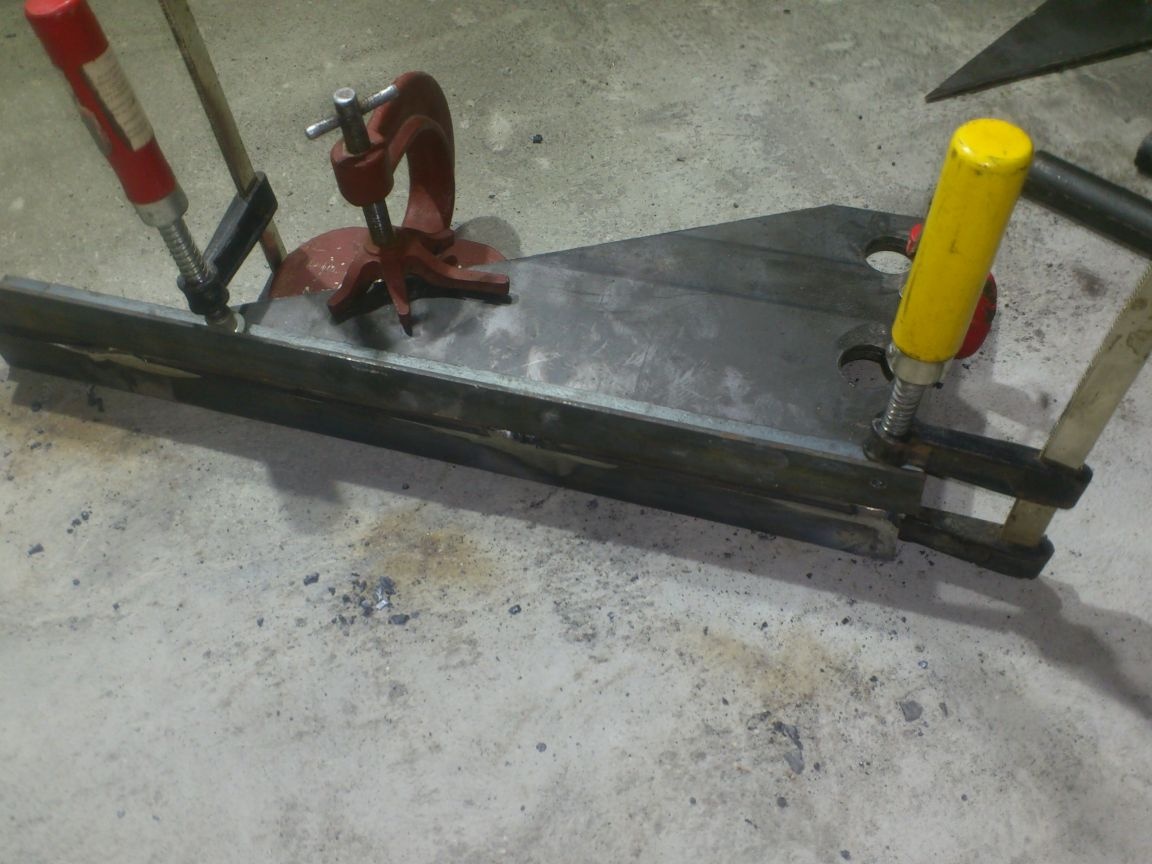
Let me remind you, I made them from the "highest" workpieces. It remains to make a template and weld the rest on it. As a basis, I needed an even horizontal plane. I used a piece of old wooden wide window sill. On it I screwed the finished brackets around the edges with screws, and between them I screwed the corner-bases of the future:
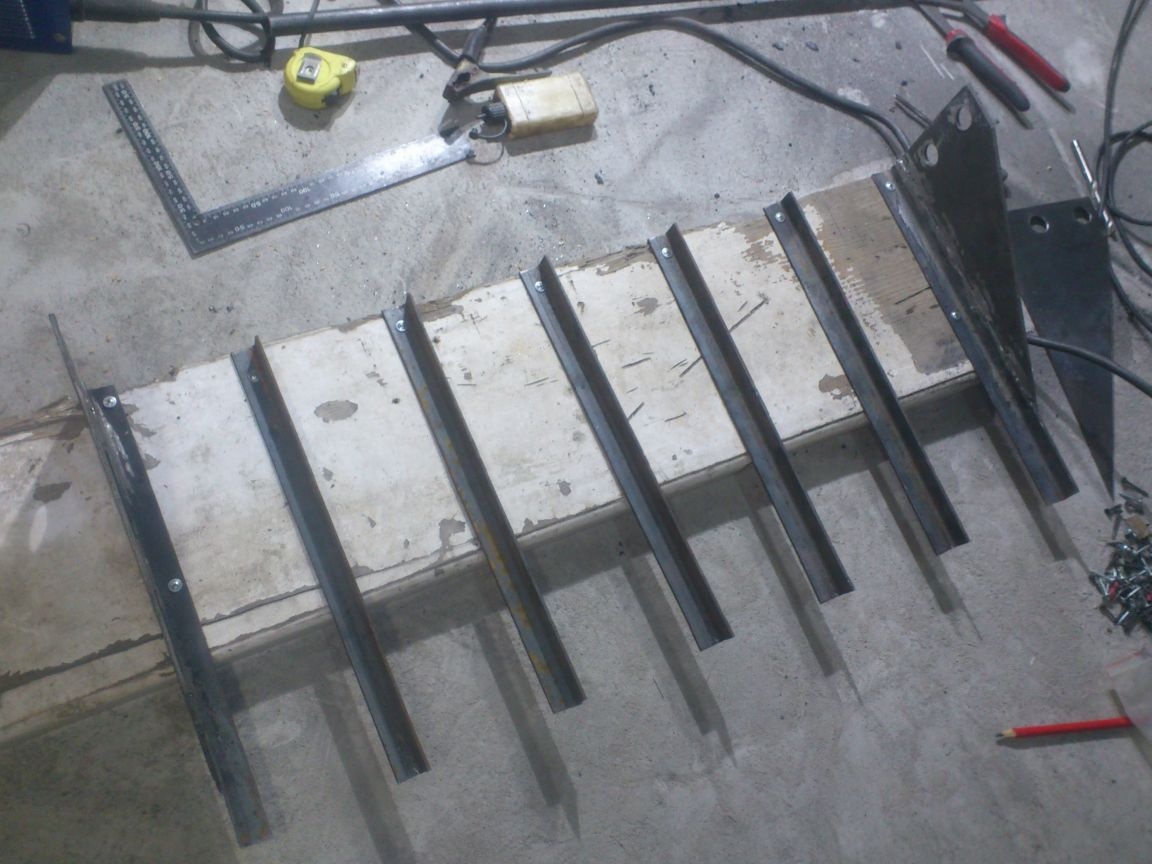
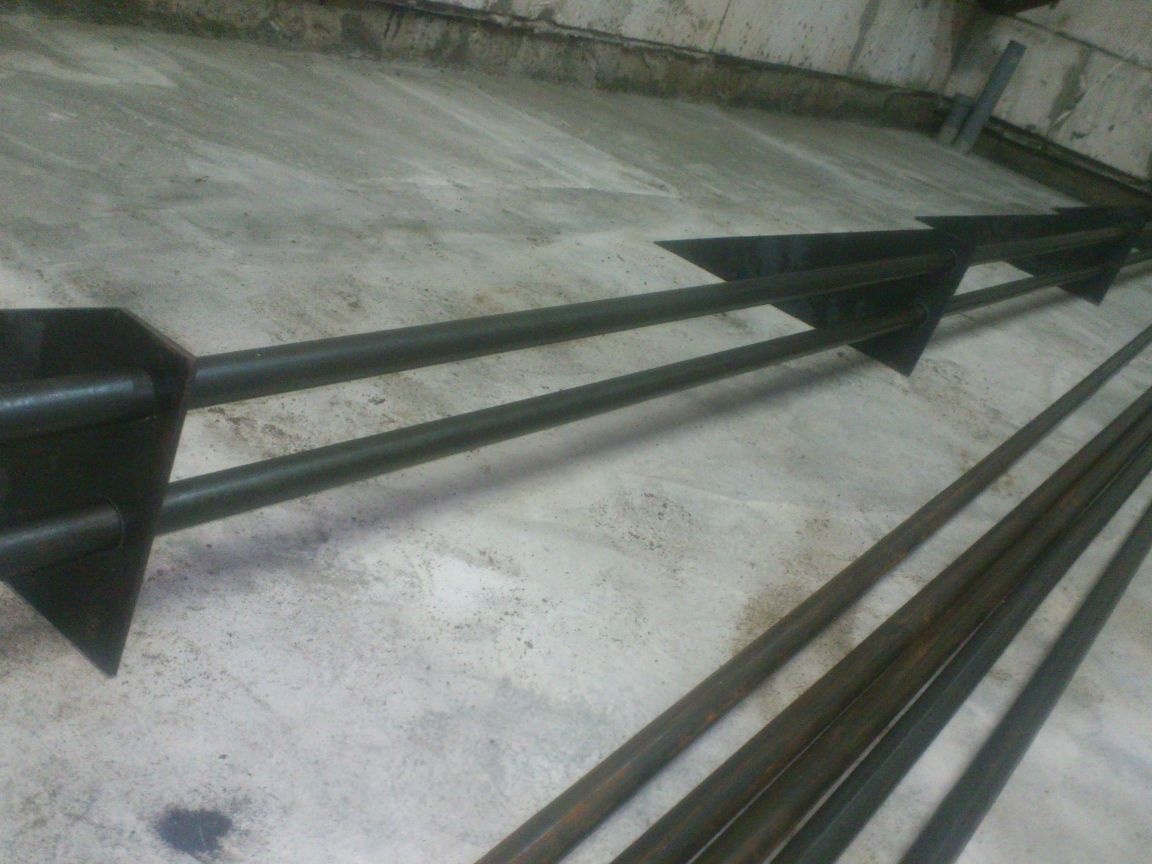
Then he inserted the pipe scraps, hanging the remaining triangles on them:
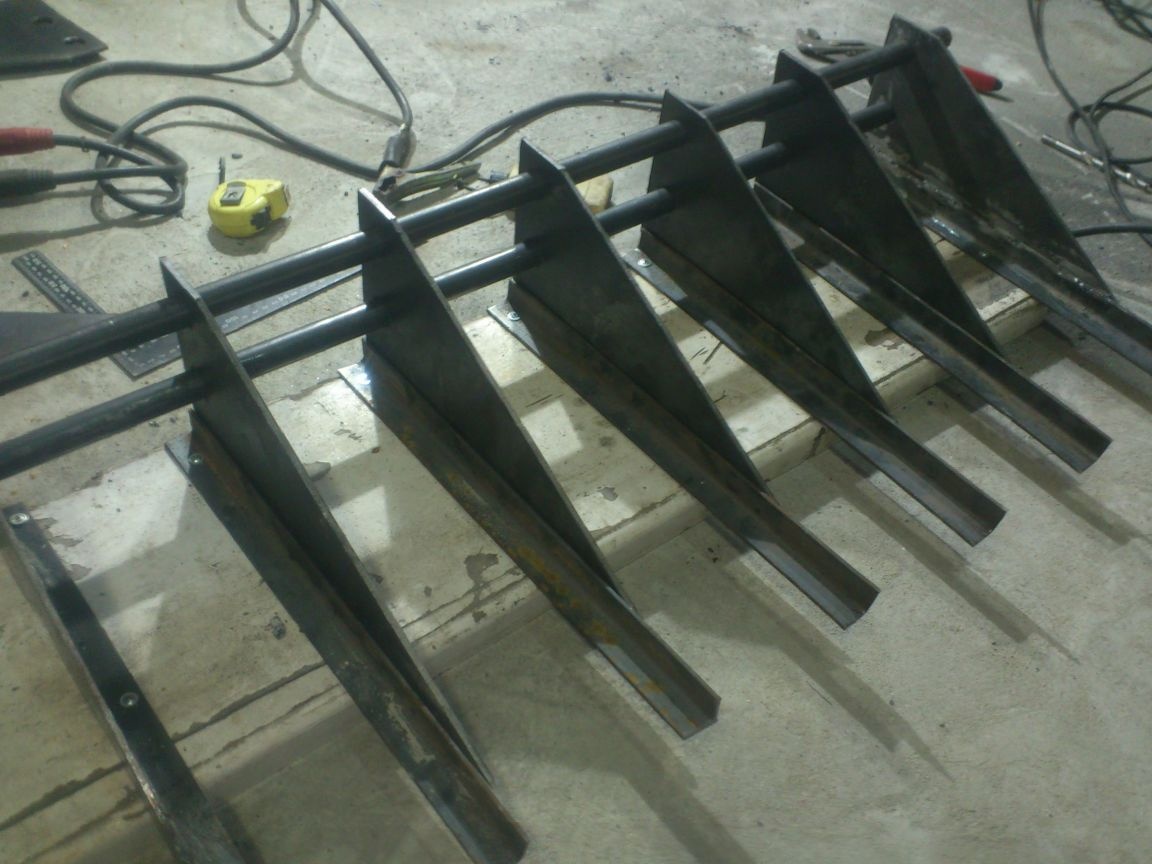
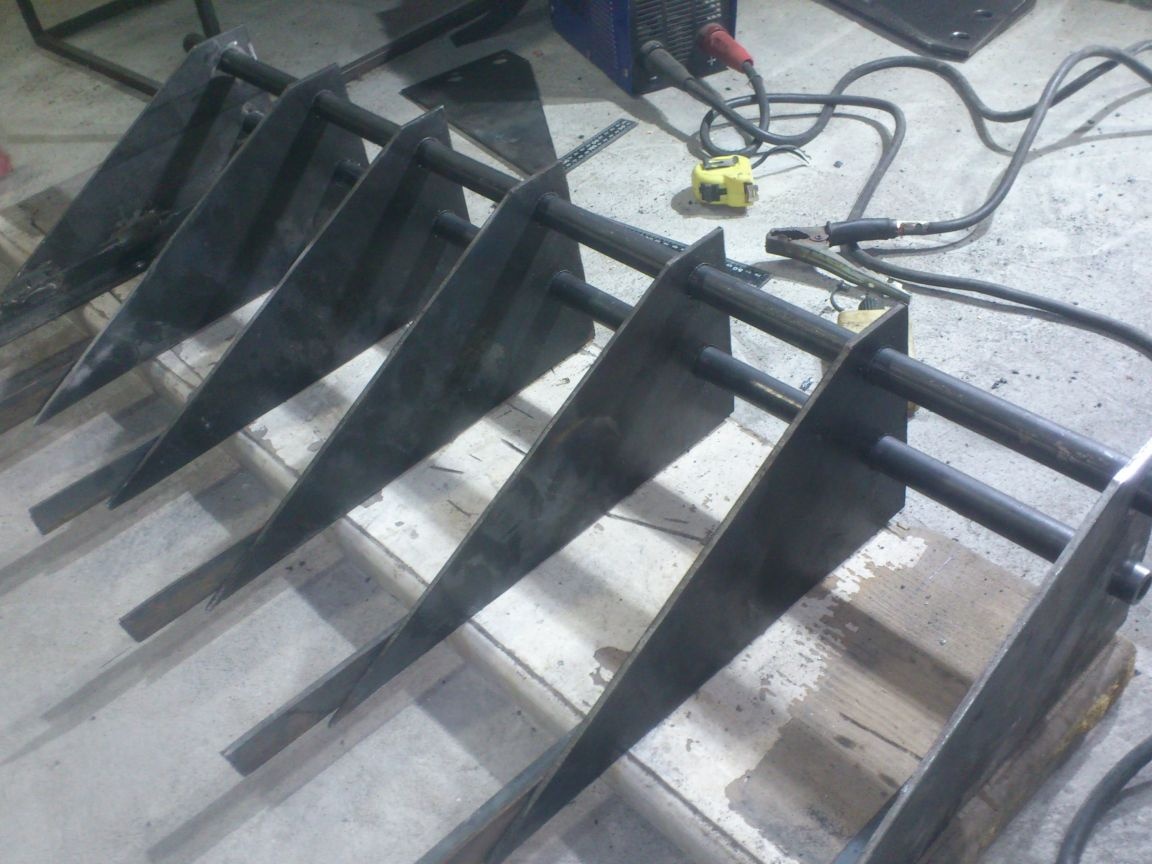
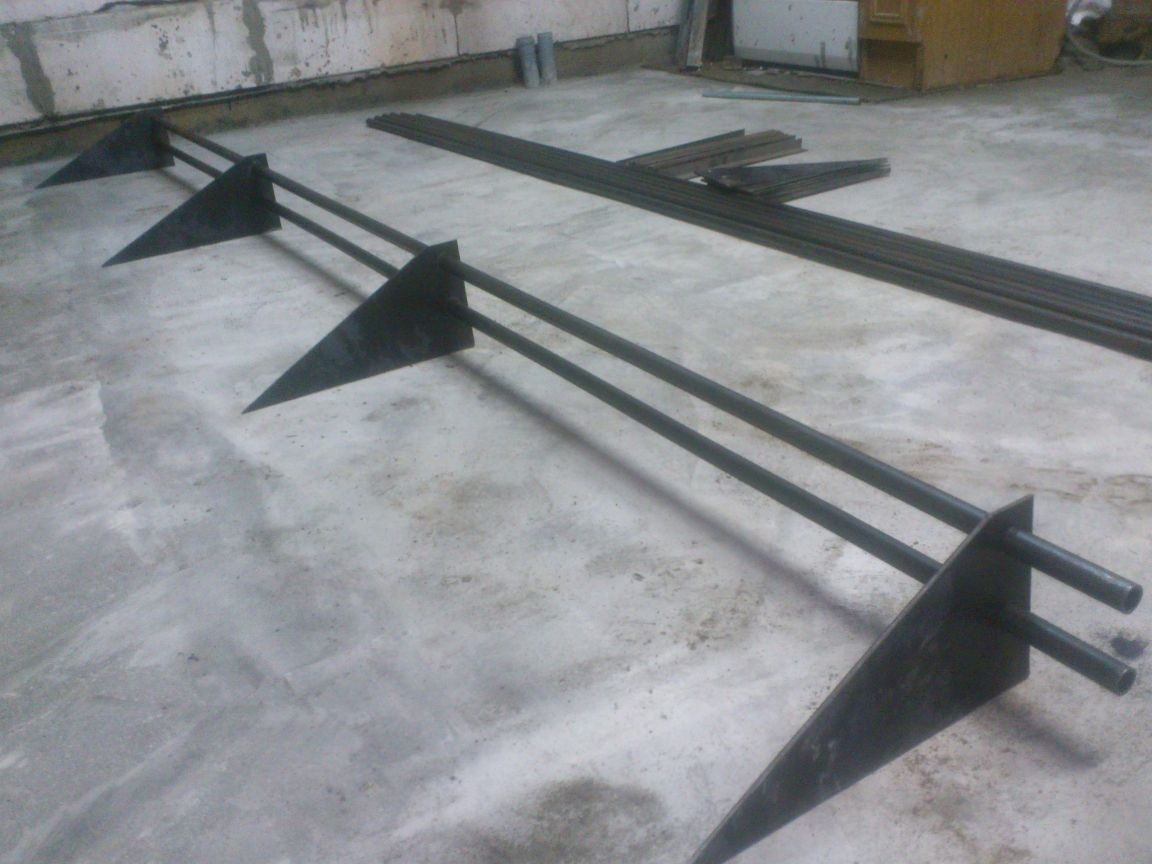
In this position, I cooked them all with the corners. I got 12 absolutely identical brackets.
Now the pipes.
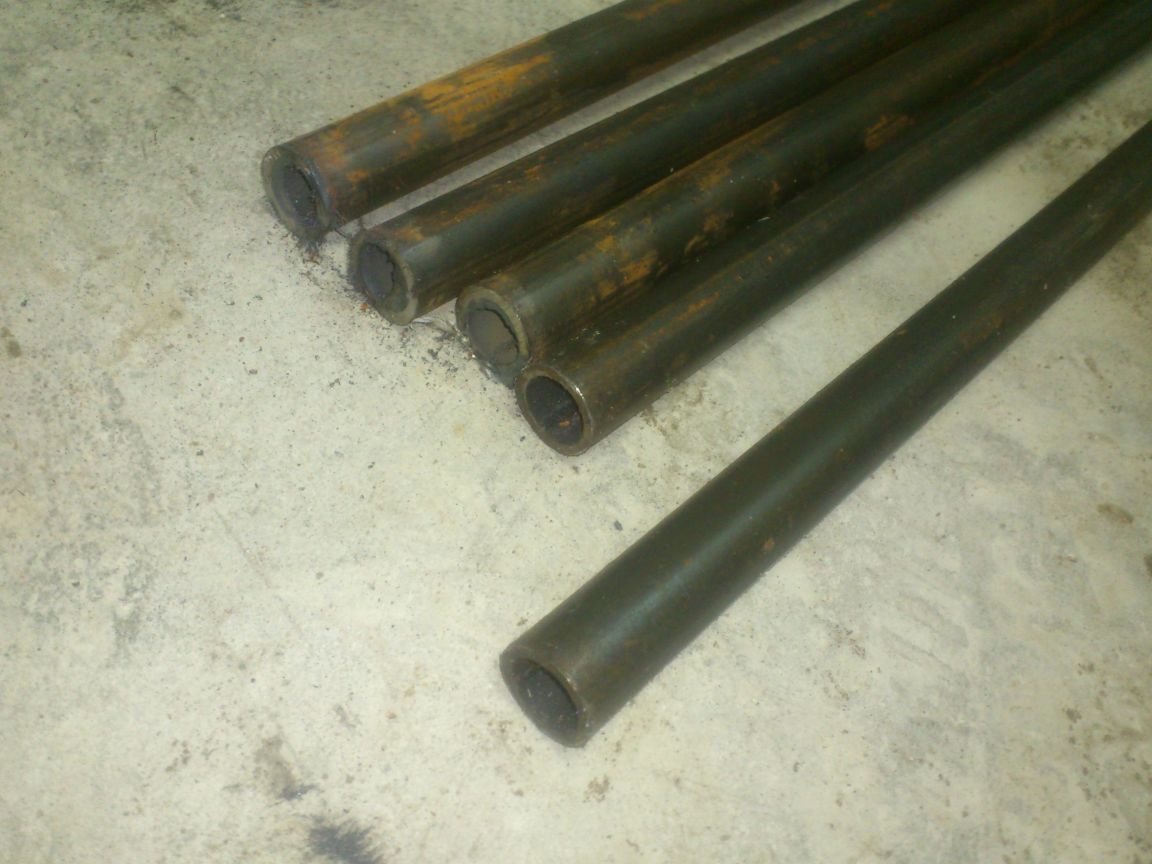
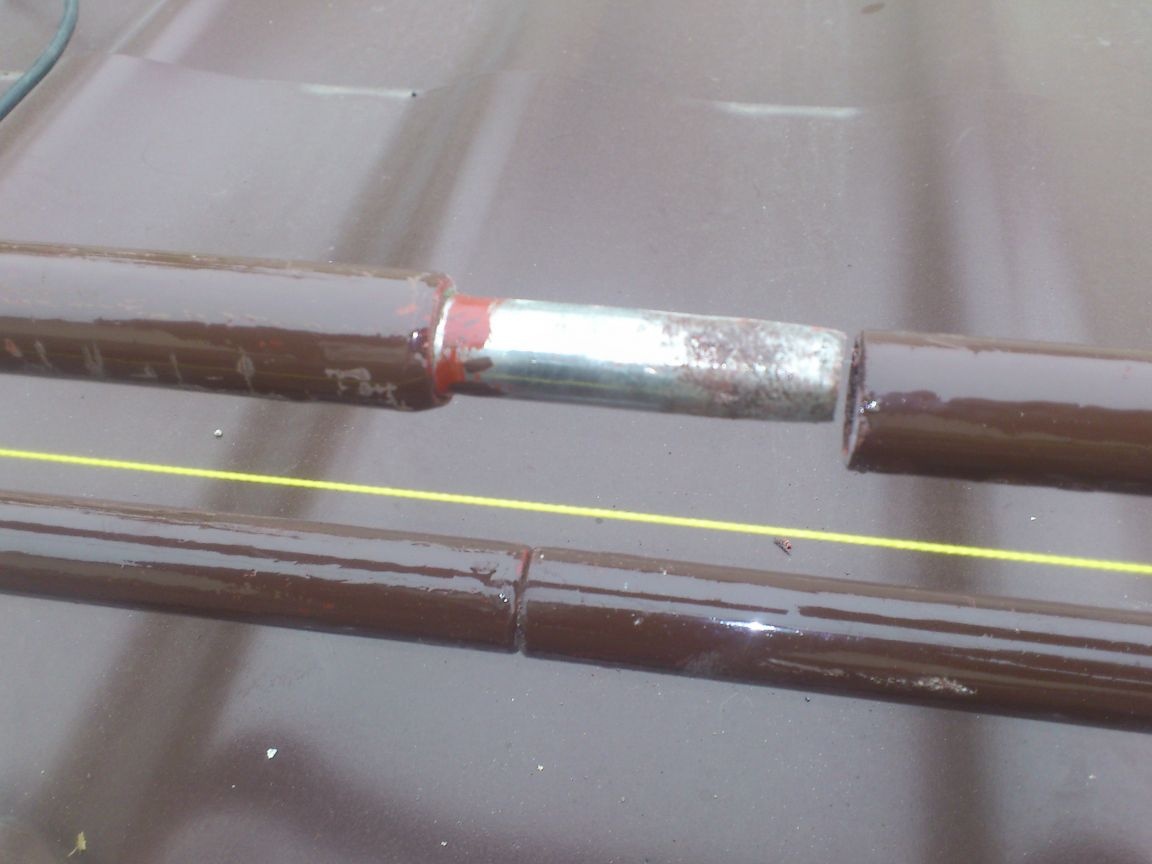
On the roof they will need to be connected to each other to get two pipes of 12 meters. I decided to do this like the construction of a frame of stalls .. That is, the end of the pipe ends with a pin of a smaller diameter, which is inserted into the next.
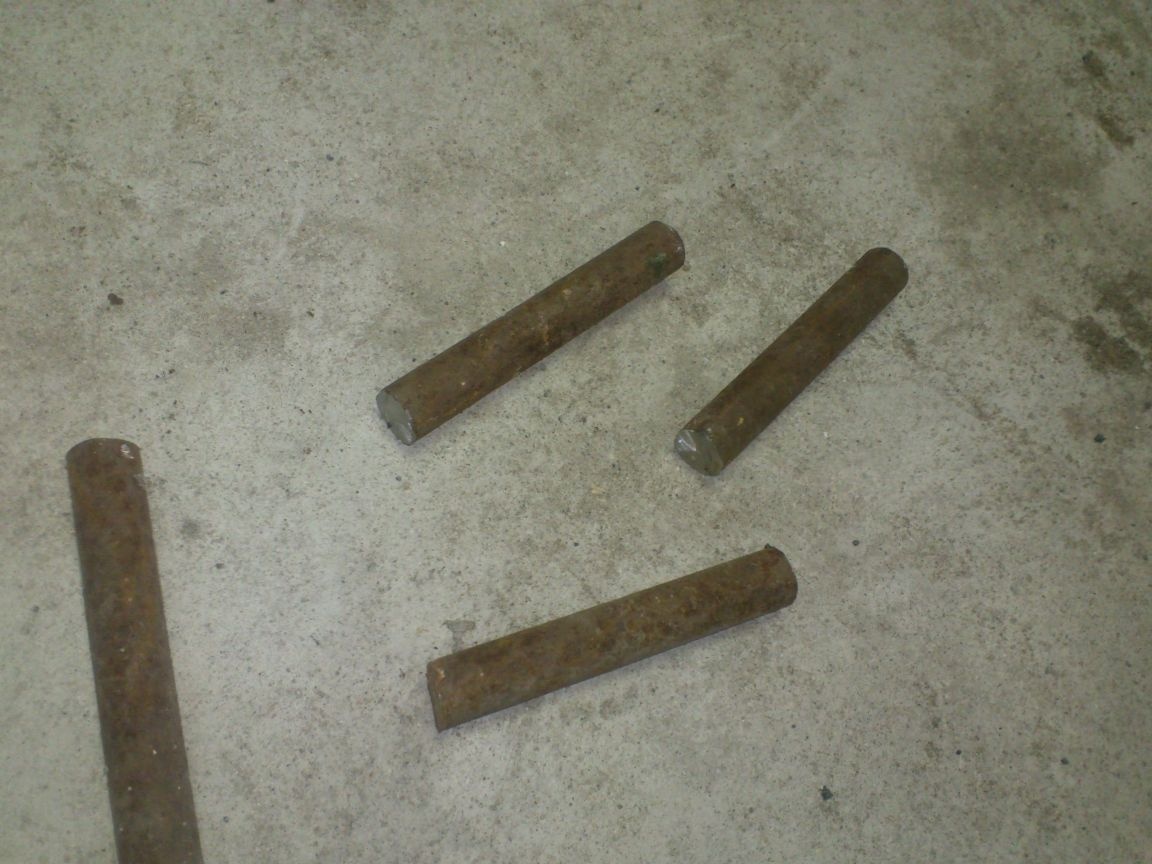
I was lying around a rod with a diameter of 16 mm.
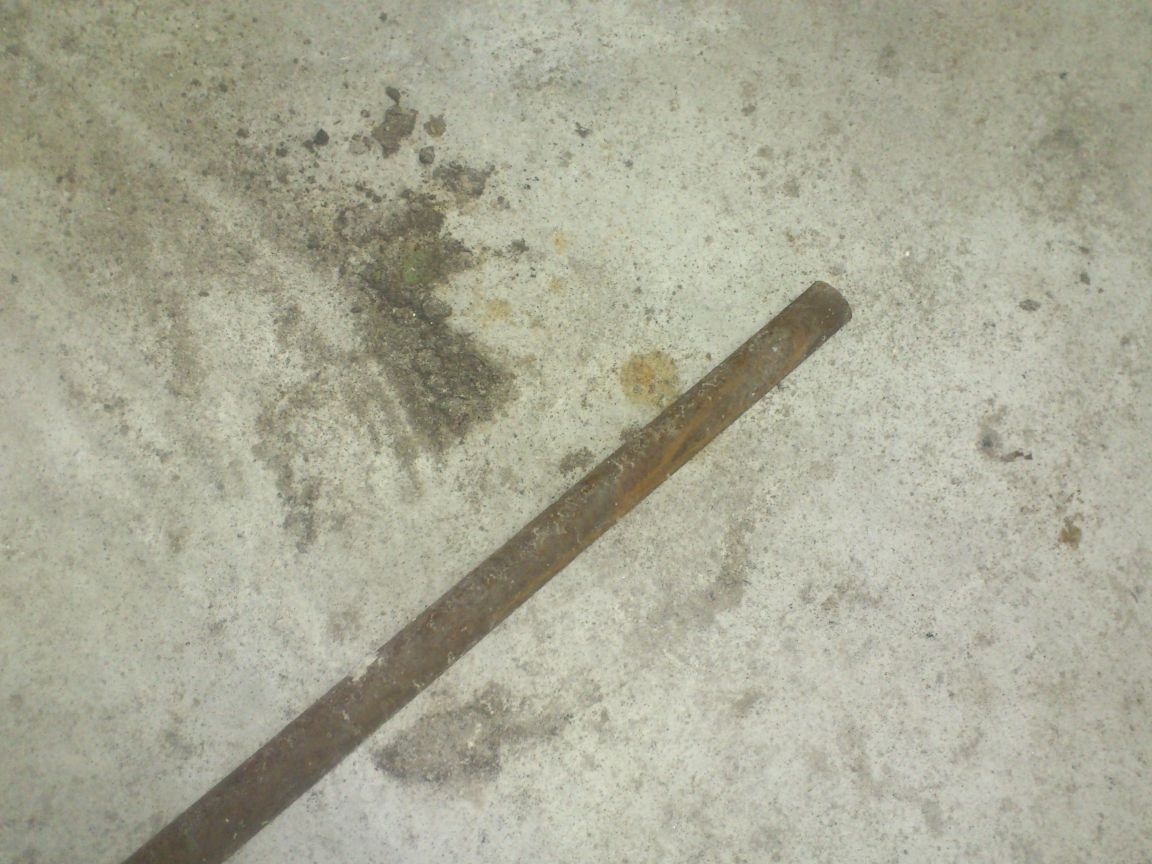
From it I cut lengths of 100 mm long.
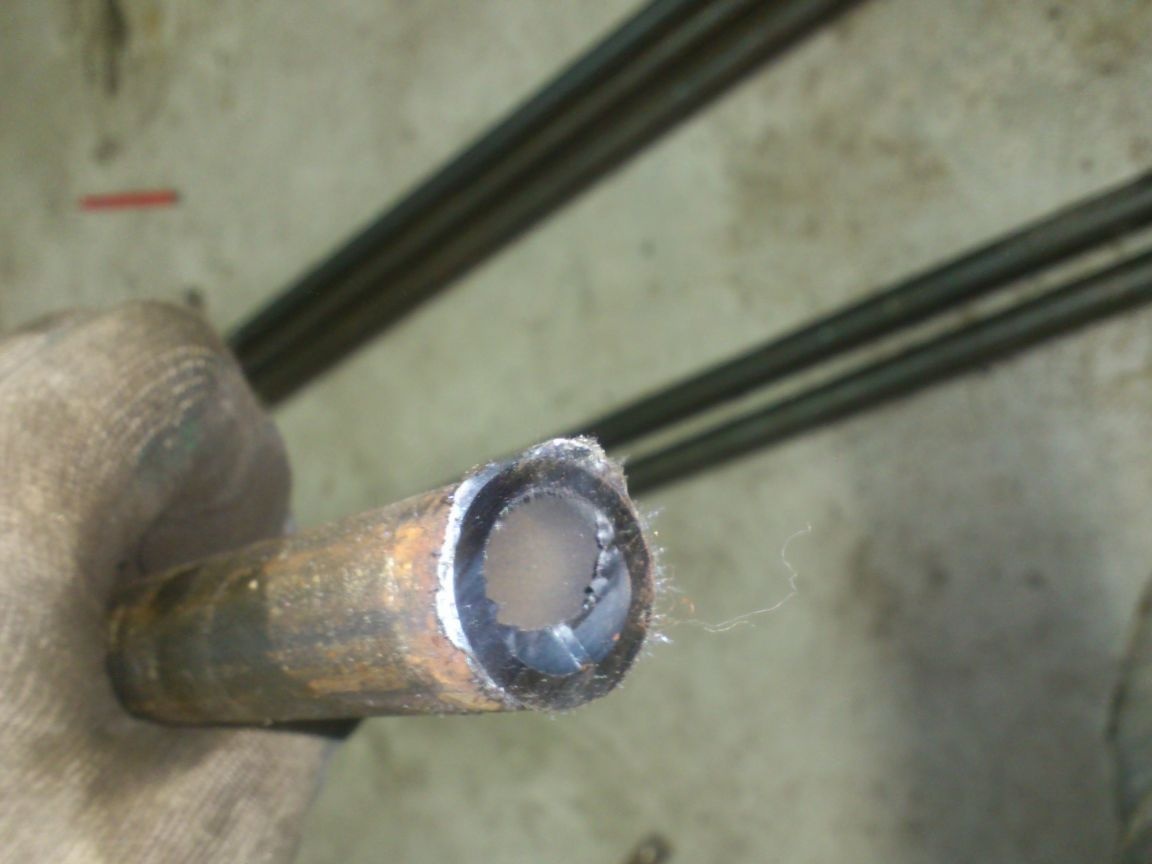
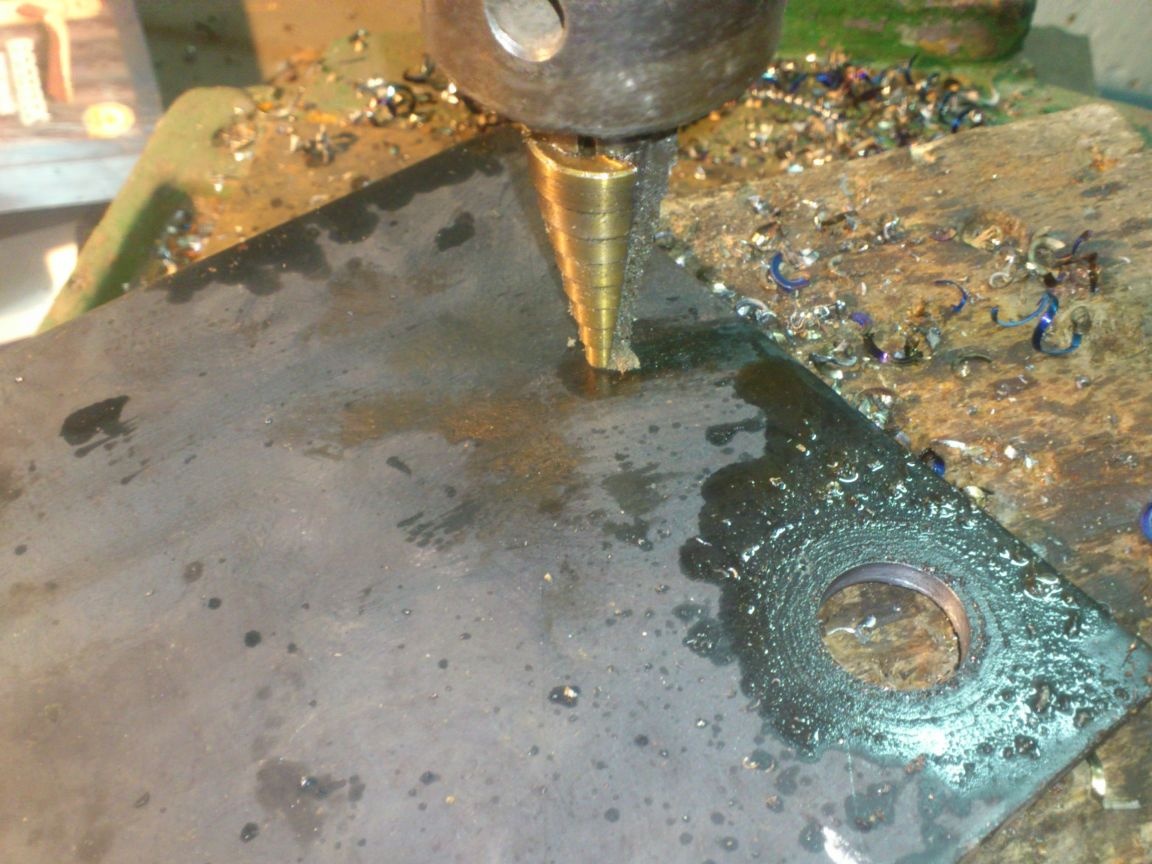
Therefore, I had to eliminate this problem with a drill with a stepped conical drill:
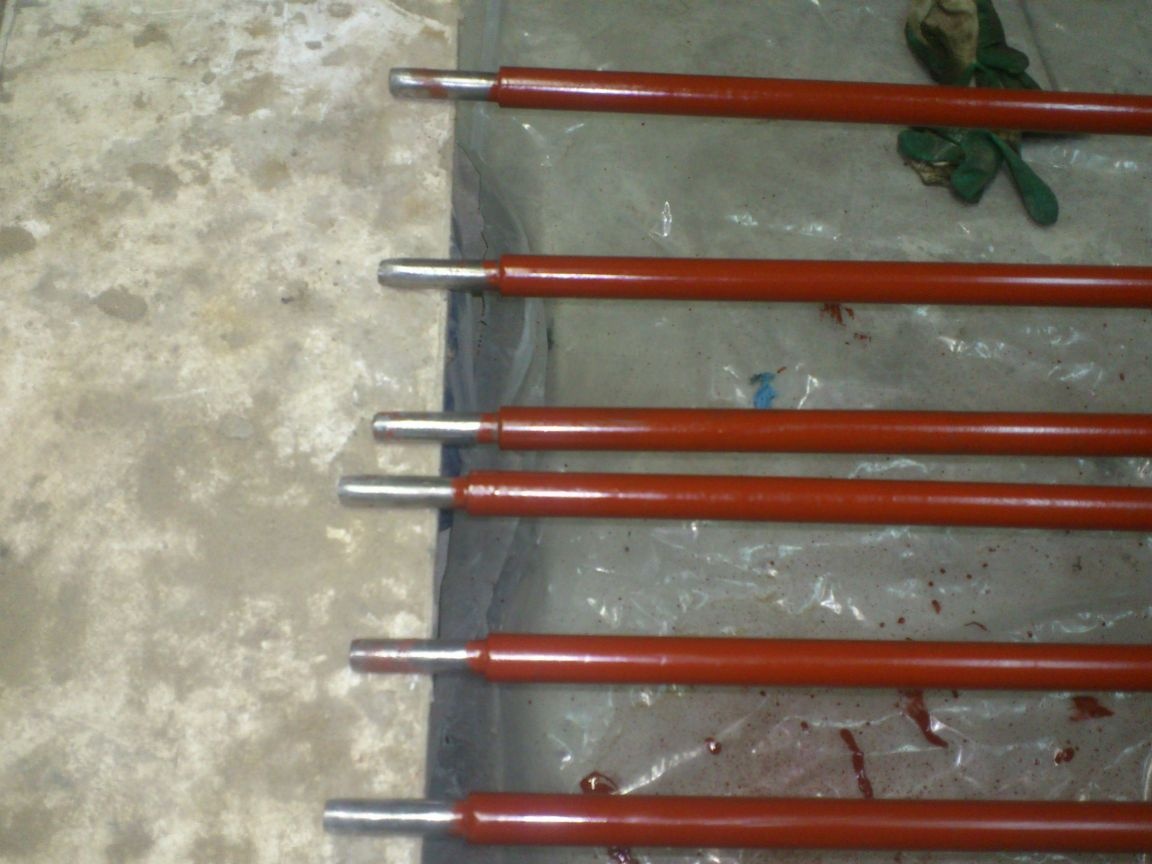
Initially, I thought I would grab the pins to the pipes by welding. But making sure that they go inside very reluctantly, he decided not to. I just hammered them inside with a three-kilogram sledgehammer, before dipping it in paint - at this stage the paint served as a lubricant, then it will act as glue.
After that, I turned the sticking ends in an emery-petal circle so that they easily, but tightly fit into the pipes:
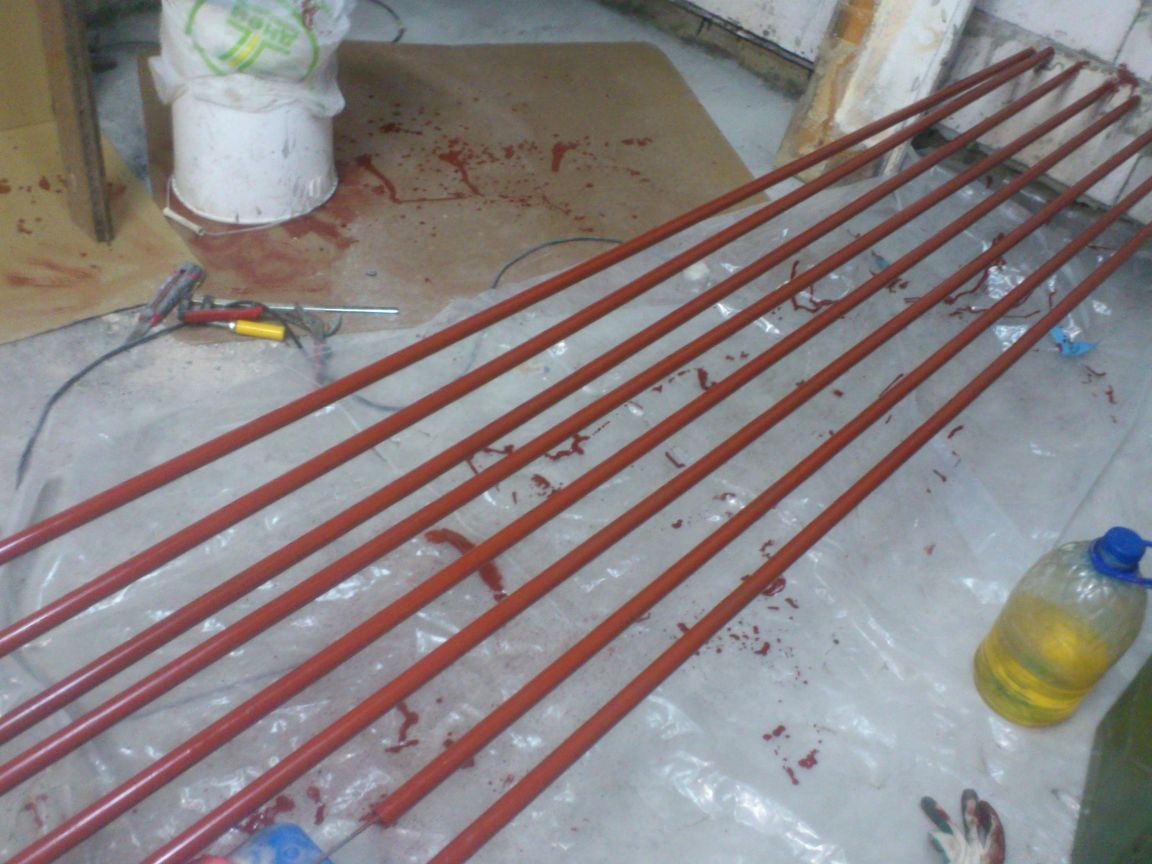
The next step is primer and painting. Since my design will have to be exposed to atmospheric influences for a long time, I approached this matter seriously.
After cleaning all the seams and burrs with an emery-petal wheel, I thoroughly washed all the constructions with gasoline and wiped them with paper towels, removing dirt and residues of factory grease:
After that he covered with “ship meerk” in three layers with intermediate drying. (I was going to mount it anyway next weekend, so I applied the first coat on Sunday evening, then every day in the evening, after work, I applied a new one.)
Yes ... and I forgot ... To those "mirror" brackets that I will have around the edges, I grabbed two M8 nuts by welding. Then I screw the bolts into them and clamp the pipes to fix it from displacement.
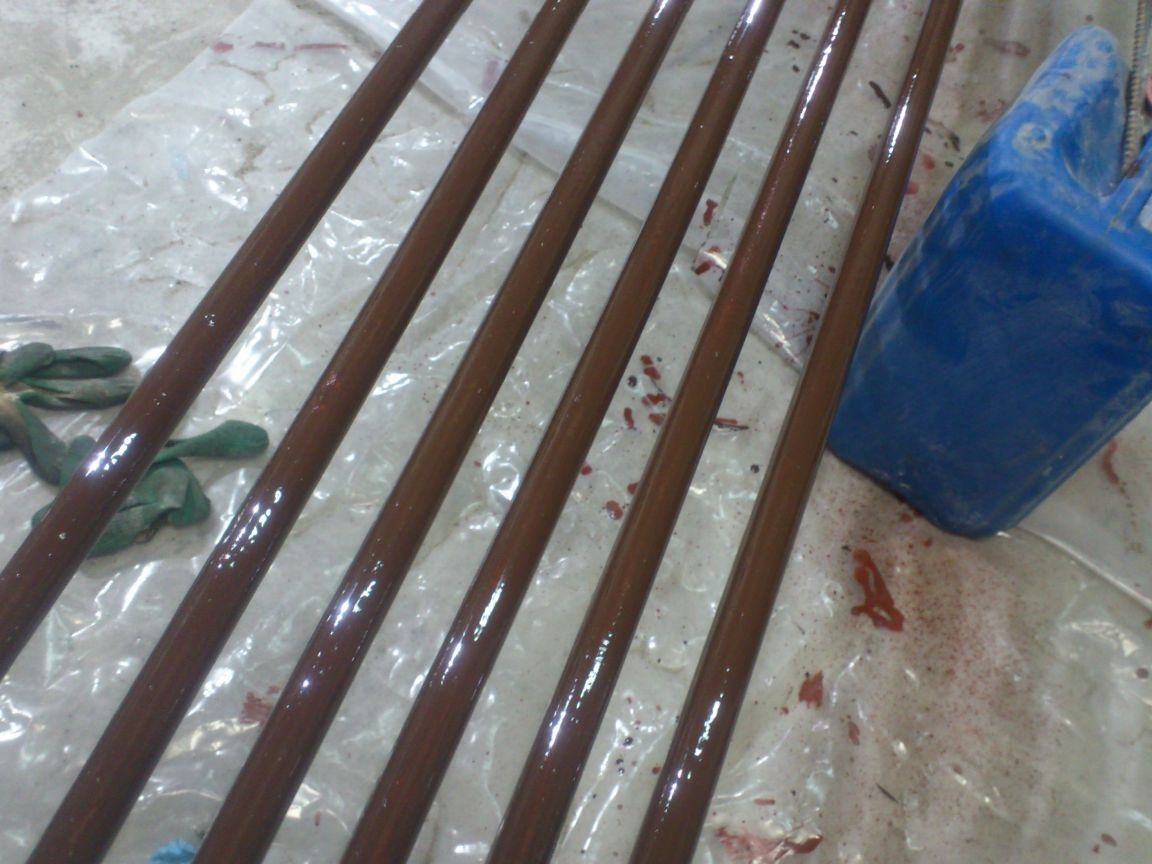
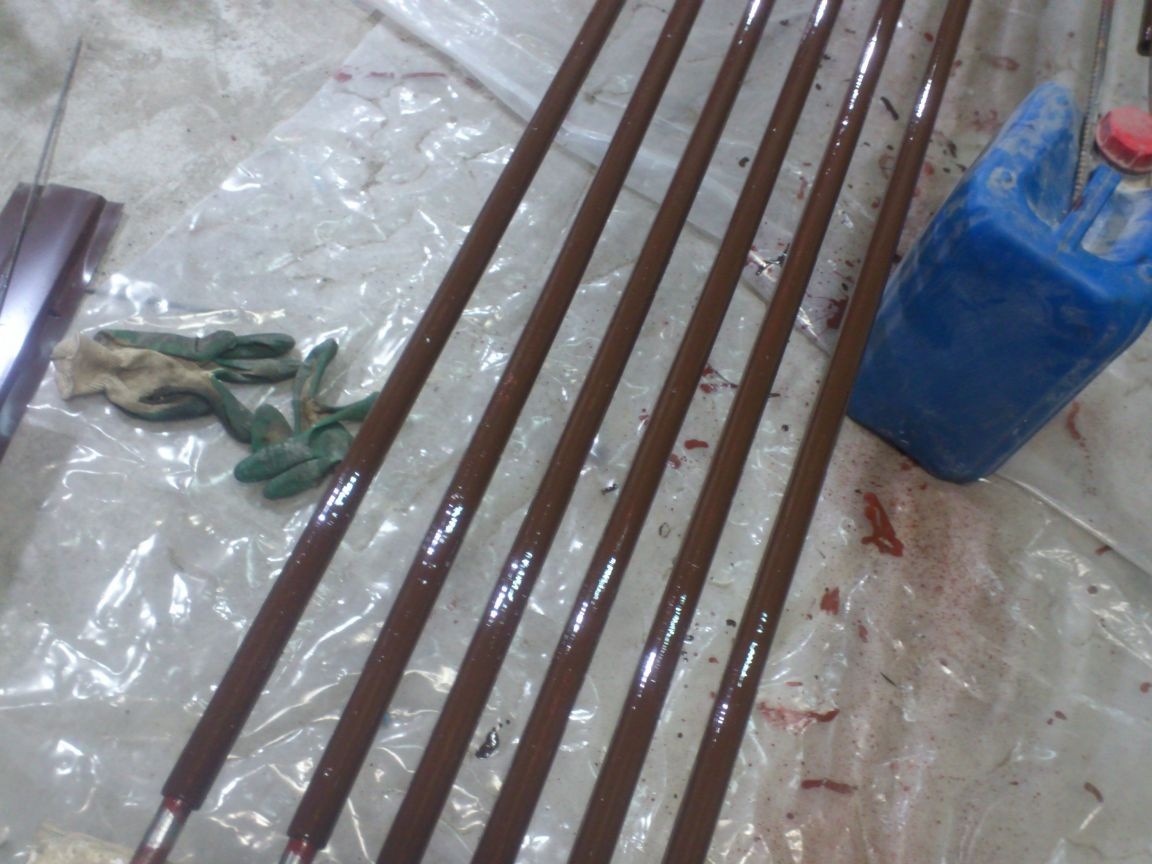
After the primer, I applied two layers of PF-115 enamel.
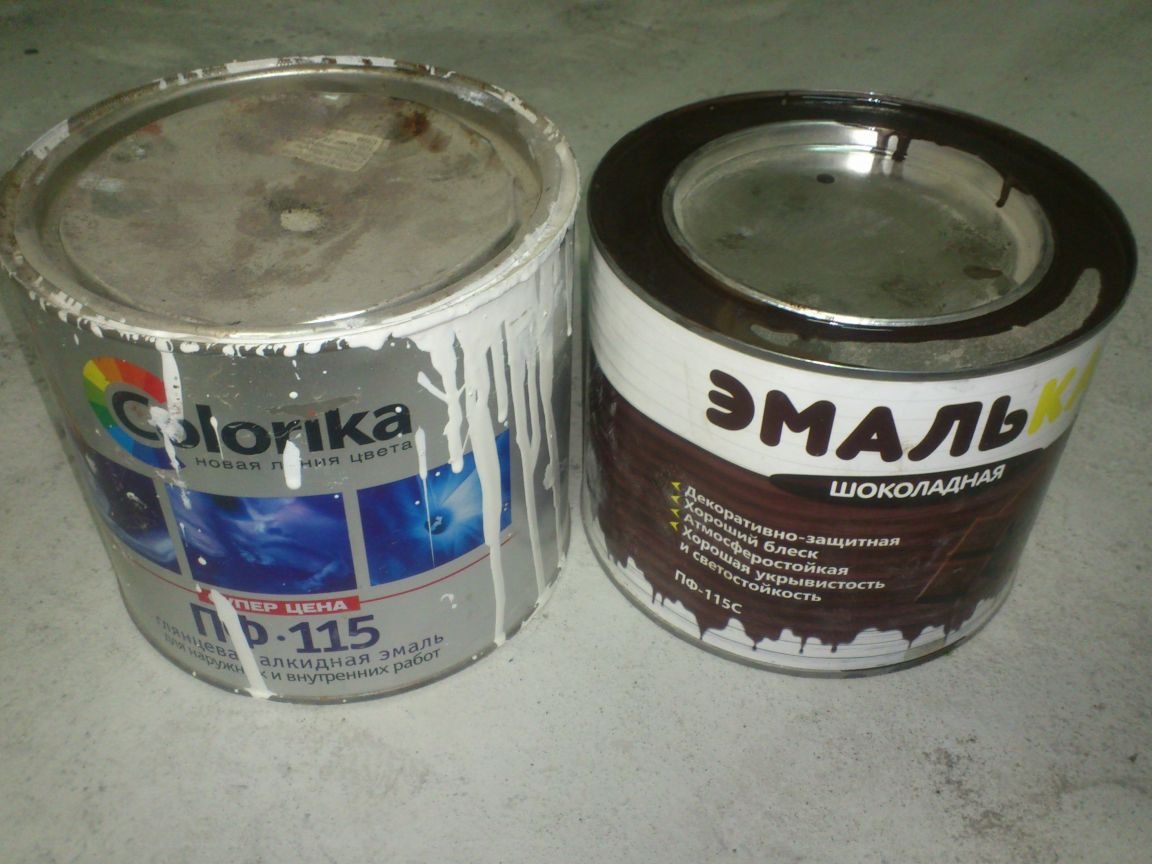
Since the brown enamel I had was too dark, I added white to it. The resulting paint dripped onto a piece of corrugated board with the same color according to RAL and added a little brown, or white. I achieved such a primitive method of full color matching - drops of paint looked like drops of transparent water. It became even interesting to myself.)))).
So surely it could not have been done. After all, structurally tubular snow retainers are different from the roof - it was enough "similarity" of colors. But ... I did it ... I played too much))))
Paint applied with a brush. I have a compressor and everything I need. But, firstly, I did not want to remove the entire instrument and stuff, hang everything up, etc. And secondly, I gave preference not to the quality of painting (anyway, no one will climb onto the roof to look at them, but you can’t see them from afar))), but to the layer thickness !!! Therefore, I simply applied two plentiful layers of thick enamel without diluting it. The layers turned out ugly and with streaks ... But they will reliably protect from atmospheric influences.
All.The next Saturday I started installation. To do this, I bought powerful wood screws (In our region, for some reason they are called "grouse"):
I also had ordinary roofing screws (I forgot to photograph them). And I also bought sealing washers of different sizes:
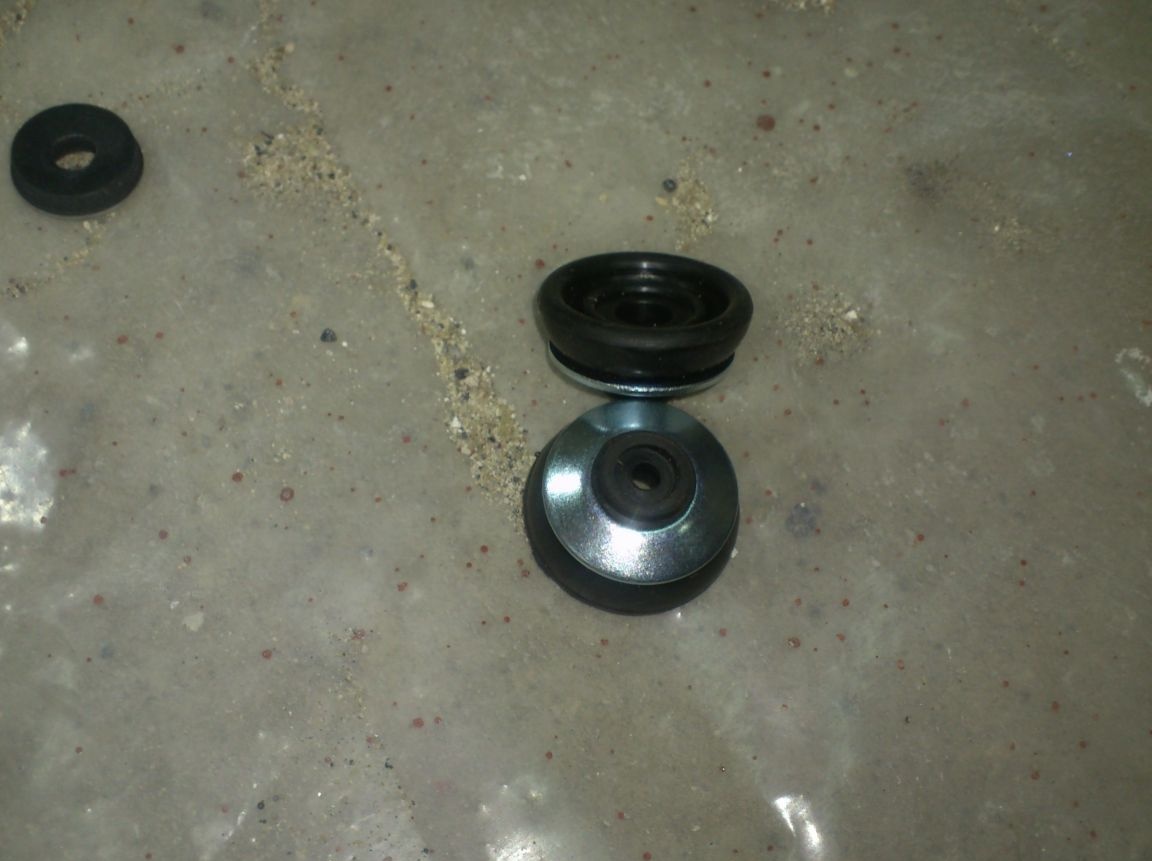
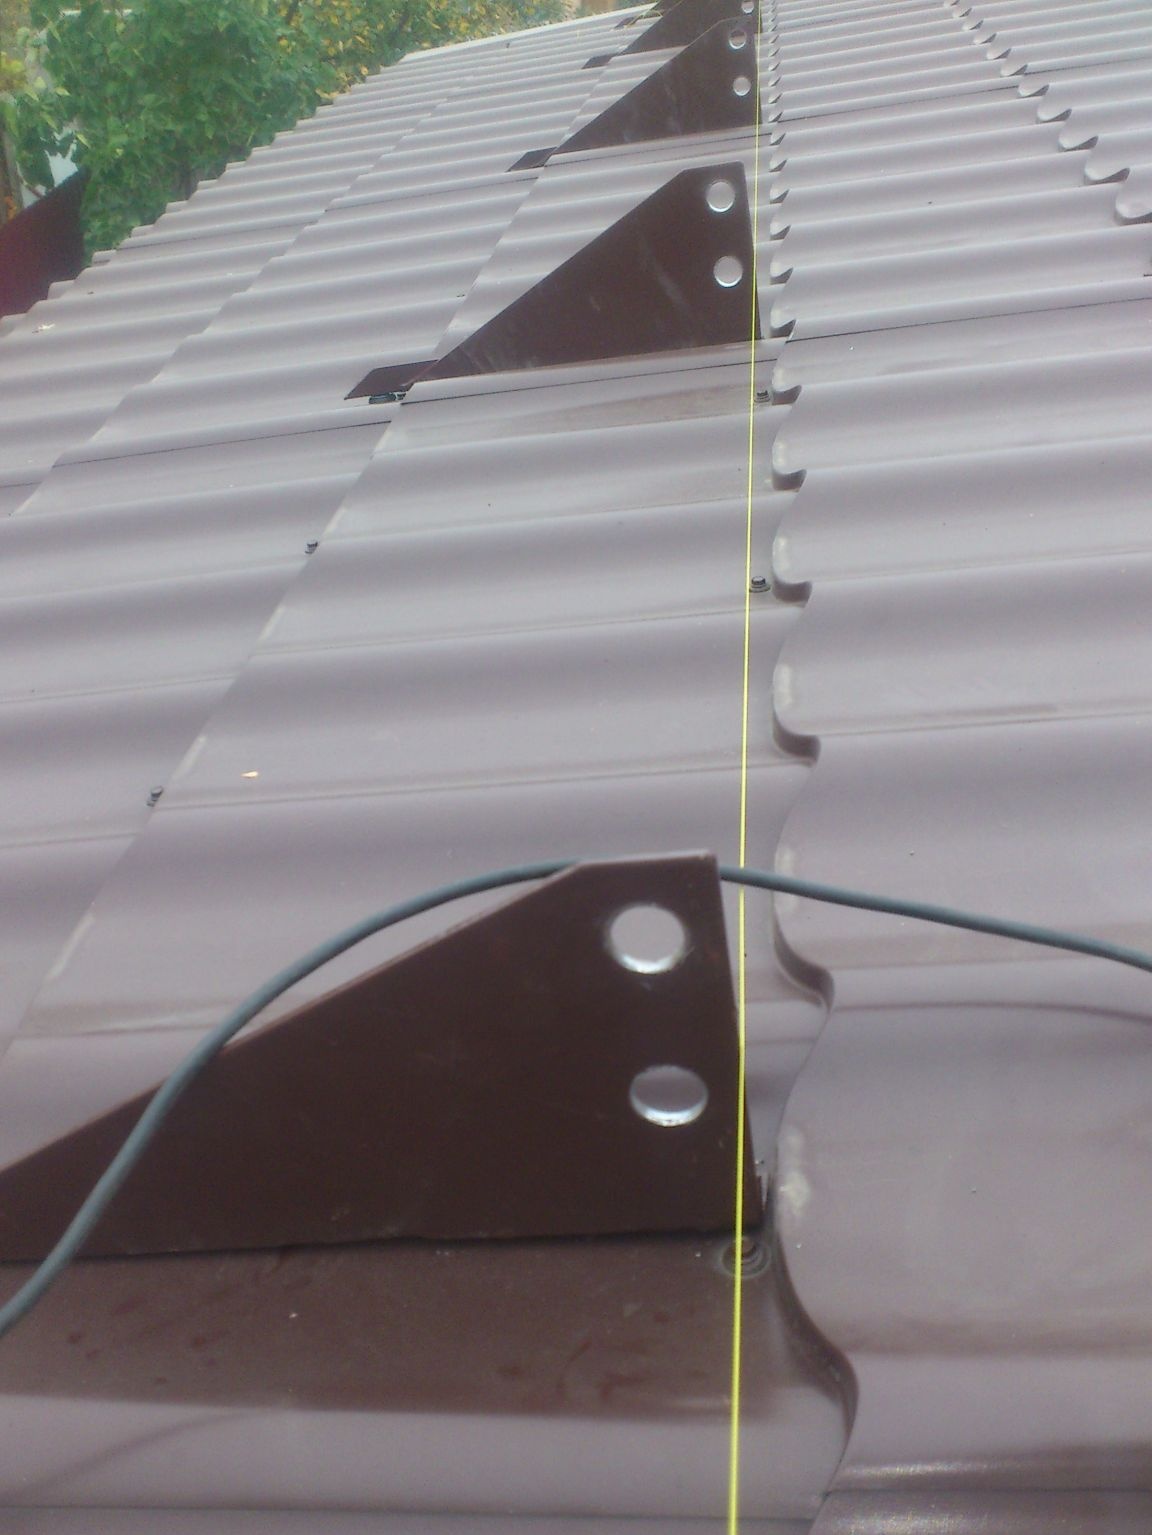
I fastened the front part with two ordinary roofing screws, placing sealing washers between the bracket and the roof. The back is a capercaillie. To compensate for the height of the step of the metal tile, I put two large sealing washers there:

Yes, I completely forgot ... In the front and in the back, I drilled instead of one, three or four holes for the screws. It is not difficult to do this on the machine, and then on the roof you don’t have to think: “Ehhhh !!! Slightly to the side !!!” when the attachment point falls, for example, on the edge of the cap, or the sealing washer already screwed earlier screw, which secured the sheet.)))) "The law of meanness" has not been canceled! ))) And, I tell you, I came across this twice! ... But I just grinned and moved the screw into another hole.))) And I would have to remove the screw and cover the hole with a selikon ... Which would not have affected very well reliability of the roof.
First, I fixed the extreme brackets and pulled a thread between them. And then set the rest, aligning them with the thread. (That's why I leveled the size of the long leg!))))):
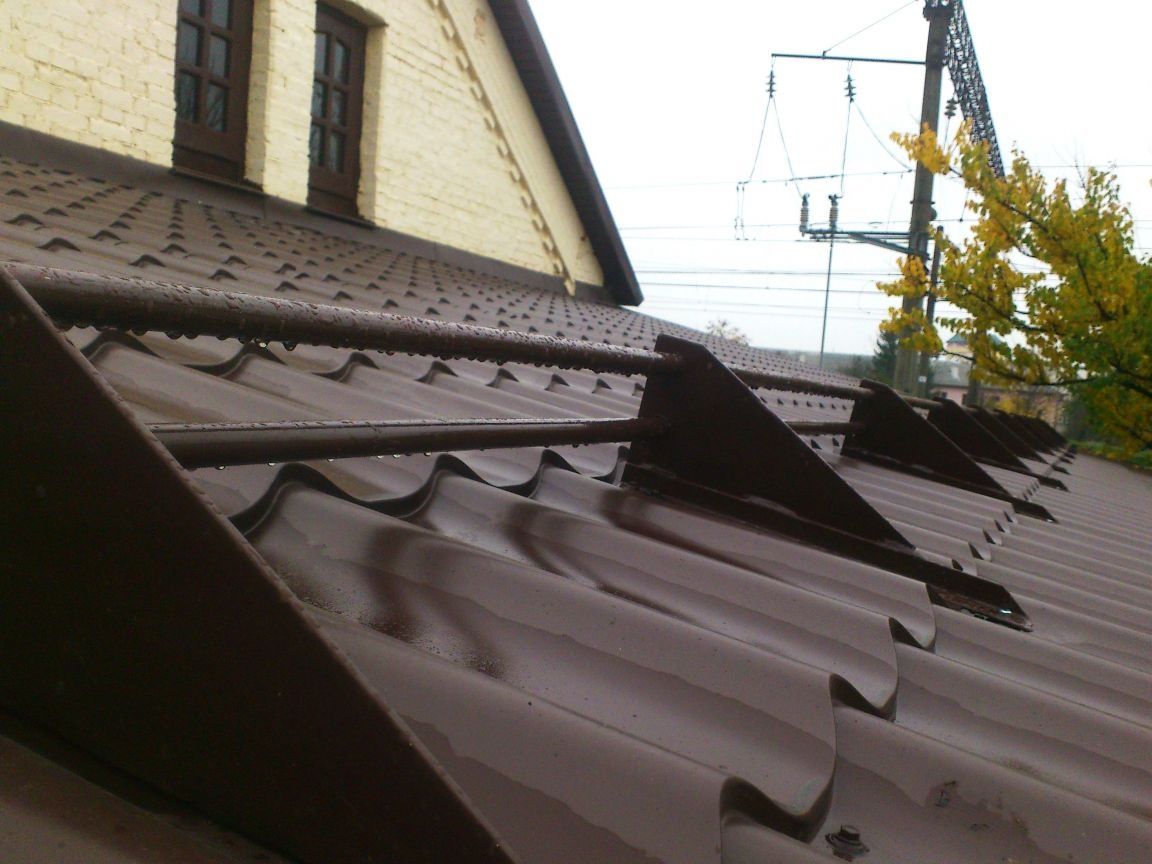
After that, I inserted and connected the pipes, clamped them with bots in the extreme brackets and hammered into the ends of the haglushka:

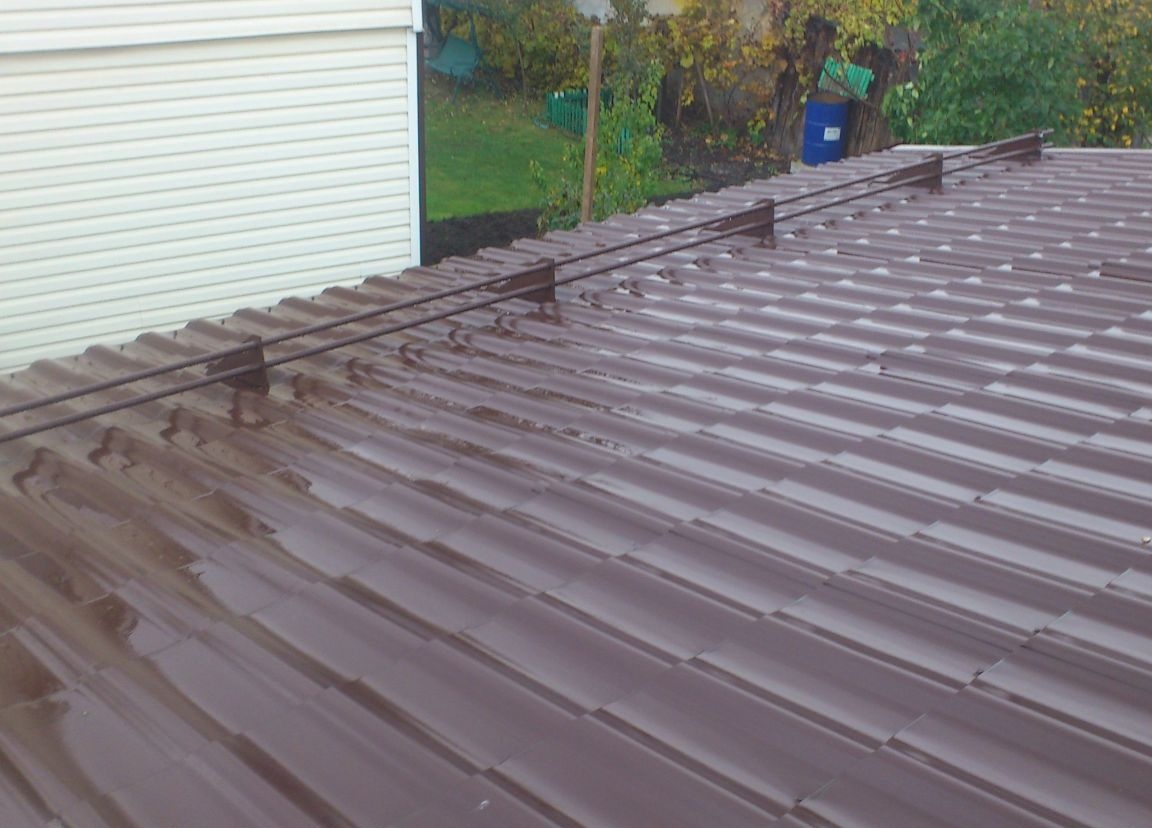
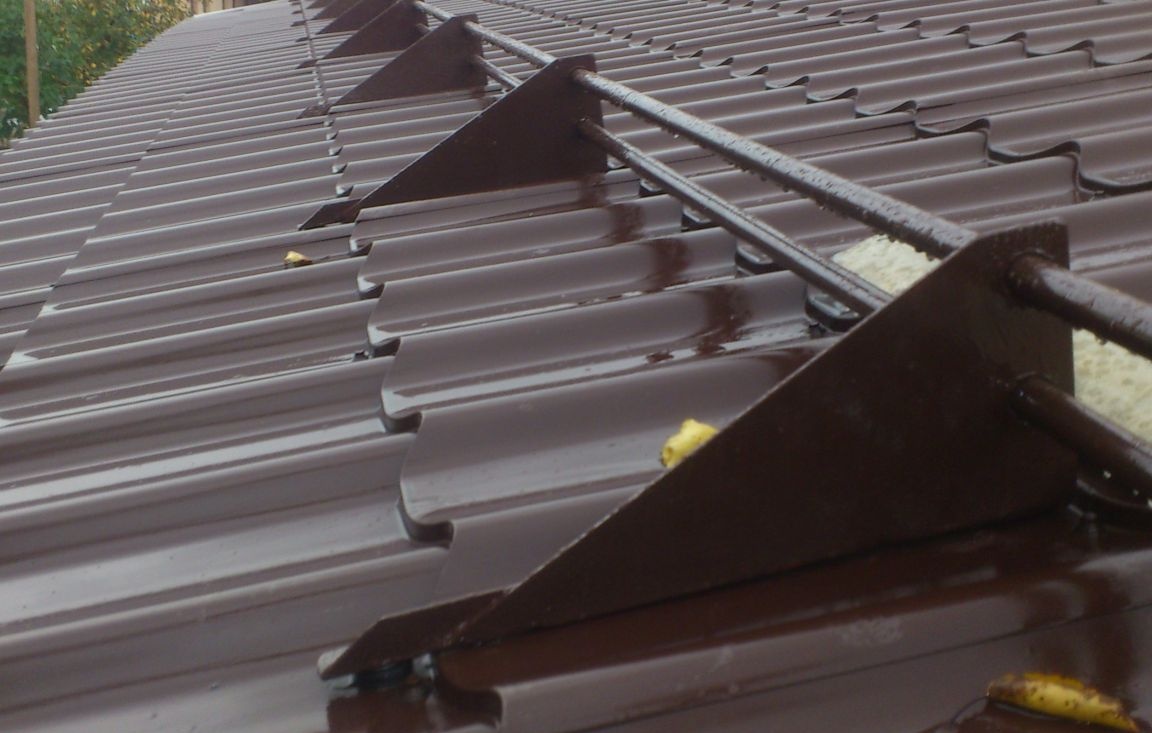
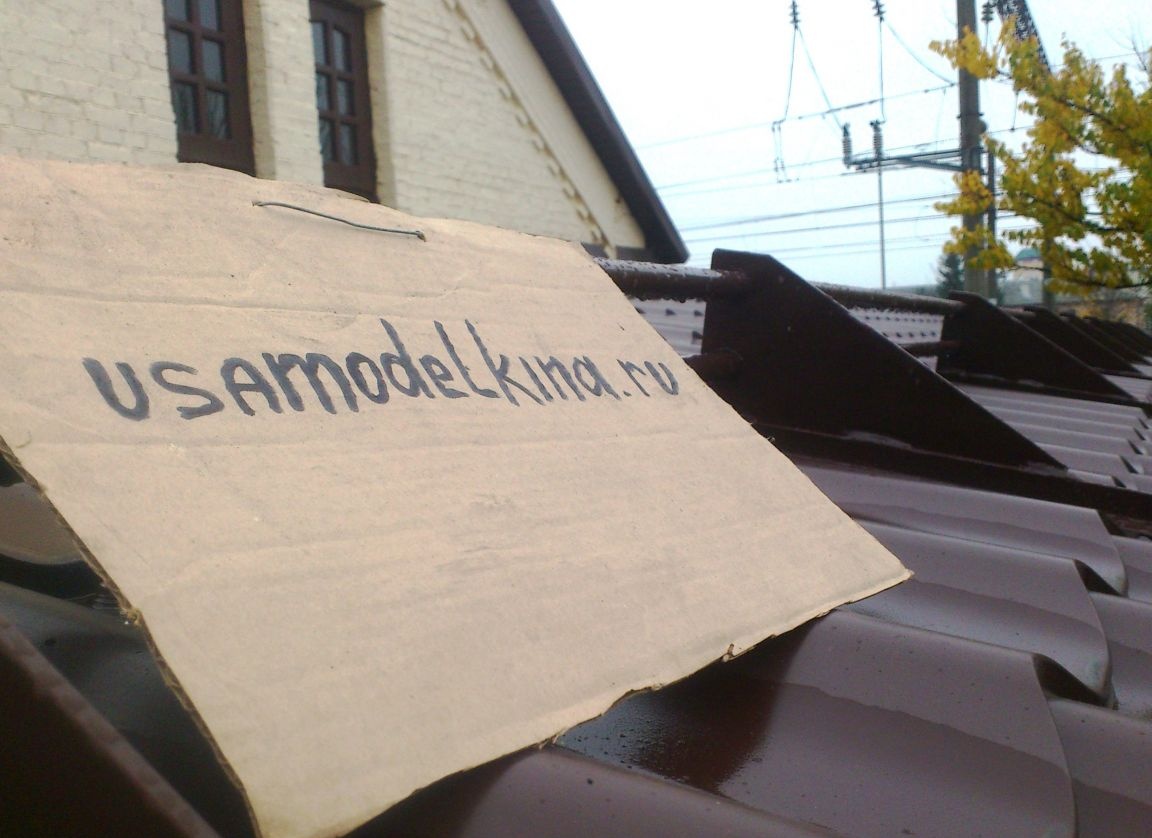
All!! The work is over! Toward the end of the installation, a little rain started, but it did not stop me!)))
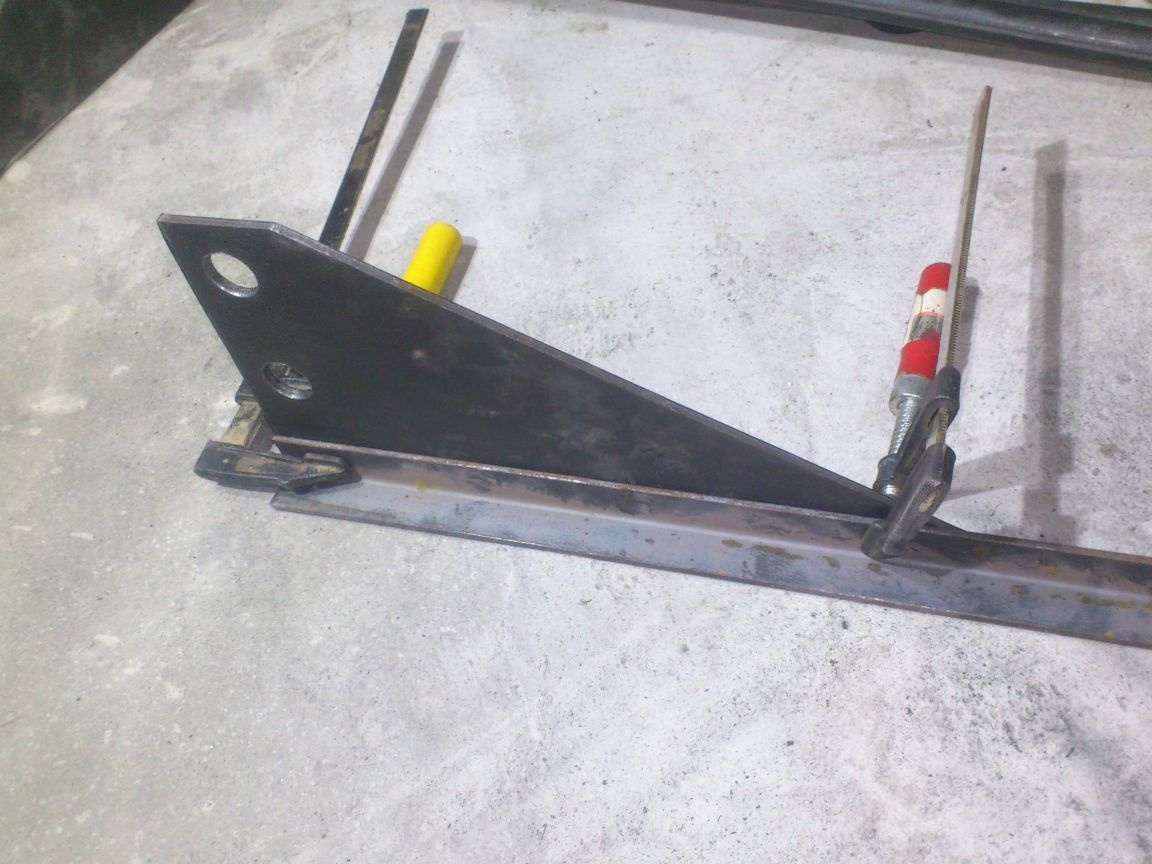
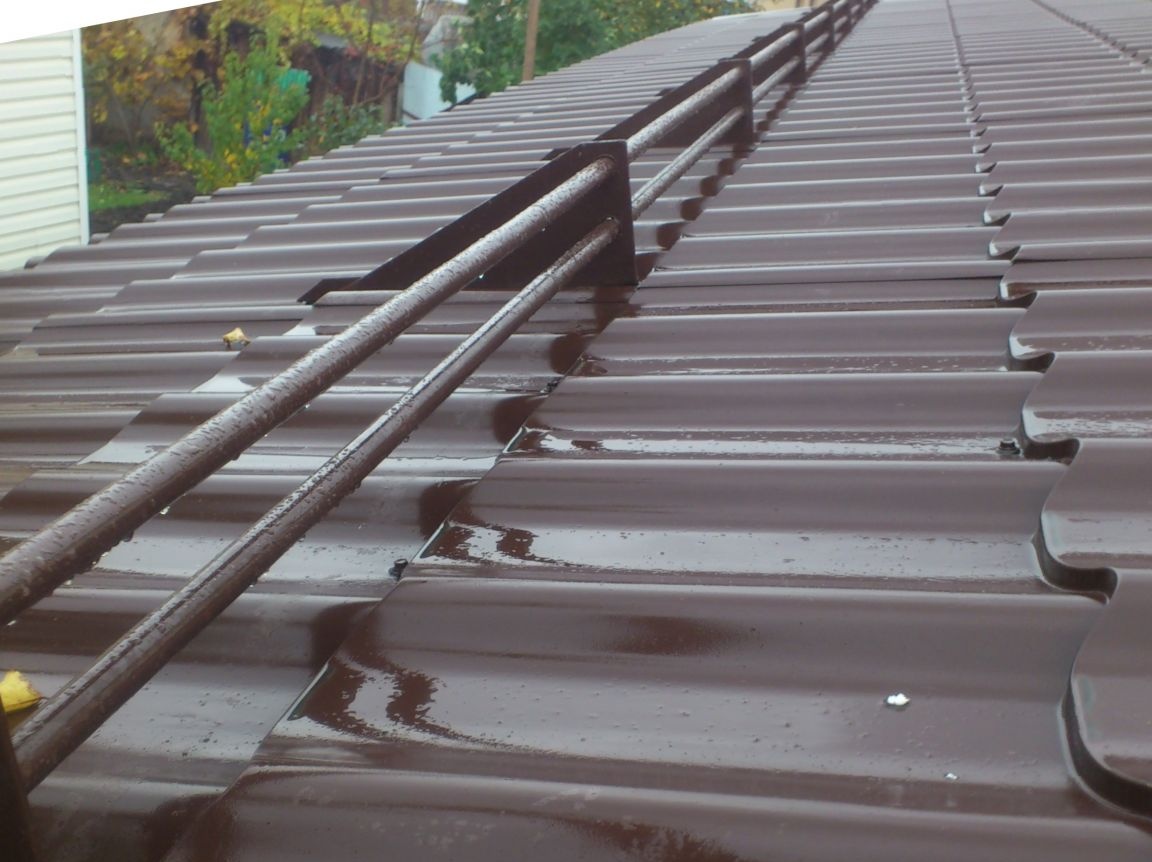
Look, are mine very different from the purchased ones?
PURCHASING:
And here is mine:
And this despite the fact that mine - guaranteed stronger, and cost half as much!
.... Well .. And the pleasure of working, of course ...)))