Far from always beautiful furniture difficult to manufacture. Sometimes it’s worth it do it yourself to make something beautiful and unusual that goes beyond strict geometric designs. Especially when it comes to furniture that you and your loved ones will use for more than one year.
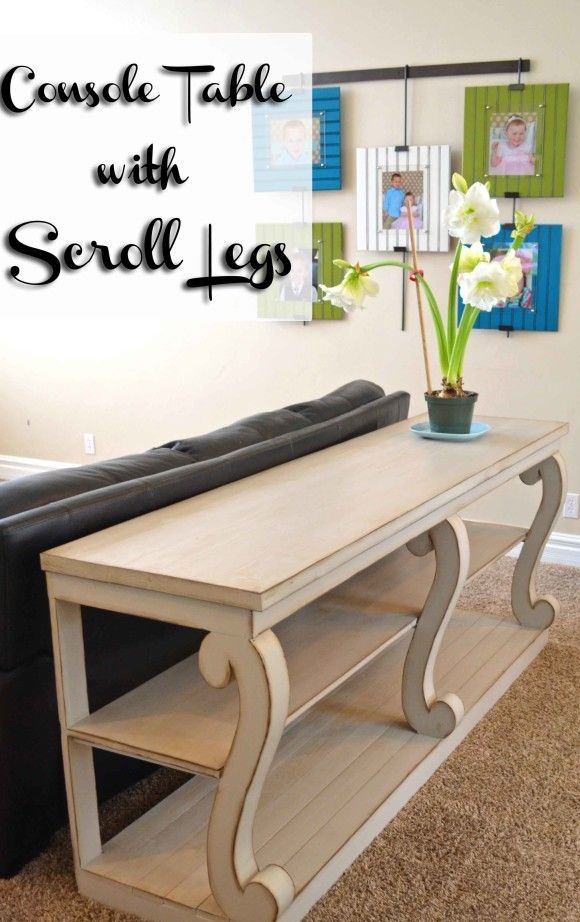
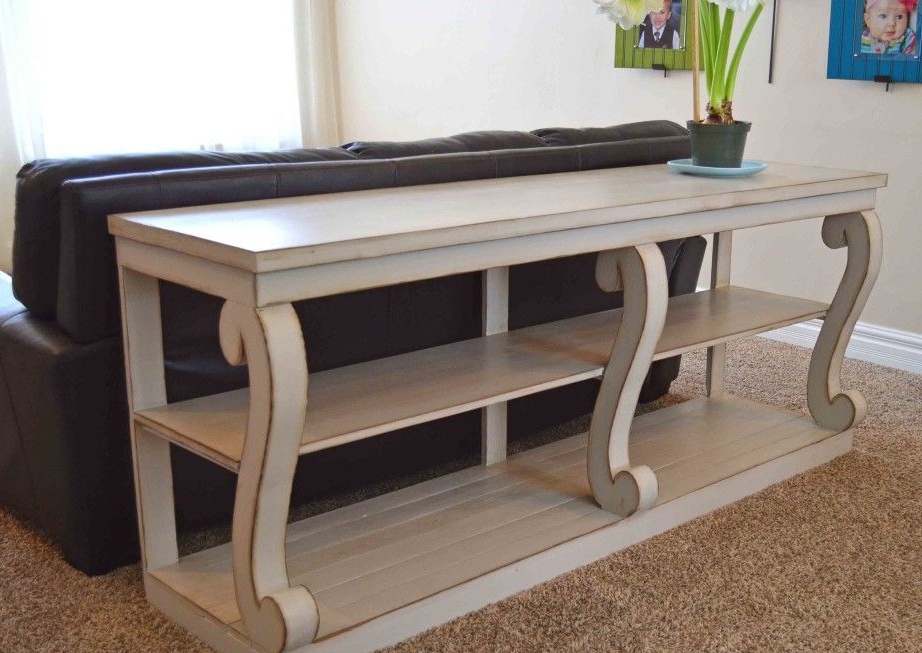
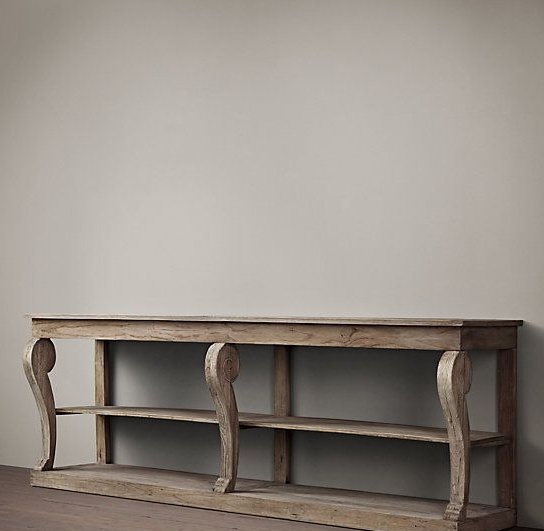
The console table from the master class has three decorative legs, which, among other things, carry the load from the countertop. In the final version, they look massive and voluminous, and all because they consist of two parts glued together. Make them completely easy, believe me. But this will add sophistication and originality to the table.
In order to make a table with curved legs with your own hands, you will need:
Materials:
- boards with a thickness of 20 - 25 mm for the manufacture of the frame and the base of the table;
- boards thicker - 30 - 35 mm thick for the manufacture of countertops and curved legs;
- plywood or thin boards with a thickness of 15 mm for the base of the table shelf;
- glue for woodwork;
- furniture screws or wood screws;
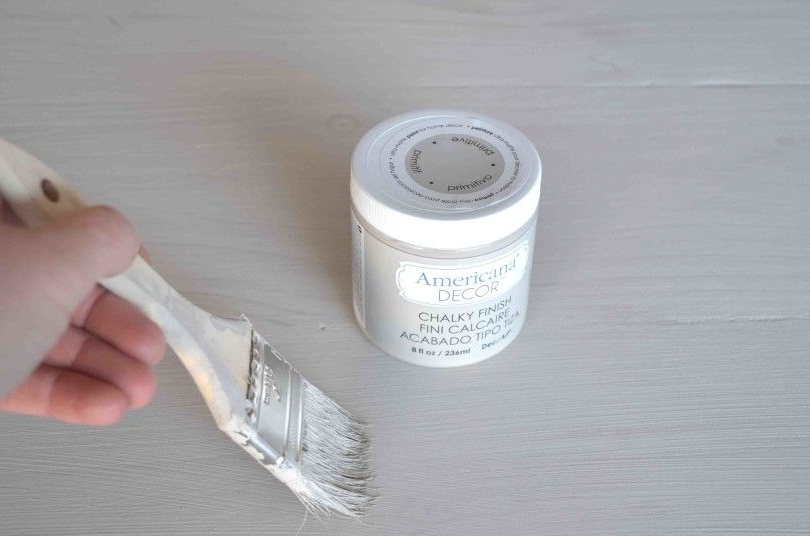
- paint of white or milky color (oil, alkyd);
- paint of a deep dark brown shade for decorating an antique table (resistant, better alkyd or specialized furniture);
- resistant varnish for woodwork (nitro varnish or furniture varnish);
- paper, wallpaper or cardboard for the manufacture of paper patterns.
Instruments:
- miter saw, circular or hacksaw on wood;
- jigsaw;
- grinder;
- electric drill;
- screwdriver;
- a clip with a device for drilling inclined pocket holes;
- sandpaper;
- paint brushes, lint-free fabric for painting the table;
- building tape measure and square;
- plastic sewing patterns for the manufacture of paper patterns of curly legs;
- scissors and a ruler;
- a pencil.
Step one: stepwise production of curly legs
Curly legs are the most intricate element of this table. However, making them is simple. To do this, you need suitable paper or old wallpaper for patterns, a plastic sewing pattern, scissors, a jigsaw and a few thick boards.
A sewing pattern is a simple and very common tool that you can buy at any sewing store. It costs a penny, but the service will do you considerable, because with its help it is very easy to draw smooth curved lines when building curly furniture details.
In addition, you will need glue and clamps - at least two. The fact is that the legs are conceived as massive and voluminous. And in order to simplify the work of their manufacture, the author came up with the idea of making them glued, made up of two absolutely identical parts. Thus, in order to make three legs, you will need six parts - two for each leg.
For a number of reasons, they should all have exactly the same shape. Therefore, first make a paper piece, on which you can mark up each part. First, sketch on paper a sketch that shows the final shape of the table leg. Using this sketch, draw the outline of the part on paper using the sewing pattern. However, if you succeed, draw by hand, because real masters of furniture art do it.
Cut out the paper pattern and transfer the marking to pre-prepared boards. Please note that the boards must be qualitatively planed. And in order to make sure of this, attach them to each other and make sure that there are no gaps between the boards and their plane is as flat and smooth as possible.
Saw the workpieces for the legs using a jigsaw. Glue each pair together. Use good wood glue for this. Apply a small amount of it evenly on the entire surface of the joint, attach the second part, dock it with the first and press it against each other. Place the resulting workpiece in the clamps, and immediately remove excess glue with a damp, clean cloth.
Once the glue has hardened, proceed to sanding. Grind all accessible surfaces carefully with a grinder. But for grinding hard-to-reach areas, use sandpaper.


Step two: mark up all the other parts and make them
In his master class, the author gives all sizes in inches. Try not to convert inches to centimeters as much as possible, since with the most detailed calculations you will get inconvenient values, sometimes with a couple of decimal places.
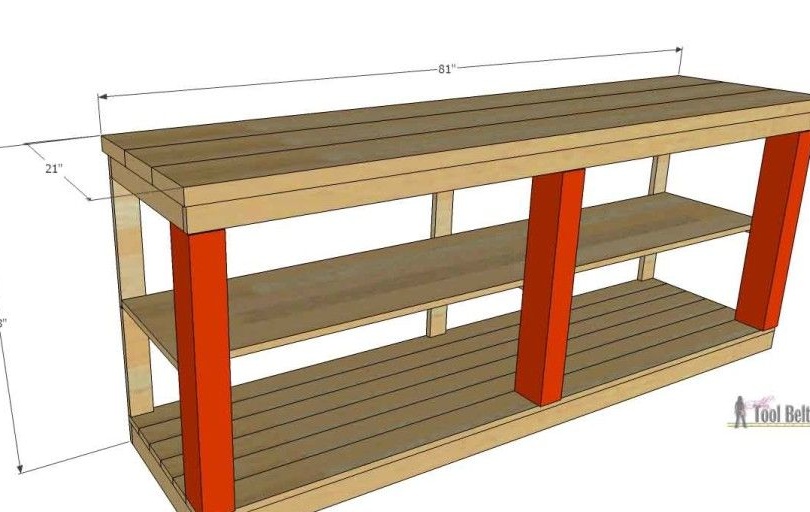
Instead, come from your own needs. What height should the table be, what are the sizes of the countertops, etc. Thus, determine the dimensions of your product and mark the parts. For a general idea, it is worth adding that the height of the table from the master class is approximately 820 mm, while the dimensions of the countertop are 2020 x 520 mm.
Cut all parts to size. It is convenient to cut the blanks from plywood using a jigsaw. But for working with boards, a miter saw is simply an indispensable thing. It allows you to make clear straight cuts, so that the parts fit snugly together, and the joints do not need additional adjustment.
Grind all parts carefully. This is especially true for edges and saw cuts, where the wood is sawn across the fibers. The surface of the workpieces should be perfectly smooth and even. Especially if you plan to use high-quality and expensive paints and varnishes for painting. The smoothness of wood significantly reduces material consumption.
Step three: assembly of the console table with curly legs
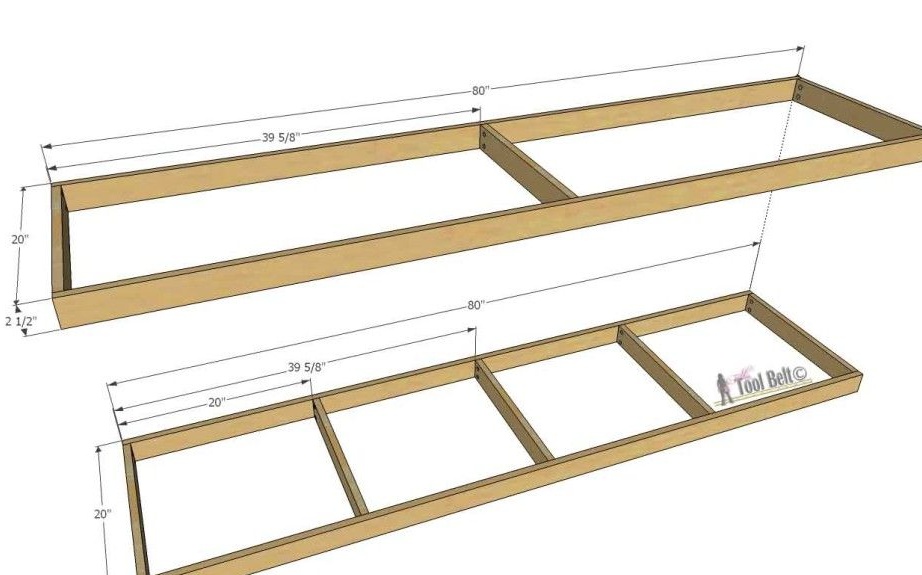
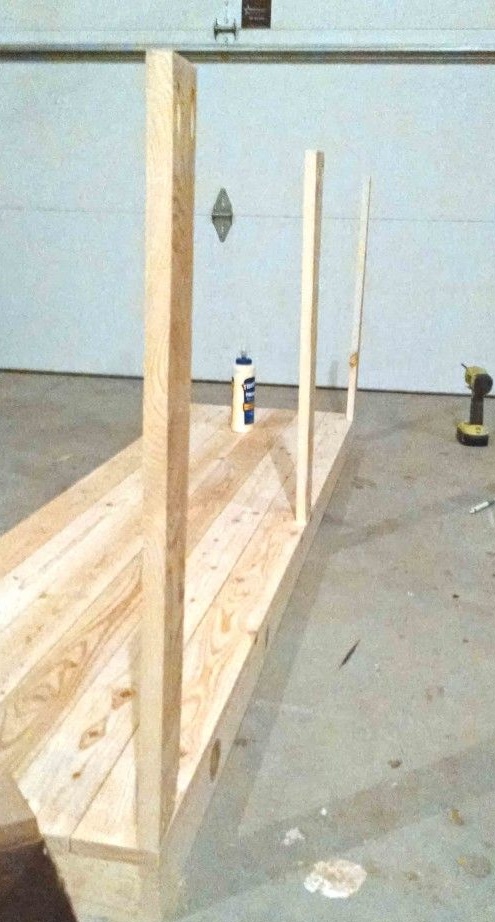
Since the main advantage of this table - its bent legs - is ready, it's time to start assembling all the other parts. The author advises starting with the lower and upper frame of the frame. The lower frame will serve as the base of the table, while the upper is intended for the base for the countertop.
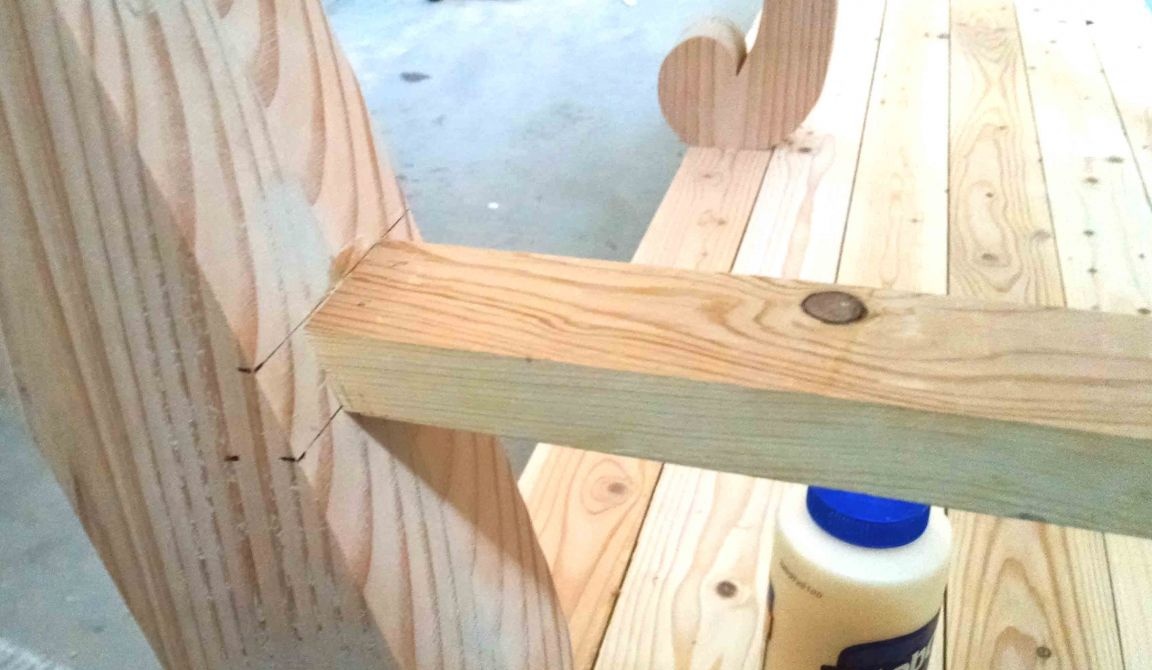
Prepare the necessary details. The author connected the frame using furniture screws. To do this, he made inclined pocket holes using a special clip with a drill attachment. It allows you to drill at the right angle. The screw itself, like its cap, are completely hidden in the hole, which can later be filled with sealant or putty. Thus, you get a secret connection, hidden from prying eyes.
The use of pocket joints is always combined with glue. This blow allows you to achieve excellent strength without additional troubles, such as making grooves on a milling machine.In the final version, they look massive and voluminous, and all because they consist of two parts glued together.
Assemble the base of the table from two longitudinal and five transverse parts. In the same way, connect the base details under the countertop. It has only one supporting jumper.
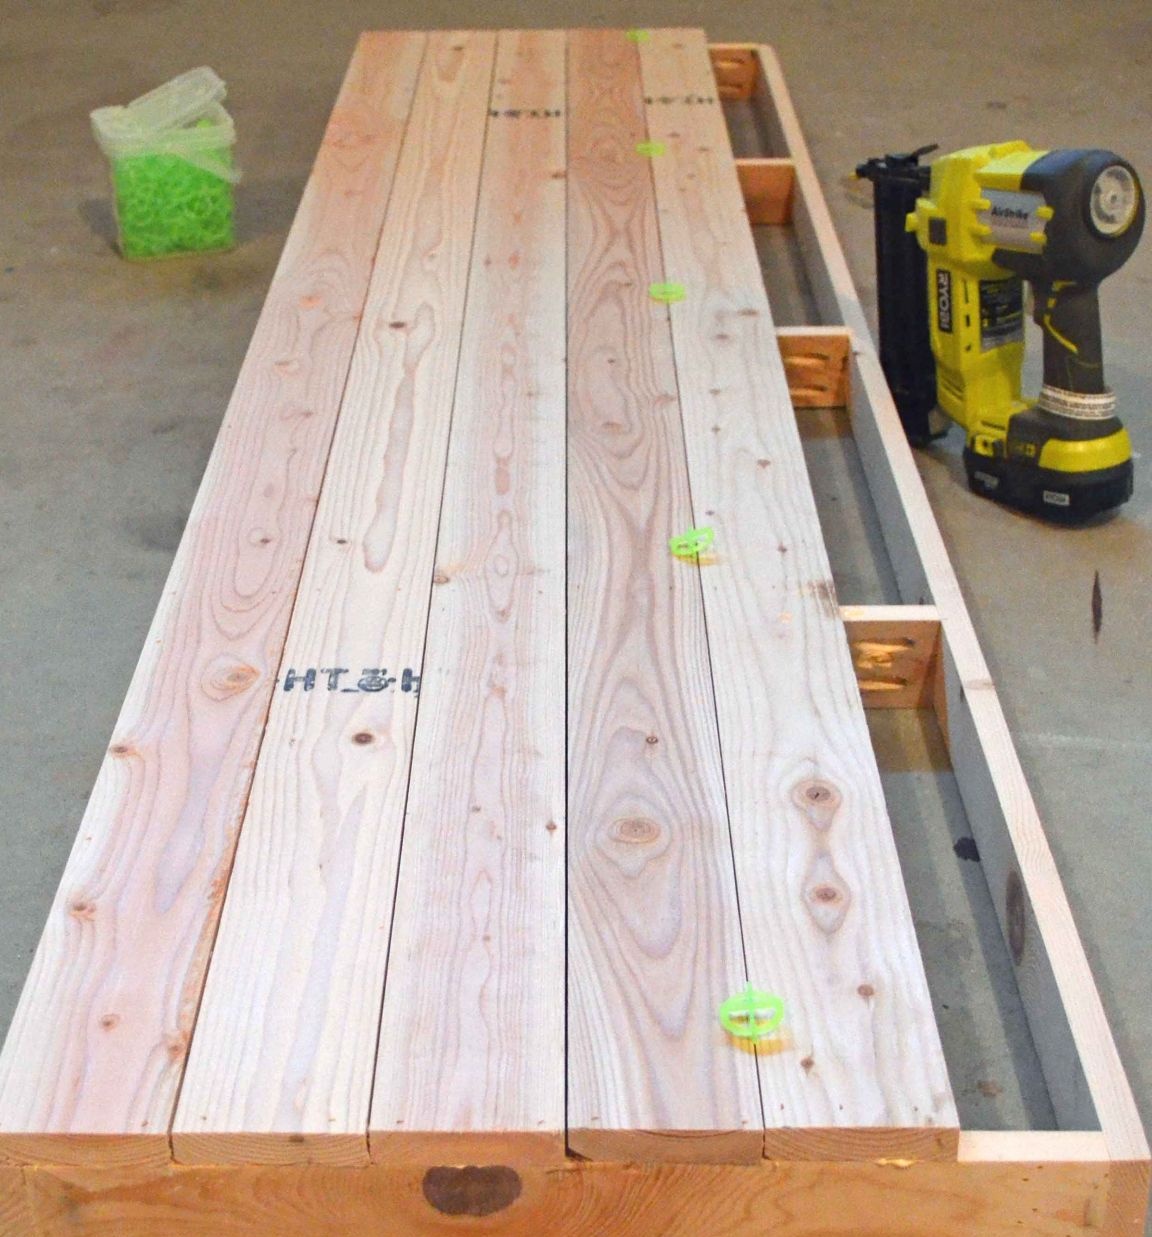
Sew the base of the table with pre-prepared boards with small gaps of a millimeter or two at will. You can use ordinary nails for this.
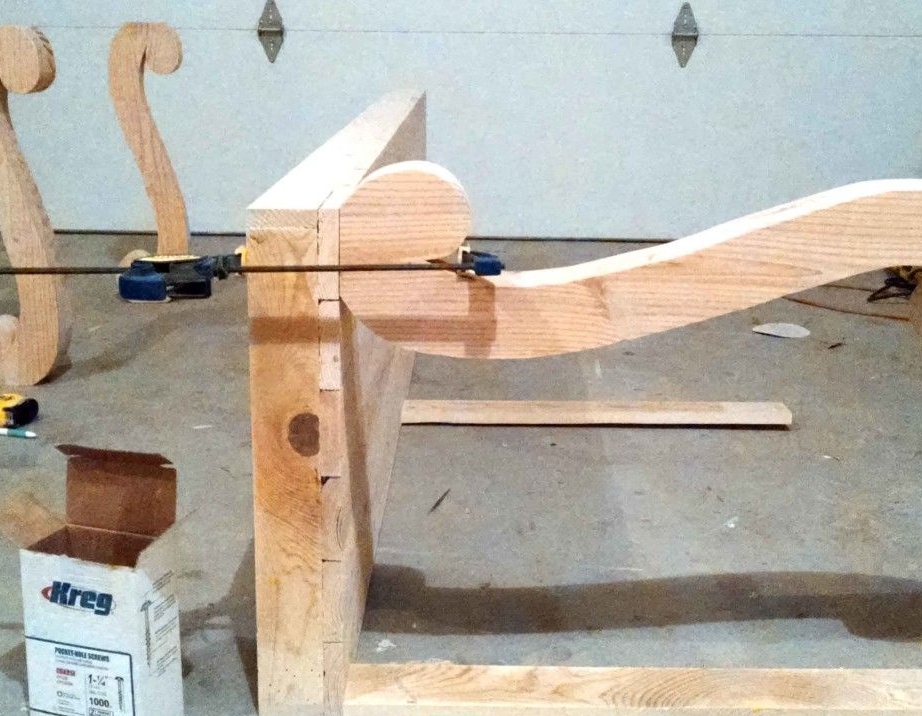
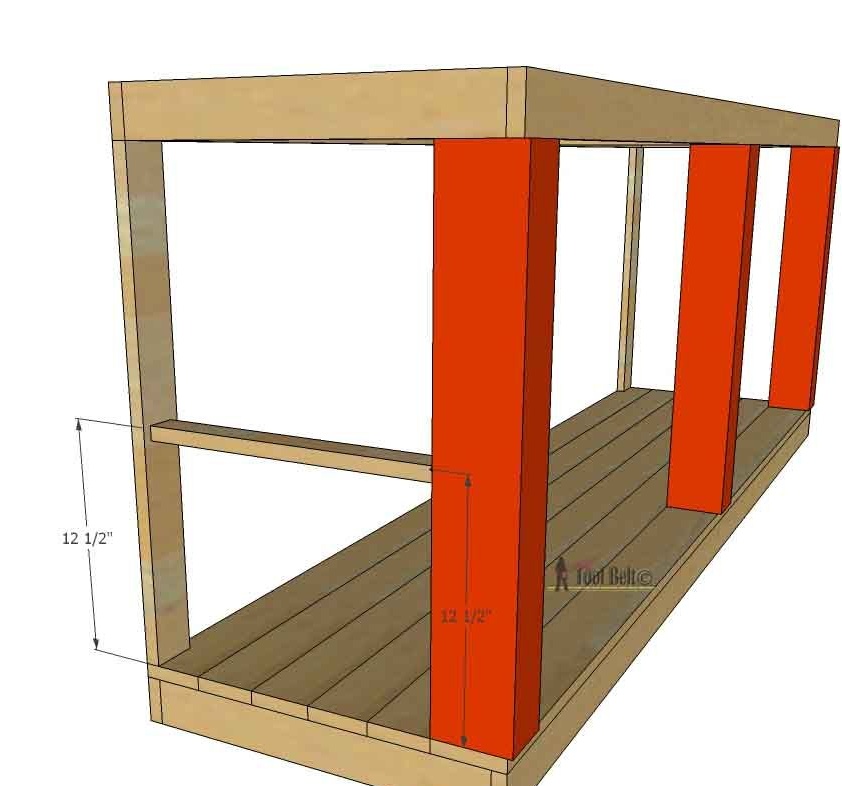
Install and lock the rear uprights. Fix the curly legs with glue and clamps as shown in the photo. When the glue is completely dry and hardens, install the top frame for the countertop and screw it using all the same pocket joints mentioned above.
Also install side support jumpers for the plywood shelf. Fix on them a sheet of plywood or thin pieces of natural wood. Use small nails instead of screws.
Therefore, mark the connection points of the parts and drill pocket holes for the screws with or without a clamp.
Step Four: Art Painting the Table
The table is stylized by the author as an old console with characteristic scuffs. To do this, he applied the paint in two shades: milk and dark brown. Moreover, to draw "scuffs" he used a tool called "glaze". In any case, consider that both paints must be resistant and give a hard, non-scratch coating after drying. All other compositions for coloring furniture are not suitable, as they do not have sufficient wear resistance for this.
Find the right color for oil or alkyd paint and get to work. Using a brush, apply a milk-colored paint to the entire surface of the table. Wait until it is completely dry and repeat the procedure. So, paint the table in two to four layers. Look at the density of the coating. If the color is perfectly even and all details are stained, then there is enough paint.
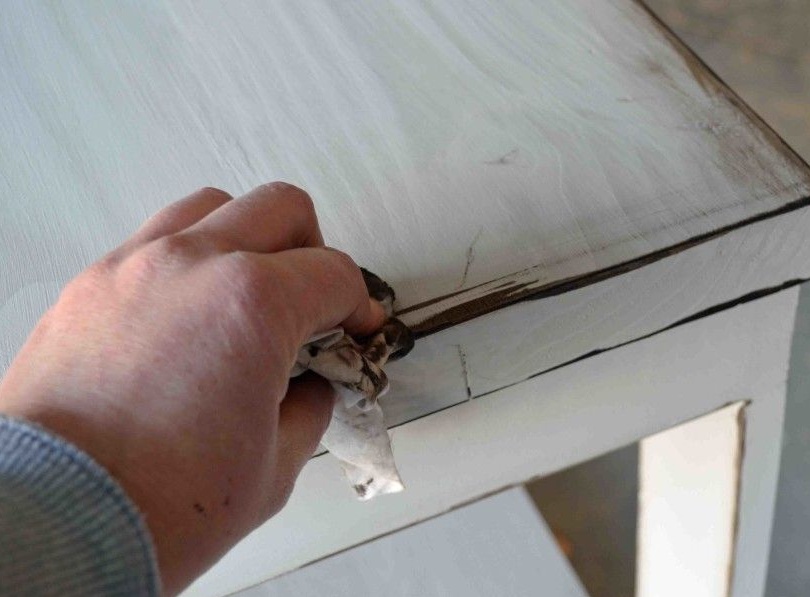
And now the most interesting stage is the stage of artificial aging. There are several ways to create scuffs characteristic of antique furniture, and this is just one of many. To process the edges, the author used a dark brown paint. Apply a small amount to areas that are usually susceptible to natural abrasion. To do this, use a soft, lint-free cloth. Gently spread the paint along the edge so that everything looks as natural as possible. Let the paint dry and evaluate your work. If some areas need additional coloring, do it.
In principle, the paint used is considered to be completely self-sufficient and does not require varnishing. However, if you want the product to serve you not just for many years, but for decades, varnishing the table is still worth it. To do this, any quality varnish with a hard coating, such as nitro varnish or special furniture varnish, is suitable for you.
Apply the varnish in several layers, sanding each new layer after drying. To do this, use fine-grained sandpaper. Finishing coat of varnish is not necessary.