Americans are very resourceful when it comes to design of furniture in a rustic style. They know how to create rude and uncouth, but organic things that sometimes take your breath away. Furniture so specific at first glance looks great in modern interiors, as if it was created for them. Its use in the environment is based on the contrast method, where modern materials are very advantageously combined with antique furniture.
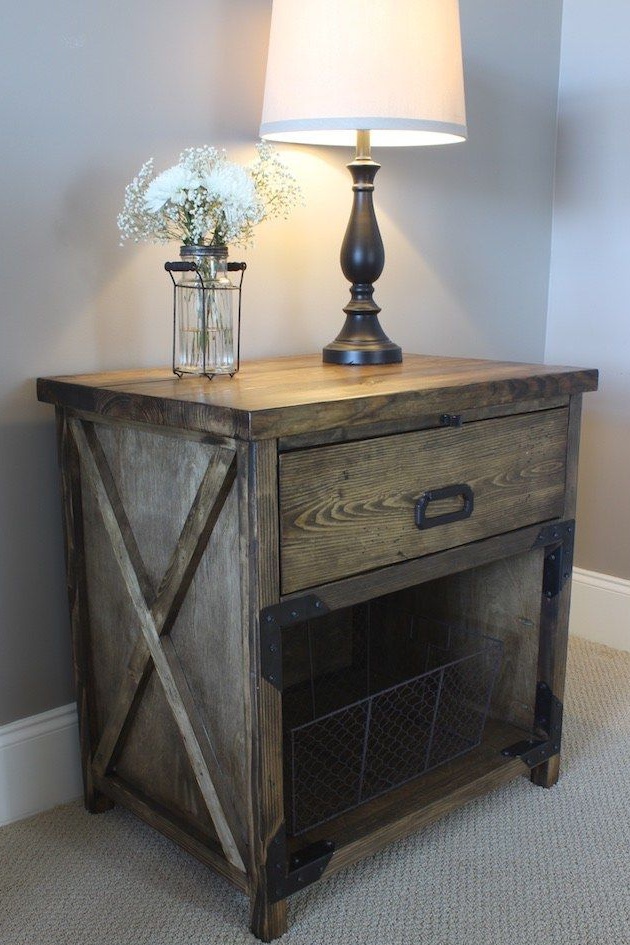
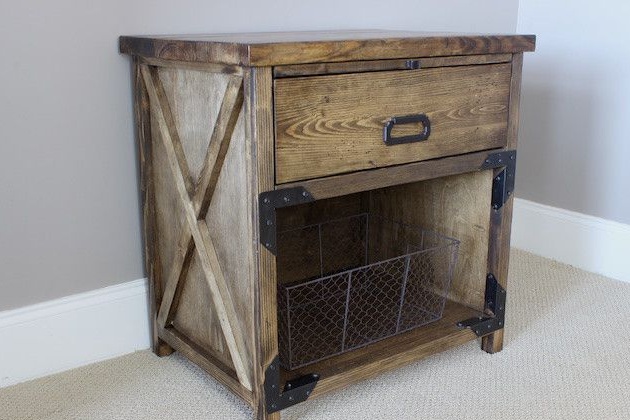
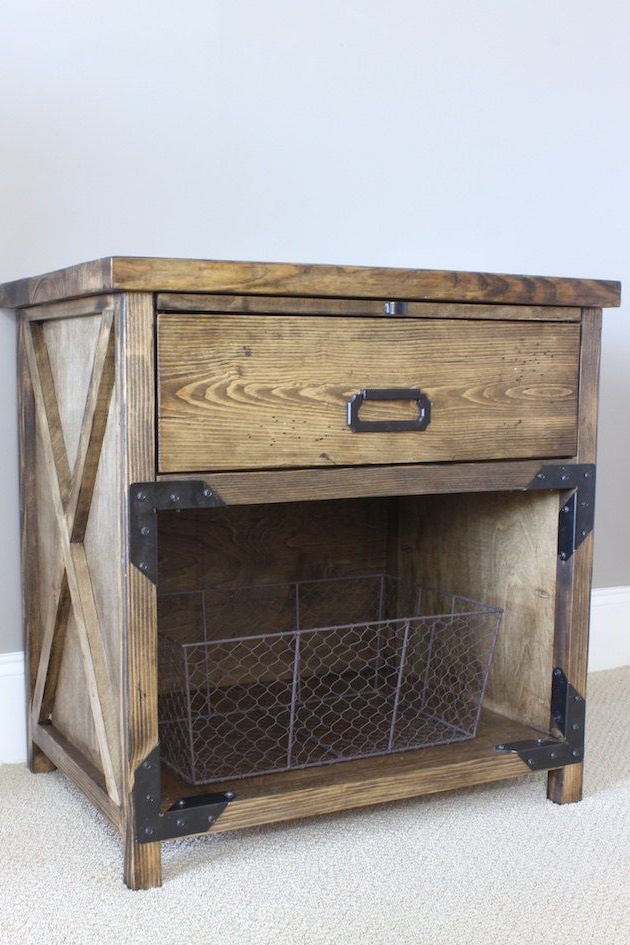
This cabinet made of plywood and natural wood was originally conceived as a bedside table. However, it can be successfully used in the kitchen as a work surface with spacious drawers and a compartment for storing vegetables or fruits.
You will need laths and boards made of natural wood for assembling the frame and for making the front lining for the drawer. They also made an additional retractable working panel, as well as a massive countertop. Plywood is used for cladding cabinets to avoid endless gluing of boards and other nuances that greatly complicate the process.
But let's take a closer look at everything you need to make this wooden pedestal do it yourself:
Materials:
- a wide board of suitable thickness for the manufacture of a decorative panel drawer;
- boards with a thickness of at least 30 mm for the table top;
- wooden slats for the frame;
- boards for manufacturing a retractable work surface;
- metal-plastic or metal fittings for a drawer;
- handle for the box;
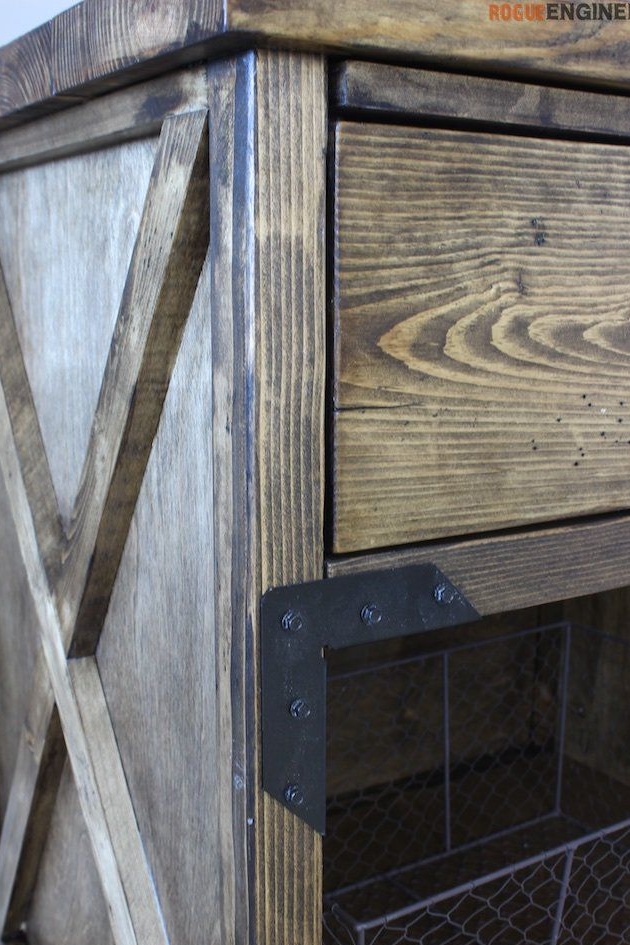
- metal corners to strengthen the curbstone and as a decor - four pieces;
- a small handle for a retractable work surface;
- furniture screws or wood screws, small nails;
- toner for wood;
- varnish for woodwork.
Instruments:
- miter or circular saw for working with boards and rails;
- jigsaw optionally for sawing plywood parts of the cabinet;
- electric drill;
- screwdriver;
- grinder;
- paint brushes;
- sandpaper for small jobs;
- building tape measure and square;
- a pencil;
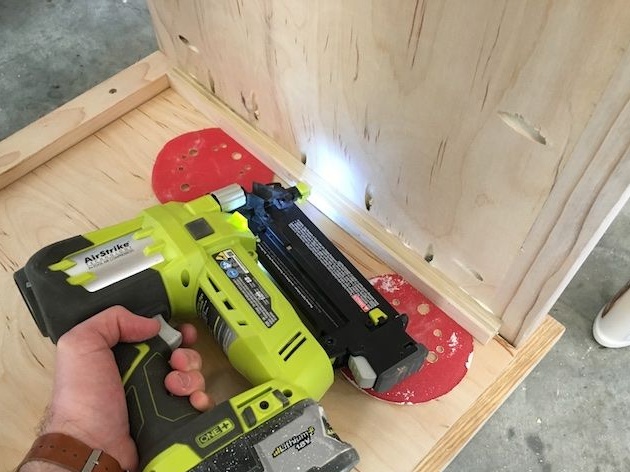
- pneumatic nail gun or joiner's hammer.
Step One: Detailing the Cabinet
The author described in detail how the manufacturing process of the cabinet occurs. From photos and graphic pictures you can judge what specific details you will need.However, since all dimensions are in inches, the exact dimensions of each part are not easy to calculate when converted to centimeters. You will receive incomplete values, and working with them is difficult.
Therefore, list on paper every detail of the structure, but rather indicate the exact calculated dimensions. This will prevent confusion during the work, although at first glance the task seems long and tedious. But this is not so. Detailing is needed.
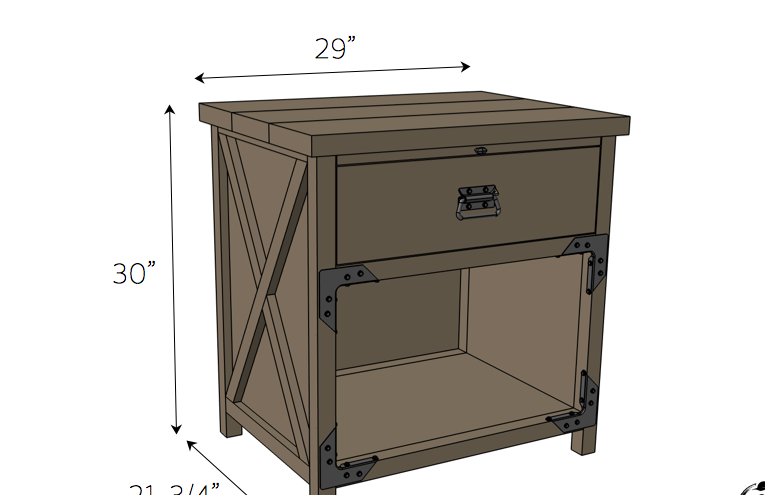
To understand the overall overall dimensions of the cabinet from this workshop, it is worth noting that its height is 750 mm. Please note that if you plan to install a cabinet in the kitchen, the working surface should be at least 80 cm high. This is the law of any professional kitchen, because properly constructed furniture will help you get less tired and keep your posture. The width of the cabinet is almost 550 mm, while its length is 720 mm. Consider these proportions if you want to make your pedestal identical to this one.
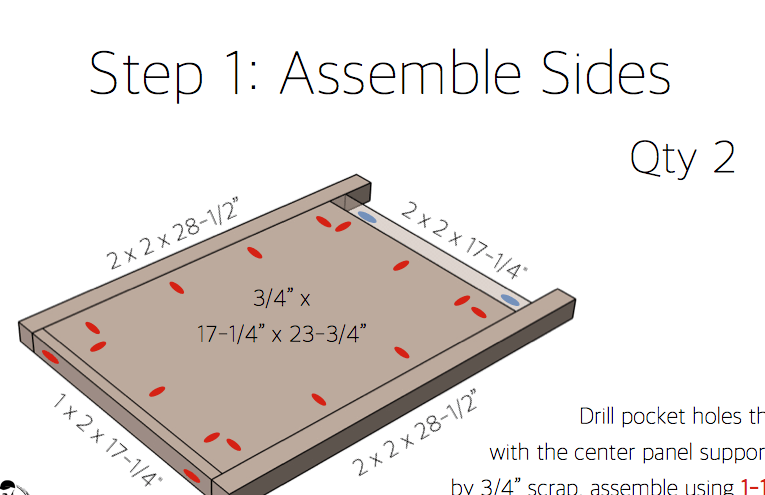
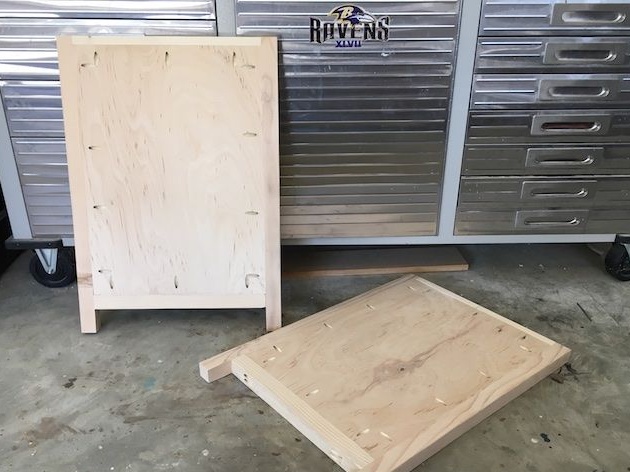
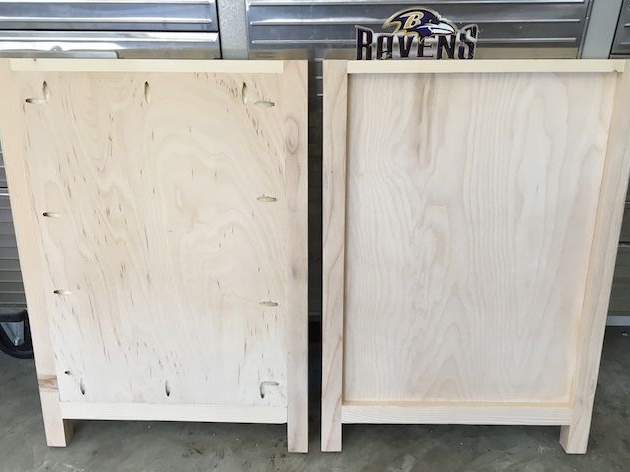
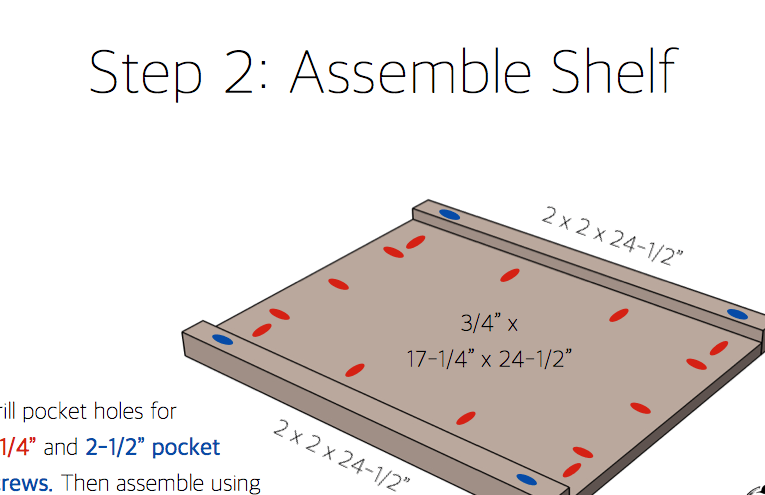
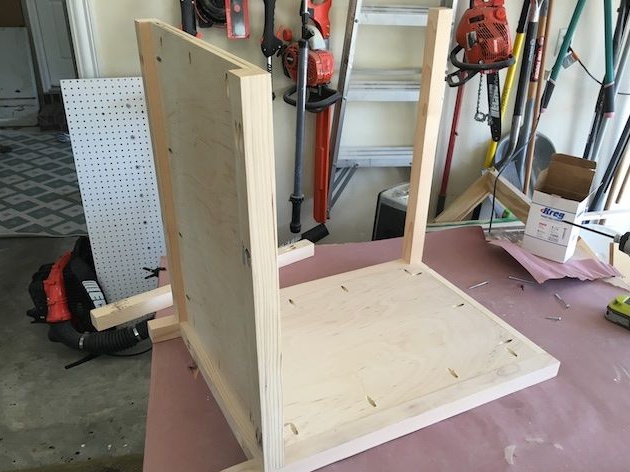
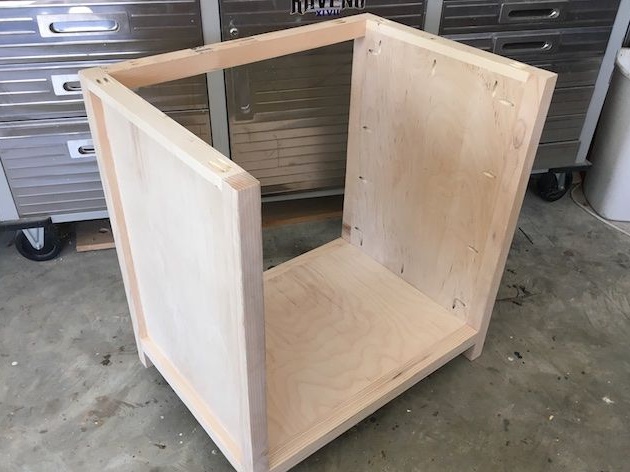
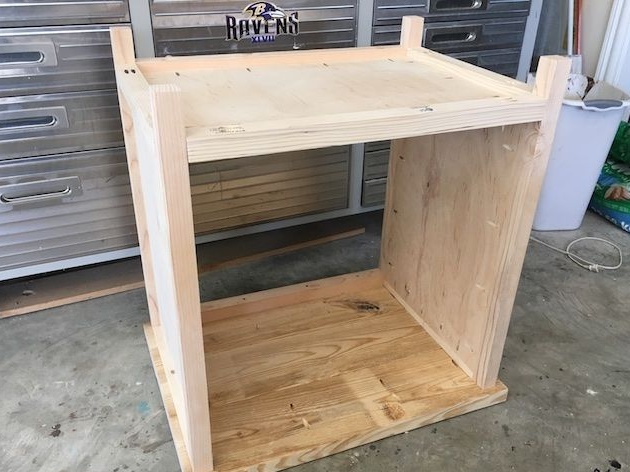
Step two: making side panels and the bottom of the cabinet
Before you start sawing plywood and boards, mark up. Now you have a list and you will not miss anything. Mark out the plywood parts, as well as elements from the rails and boards that will go to the assembly of the side panels and the bottom of the cabinet.
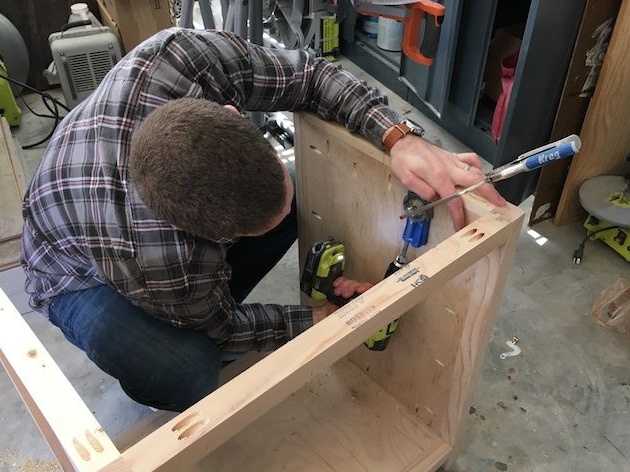
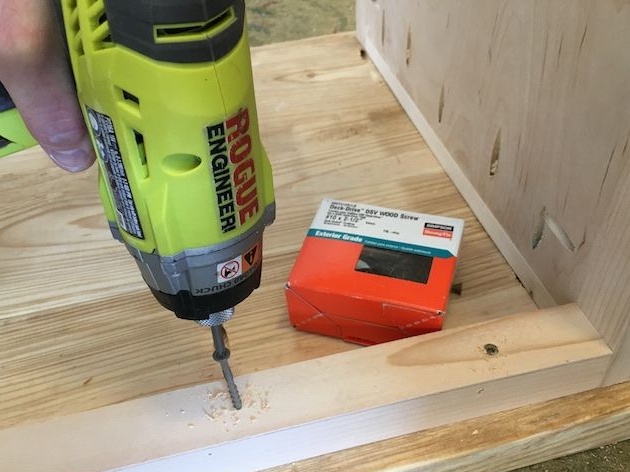
The author used pocket joints on screws and glue. Pocket holes in this case are inclined holes made using an electric drill. The screw is actually located inside and the connection can be filled with putty and thereby completely hide from prying eyes. If you do not plan to paint the cabinet with paint, but intend to tint, place the compounds in places inaccessible to the eye, since upon closer inspection, the toner does not completely hide the putty.
So, mark the joints, make pocket holes and proceed with assembly. To do this, apply a uniformly small amount of glue to the edges of the parts and only then screw in the screws, tightly pressing them to each other. It is not necessary to wait for the glue to dry. You can continue to work immediately.
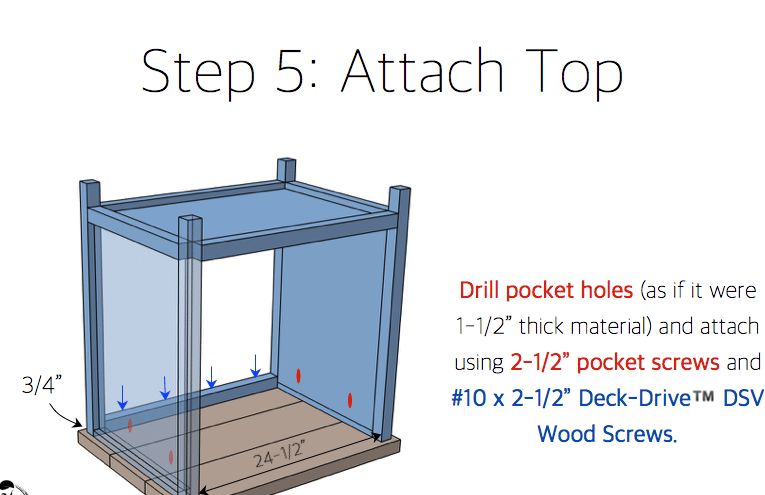
By the same principle, collect the bottom of the cabinet and secure it between the two sidewalls. At the top back, at the base of the future countertop, screw the frame strip to give the structure the strength necessary for further assembly.

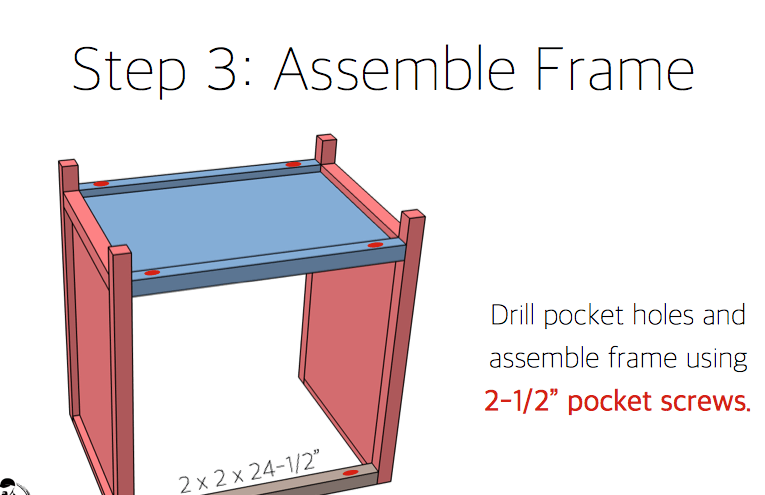
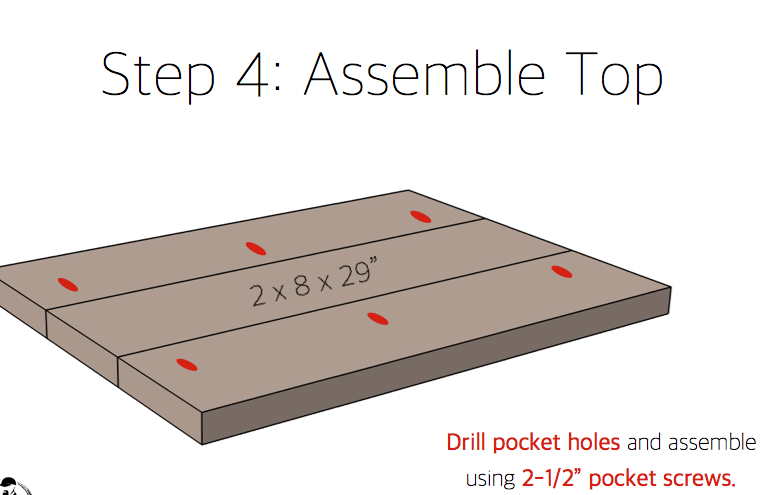
Step Three: Manufacturing Countertops and Retractable Worktops
Try to use a material that is identical in thickness, especially when making countertops. Otherwise, grinding work will take a lot of time. The same goes for the drawer.
For a tabletop, select massive boards with a thickness of at least 30 mm, and preferably thicker. Fasten them to the frame using the same pocket holes and glue. Instead, you can use metal corners. However, here the glue will not be superfluous.
Separately, make a retractable working panel from three boards of the same length. Prepare the rear locking bar for the drawer and screw it in with screws. Install the side strips along which the panel slides and slide forward.
Replace the panel and check for smooth running. There is no sense in installing any additional accessories here. But the limiters that prevent it from falling out of the cell will not interfere.


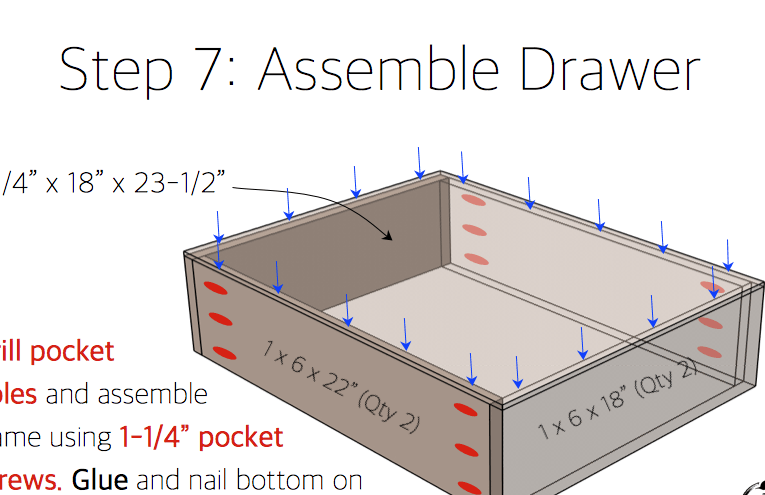
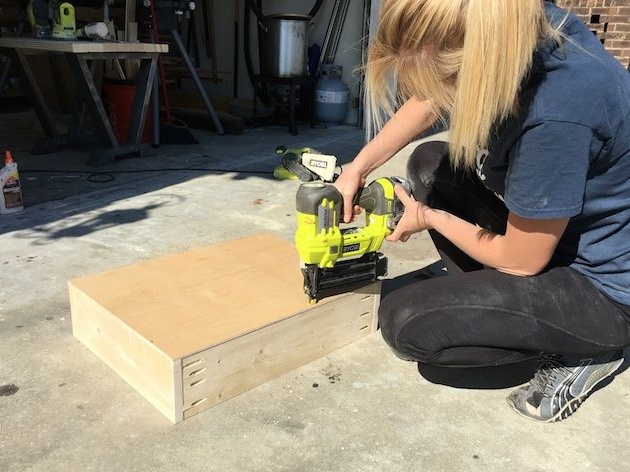
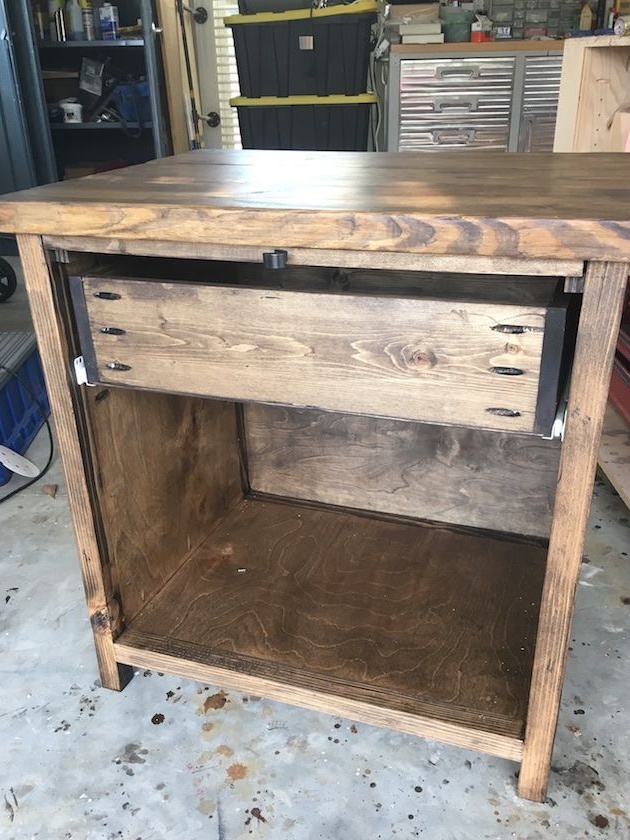
Step Four: Drawer Production
The box is assembled from plywood. This is the most suitable material for the manufacture of such parts. Natural wood is worth saving for more responsible purposes.
Gather the perimeter of the drawer and fasten its bottom. In an extreme case, for the manufacture of the bottom, you can take a non-thin fiberboard, but later it should definitely be varnished on both sides, because fiberboard has the ability to attract moisture and exfoliate.
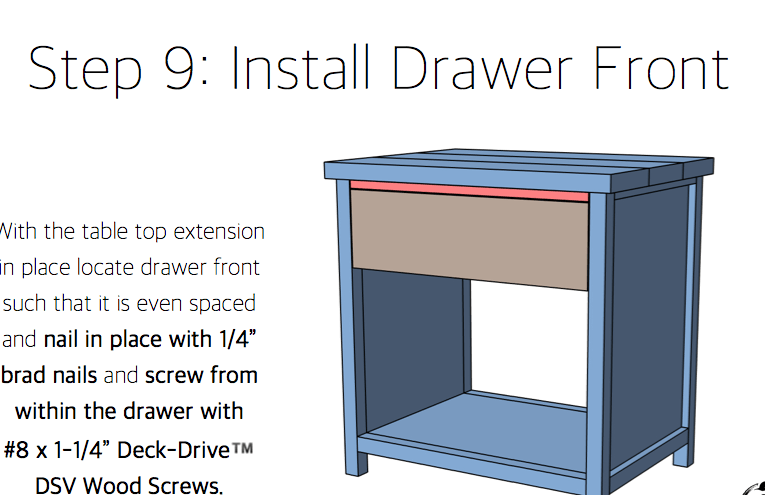
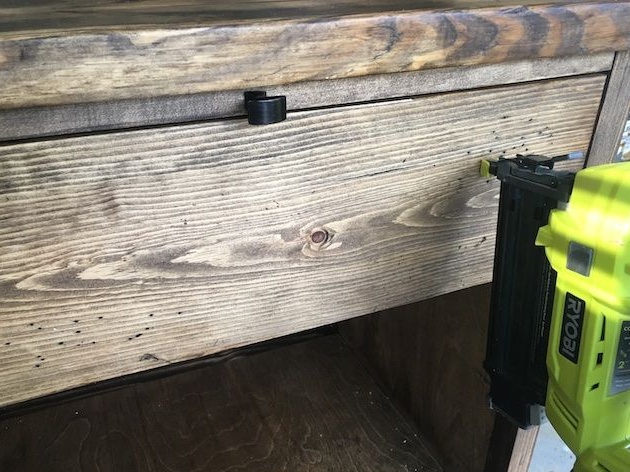
Install a retractable metal-plastic hardware and place the box in the cell to check how everything works. If the ride is smooth, use glue and small studs to fix the decorative wood panel on its front.
Step Five: Finish the Build Stage
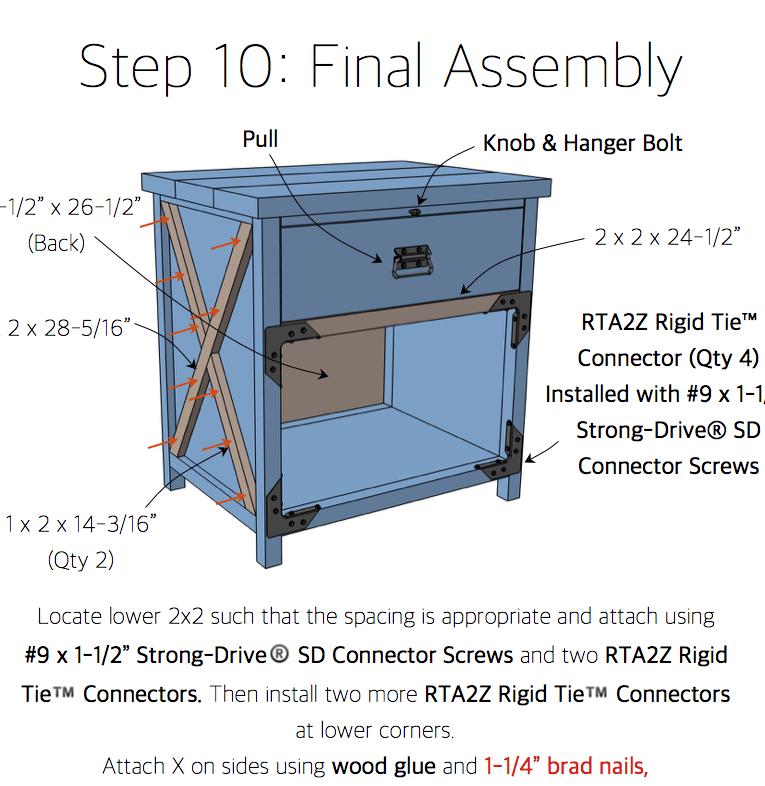
You are almost at the finish line. It remains to establish the rear wall of the cabinet. and decorative X-shaped slats on the sidewalls. The back wall, as well as the bottom of the box, can also be made of fiberboard, because this will slightly facilitate the design. However, it is safer to use plywood in this area.
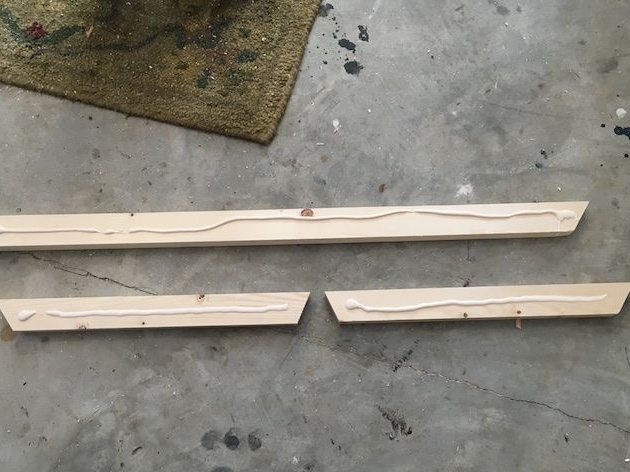
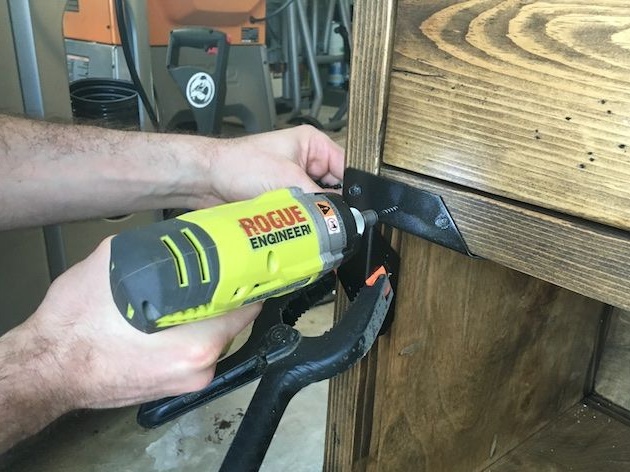
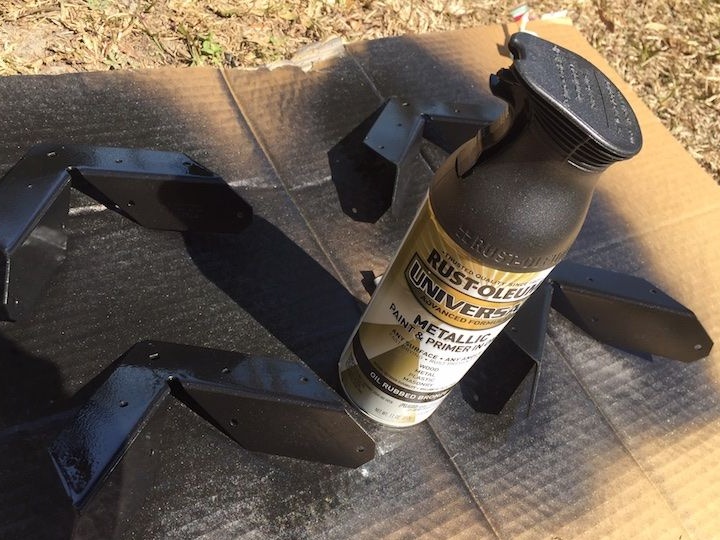
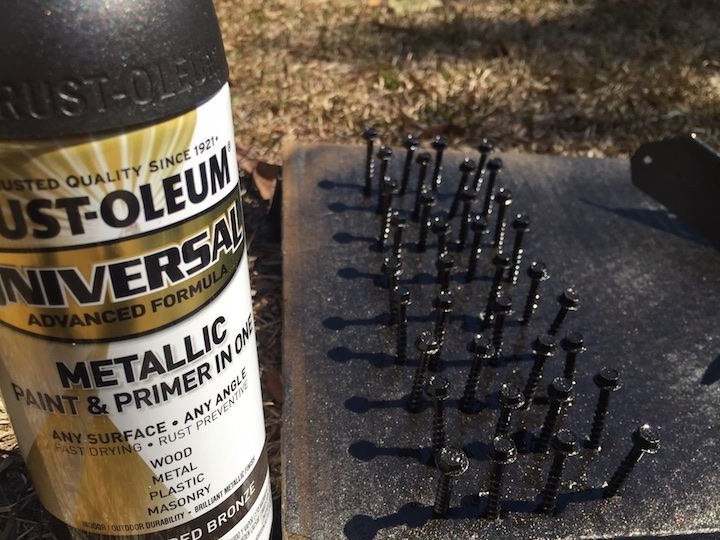
Use glue to fix decorative slats on the sides of the cabinet. You can additionally fix them with small carnations. Install metal hardware, including drawer handle and drawer. Do not forget that, among other things, it plays a decorative role. The author painted all the metal parts, right down to the screws, in black to comply with his chosen style.

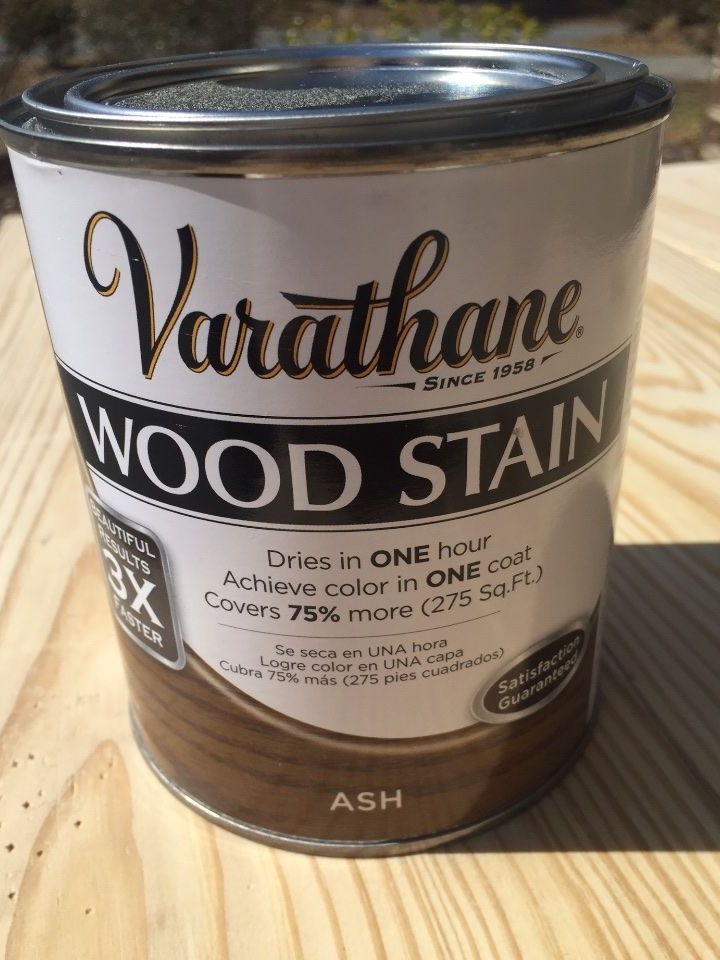
Step Six: Wood Processing
For protective and decorative processing of the cabinet, the author used a Varathane primer-toner. It can be replaced with tinting compounds such as "3 in 1" or protective-decorative oil-toner. All these tools have their advantages and will not disappoint you.
Apply the composition with a soft cloth on the surface of the tree, gradually rubbing it into the pores of the wood. If the tone is not deep enough, repeat application. A pair of layers is usually enough to get the color declared by the manufacturer. However, partially the consumption of material depends on the processing of wood. Careful grinding reduces it.
Finally, varnish the cabinet. Choose a resistant varnish suitable for varnishing furniture. Apply several layers of varnish, including on the inner surfaces of the product. This is necessary if you want to carry out wet cleaning inside.
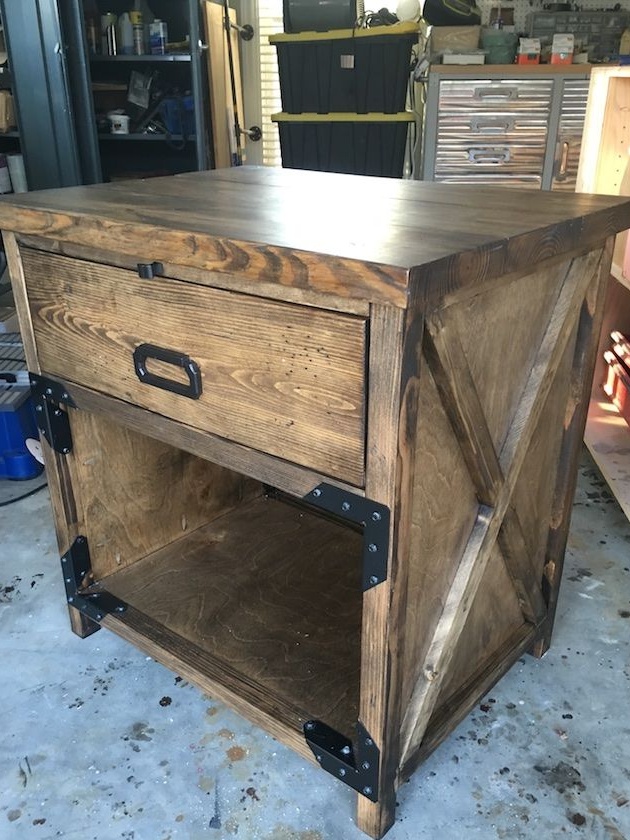
The work is finished, and your rustic wooden cabinet is ready!