
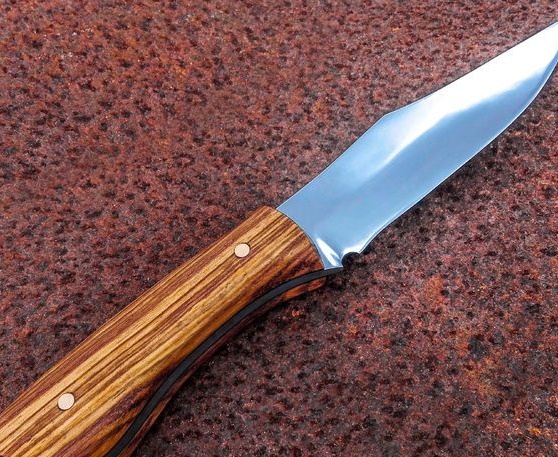
If you want to make a simple but high-quality knife do it yourself, you can look at this instruction. The considered knife has a simple and elegant appearance, it’s easy to assemble, if you compare this homemade with others. In the manufacturing process, the blade goes through hardening, which causes the knife to remain dull for a long time and sharpen well.
For ease of manufacture, a belt sander is required; without it, the process of forming bevels and grinding will be long and tedious. To make this knife, you will need high carbon steel, it can be 1095 or 1070. The author chose 1070 steel.
Materials and tools for making a knife:
- steel 1095 or 1070;
- paper, felt-tip pen (or a ready-made knife template);
- wood, deer horn (or other material for making a pen);
- pins made of copper or brass for fixing the handle;
- belt grinding machine;
- drill with drills (preferably a drilling machine);
- a furnace or other heat source for hardening steel;
- files, sandpaper of different grain sizes, WD-40, etc .;
- linseed oil for impregnation of the handle;
- tape cutting machine (in the most extreme case, a grinder and a lot of patience).
The process of making a knife:
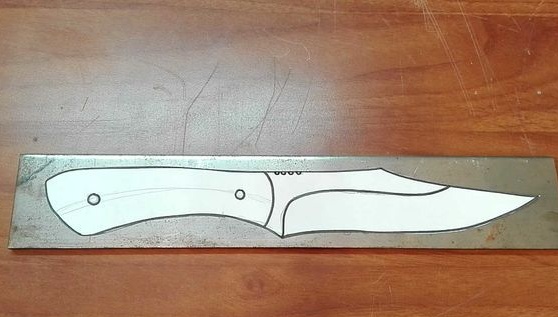
Step one. Billet
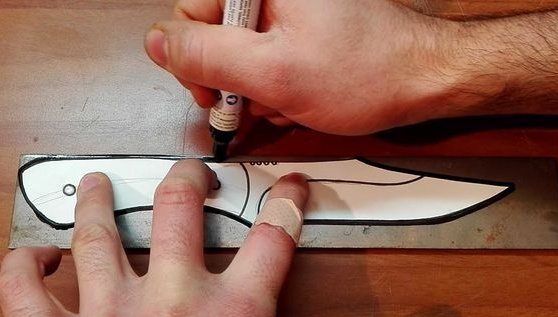
In the manufacture of any knife, it all starts with a template. The template can be downloaded already ready and simply printed on a printer. Or you can develop your own. Next, the template needs to be cut and then glued to the sheet of metal from which the workpiece will be made. Or you can simply circle the template, but working with paper is easier.
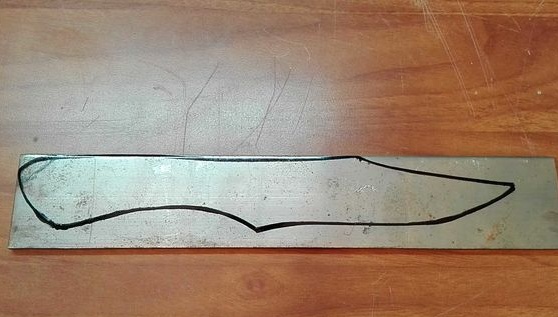
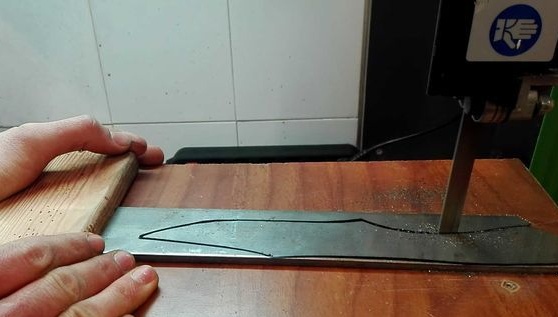
Next, the most difficult part begins, you need to cut the main profile of the knife. If you do not have a tape cutting machine, like the author, then this process will be more difficult and lengthy. Theoretically, the work can be done with an ordinary grinder.
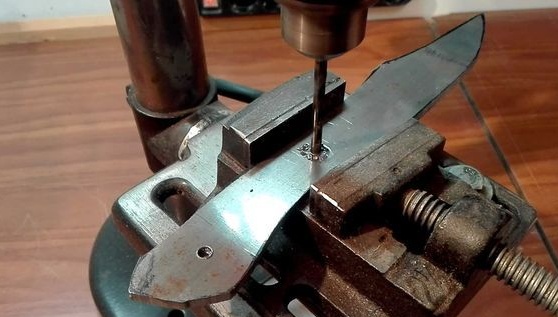
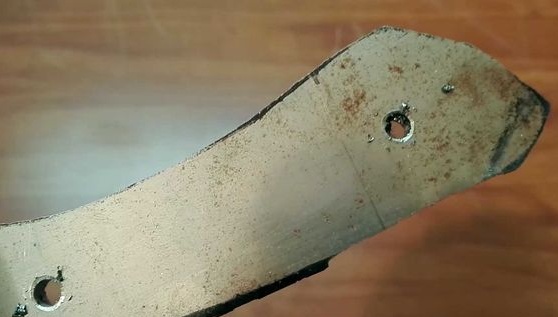
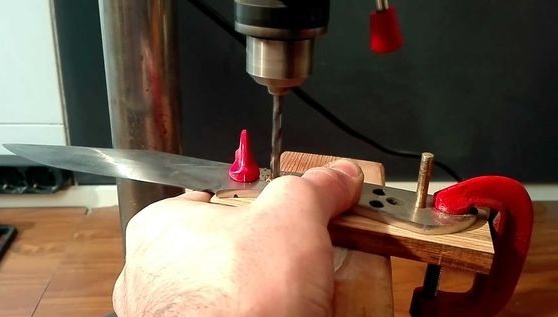
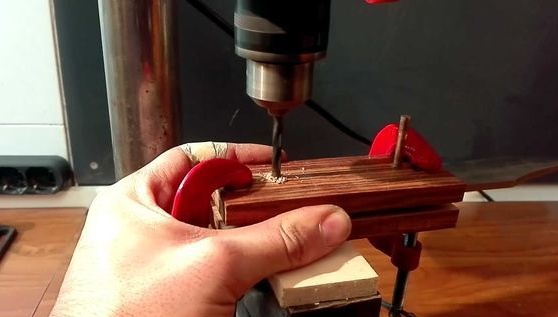
Step Two Drill holes
At the next stage, the author drills holes for the pins that will hold the handle. At a minimum, there must be two such pins. But for beauty they can be made and more. Holes are conveniently drilled on a drilling machine. Select the diameter depending on the thickness of your pins.
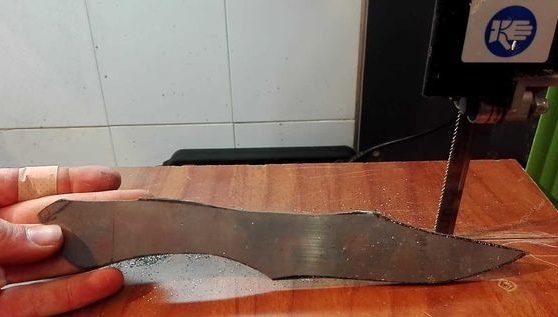
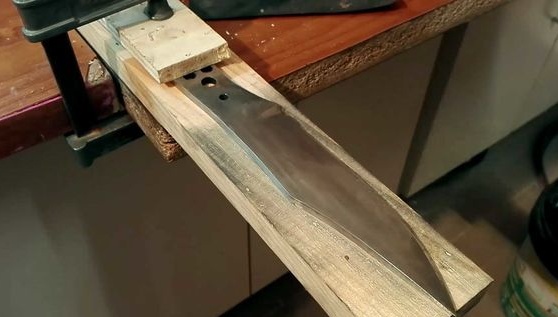
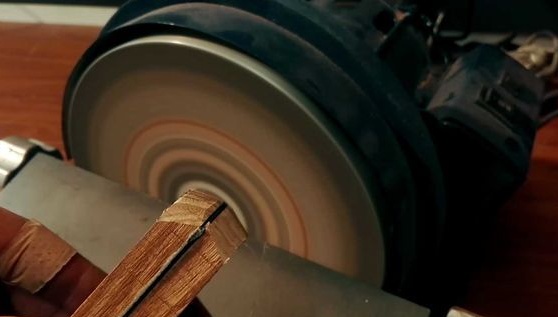
Step Three Workpiece grinding
Before grinding our workpiece, you will first need to work a bit with a file. With it, you will need to remove the burrs that formed after drilling.Also, if the edges are too rough, you can carefully grind them off with a grinder. Well, then a belt sander comes to the rescue. We carefully process the profile on it so that in form it becomes the way it was originally intended.
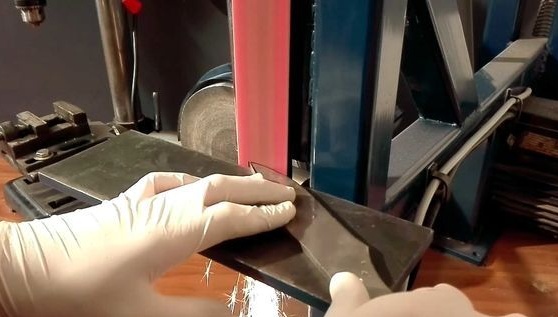

When working on a tape machine, it is imperative to use a respirator and it is advisable to wear safety glasses, as a lot of metal dust is generated. Although our blade will undergo hardening, it is not necessary to allow excessive overheating of the metal.
Step Four We form bevels
The next step is the formation of bevels and this activity can be considered the most responsible. The cutting characteristics of the knife and how easy it will be to grind in the future depend on the angle of sharpening. For the knife to cut well, the blade must be thin, and for the knife to cut well and be strong, the blade must be made thicker.
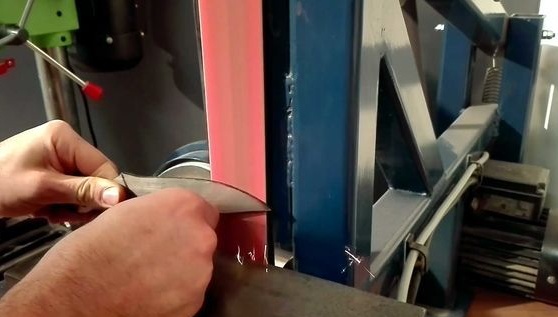
It is also important to remember that if the metal blade is too thin before hardening, it will overheat too much and hardening will turn out to be of poor quality or not work at all. So it is better to first form the main profile of the bevels, and then modify it on a belt grinder, and preferably by hand.
To form the bevels correctly, you must first draw a line on the workpiece and then, focusing on this line, grind the metal. In general, here you will need some skills with a grinder.
Step Five We temper the blade
Now we need to harden steel, so it becomes elastic, and the metal will not bend when cutting solid objects, in addition, the knife will hold the hardening well. Quenching temperature is selected depending on the type of steel. If we talk about steel with a high carbon content, then it is usually heated to a temperature of up to 800aboutFROM.
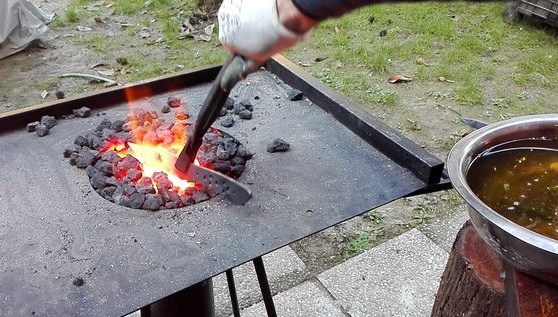
To understand the temperature to which the metal is heated, if you do not know what kind of steel it is, you can use a permanent magnet. As soon as the magnet ceases to be attracted to it as the steel heats up, the steel can be cooled.
You can also determine the desired heating temperature using a special color scale.
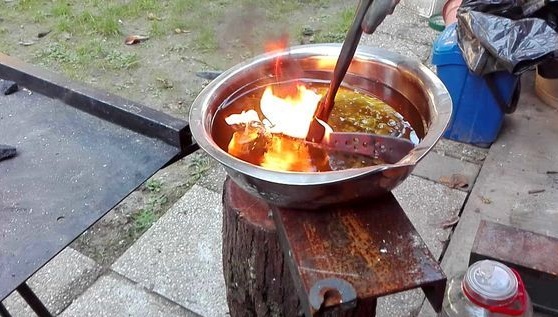
The metal is usually cooled in oil, in rare cases, the steel is quenched between two plates, in water or in air.
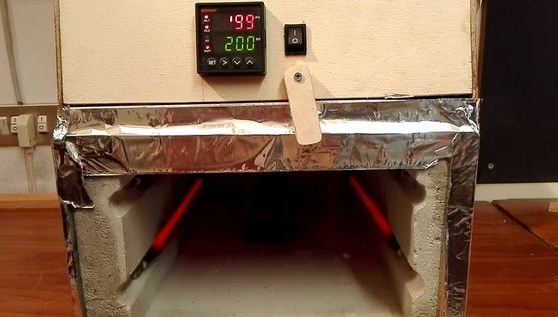
After steel hardening, there is one more trick - this is steel tempering. If the steel is not released, the blade may fall into small pieces when dropped, as the metal will be too fragile. To make it more resistant to mechanical stress, we place the blade in the oven with a temperature of about 200aboutC. Then our knife should be heated for an hour, and then cool with the oven. As a result, metal tempering will occur.
In conclusion, I would like to remind you that quenching oil should not be cold, otherwise it may be too thick. If the oil is thick, then you may need to warm it up.
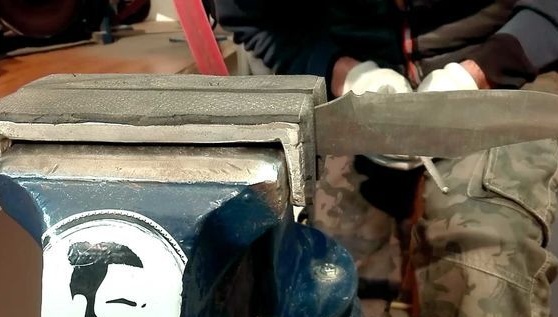
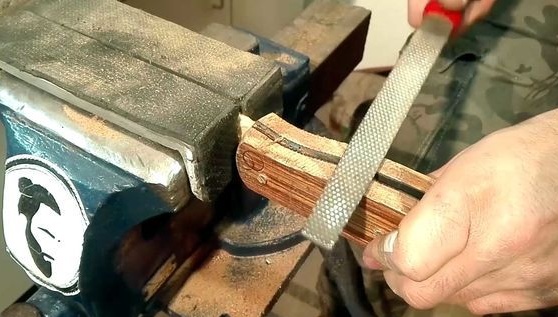
Step Six Blade cleaning
After extinguishing in oil and heating on the metal there will be a lot of pollution. How to deal with them, here everyone decides for himself. You can lightly walk on steel with a belt sander, and then finish the metal manually. Or, armed with sandpaper and WD-40, you can clean the metal manually.
The author set himself the task of polishing steel to a mirror shine. Then he needed a polishing wheel with paste.
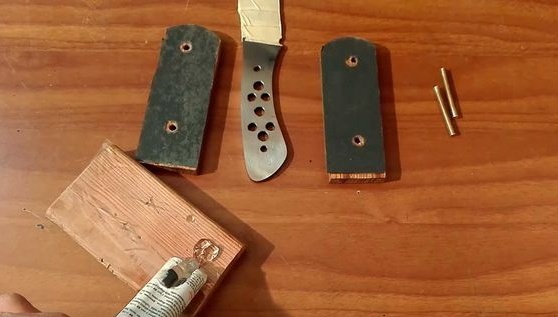
Seventh step. Handle Installation
The author makes a pen from wood, but you can choose the material to your taste. First you need to take two blanks, tighten them with clamps and then drill two holes, first and at the end. These holes should coincide with the holes in the metal part. It is advisable to drive out the holes in the steel with a drill in order to clean it. Well, then epoxy glue comes to the rescue. It must be applied over the entire area into two halves, and then carefully pulled together with clamps or clamped in a vice.At the same stage, you must not forget to hammer the pins into the handles.
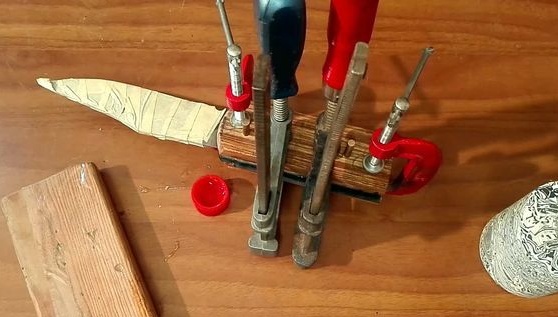
Step Eight. The final stage of knife assembly
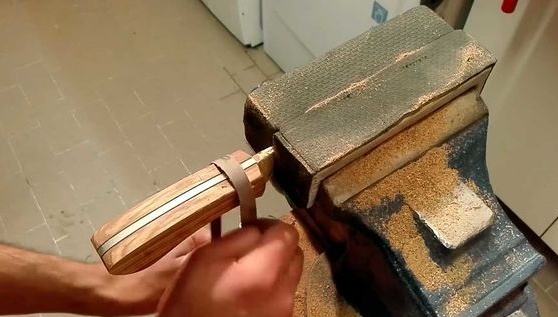
When the epoxy glue is completely dry, the clamps can be removed and now the knife is again sent for grinding. This time, using the grinder, you need to set the handle profile. Well, this parameter we have corresponds to the profile of the blade, where the wooden handle is attached. So just level the wood at the metal level. A rough profile can be defined with a rasp.
You will also need to remove all burrs, bumps, and so on. At the end, you need to bring the handle to a perfectly smooth state. This is done by reducing grit on a belt sander. It is also advisable to grind the handle by hand with fine sandpaper.

When the pen is ready, you will need to protect it from moisture. Then linseed oil will come to the rescue, they need to thoroughly soak the pen. In addition to protection, it will also decorate its appearance. It is also important to take care of protecting the blade if it is made of quickly rusting metal.
That's all, the knife is almost ready, the final step remains - sharpening. The author sharpens the knife to the state of the blade. He should cut paper no worse than a clerical knife. For such fine sharpening, you can use water stone or polish around.
If you want to make your knife unique, you can engrave on it or etch the desired inscription.