
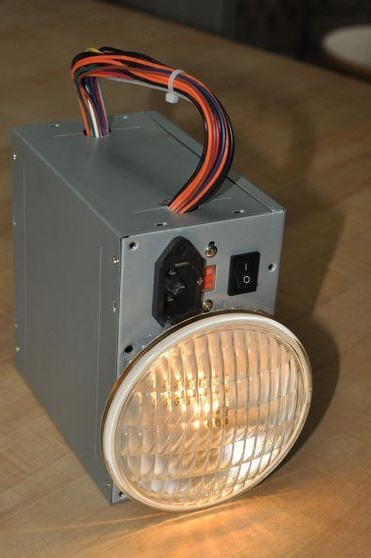
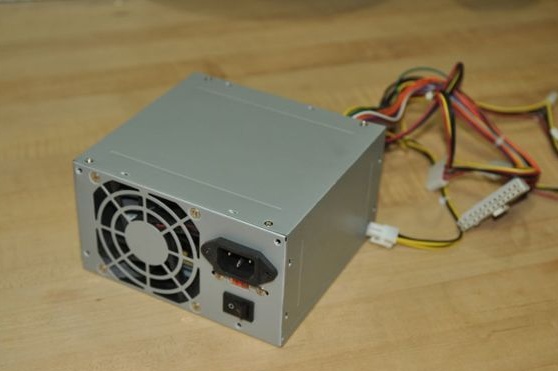
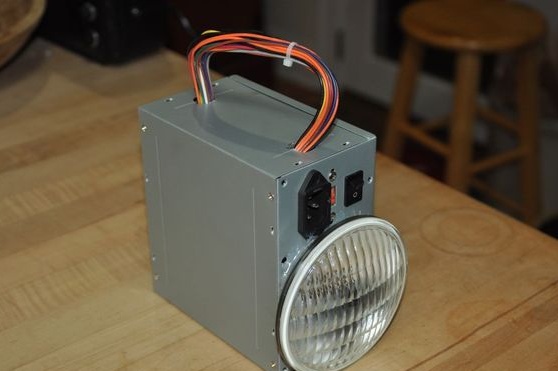
If you have an old non-working power supply from a stationary computer or a case from it, lying around, you can make an excellent flashlight out of it. You only need to install the headlight and the battery, and the switch, as well as the connector for the charger in the unit is already available.
The power supply housing is quite large, so you can install a battery with a fairly solid capacity. As a source of light, the author used a spotlight to illuminate the landscape. You can easily install a headlight from some cars or a motorcycle in this case. A headlamp with an incandescent lamp shines quite brightly, though it quickly drops the battery.
So it would be more rational to install LEDs instead of an incandescent lamp.
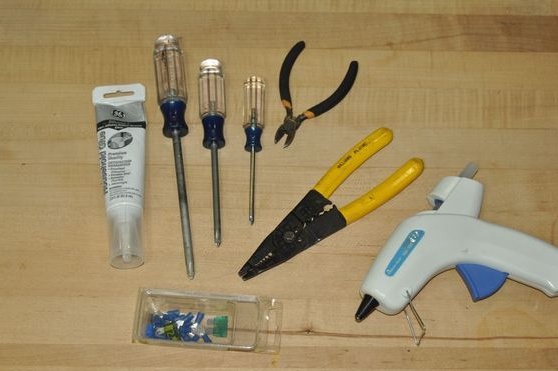
Materials and tools for the manufacture of a lamp:
- battery (author used 5AH);
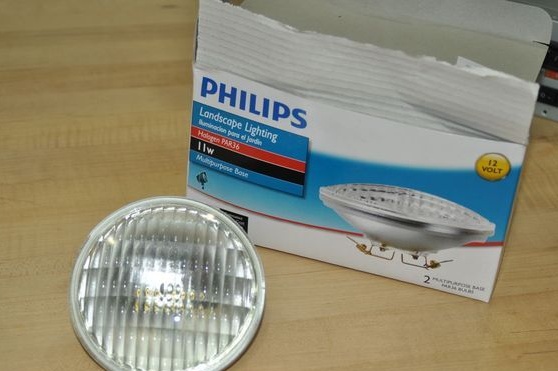
- a headlight for landscape lighting (suitable for a motorcycle, a headlight for a car or a home-made headlight);
- heat shrink or electrical tape;
- battery charger;
- old power supply from a stationary computer;
- cable from the power supply;
- wires from the power supply or other material for the manufacture of pens;
- screwdrivers, pliers, multimeter and more.

Flashlight manufacturing process:
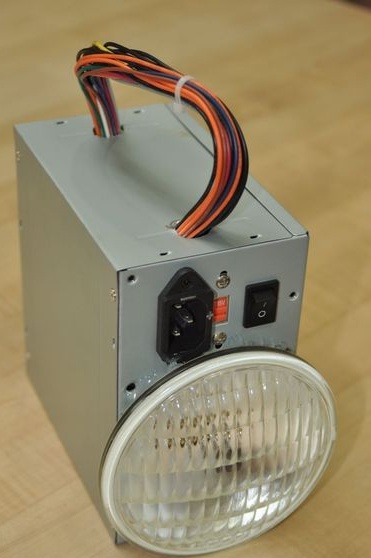
Step one. We disassemble the power supply
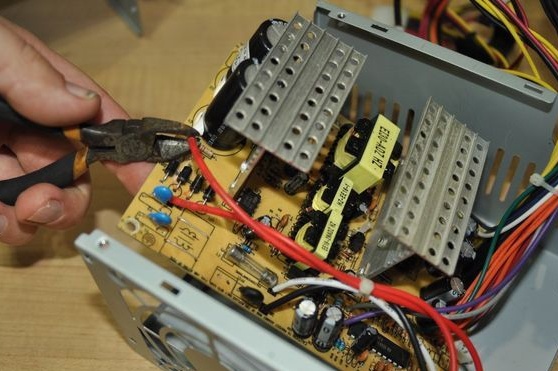
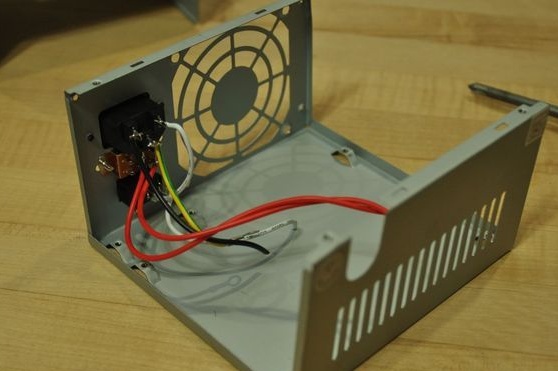
First of all, we arm ourselves with a screwdriver and disassemble the power supply. We need to pull out all the unnecessary from the power supply. First of all, we remove the board, we do not need it, for this we unscrew a couple of screws that secure it to the case. From the board you need to cut off a pair of wires that go to the power connector and a switch mounted on the case. These wires must be cut off at the base of the board so that they are more authentic. Then the battery and switch are connected to these wires.
The wires going to the 115/230 switch can be completely removed, we will not need them. Although, if you use LEDs, you can use it to switch brighter / weaker modes. You can connect a resistor or just turn on the LEDs in groups.
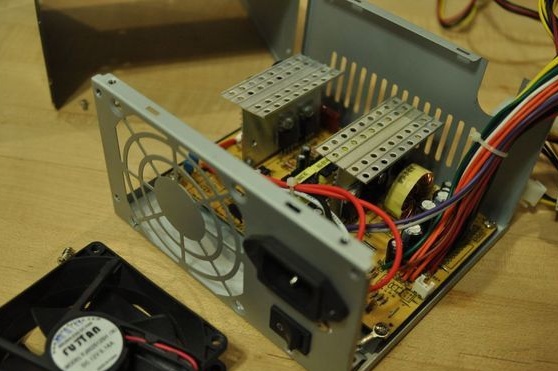
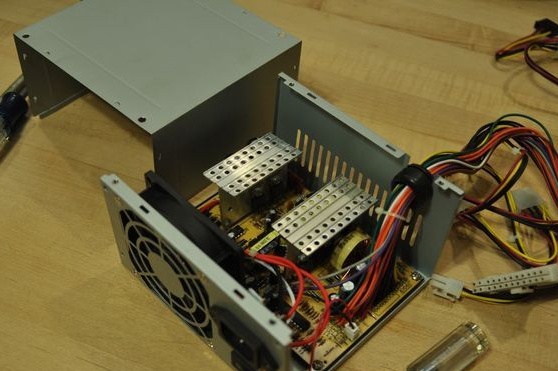


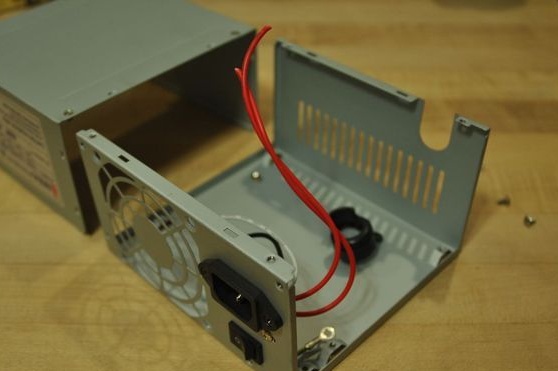
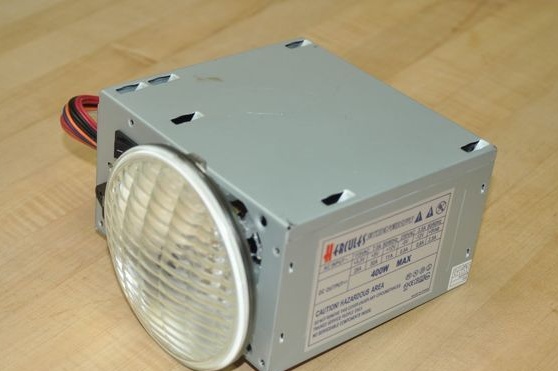
In the next step we remove the cooler, we do not need it. At this point a headlight will be installed. At this step, the work is over.
Step Two Battery Preparation
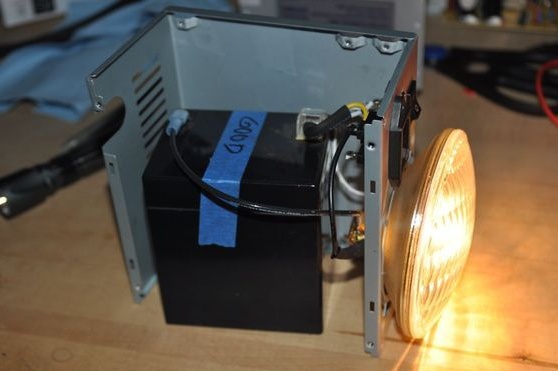
The author chose a 5Ah battery, it fits perfectly into the power supply case, although you can put a bigger battery in it. If you have cells from a laptop battery, this would be a great solution.The author used the battery on 12V, so that it can be charged with the same devices with which we charge car batteries.
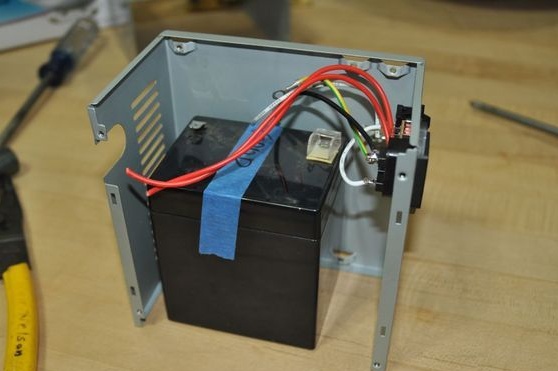
The battery can be secured to the case using epoxy glue or hot glue. But for reliability, I would recommend to make a clamp for it and tighten it thoroughly with screws and nuts, otherwise, in the event of a lamp fall, the battery can easily come off.
Solder the wires of the flashlight to the contacts of the flashlight. It is important to remember the color of the wires so that you do not mix polarity later. However, the polarity can then be easily determined with a multimeter.
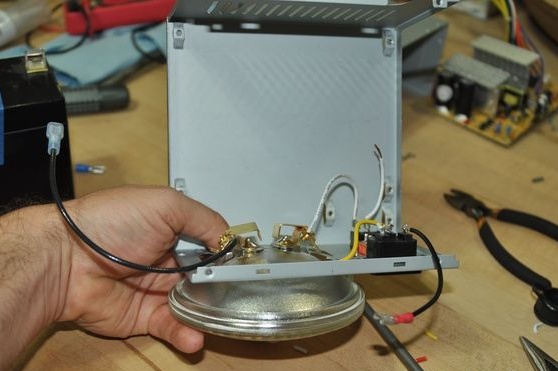
Step Three Install the headlight
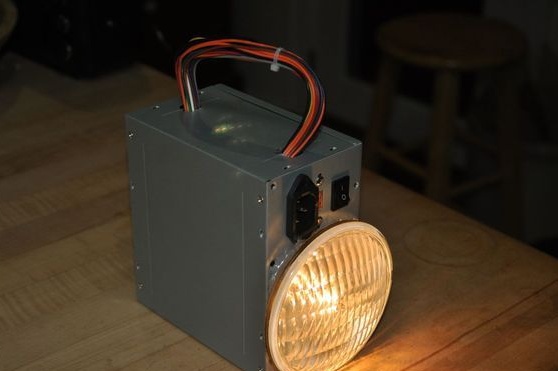
Having picked up a headlight, necessary on diameter, it can be installed in the case. As I said earlier, instead of an incandescent lamp, it would be more rational to use LEDs. They can be glued to the lamp reflector with hot glue, or come up with some kind of cartridge. The author has an incandescent lamp of 11 watts on 12V. Such a lamp discharges the battery to 80% in 4 hours.

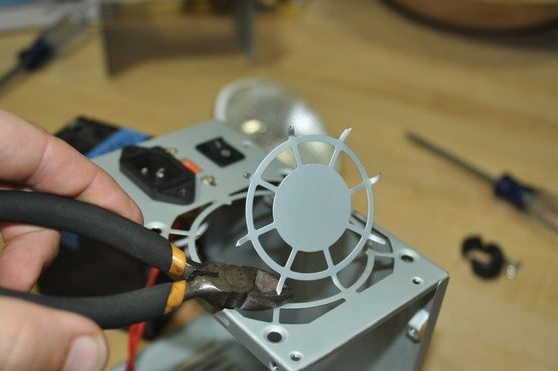
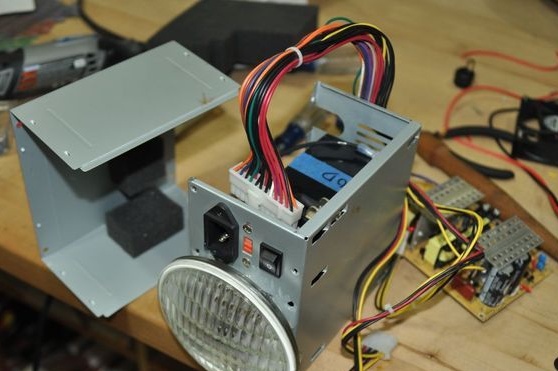
We take the power supply housing and wire cutters. We need to cut the grill, which is designed for the cooler. If the hole is small, then it can be expanded, then a more serious tool such as a dremel will already be needed.
We install the prepared headlight in the housing. It remains only to glue it well. Here you will need hot glue, epoxy or other durable glue. Next, the mono headlight as an experiment, directly connect the wires to the battery, if it is on, then everything is fine.
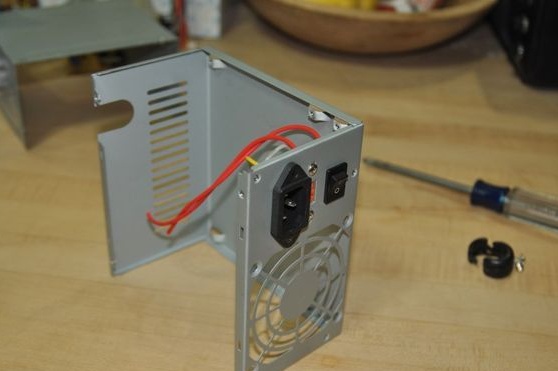
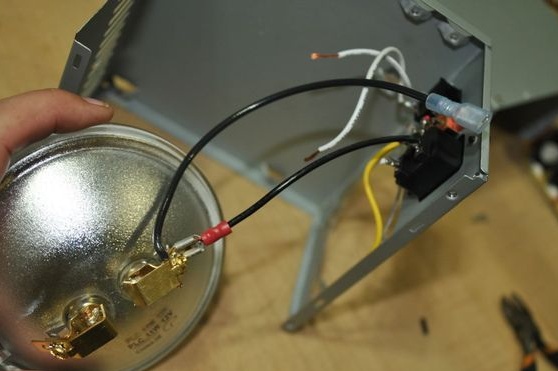
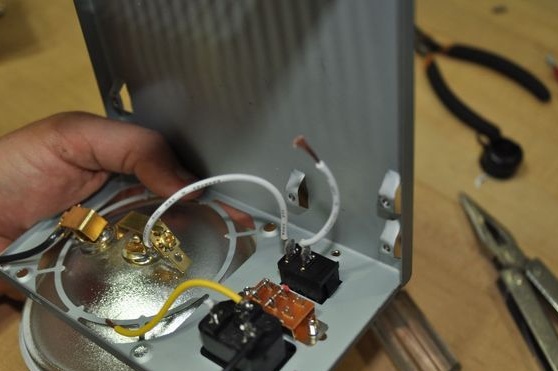
Now we need to connect the headlight through the switch. To do this, let one wire directly from the headlight to the battery, and connect the other to the gap with the switch. We try to turn on / off the headlight.
It is advisable to solder the wires and not use electrical tape, heat shrink, etc.
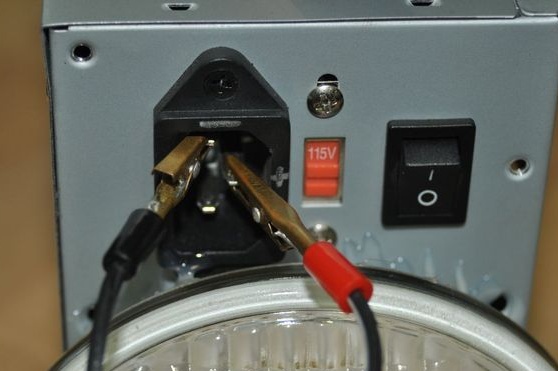
At the end, you have to try to charge the battery. Here you need a 12V charger and a cable from a computer power supply. Immediately cut off the plug from the cable with which it is inserted into the 220V power outlet in order to avoid an error if someone wants to charge it from the power outlet. It is advisable to come up with an original connector that connects the cable to your charger.
The author does not use a cable for charging, he directly connects his power supply to the contacts using crocodiles.
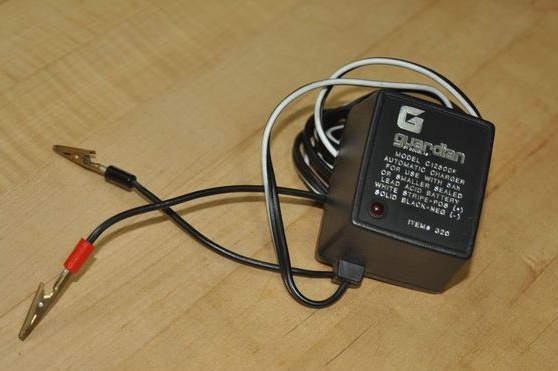
Now it remains only to determine the polarity on the wires and connect the polarity of the battery to the charger. If the charger is not automatic, then set the charging current to no more than 10% of the total battery capacity. That is, for the selected battery, the charging current should be no more than 0.5A.
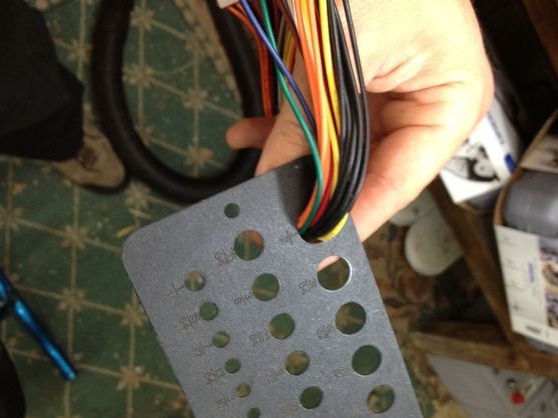
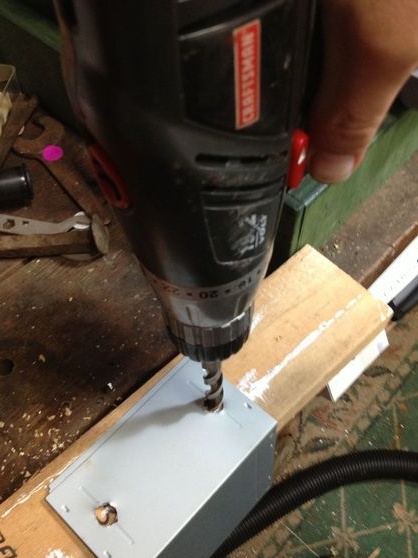
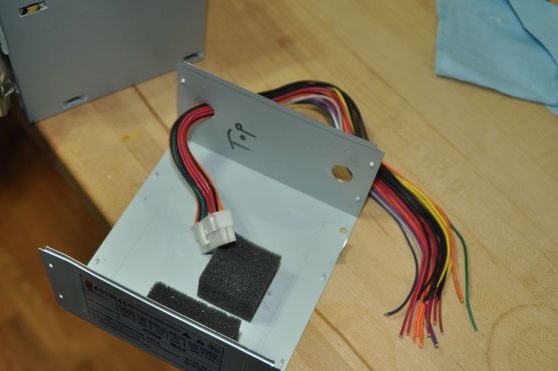
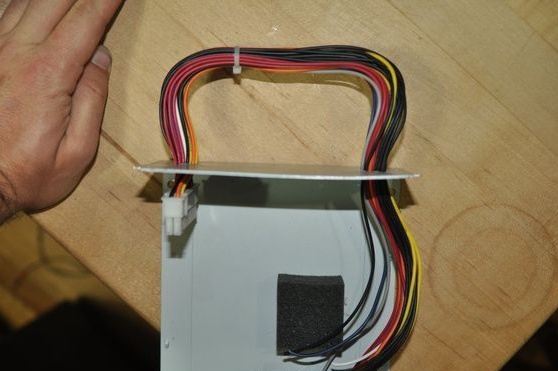
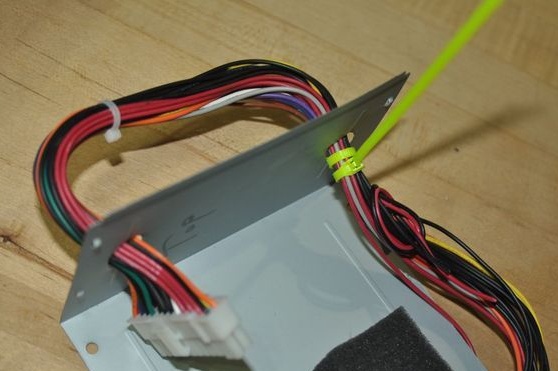
Step Four Pen making
To make a pen, the author simply used a wiring harness from the same power supply, leaving a connector at the end. To install the hands, drill two holes in the body. Next, insert our wiring harness, one side of it will be held on the connector, and on the other side we will bend the wires and fix them with a plastic clamp. Well, or you can tie a knot on the wires. At the top, the author also tightens the tourniquet with a clamp so that the wires are held together.

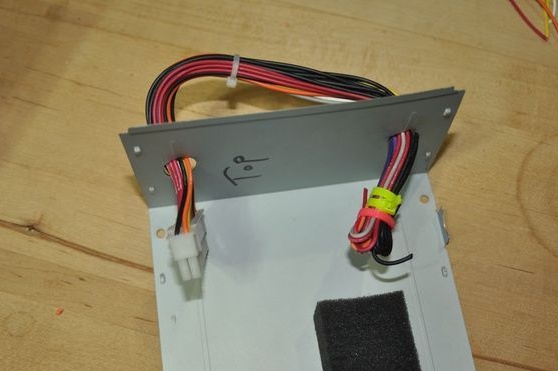


In general, wires can be used for some more useful purposes, and a pen can be made from a piece of leather by screwing it with screws. Well, or use a piece of copper pipe. So the flashlight will look more solid than with a handle made of wires.
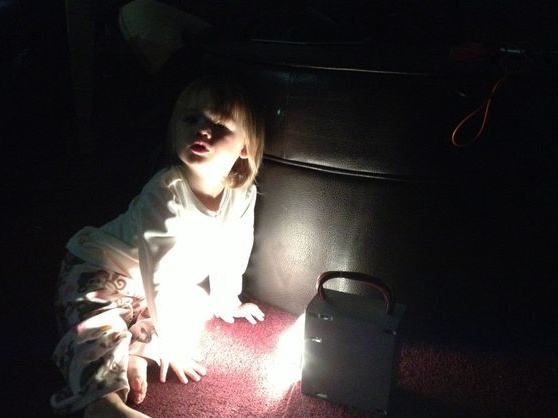
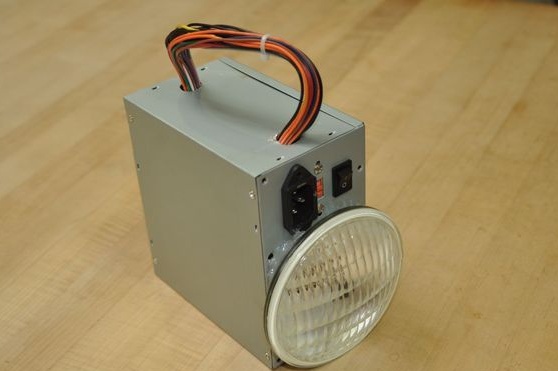
That's all, now the flashlight is ready. It has a strong case and shines brightly, and charging it is not difficult. We collect and rejoice.