Old furniture from a natural tree - perfectly gives in to restoration. Assess her condition is quite simple. First of all, you need to look at the product for the presence of rot and rotten elements. This is a common occurrence for furniture that has been stored in inappropriate conditions. Moisture quickly destroys wood, which is why it can not be restored.
Pay attention also to the frame of the product. If the parts are intact and made of natural wood - great news for you. Old plywood, sheets coated with peeled veneers can be removed. But the frame will become a reliable pillar of the entire restoration process.
In addition, remember that the paintwork is of great importance if you evaluate the product as the subject of further restoration. Furniture varnish is difficult to remove, and even then, mainly on flat areas with a flat surface. Processing of small figured elements requires special equipment and a large number of consumables. It is better not to mess with such furniture if you have no experience.
Finally, paint is not a sentence for a restorer. Instead, be prepared to run into multiple layers of old paint. There are several ways to get rid of it. Building hair dryers and solvents are the most sparing of them. Then the product is polished and after that it is ready for restoration.
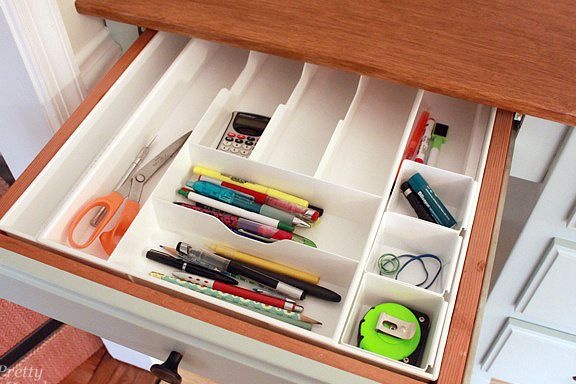
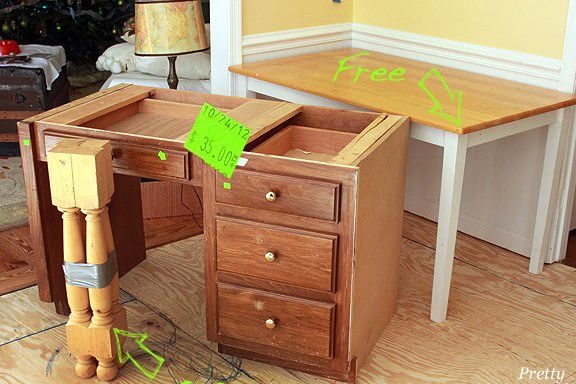
The table from this master class cost the author only $ 35. He is still in pretty good condition, and the varnish on the surface is easily painted on a new one.
Let's see what is needed in order to restore the old desk from this master class:
Materials:
- wooden curly legs - 4 pcs;
- a small pine board to strengthen the frame;
- countertop in the size of the frame;
- Thin wooden boards no more than 15 mm thick for decorating the side panel of the table;
- primer on wood;
- resistant paint of a light shade;
- paint with a loose coating for a decorative side panel - 2-3 shades;
- glue for woodwork;
- self-tapping screws and furniture screws;
- accessories for fastening the back of the table to the wall;
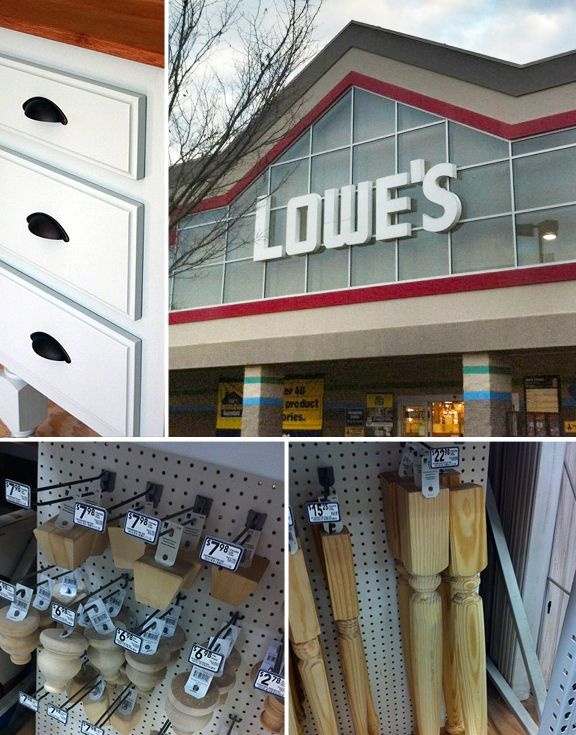
- plastic handles for drawers;
- putty on wood.
Instruments:
- grinder;
- sandpaper;
- paint brushes and roller;
- screwdriver;
- screwdriver;
- electric drill;
- construction tape measure;
- a hacksaw for metal;
- putty knife.
Step one: preparing the table for restoration work
The table for restoration went to the author for free. By the way, as many as four tables. However, his countertop turned out to be completely unusable, so he took another from his neighbor - with a countertop suitable for the project. All this pleasure cost him $ 35. And part of the money went to purchase curly legs and paints and varnishes. It turned out quite economically.
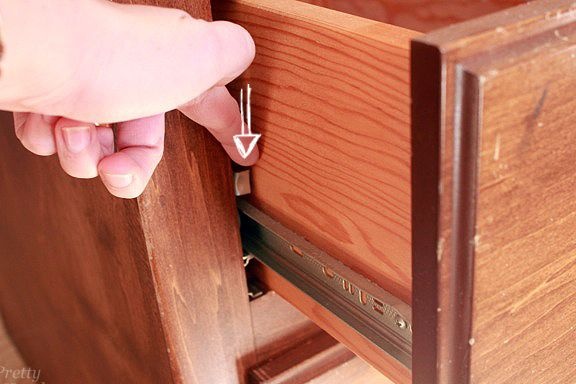
The author cleaned the table of dust and set about re-equipping it. To do this, he took out all the drawers. On the side, levers are usually located, which should be pressed from both sides. Then the box is easily removed from the cell.
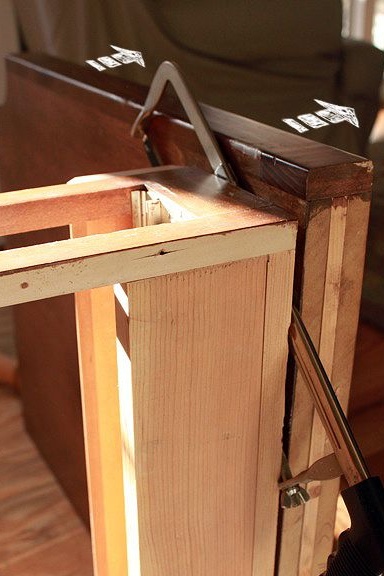
He also removed the sidebar of the table. It was mounted on furniture screws and it was too difficult to unscrew them. Therefore, the author used a hacksaw for metal and cut the screws along the line between the panel and the frame.
In order to maintain the rigidity of the countertop frame, he strengthened it with a small wooden board screwed on with screws and put on glue. Always use glue when assembling furniture, if you have such an opportunity. This significantly extends the life of the fasteners.
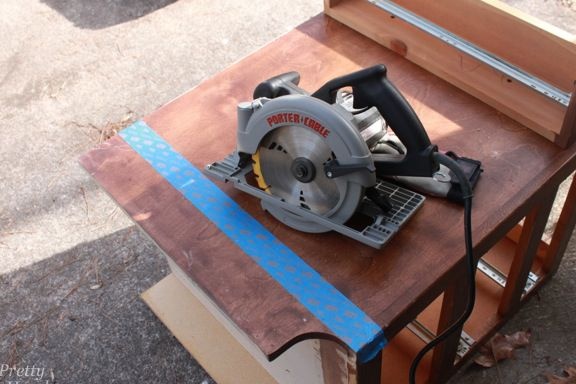
The author removed the bottom panel of the table under the drawers. In order to prevent plywood from cracking, he previously glued the tape along the cutting line. Manual circular perfectly coped with this task. For the same purpose, you can use a jigsaw.
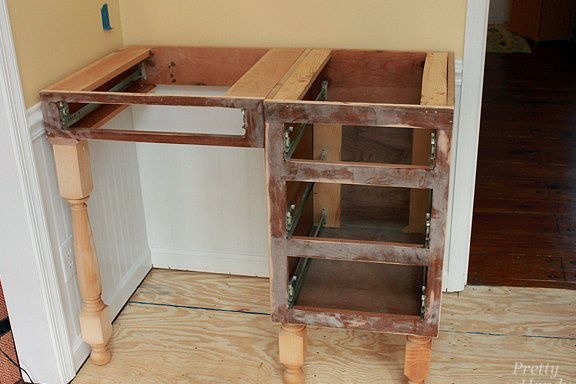
Step two: refitting the table
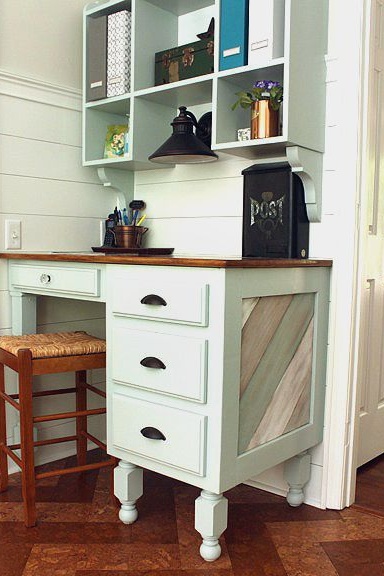
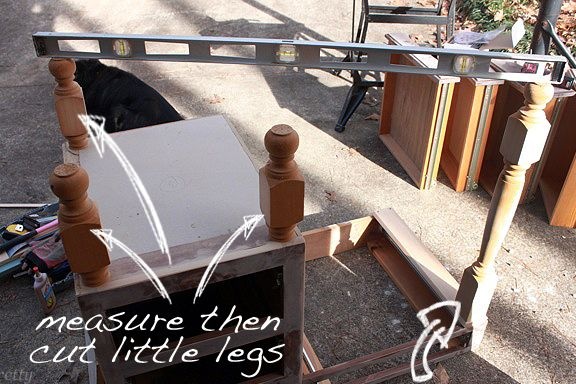
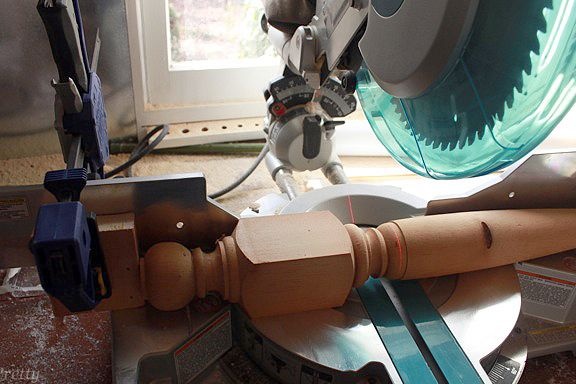
Since the table lost its support and side panel, they should have been replaced with something. But the decision was ready in advance. The author acquired four curly legs in a supermarket. He sawed three of them on the machine. They will be located under that part of the table where the drawers are located. One leg will partially replace the remote side panel.
The author secured the long leg with pocket holes and glue. Later, the holes will be puttied and after staining will become completely invisible.
The second legs fixed the short legs under the panel with drawers with screws on the back side. It also needed glue. Remember that excess glue should be removed promptly, otherwise they will affect the quality of the product. This is done using fine-grained sandpaper.
The author puttied all the irregularities, recesses and dents. If you use putty in the process of working with furniture, choose the composition of proven manufacturing companies. Poor putty can spoil the mood of anyone.

Step Three: Painting The Old Table
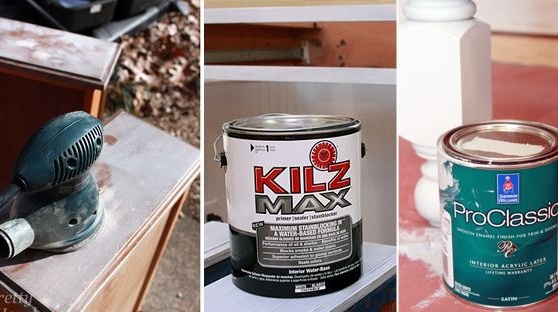
Before painting, the surface of the product should be carefully sanded. Small items and hard-to-reach spots are, as usual, sanded with sandpaper or disassembled.
The author applied a base coat of primer in order to level the surface and increase the degree of adhesion of materials (adhesion of paint and table surface).
Then he applied two coats of white paint. The author used acrylic paint. It is not very durable, but has its advantages. For example, acrylic is non-toxic and odorless. Therefore, all work can be carried out in the living room.
Often acrylic paint needs varnishing. Alkyd, oil and nitro paints are more resistant, however, even when using the latter, the furniture should be varnished. This will extend the life of the paintwork.
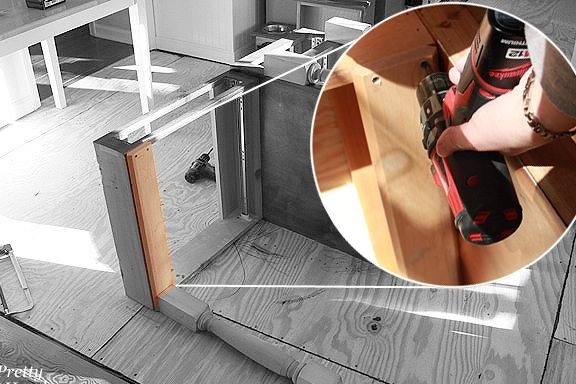
Step Four: Set up the table
You probably noticed that the table lacks legs. That's right, you're right. The author used only four supports, instead of six. That's because the desk is designed to be used in one particular place - in the corner where the old desk was previously located.
And since it was not planned to rearrange the table from place to place, the author decided to save a little and fix the frame stationary to the wall. He began this work before installing the countertop.
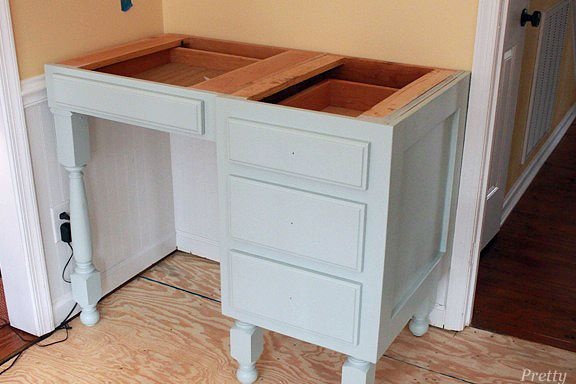
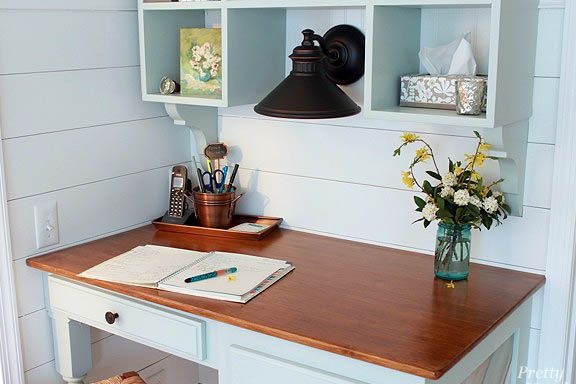
Step Five: Install Countertops and Final Cooking
You probably remember that the author borrowed the countertop from another table. She fit perfectly in size. A little grinding, and the workpiece was ready. To install the countertop on the table frame fixed permanently, glue is enough.
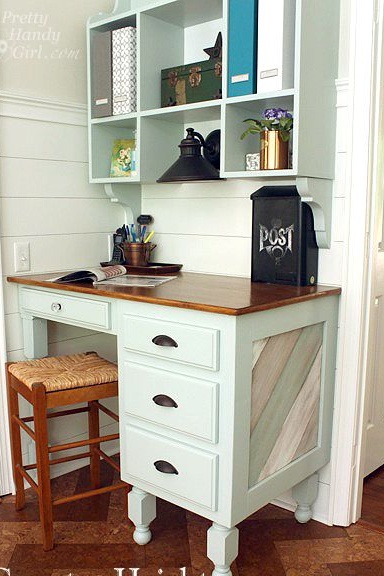
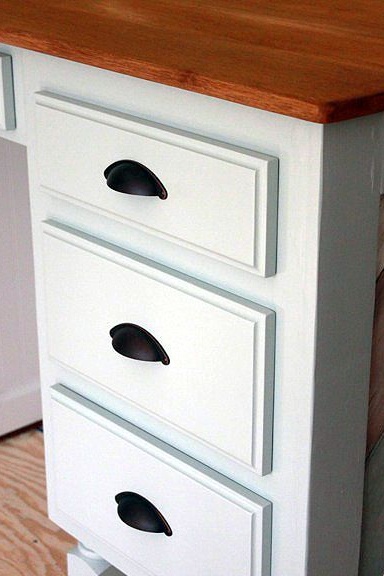
The author also replaced the plywood side panel part with drawers. Instead, he used several tinted boards that fit perfectly into the overall picture and turned into a highlight of the product. Such tinting is carried out using materials having a loose coating. Their choice among acrylic paints is huge. A similar effect can be achieved with some decorative oils.
Finally, the author secured the handles of black matte plastic on all the drawers and varnished the tabletop with glossy varnish. When choosing a varnish for countertops, pay attention to the degree of resistance of the coating. If you have the opportunity to compare samples of materials, then a good furniture lacquer should form a hard, scratch-free, fingernail coating after drying. So you will be sure that the countertop will have an excellent fresh look for a long time.


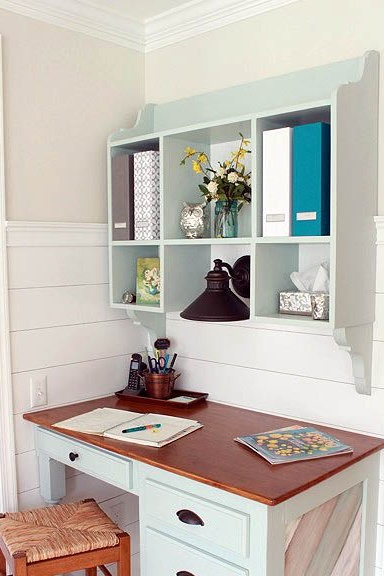
Judging by the photo of the final result, the work was a success!