
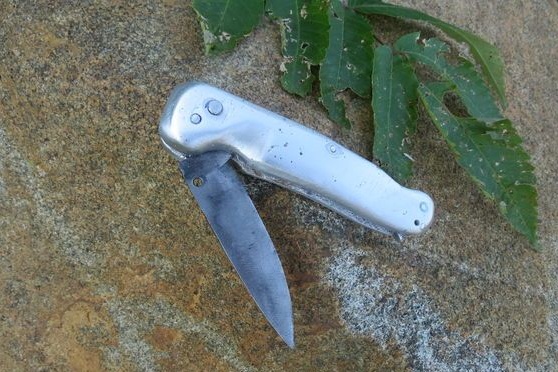
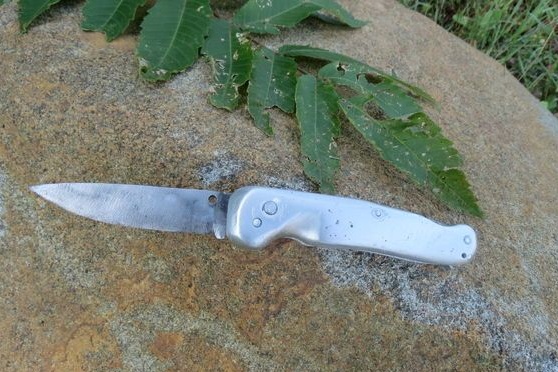
A folding knife will be useful for you when going for mushrooms, fishing trips, hunting, and indeed it will be useful in everyday life, because you can carry it with you in your pocket. A good folding knife made of good steel, which is easy to grind and does not stupid for a long time, is expensive, so this homemade will be worth the effort.
Everything is assembled from scratch using a minimal set of tools, everything is done almost manually.
To make a pen you will need an aluminum source and a furnace. The workpiece is first cast, and then finalized to the desired parameters.
Materials and tools for making a folding knife:
- oven or propane burner;
- source of aluminum;
- a piece of high carbon steel for the manufacture of a blade;
- vise;
- files;
- sharpened, grinder;
- oil for hardening;
- household electric oven;
- polystyrene foam or other material for the manufacture of molds;
- fine sand;
- drill with drills;
- pins, screws and more.
The process of making a knife:
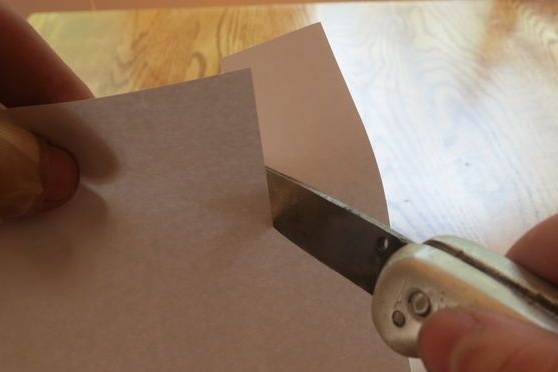
Step one. Transfer and cut out the template.
First of all, you need to think about the size of the knife and the shape of the blade. Draw a blade profile on paper, and then cut it out. Glue the template to a piece of steel and cut the profile with a grinder. However, the profile of the knife can simply be drawn on metal with a felt-tip pen.
You can also download and print ready-made templates, for example, at
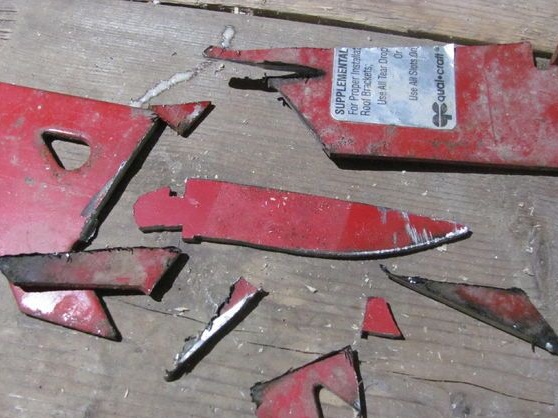
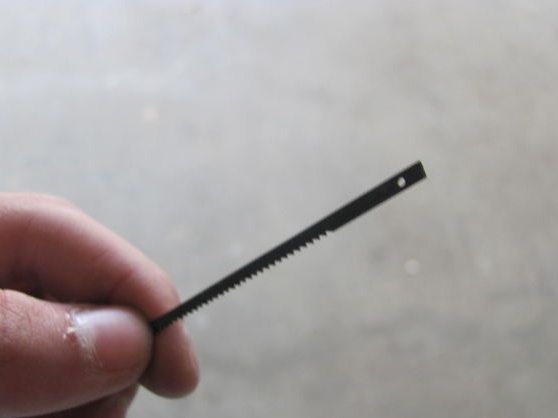
As a blank, the author used steel 3 mm thick. The blade can be cut with a hacksaw, a band saw or with a grinder.
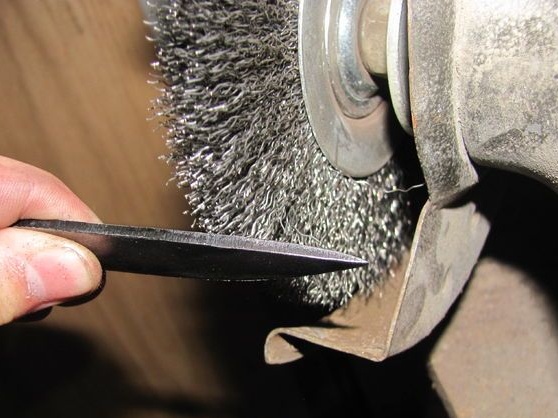
Step Two Grinding a knife and forming bevels
At this stage, the author needed a file and a vise. To simplify the procedure, you can work with a grinder, but when using a file there is less chance of spoiling everything. We clamp the workpiece in a vice and align the profile in a circle with files.

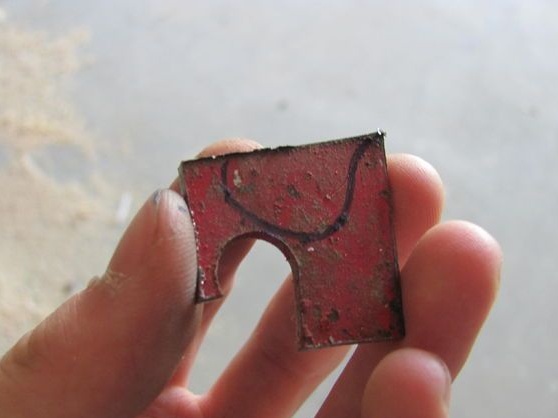
As soon as the profile is formed, we proceed to the formation of bevels. First, mark them on the blade. To do this, draw a line along the length of the blade, which will divide it into two halves, we will then adhere to this line as the center. Such a line can be drawn with a drill of the same diameter as the thickness of the blade, in our case this drill is 3 mm.
Next, take a felt-tip pen and draw a line that will indicate the width of the bevel. The further the bevel goes, the better the knife will cut, but there are limitations on the thickness of the steel.
Further work is still being done with the same file.
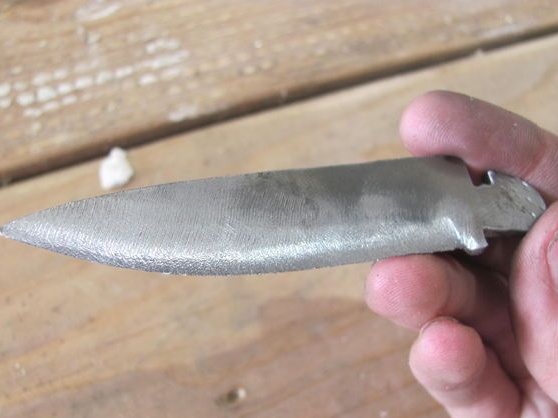
After rough work with files, the blade will need to be polished in order to remove gross scratches. You will need sandpaper, the granularity of which should be reduced as you grind. If necessary, the blade can be brought to a mirror shine.
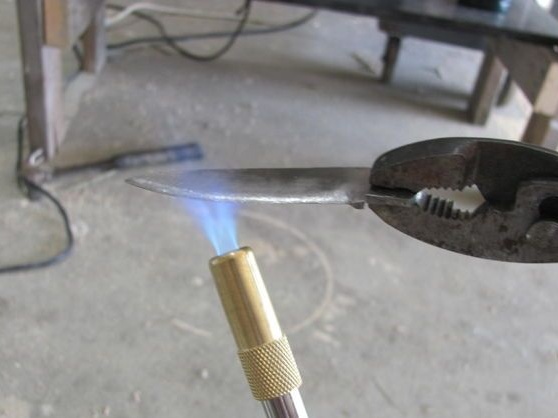
Step Three Quenching and vacation
When the mechanical work with the blade is over, you can proceed to hardening. This will give the blade strength, and it will not quickly blunt. For hardening, you need either a furnace or a good burner. The metal must be heated to such a temperature that the permanent magnet ceases to be attracted to it. Steel should be bright red in color. Well, then quickly cool the blade in motor or vegetable oil.
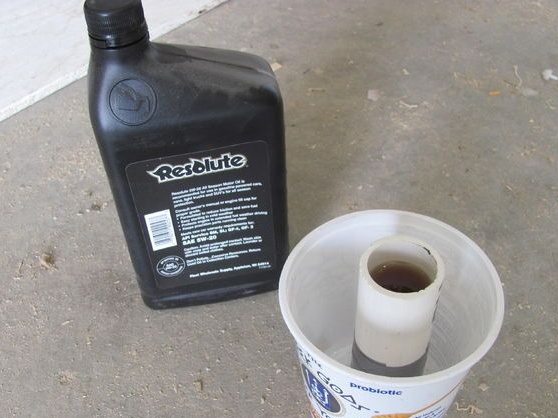
After cooling, the workpiece will need to be prepared for the next step - vacation. To do this, take sandpaper, preferably WD-40, clean off scale, oil deposits and other contaminants from the knife. Now you need a domestic oven, set the temperature in it to 200-210 degrees Celsius and after heating, put the blade there for an hour. Then the blade must be allowed to cool with the oven without opening it.
After tempering, the metal will turn yellow, so the blade will have to be ground again. Here you need small sandpaper.
Step Four Cast the handle
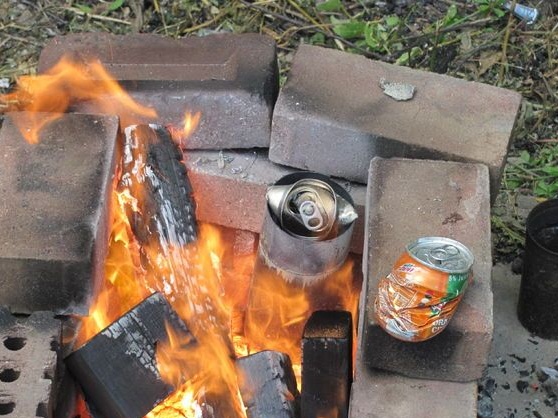
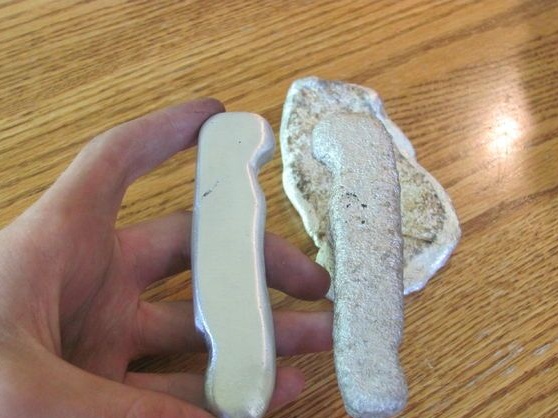
The author makes a pen by casting. Here you will need any source of aluminum, aluminum cans from under drinks can be considered free. We take a crucible and melt the desired volume of metal. A good bonfire or coals will suffice for melting metal; to reach the desired temperature, coals can be inflated with a household hairdryer.
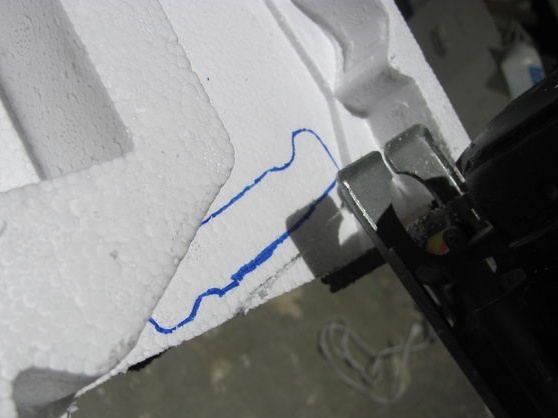
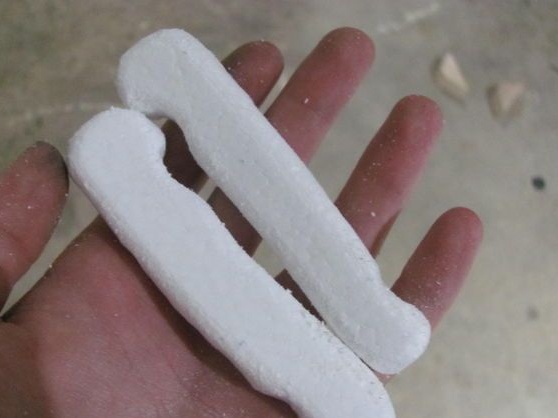
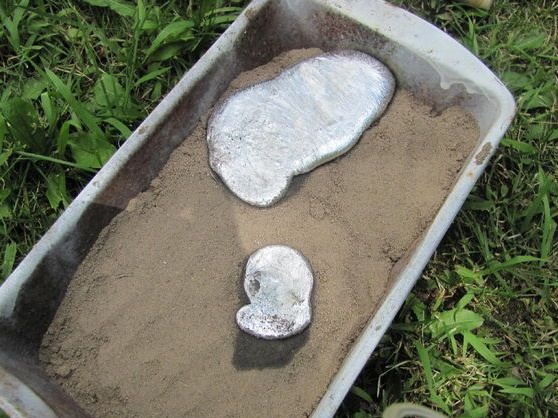
While the metal is melting, prepare the mold. You will need a piece of polystyrene foam or other foam. First draw a pattern on the foam, and then cut it out. Then use the file to form the handle profile. The better the profile is made, the less it will need to be finalized.
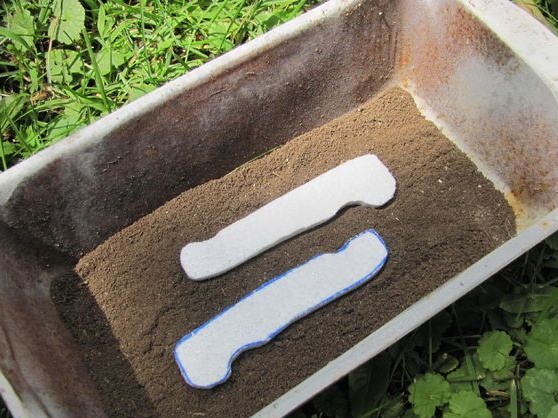
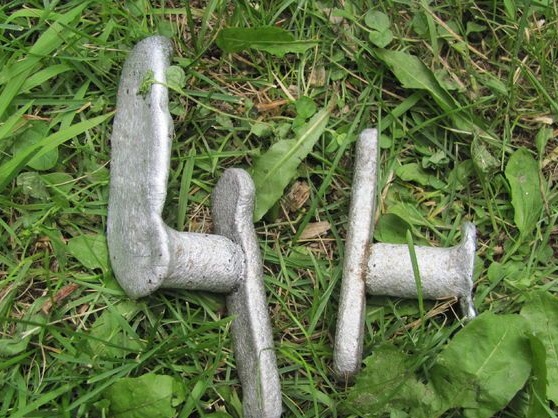
Now some capacity and sand will be needed, the author did not find sand, so he used the land from the garden. We fill the template in the sand and form a hole through which we will pour aluminum. That's all, as soon as the metal melts, fill it into the hole. Due to the high temperature, all foam instantly burns out, and the metal fills the formed cavity. It remains to wait until the aluminum cools and hardens.
Metal casting is considered a hazardous event, it produces hot vapors and other gases, which are dangerous to inhale. Even when casting, there are splashes of hot metal and other dangers, so work in compliance with all safety measures. At a minimum, you will need welding gloves, boots, and good clothes made from durable fabric.
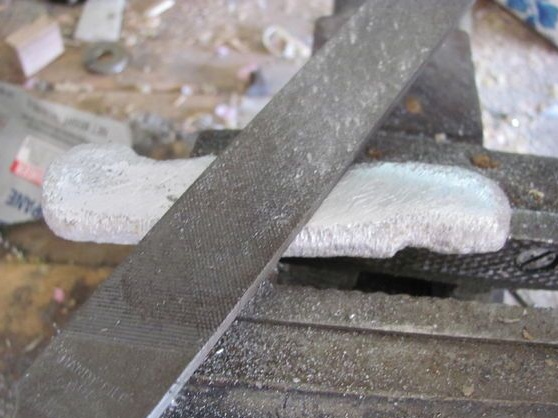
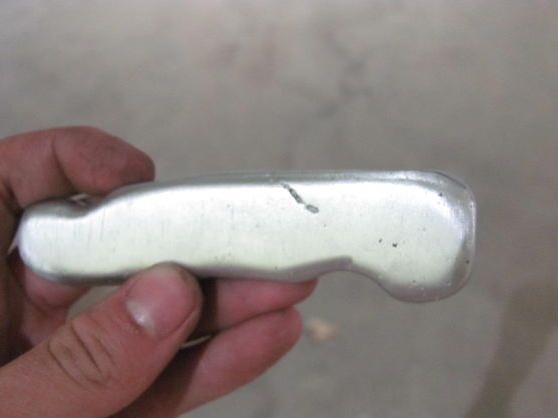
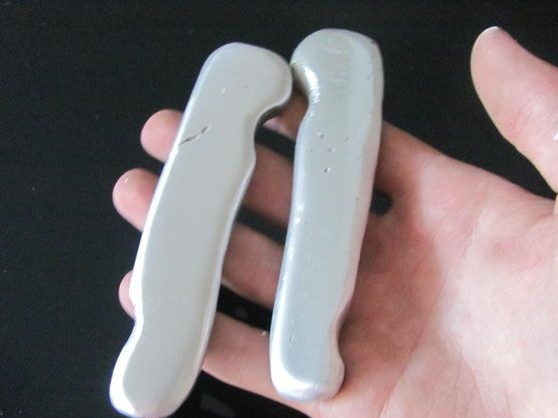
Step Five Grinding pen
In the next step, we need to bring the pen to its final shape. It should be smooth and shiny. First of all, take a hacksaw for metal or a grinder and cut off a piece of aluminum that has formed in the filler channel. Next, take the files and carefully grind the handle, removing all irregularities.
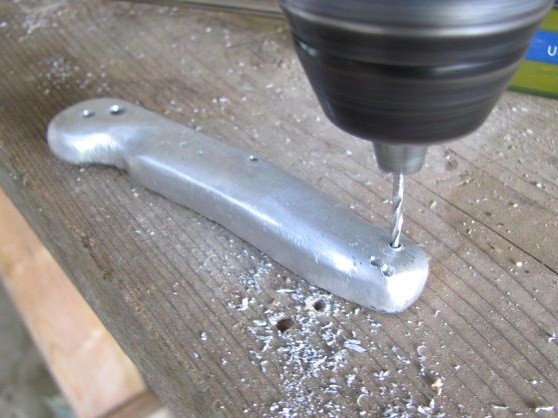
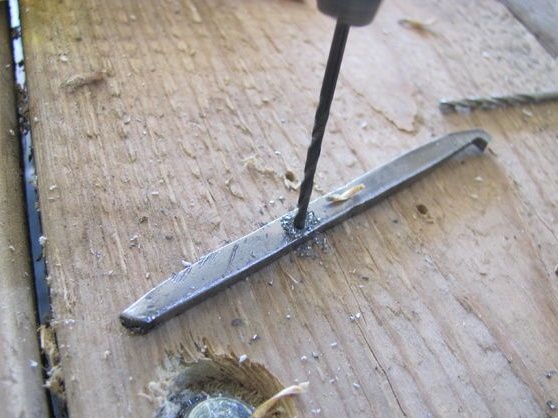
Step Six Drill holes
After polishing the handle, we take a drill and drill holes in the handle for assembly. There will be a mechanism for fixing the blade, the axis of attachment of the blade, and so on. Their places must be provided in advance on the template. It is easy to drill aluminum, and there is enough a cordless drill.
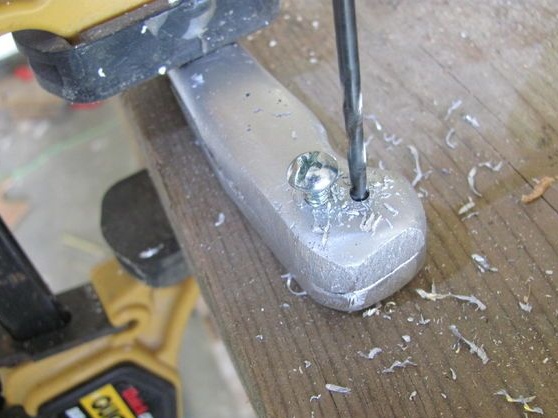
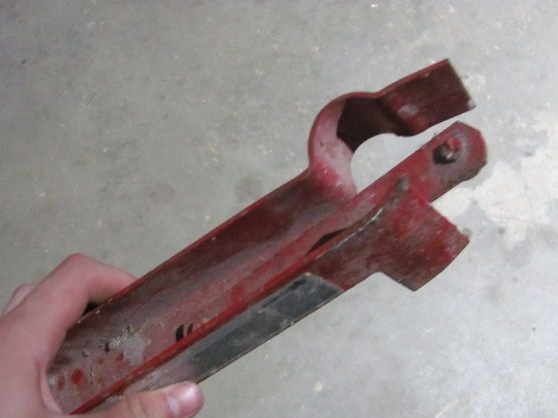
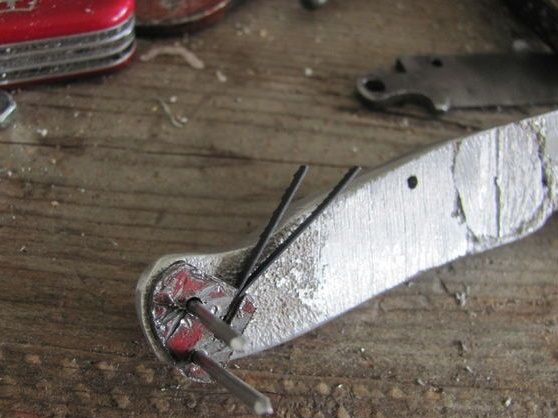
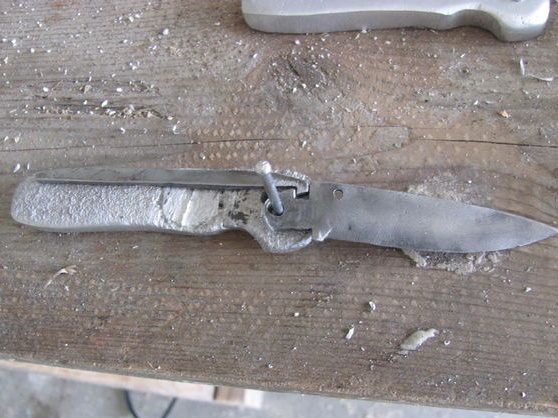
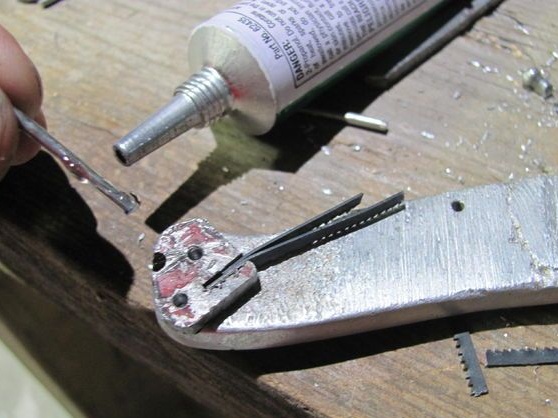
Seventh step. Blade lock
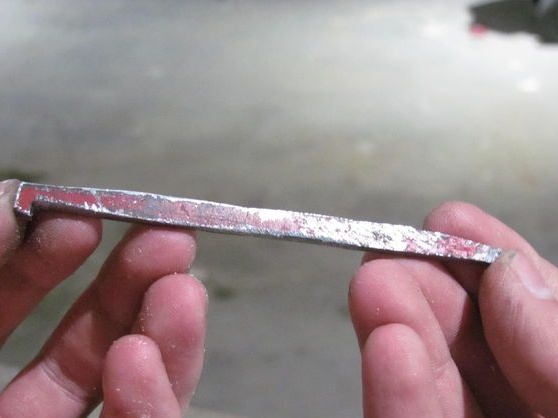
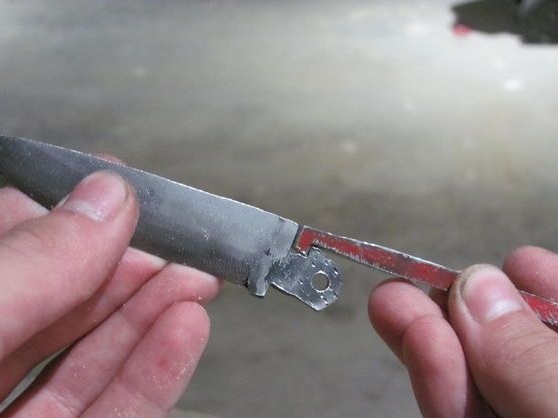
At this step, you need to think through and assemble the lock for the blade. It should automatically lock the blade when it is removed from the handle. Of course, the latch must be spring-loaded so that the knife does not fold by itself. Here the author needed plates of steel, a grinder and other details.


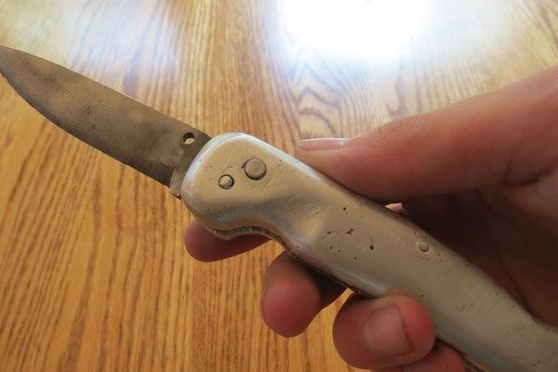
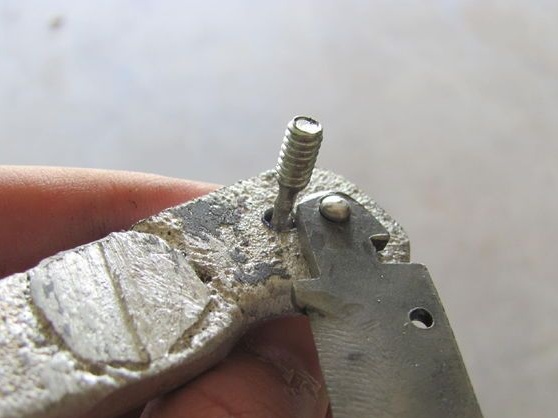
Step Eight. Knife setting
Since the author makes the handle of aluminum, and not of wood, as in the classic version, it requires a lot of settings and improvements for the knife to work as expected.So, for example, so that the blade could move, it was necessary to sharpen the connecting bolt, making it thinner.
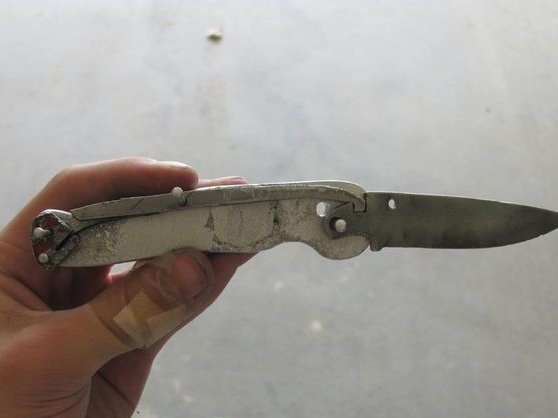
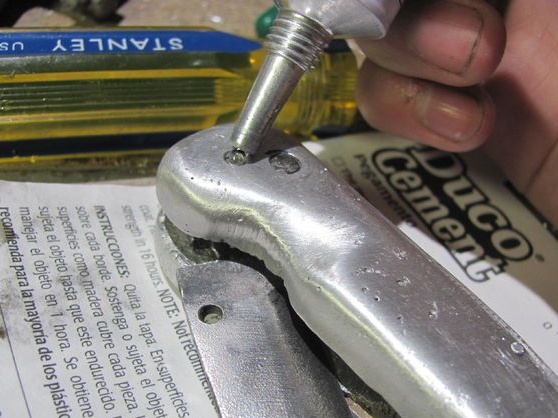
Step Nine. Knife assembly
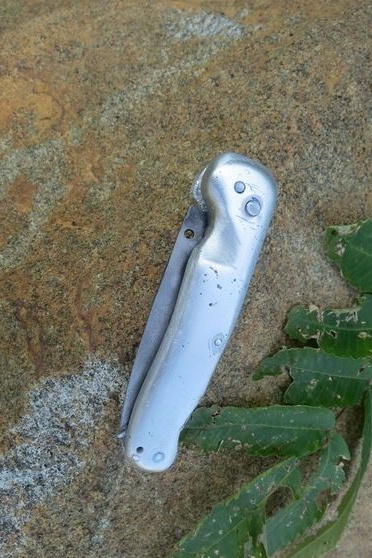
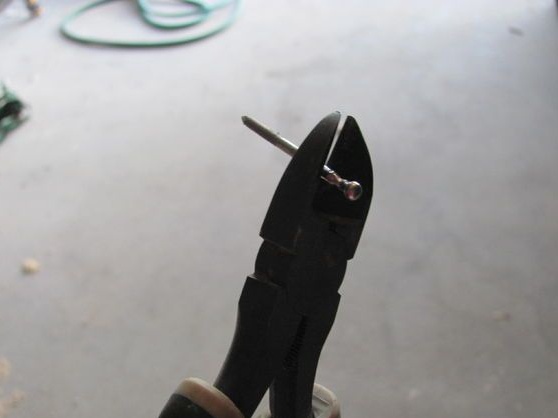
As a result, we have two halves of the handle that need to be connected. For such purposes, the author used an adhesive called Duco Cement. But as for me, this is not the best way to combine metals. It is best to use screws to assemble the handle. The author used nails and aluminum rivets as pins.
We collect everything as in the photo and leave the glue to dry.
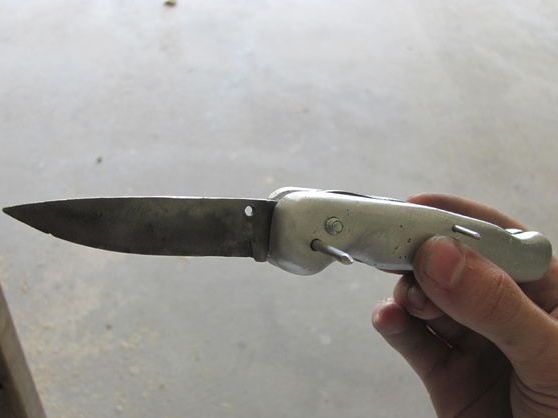
Step Ten Completion
That's all, the knife is ready, now it remains to sharpen it well, for which you need fine sandpaper or water stone. This homemade product was made of garbage, which became aluminum cans and a piece of iron.
Of course, this is just an example of manufacturing, if you wish, you can modify the knife and make your own masterpiece. Good luck