
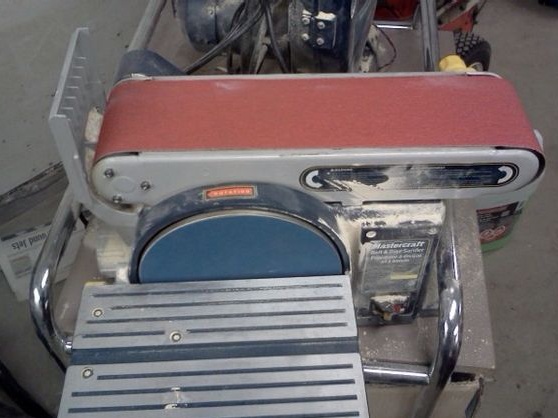
Want to try making your first little knife? Then this instruction is for you. The knife is made from improvised materials using common tools. I note right away that for the manufacture of knives, especially mass knives, it is advisable for you to have a belt sander. It will allow you to quickly and accurately display the profile of knives, form bevels and so on.
But if you don’t have it, then the knife can also be made manually using a hacksaw, and files.
Materials and tools for homemade:
From materials:
- a piece of steel with a high carbon content, the author's steel is 5160 (from spring);
- thick leather for making scabbard;
- wood for the manufacture of pens;
- nails for the manufacture of pins (it is better to use copper or brass);
- cardboard, glue, scissors, stationery knife, sewing supplies and other little things.
From the tools:
- a grinder or other tool for cutting and rough grinding of metal;
- belt sander (or a good set of various files;
- drill with drills;
- a furnace or other heat source for hardening steel;
- files of different grain sizes and shapes, as well as sandpaper for final grinding of the knife manually.
The process of making a knife:
Step one. Working on design
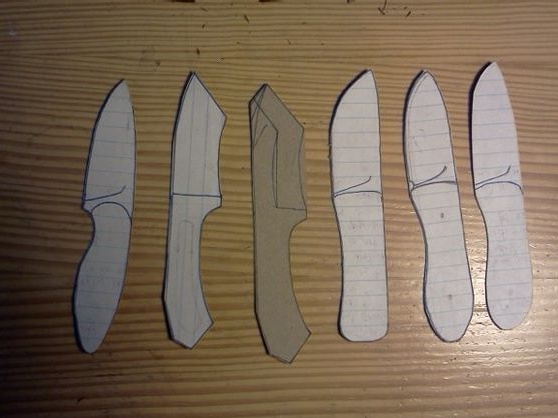
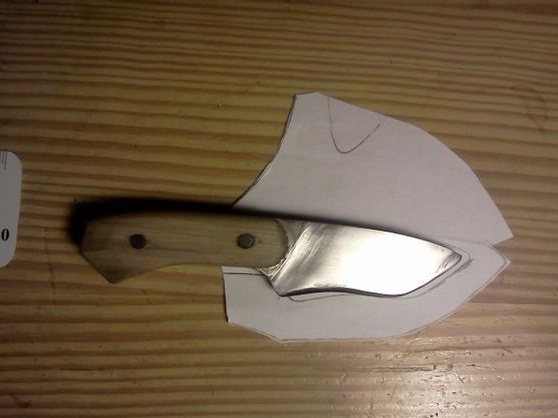
First of all, you will need to determine the shape of the knife, size and other features. To do this, look for ready-made templates on the Internet or come up with your own. Next, take a thick cardboard, draw a template on it and cut it out. As a result, you get a cardboard knife that you can hold in your hands and make sure that this is exactly what you need.
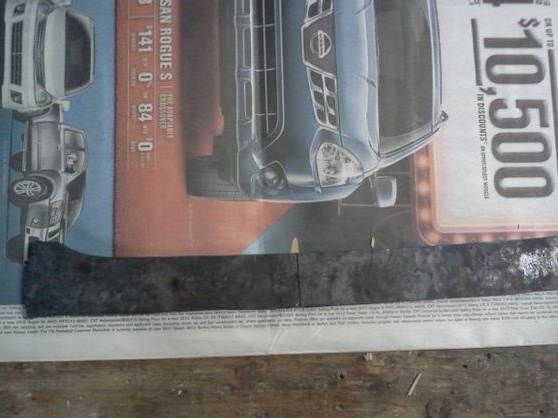
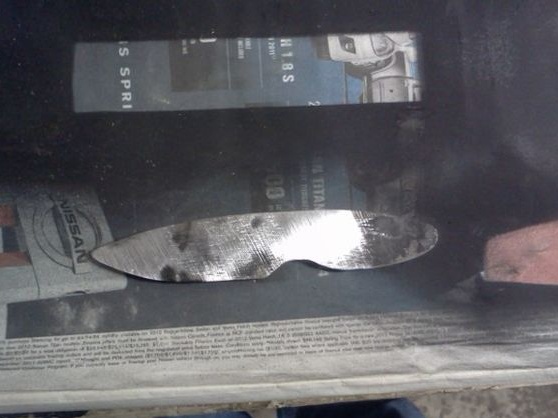
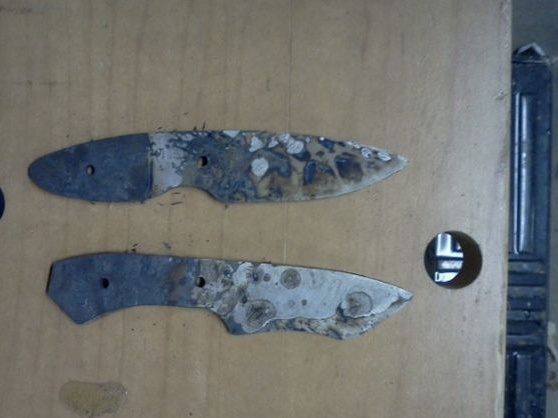
Step Two Transfer the template to metal and cut the workpiece
We take the prepared piece of metal and transfer the template to it. To do this, attach the template and circle it with a thin marker, and it is better to scratch the drawing with a sharp object.
Now you need to cut the profile. This can be done with a hacksaw, a grinder, a band saw, it all depends on your tools.
Having cut out the primary profile, we modify it with files, a grinder or on a belt grinder.


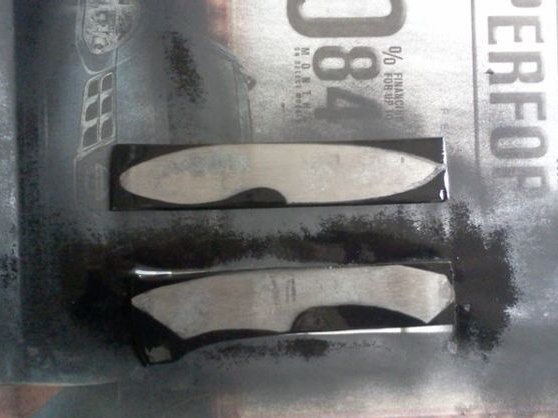
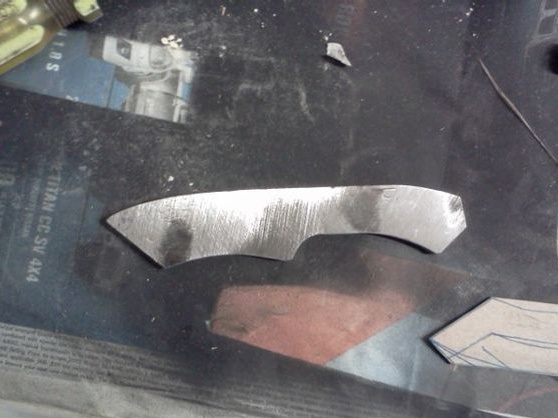
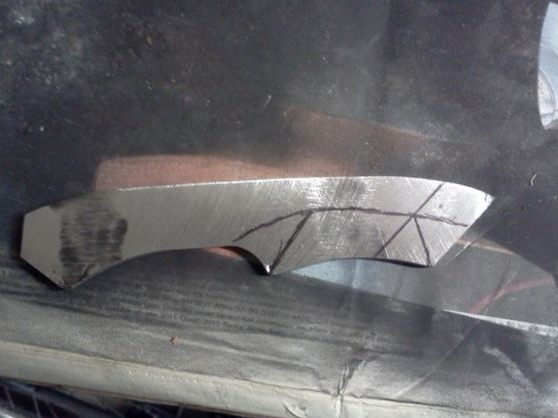
Step Three We form bevels and drill holes for pins
To form the bevels, we first need to mark everything out, otherwise it may not work to form even bevels. First of all, we take a drill of the same diameter as the thickness of the workpiece, apply them to a flat surface and divide the blade from the blade side into two halves.This will be the designation of the center, which we will focus on when forming the bevels.
It will also be necessary to determine how far the bevel will go. It all depends on the thickness of the workpiece and on what purpose you will use the knife. If the knife needs to be cut a lot, then the bevel should be as wide as possible, that is, the blade will be thin.
It is important not to grind metal at this stage to a blade thickness of less than 1 mm, otherwise the steel will overheat when quenching.
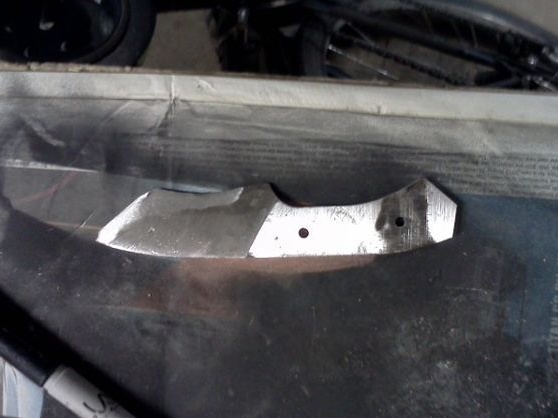
Before hardening, it will be necessary to drill two or more holes for the pins that hold the handle. The author used ordinary nails as pins, so we select a drill for their diameter.
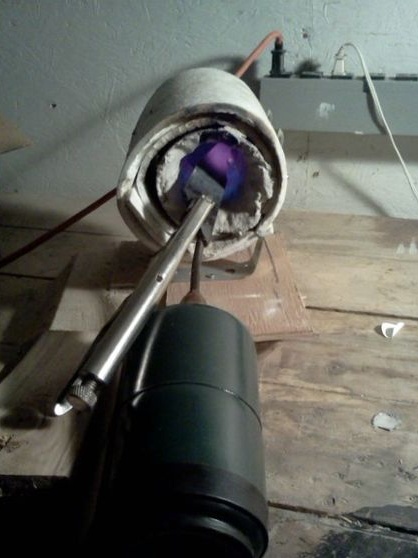
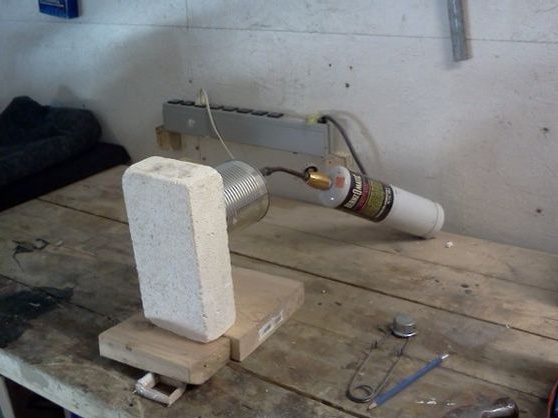
Step Four Blade hardening
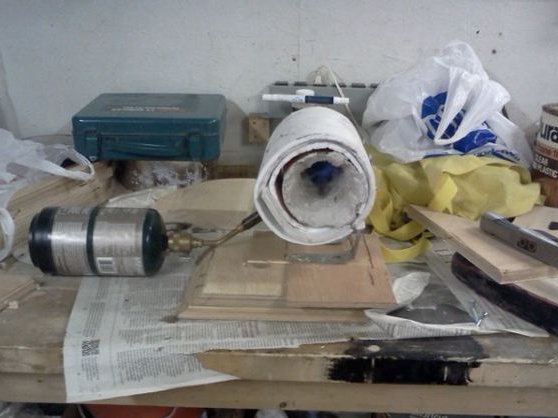
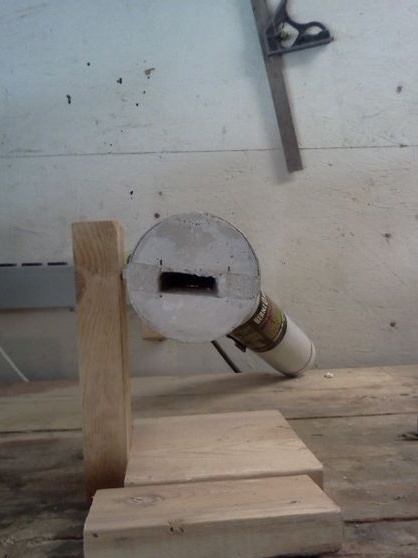
So that the knife does not stupid for a long time, it is important to harden the metal. Here you will need a heat source in which you can get a temperature of 850 aboutC, which is necessary for steel 5160. Theoretically, such a temperature can be obtained in coals if they are inflated with a hairdryer. The author used a homemade hedgehog and burner for these purposes.
The blade is kept at this temperature for two minutes, and then cooled in oil.
This is not the quenching, now we heat steel at 200aboutC for half an hour and then cool in water. Well, then comes the vacation, we warm the steel for another 30 minutes at 200aboutC and let cool. Thanks to tempering, the metal ceases to be brittle. As a result, the hardness of steel is obtained in the region of 55 HRC, which is quite enough for a household knife.
If you cannot determine the temperature at which steel should be heated, just keep a permanent magnet with you. When the steel warms up to the desired temperature, it will cease to be attracted to the magnet. It is possible to extinguish metal in water, although this is more risky, since water removes heat very quickly, and the workpiece may crack. And oil, when immersed in red-hot metal, often ignites, so be careful.
As for the oven, many make them from cans, there are enough instructions on the Internet.
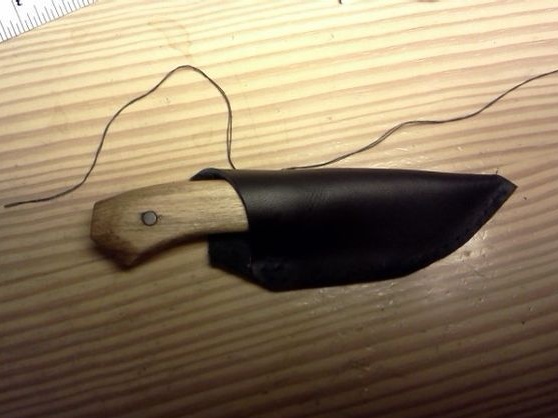
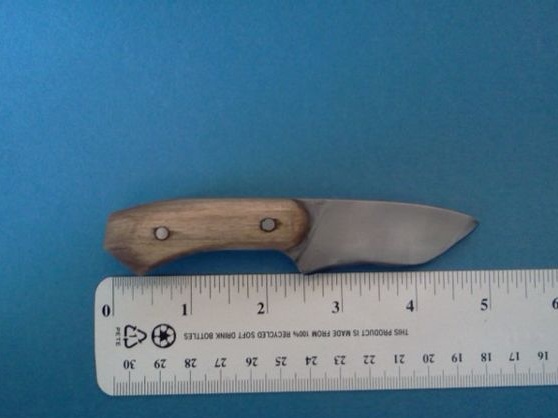
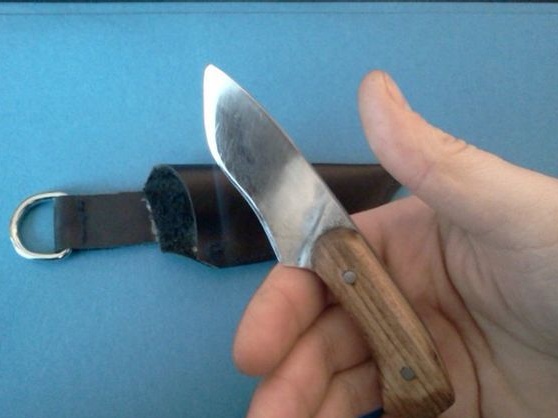
Step Five We make a pen and collect a knife
To make a pen you need two boards of small thickness. If you put them together, their thickness should be such that the knife fits comfortably in your hand. We attach the blade to the boards and circle in the place where the handle will be. Well, then slowly cut out. You will also need to drill pin holes in the tree.
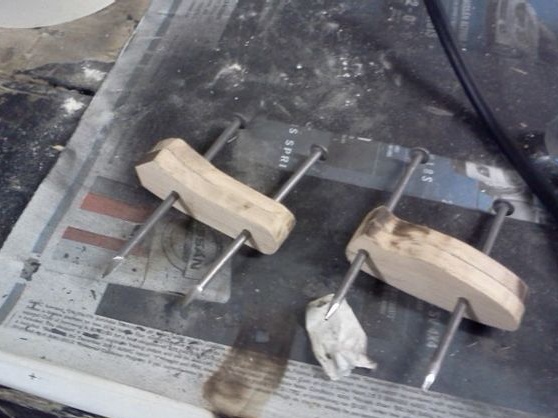
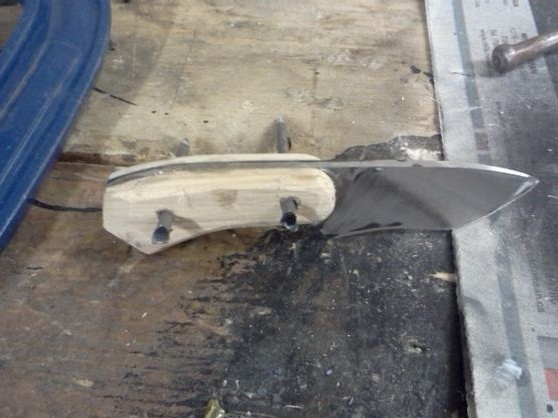
When everything is ready, we connect both halves and the knife with pins, which in this case are the nails. If everything is going well, dilute the epoxy with a hardener and apply to both halves of the handle. The metal surface must be well cleaned so that the glue sticks to the handle securely. Well, then we tighten the handle with a clamp and let the glue dry completely.
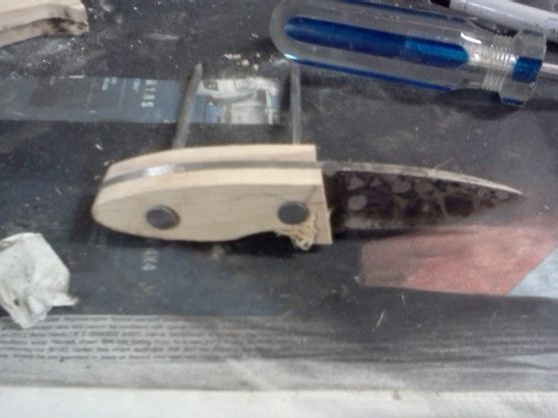
After the glue dries, the final grinding of the knife begins. At first, the work can be carried out on a belt sander, grind off all that is unnecessary and form the final shape of the handle. Now there comes manual work, we need sandpaper of different grains. We start grinding coarse, and then gradually reduce the graininess, bringing the handle and blade to a perfectly smooth state. If necessary, you can polish the metal to a mirror finish.
The knife will also need to be sharpened well, many use very fine sandpaper for this. More professional is the use of water stone.
At the end of the work you need boiled linseed oil (natural drying oil). Soak a pen with it and dry it in the sun, this will protect the tree from moisture. Metal also needs to be treated with oil to protect it from rust.
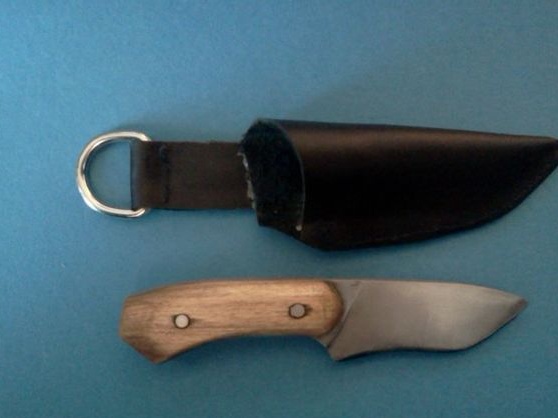
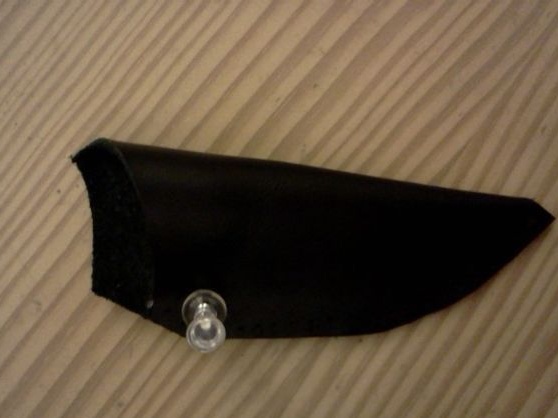
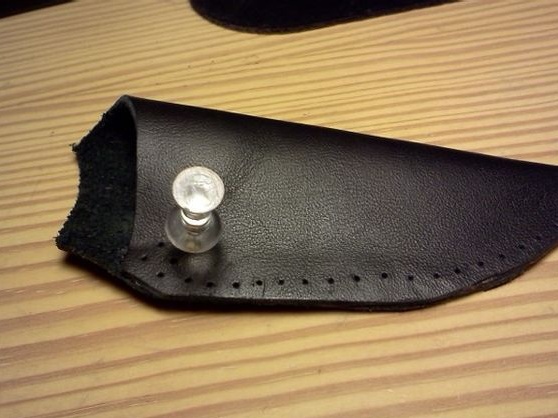
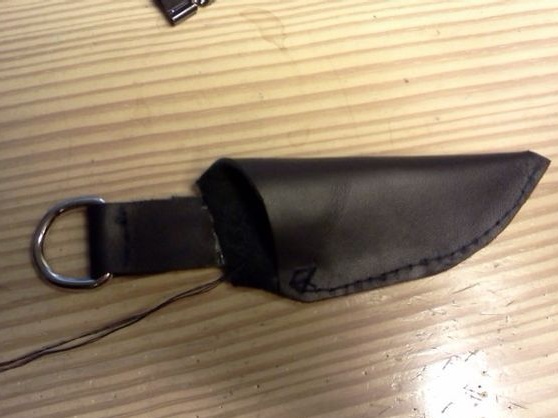
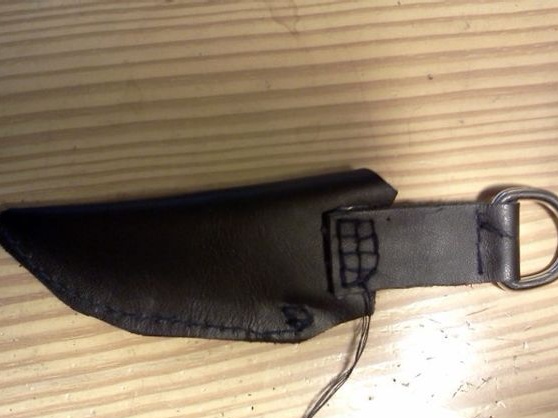
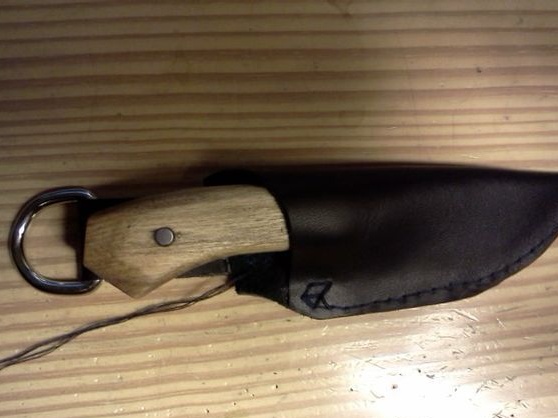
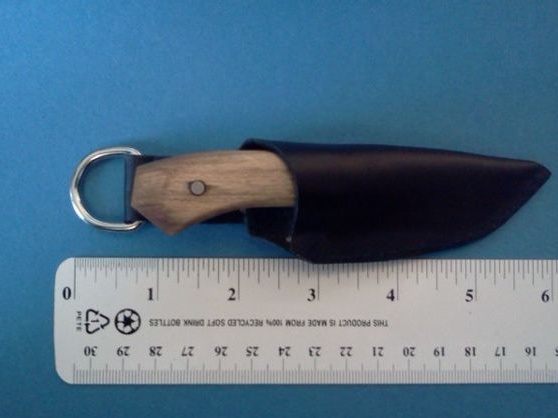
Step Six Make the scabbard
The manufacturing process for the sheath is similar to the manufacture of a knife. We attach the blade to the paper and circle the pen, as a result, a template is obtained. Do not forget that if the cover is too small, the knife will go badly there and will cut the skin.
Having made a template, then we cut out the blank from the skin.
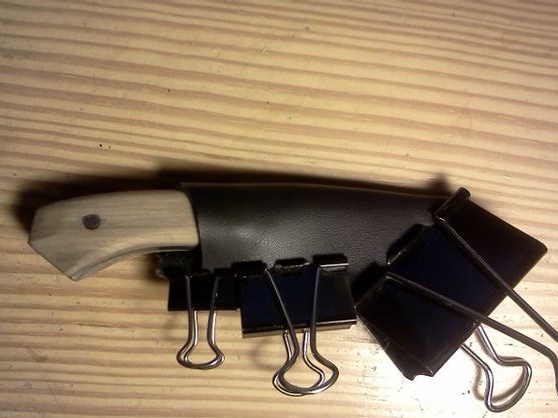
To connect the halves of the cover, the author uses gluing and firmware. First of all, the parts are glued together, and then after the glue hardens, they are stitched.

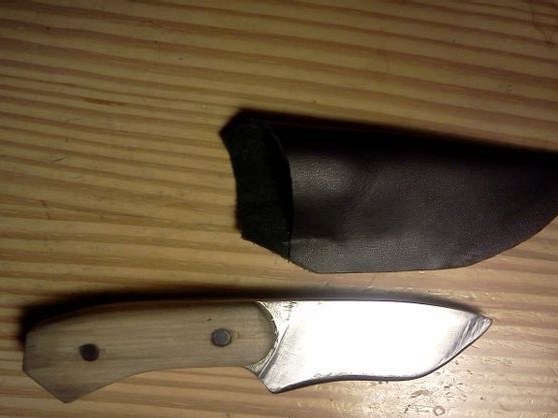
As a result, a strap with a ring will remain attached to the case, with the help of which it will be attached to the belt, belt and so on. Then a carabiner will come to the rescue.

That's all, the knife is completely ready. Good luck