

In my free time, I often do my favorite thing - designing various electronic structures and of course, to get a complete device, you just need a ready-made electronic the circuit (a printed circuit board with radio components, wires, etc.) should be placed in a beautiful finished case, which will protect the device from external negative factors and will delight the owner’s eye for many years.
I think many radio amateurs agree with me that it’s possible to produce a radio-electronic design, of course, depending on the complexity, in a couple of hours, but it’s often difficult to find a ready-made housing for it, and valuable time is wasted looking for it. Of course it is always possible to buy a finished case, but it is money, time and not always quality. Therefore, I decided that it would be faster and more reliable to make the cases myself to the required sizes and from various materials that are at hand. For this purpose, I was conceived as a mini circular saw from an electric drill - as an option with the least cost.
Materials:
- plywood 12 mm;
- plywood 5 mm;
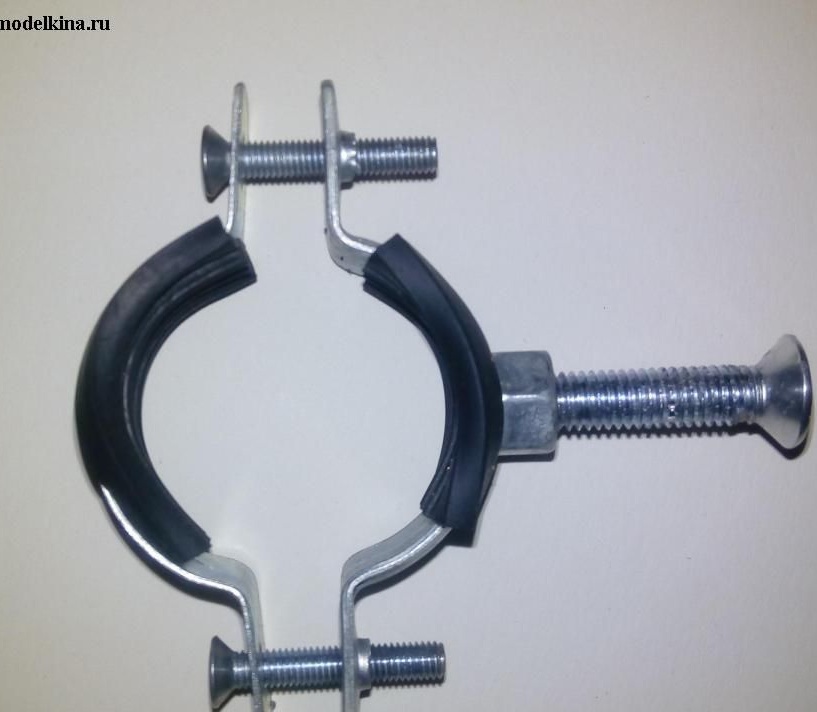
- a clamp for fastening pipes Dy = 32;
- M16 hairpin 200 mm long;
- saw blade (inner diameter 16 mm, outer 62 mm, thickness 0.8 mm);
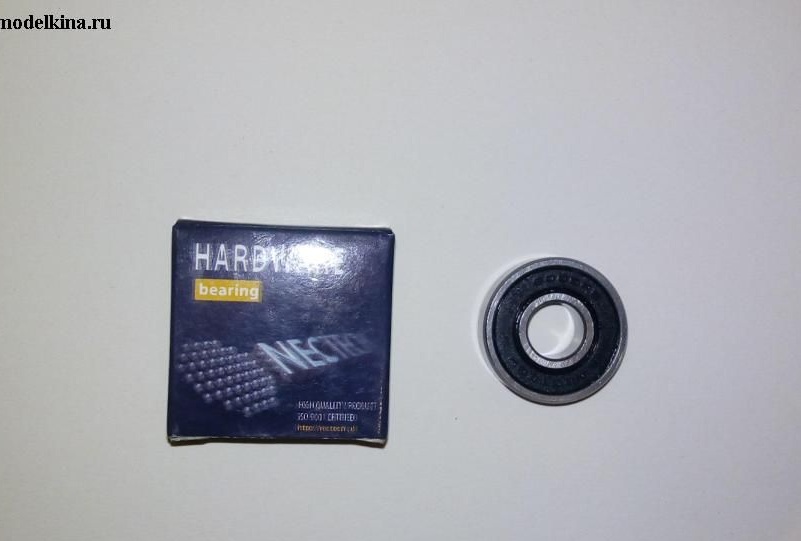
- bearings 6000 RS (26 × 10 × 8 mm)
- screw M8 × 35;
- screw M4 × 25;
- nuts - "sheep" M4;
- M16 nuts;
- washers;
- self-tapping screws;
- fiberboard 5 mm.
Instruments:
- electric drill (the basis of the entire machine);
- screwdriver;
- jigsaw;
- square;
- a pencil;
- drill.
Step-by-step instructions on how to make a mini circular saw from an electric drill.
The farm found a piece of plywood 12 mm, which was used to manufacture the components of the machine. The use of chipboard or a wooden board is also possible, the only question is preferences, ease of processing and the availability of this material.
Having estimated the location of the electric drill, racks and desktop, I made the layout of the components on a plywood sheet and cut it with an electric jigsaw with a fine-toothed saw to prevent large chips.
The base of the machine turned out with dimensions of 190 mm × 355 mm.
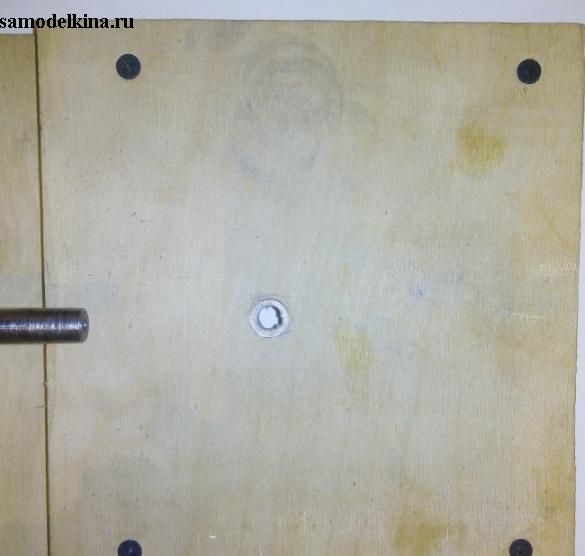
To combine the axes of the electric drill and the shaft on which the saw blade is mounted, I glued an additional area of scraps of 5 mm plywood and 12 mm plywood with dimensions of 175 mm × 190 mm to the base. For added strength, the resulting structure was pulled together with four self-tapping screws at the corners, having previously drilled holes of a smaller diameter for self-tapping screws.
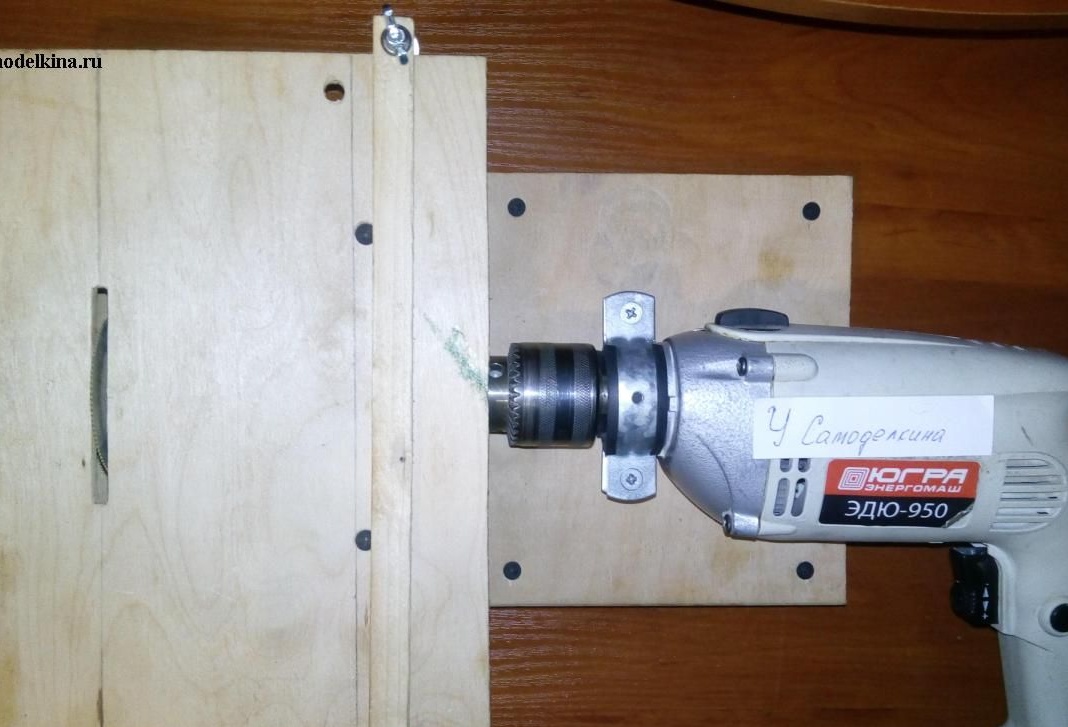
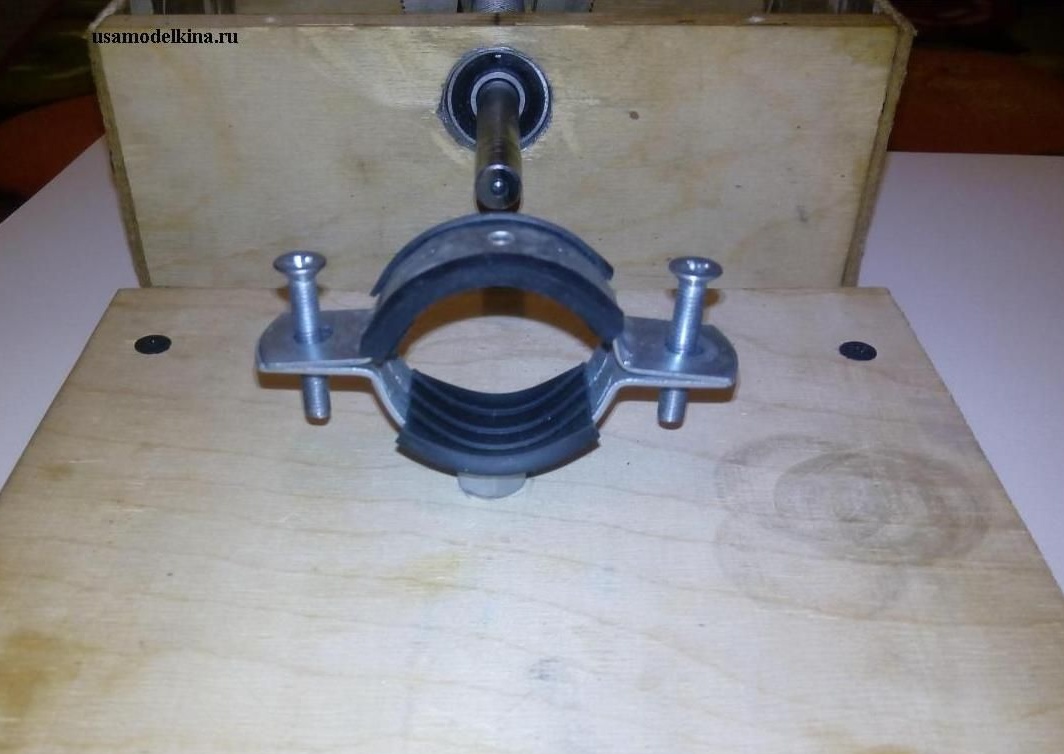
The electric drill is fastened to the structure using a pipe clamp Dy = 32.
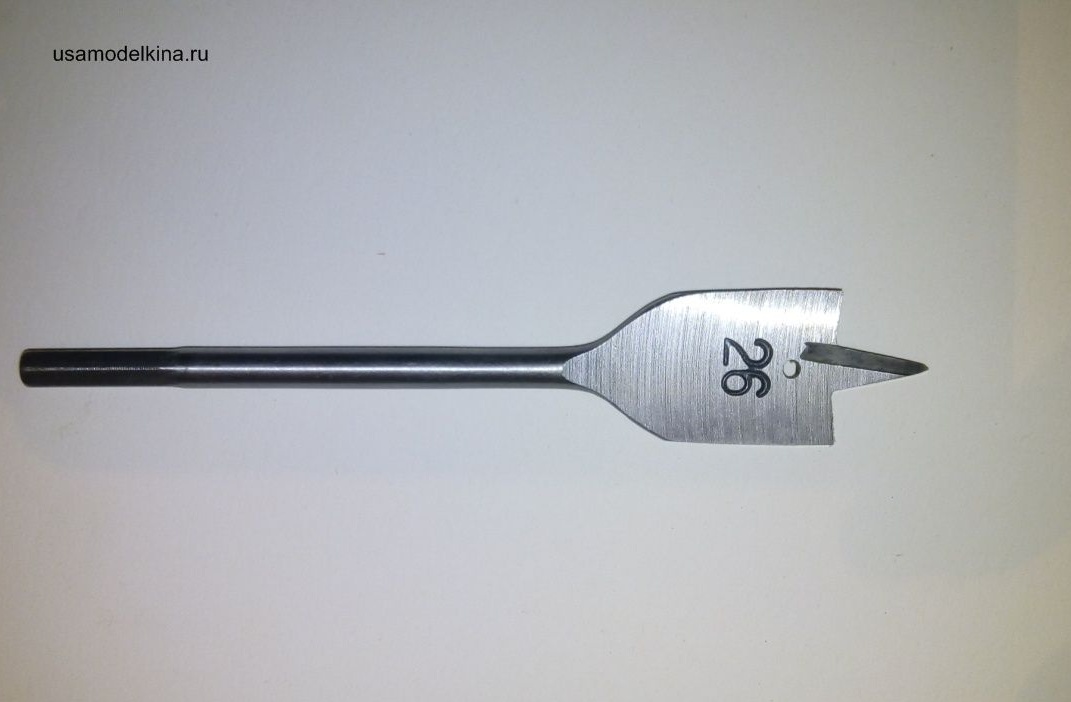
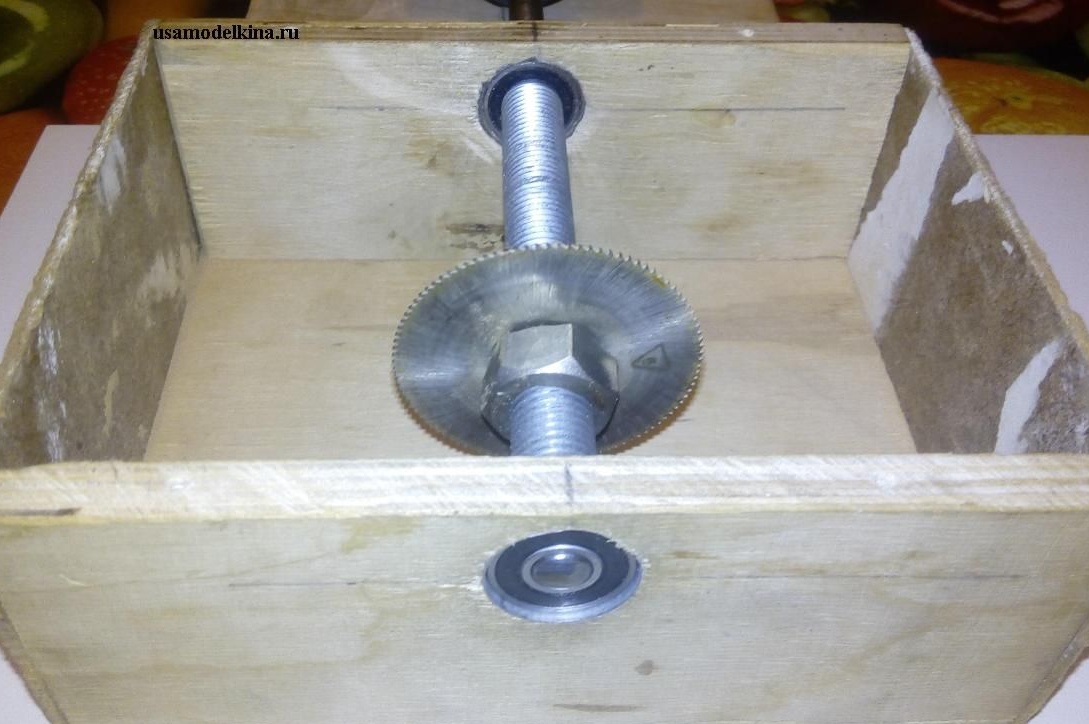
Racks in the amount of 2 pieces were cut from 12 mm plywood with dimensions of 67 mm × 190 mm. Given the design features of the mounting of the saw blade, I made the marking of the center of the future hole - it turned out 85 mm horizontally and 18 mm vertically. I drilled a hole with a pen drill with a diameter of 26 mm. The diameter of the drill was selected based on the outer diameter of the bearing.
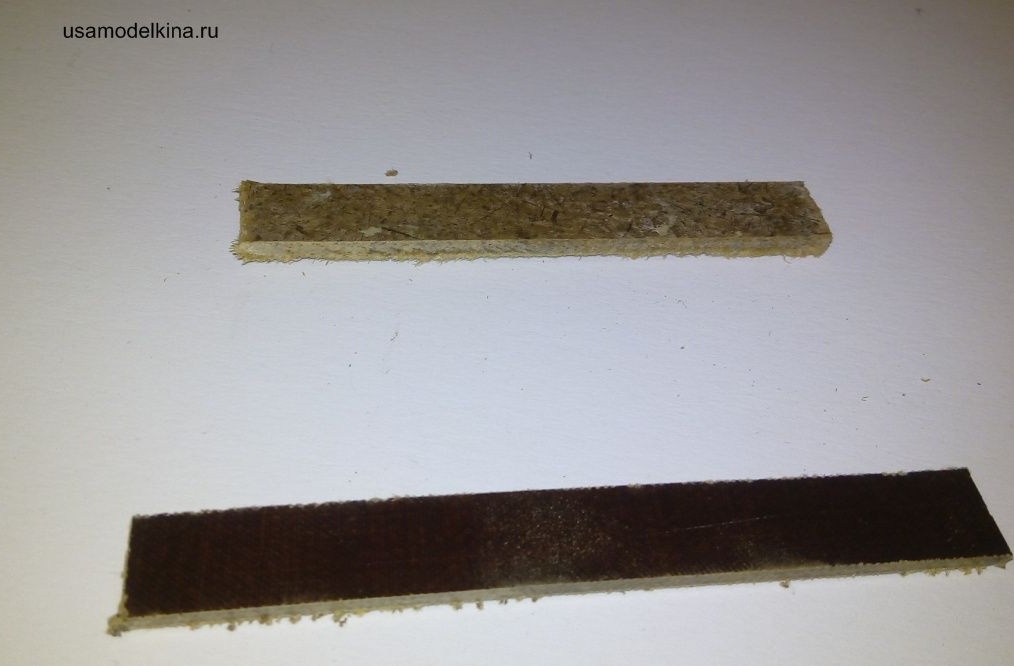
After I drilled a hole for the bearing, it turned out that its size is 26.5 mm. Since I do not have a drilling machine or stand for a drill, I drilled it with a manual electric drill, hence most likely the difference was 0.5 mm, and this was already too much to fit the bearing with interference. I got out of the situation very simply - I used 0.35 mm thick metal strips to seal the bearing in the hole. The strips were cut out with a width of 12 mm in the thickness of the uprights and a length equal to the circumference of the bearing in the outer diameter. After this procedure, the bearings fell into place with an interference fit just gorgeous! Perhaps this procedure needs to be provided in advance, in case someone wants to repeat this design.
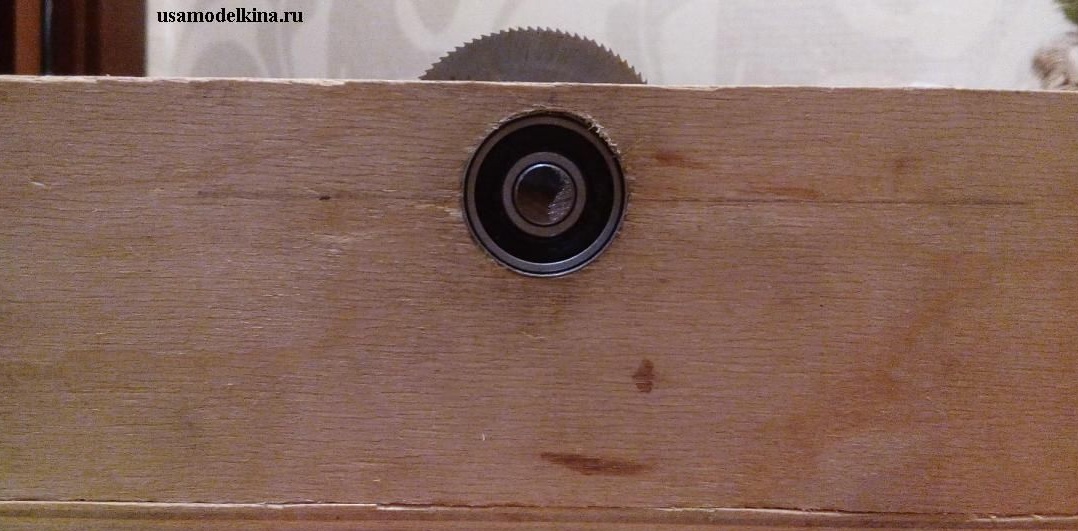
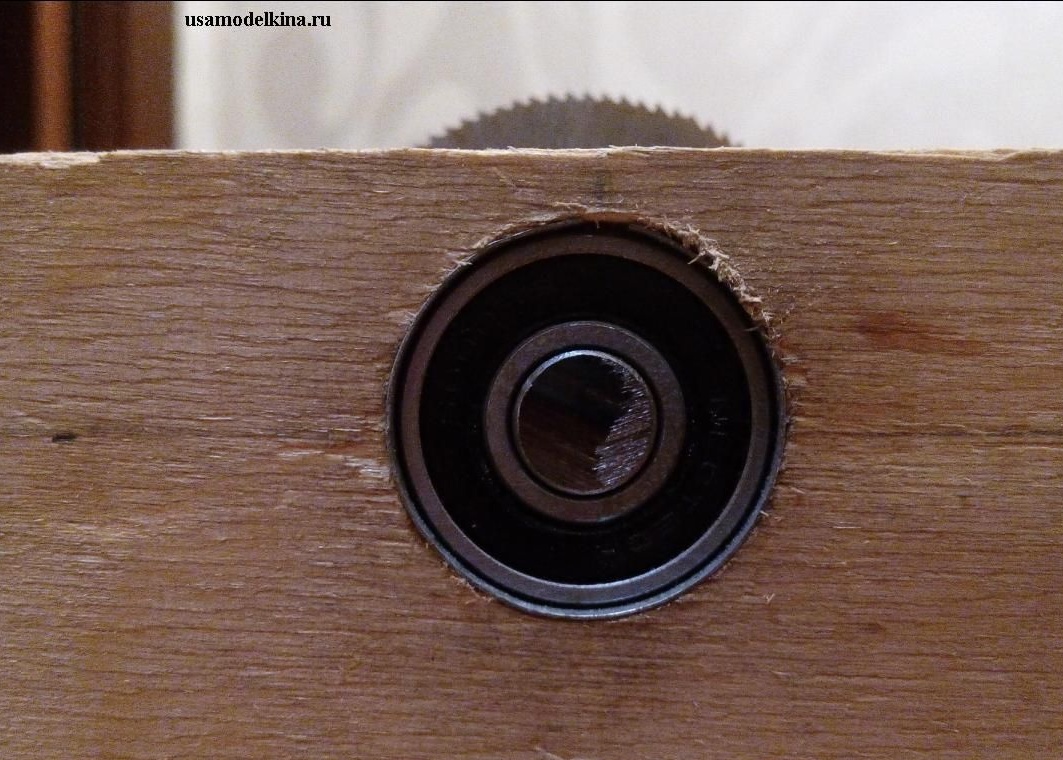
Initially, it was decided to put bearings with the name 6000 2RS (in our model 100) with an inner diameter of 10 mm for landing on a shaft, which can then be conveniently clamped into an electric drill chuck (maximum diameter of the chuck is 13 mm). These bearings are closed type, which is important - fine dust will not get.
The shaft for landing the saw blade is perhaps the most difficult and most critical part of my machine. Given the fact that I got the saw blade absolutely free from a friend and I did not choose it, this is where the dimensions of the future shaft come from.
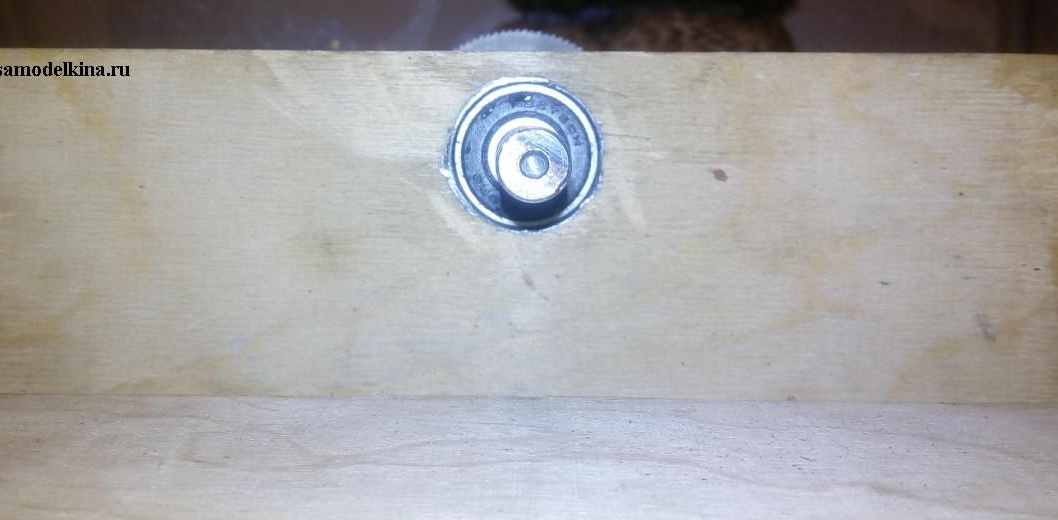
M16 hairpin was selected by the diameter of the saw blade seat. Next, it is necessary to grind under the dimensions of the bearing seat (10 mm) from one and the second side of the stud. On the side where the shaft will be clamped into the electric drill chuck, on a lathe, grind 60 mm, on the second side it is necessary to grind on the width of the available bearing, I designed 10 mm for accuracy. Many will argue that not everyone can afford working on a lathe and this procedure requires special skills, so the game is not worth the candle, but I want to convince everyone of the opposite. The costs of manufacturing such a shaft are completely leveled by the stability of the machine (vibration is scanty, the cutting accuracy is high). I also do not have a lathe, nor the skills to work with it (apart from technological practice at the university), but a familiar locksmith machined me a shaft for a symbolic price (about $ 1), because the part is not difficult to perform. As they say - everything is in your hands, gentlemen!
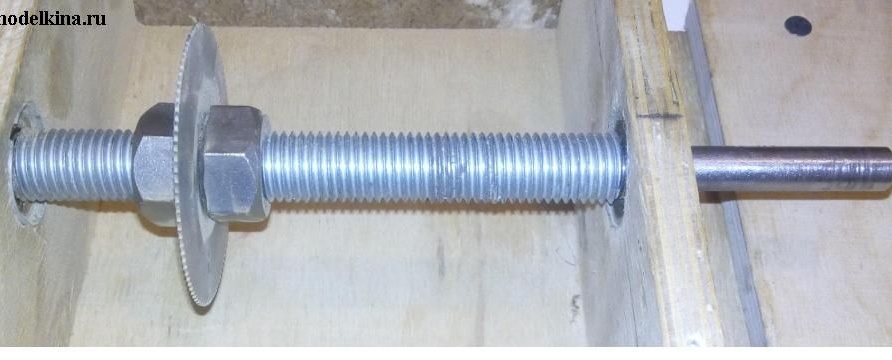
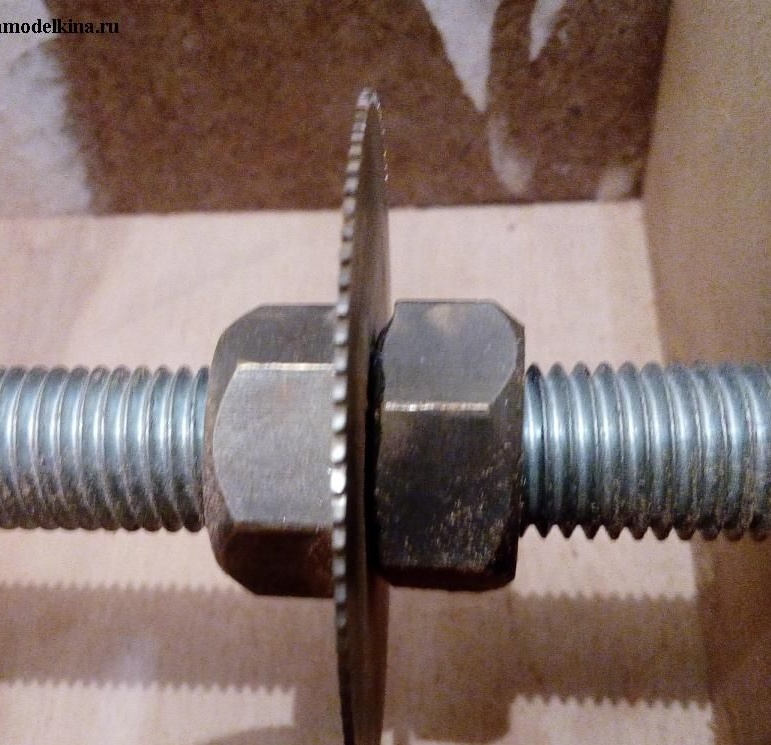
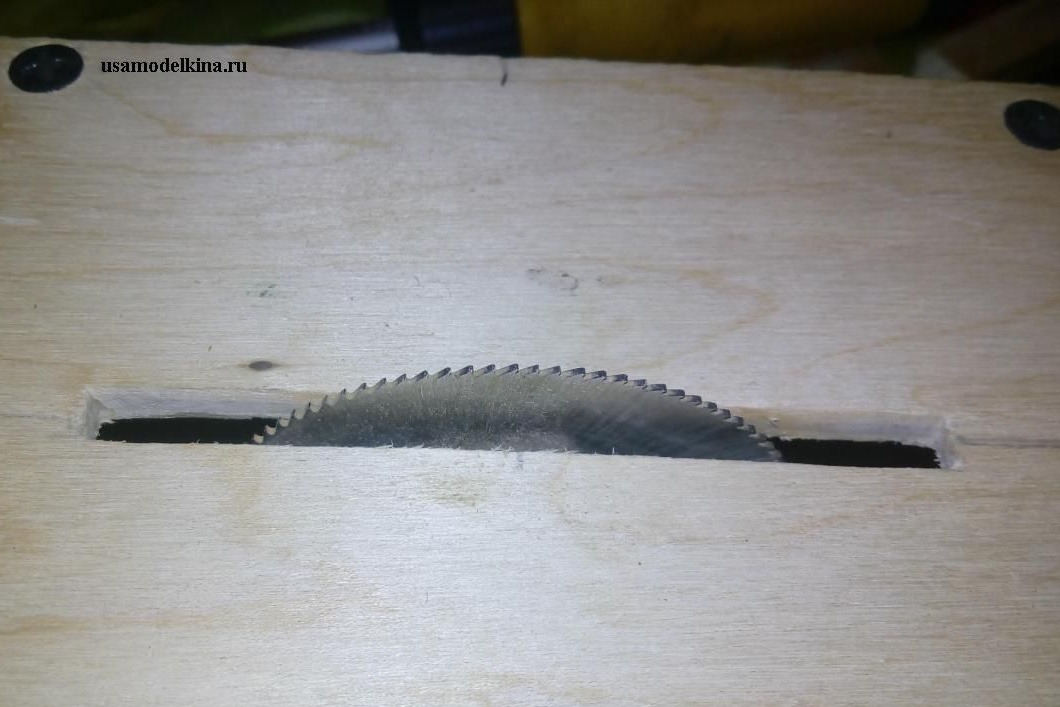
The saw blade, as I wrote earlier, got me completely free, with an outer diameter of 62 mm, an inner diameter (under the seat) of 16 mm and a thickness of 0.8 mm. Fine-toothed - did not count the number of teeth. A small tooth gap prevents the sawing material from wedging the saw blade. Having estimated the location of the saw blade on the shaft, I correctly set it (the main alignment) and clamped it with two M16 nuts.
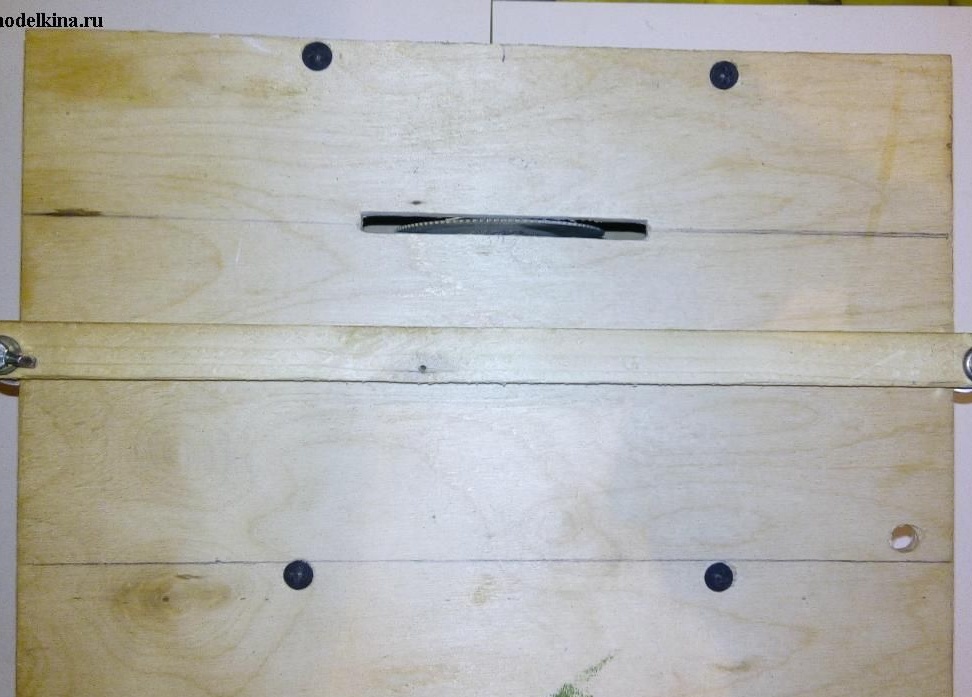
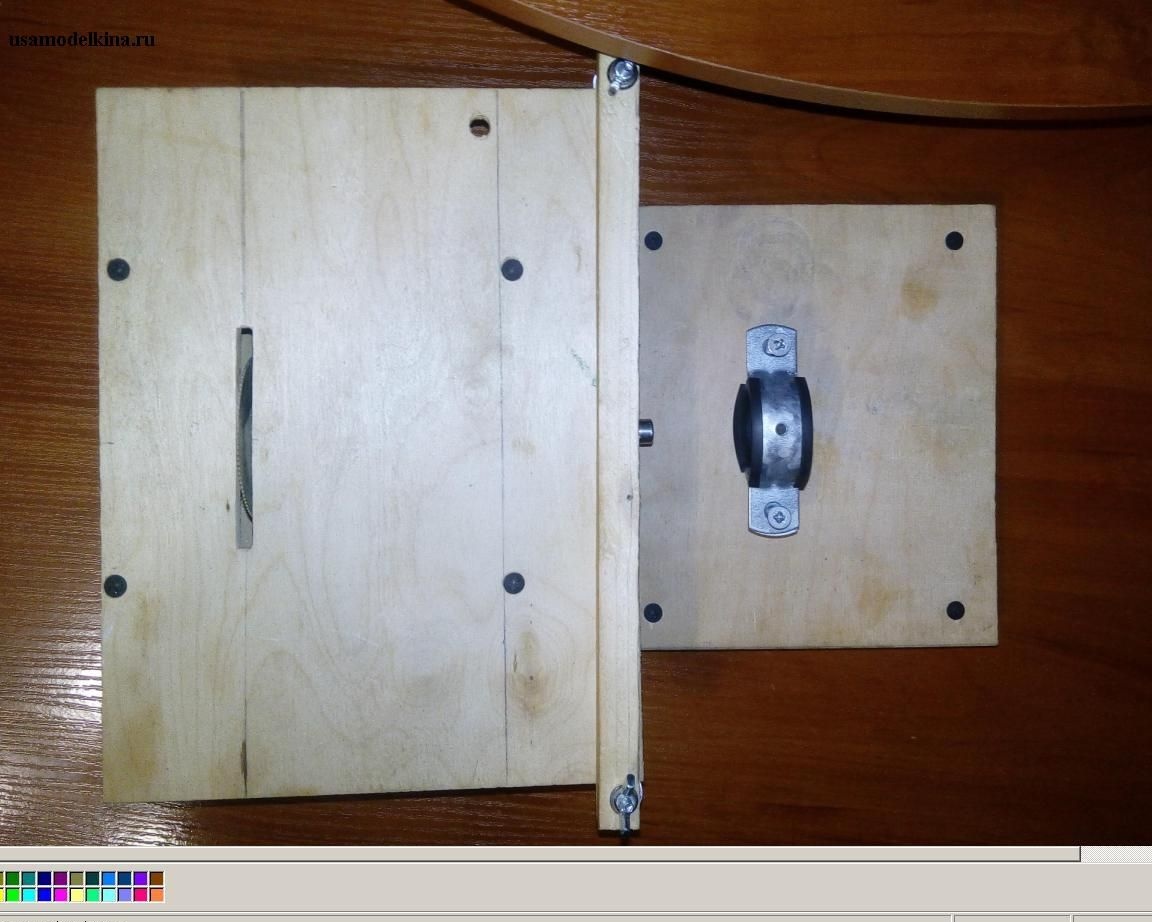
A working table measuring 190 × 250 mm is made of 5 mm plywood. The length of the slot for the saw blade is determined by its diameter. I made it a bit with a margin - 75 mm long and 5 mm wide. Propyl made an electric jigsaw. I don’t have to cut small details, as for modeling, so this cut was optimal for me, although a cut width of 2 mm in my case would be sufficient. The dimensions of the working table must be selected based on the convenience of mounting the machine shaft in the electric drill chuck.
Assembly
Each strut with pressed-in bearings was fastened to the base with three thick self-tapping screws (5 mm) to betray the rigidity structure. The distance between the uprights was 138 mm (axial). The desktop was fixed on 4 self-tapping screws (3.5 mm). Naturally pre-drilled holes of smaller diameter, to prevent delamination of plywood.
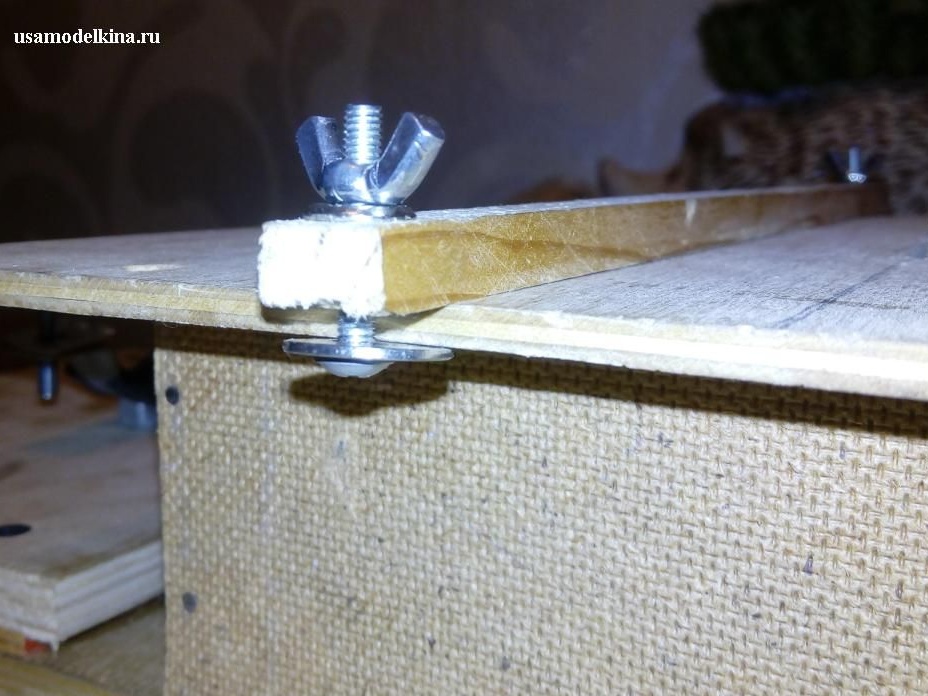
As a guide, I used a wooden beam 15 × 10 mm, 280 mm long, lying around my side, with flat sides. Of course, it’s better to use a small metal corner, but I didn’t find one. On the edges of the beam, taking into account the width of the working table, I drilled 4.1 mm holes for M4 × 25 screws, on which I installed washers with wide fields from the bottom of the timber to attract the timber to the desktop. I put M4 “nuts” on top of the screw for convenient tightening.
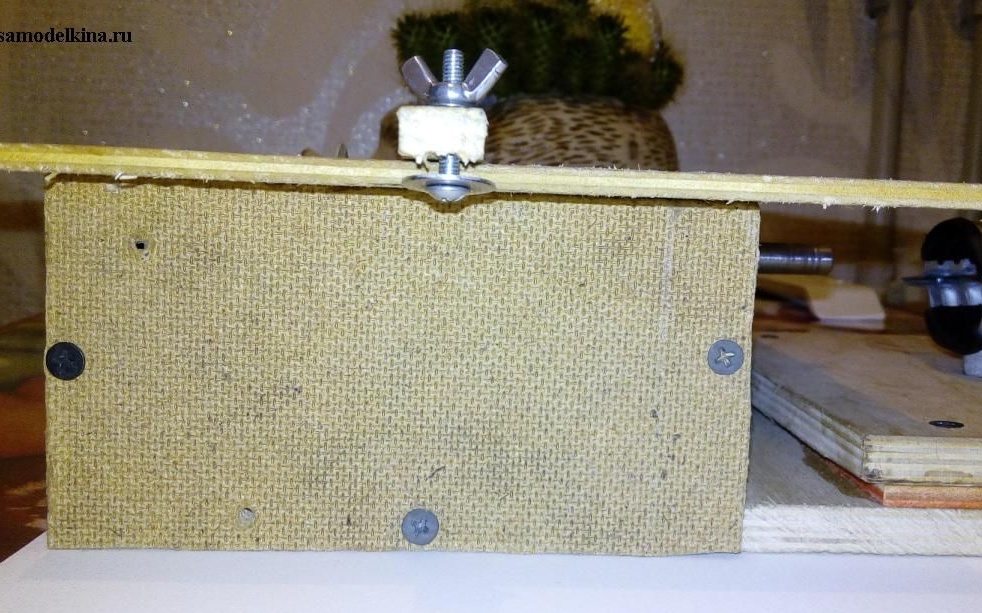
From the ends of the machine, the opening formed between the racks, the base and the working table was covered with fiberboard segments to prevent scattering of cut products throughout the room. On the one hand, he left the opportunity to periodically clean the sawdust, putting the fiberboard on the screws, on the other hand, he nailed it with small nails.
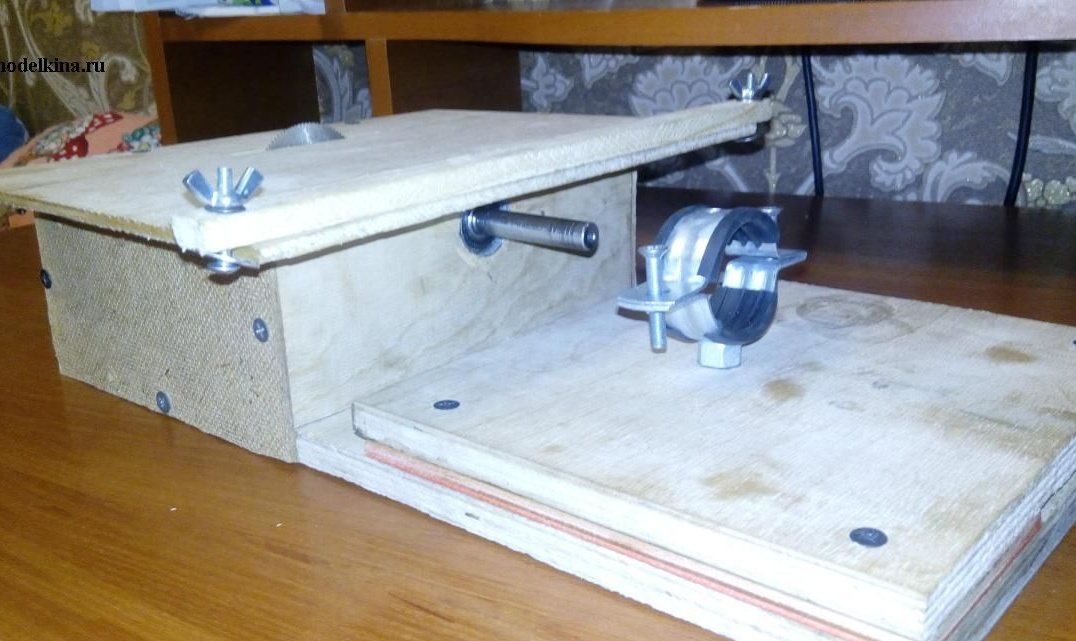
Actually assembly machine without electric drill
Conclusion
In conclusion, I would like to add that my design is fully developed for the materials and working tools that I had. Anyone who has the opportunity, he can make the machine completely out of metal, which only add stability to the machine.
The work of the machine is smooth with minimal vibration. For added safety (as you know, it is never superfluous) and protection against accidental movement, I attract my machine tool with a makeshift clamp to the work surface. The saw blade goes beyond the side of the machine’s desktop by 10 mm, which is just right for my amateur radio needs. The machine at medium speed electric drill easily cuts textolite with a thickness of 2 mm, fiberboard with a thickness of 5 mm, I have not tried other materials yet.
Well and the most important thing! Always maintain safety precautions and your crafts will please you!