

Probably one of the basic projects on arduino I am parking sensors. But this article will not describe the creation of a conventional parking sensors, but parking sensors with manual adjustment of the critical distance. In the process of creating this device, you will increase your skills in circuitry and programming.
The main components:
• arduino Nano / Uno board
• ultrasonic distance sensor HC-CR04
• 6 LEDs
• 6 resistors at 220 ohms
• 2 resistors per 10 KOm
• 2 clock buttons
• piezo squeaker
• delirious board
• dad dad wires
• shoe sponge (for the case)
From the tools:
• soldering iron
• thermo - glue
Consider the algorithm of the device
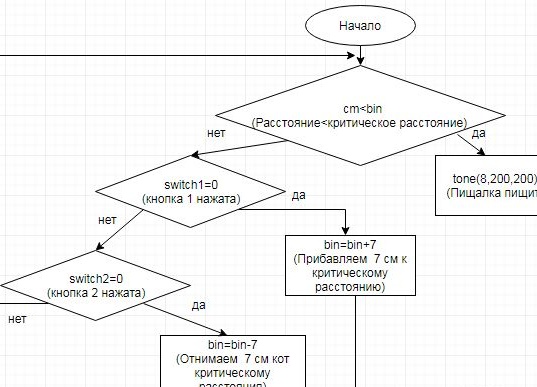
After viewing the algorithm, we collect the scheme on a delirious board:
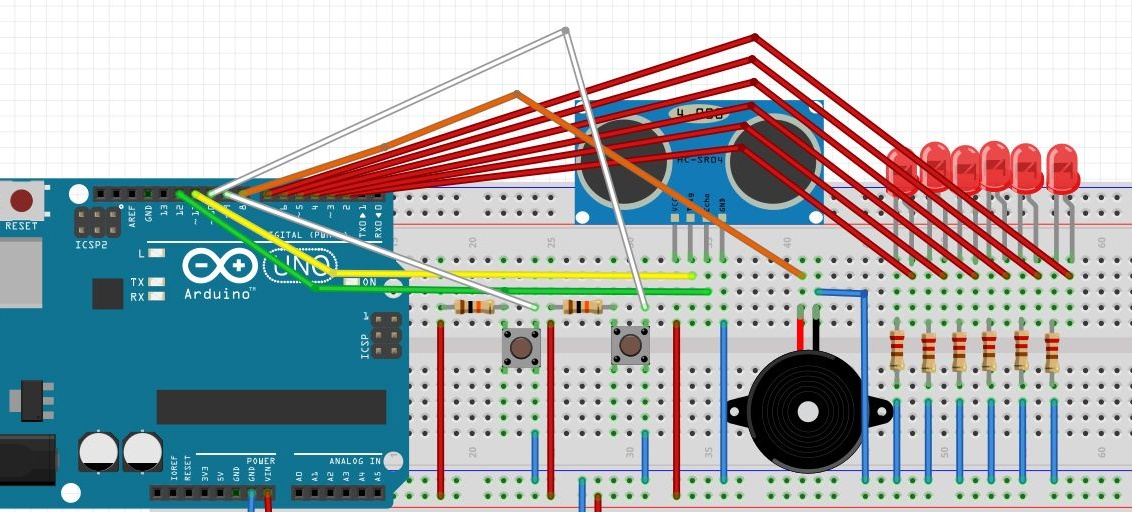
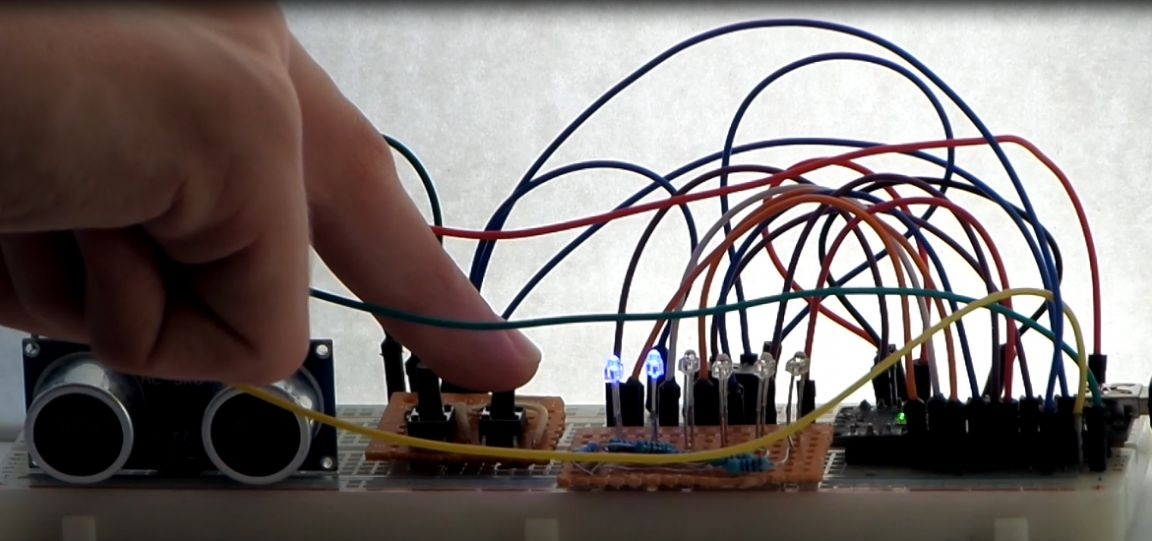
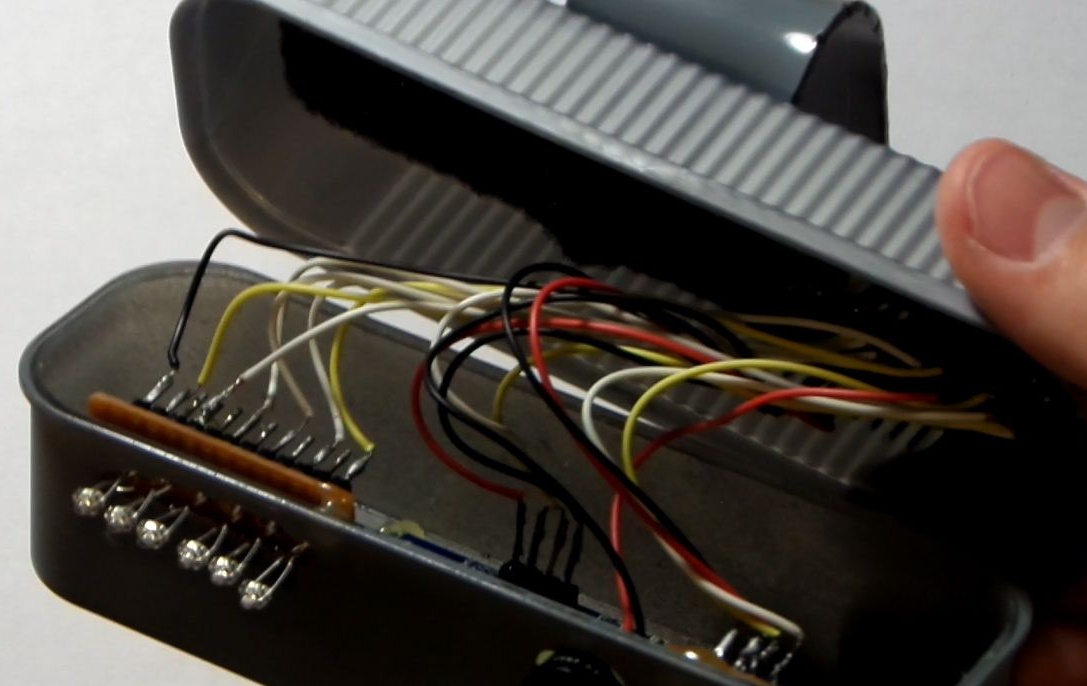
Since I mounted the circuit in the case, it was decided to make mini shields of buttons and LEDs.
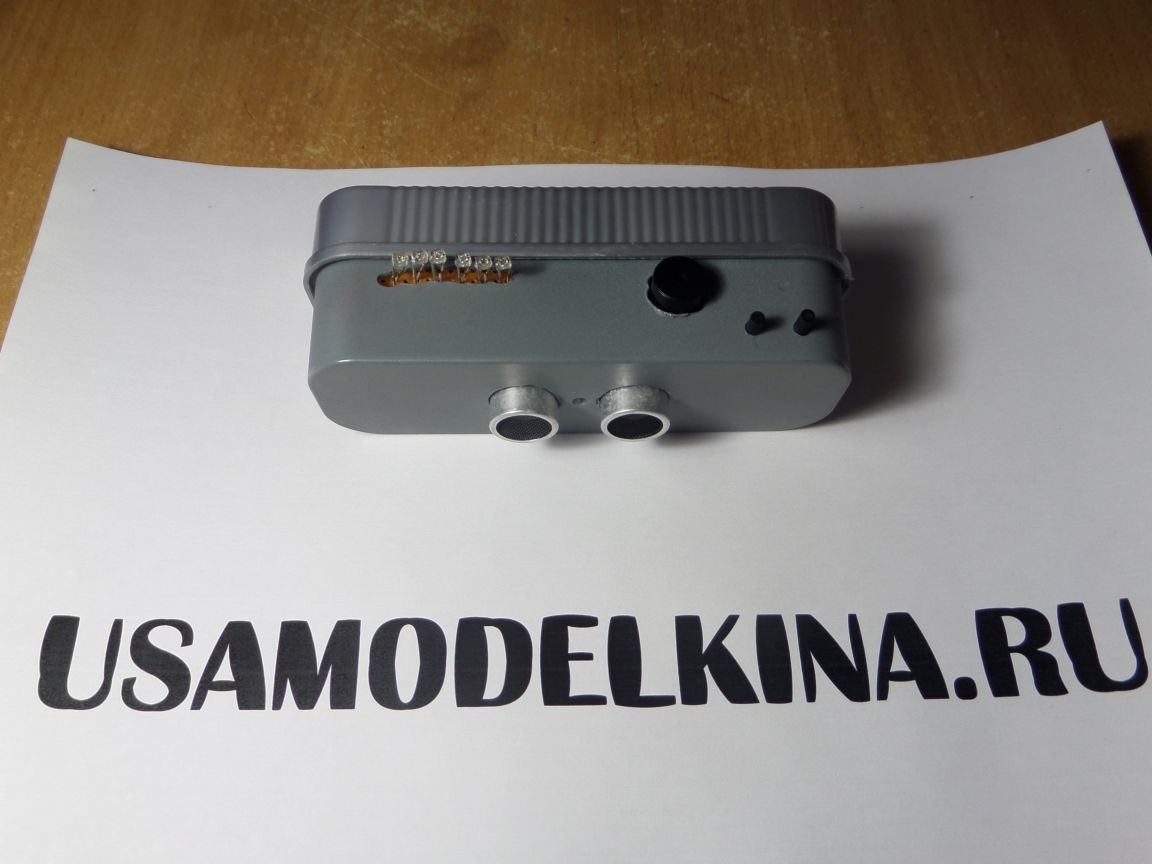
The case of the device was made of a box from a sponge for shoes.
It looks like the device inside.
Let's see the code.
int switch1 = 9; // Button 1
int switch2 = 10; // Button 2
int pin = 2;
int bin = 40; // Initial critical distance in centimeters !!!
int echoPin = 12; // Echo pin on HC-SR04 module
int trigPin = 11; // Trig pin on HC-SR04 module
int buz = 8; // Pin tweeter
boolean lBut1 = LOW;
boolean lBut2 = LOW;
boolean cBut1 = LOW;
boolean cBut2 = LOW;
void setup () {
  Serial.begin (9600);
  pinMode (trigPin, OUTPUT);
  pinMode (echoPin, INPUT);
  pinMode (switch1, INPUT);
  pinMode (switch2, INPUT);
  pinMode (2, OUTPUT); // LED 1
  pinMode (3, OUTPUT); // LED 2
  pinMode (4, OUTPUT); // LED 3
  pinMode (5, OUTPUT); // LED 4
  pinMode (6, OUTPUT); // LED 5
  pinMode (7, OUTPUT); // LED 6
  pinMode (8, OUTPUT); // Squeak
}
boolean debounce (boolean last)
{
  boolean current = digitalRead (switch1);
  if (last! = current)
  {
    delay (5);
    current = digitalRead (switch1);
  }
  return current;
}
boolean debounce2 (boolean last2)
{
  boolean current2 = digitalRead (switch2);
  if (last2! = current2)
  {
    delay (5);
    current2 = digitalRead (switch2);
  }
  return current2;
}
void loop () {
  int duration, cm;
  digitalWrite (trigPin, LOW);
  delayMicroseconds (2);
  digitalWrite (trigPin, HIGH);
  delayMicroseconds (10);
  digitalWrite (trigPin, LOW);
  duration = pulseIn (echoPin, HIGH);
  cm = duration / 58;
  Serial.print (cm);
  Serial.println ("cm");
  delay (10);

  cBut1 = debounce (lBut1);
  if (lBut1 == LOW && cBut1 == HIGH)
  {
    pin = pin-1;
    bin = bin-7; // The number 7 means subtraction by 7 cm from the critical distance !!!
  }
  lBut1 = cBut1;
  digitalWrite (pin, HIGH);
    cBut2 = debounce2 (lBut2);
  if (lBut2 == LOW && cBut2 == HIGH)
  {
    pin = pin + 1;
    bin = bin + 7; // The number 7 means the addition of 7 cm from the critical distance !!!
  }
  lBut2 = cBut2;
  digitalWrite (pin, LOW);

  if (cm  0)
  {
    tone (8,200,200);
    delay (300);

  }
  else
  {
    noTone (8);
  }
}
The bin values can be changed to a more convenient for you.
As a result, the device regularly performs its functions.
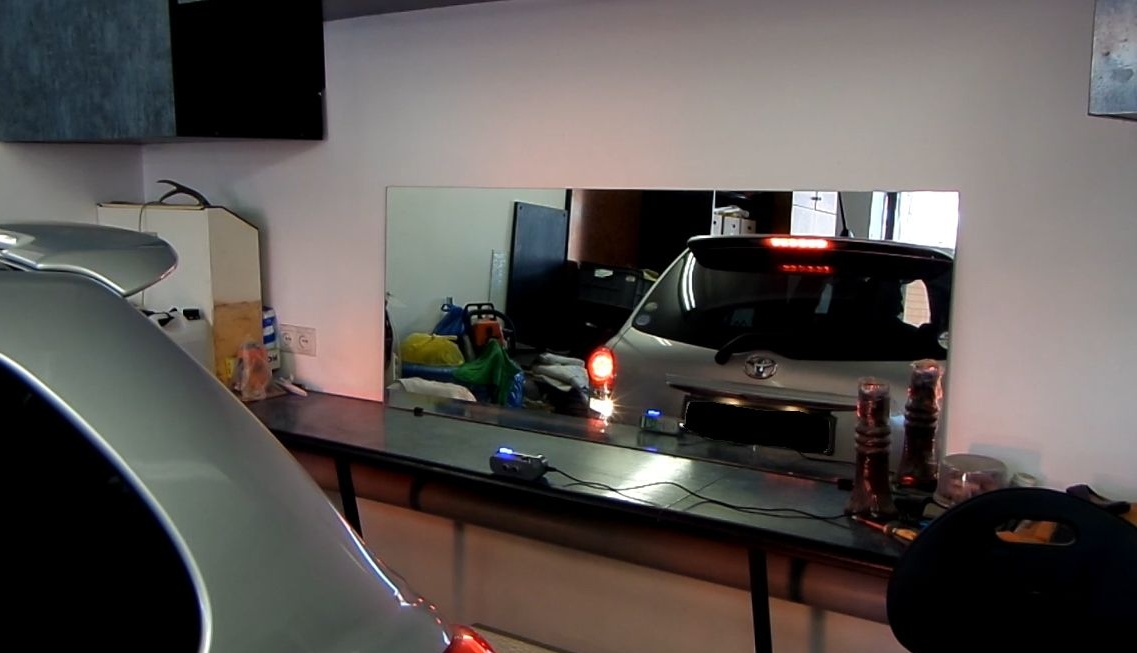
This article will help you make the same parking sensors without much effort.
I wish everyone good luck in repeating this device. I hope my guide was useful to you.