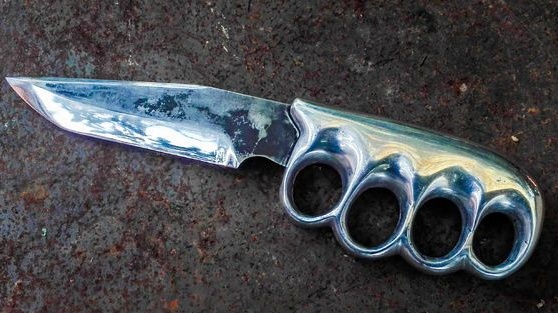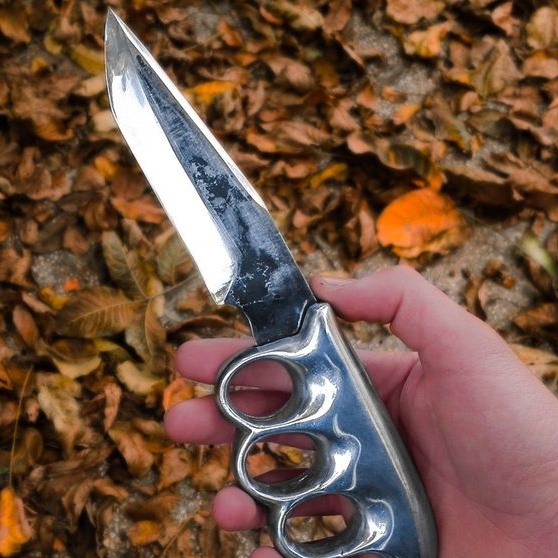
In this instruction, I will show you an interesting design of the knife, the handle of which is made in the form of a brass knuckles. Such a knife is held securely in the hand, and if necessary, the handle can easily become a defense device. Everything is done simply, you do not need either wood or pins, only a source of aluminum and a furnace. The blade itself is made of steel with a high carbon content, which allows you to harden the metal.
Materials and tools for homemade:
- source of aluminum;
- a furnace suitable for melting aluminum and all the necessary tools;
- a source of high carbon steel (the author used 1070);
- grinder;
- It is desirable to have a tape cutting machine;
- belt grinding machine (will facilitate the work process);
- a finished template or materials for its manufacture;
- foam for the manufacture of a handle profile;
- electric household stove;
- sandpaper of different grain size;
- clay or sand for casting.
The process of making a knife:
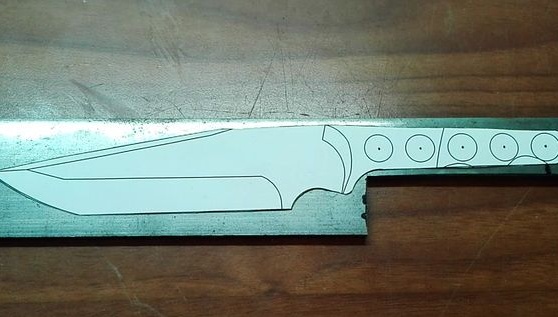
Step one. Cut the blade profile
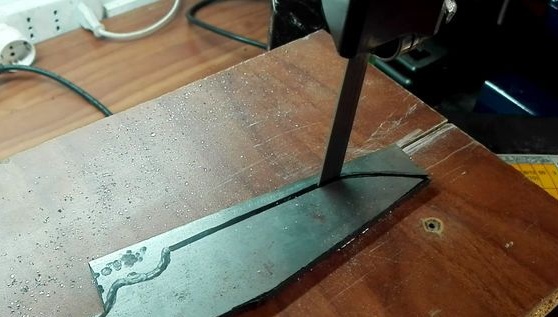
First of all, you will need to cut the blade from a piece of metal. To do this, download a template from the Internet or come up with it yourself, and then print it on a printer. Cutting out a paper template, the author simply glues it to the metal, and then cuts it with a band saw. This can be done with an ordinary hacksaw, grinder, though the process will be much longer.
The author’s workpiece thickness is 5 mm, and 1070 steel acted as the starting material. You can take an old flat file to the edge and make it out of it, there is also excellent steel for knives.
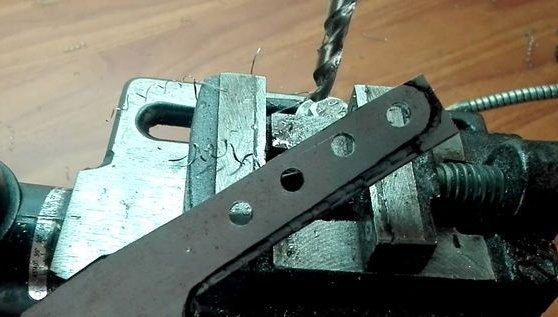
Drill holes in the blade, they are needed in order for the red-hot metal to come in and thereby form a reliable fastening.
View online file:
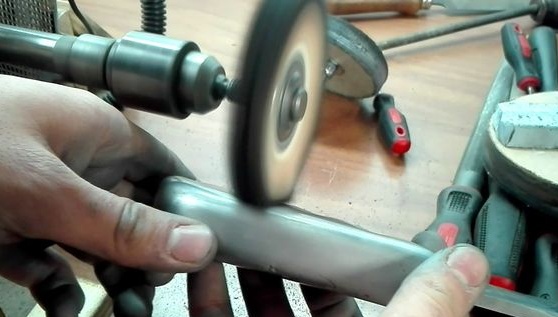
Step Two Blade grinding
For further work it will be very convenient to use a belt sander, if you do not have one, you can perform the work with a file and an emery cloth. First of all, we process the profile of the blade, grind off everything unnecessary, remove irregularities, bring the metal to a shine.

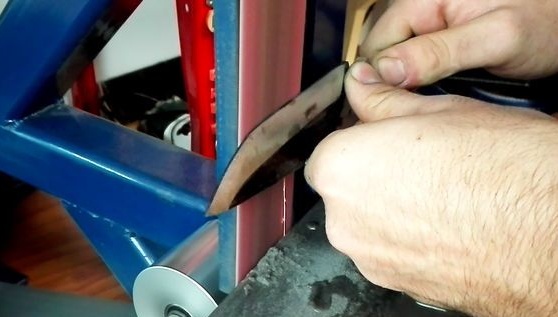
Next, take a felt-tip pen and mark future bevels on the blade. In total, you need to know two parameters to make the bevels smooth. The first is the bevel width, and the second is the centering line on the blade. Based on these two lines, we derive bevels on each side of the blade. The center line can be drawn with a drill of the same diameter as the thickness of the workpiece.We work slowly, until the blade is sharpened to a thickness of less than 1 mm, as the metal will burn during hardening or crack at all.
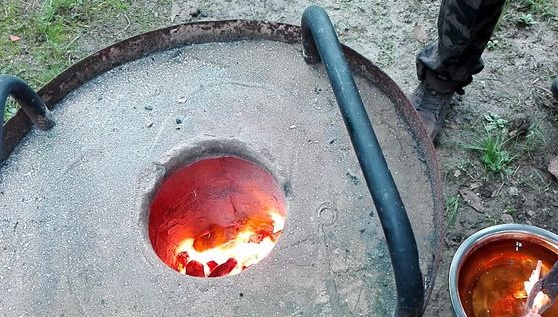
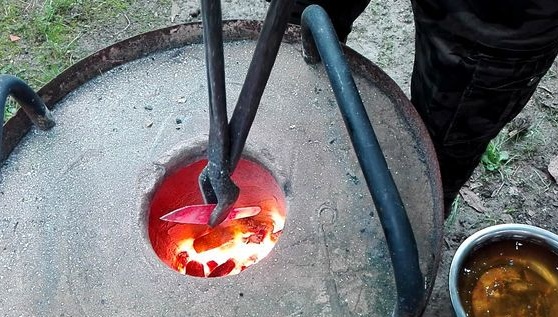
Step Three We temper the blade
If you want your knife not to go dull for a long time, temper it. For this, the metal needs to be warmed up for a bright yellow color and cooled in oil. To accurately understand whether the metal is heated to the desired temperature or not, bring a permanent magnet to it, it should not be attracted to the workpiece. The author used vegetable oil, many use motor oil, such as mining.
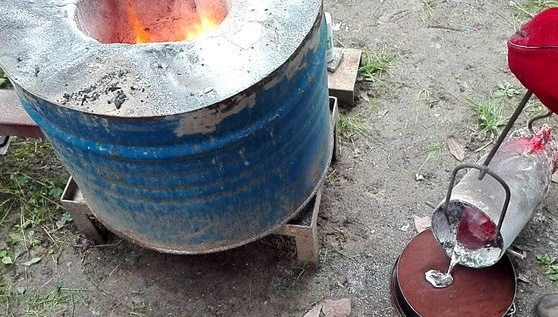
Step Four Cast aluminum handle
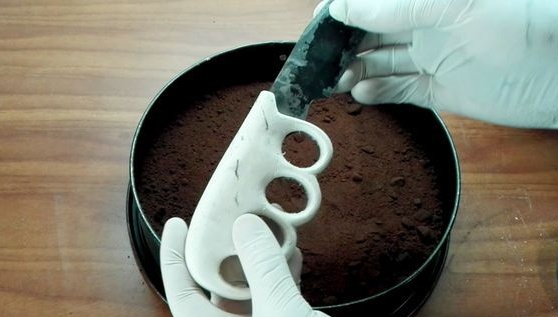
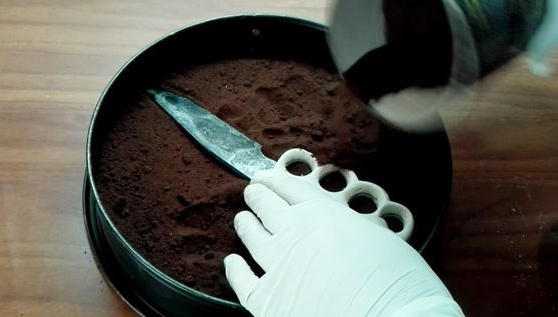
The author makes a pen from nothing, more precisely from hot aluminum, in which the blade subsequently remains shackled with metal and does not require additional fixation. First of all, you will need to make a handle profile, then you will need fine-grained foam. We cut out the profile from it, bring it to the ideal, and then install the blade in the handle and bury it in sand or clay, not forgetting to make a filler hole.
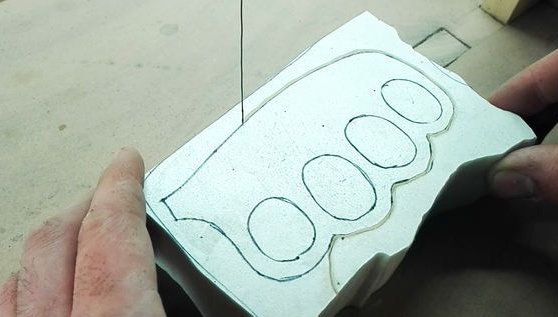
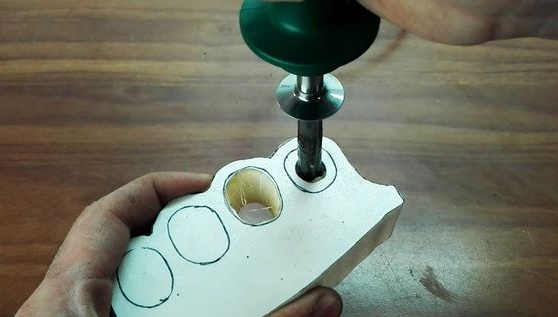
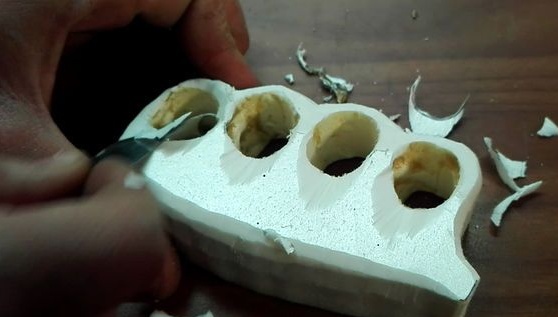
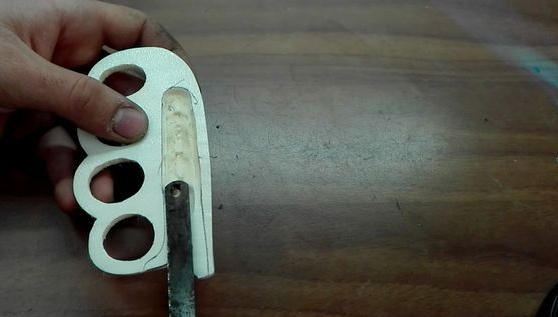
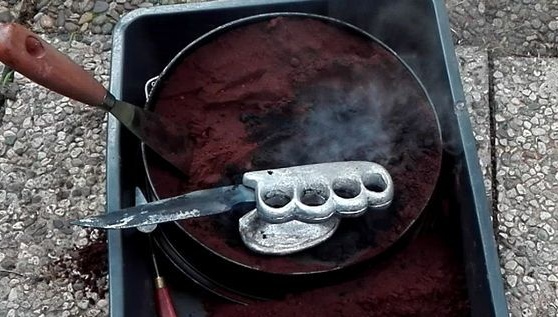
The author made a pen from two halves of polystyrene foam, and then between them held a blade. But you can make the handle whole, and then make a groove under the blade in it.
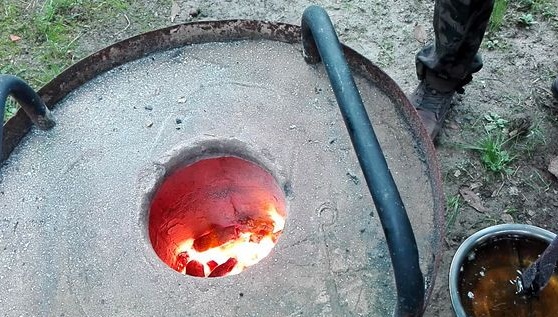
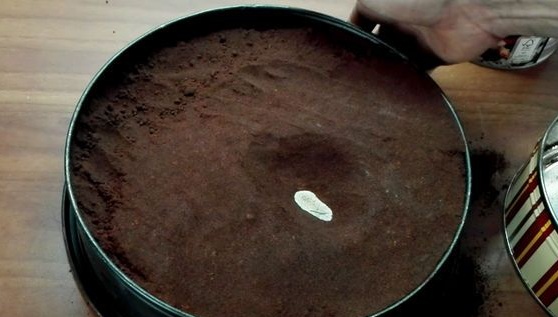
After heating the aluminum to a liquid state, pour it into the hole and wait until the metal hardens. Here you need to be careful, as steam, smoke and hot metal can splash out of the sand.
Step Five Metal tempering
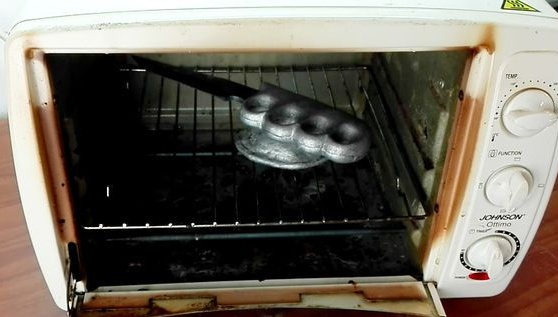
Earlier we hardened the metal, but this is not the final procedure, hardening is necessarily accompanied by a vacation. This procedure is necessary in order to make steel a little more flexible so that it can withstand loads, that is, so that the knife does not crumble, just falling to the floor.
For a vacation you will need an ordinary household oven, heated to a temperature of 200aboutC. In the oven, the knife should lie for an hour, and then let it cool with the oven.
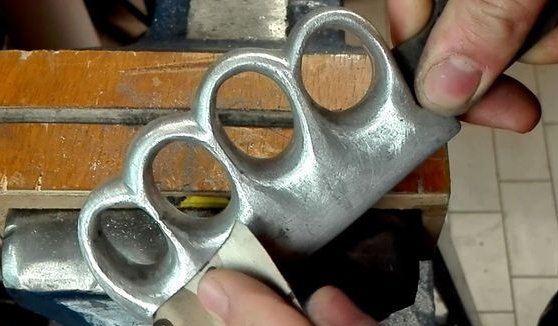
Step Six Final processing
We take the grinder and cut the gate from the handle. Next, you will need various grinding tools, the task will be to carefully grind the handle profile. At the end, the author polishes the pen to a mirror shine. For fine work, use a fine emery cloth, and in the end a grinder with a polishing wheel will do. Also polish the blade.
That's all, the knife is ready. What do you think about this? It is done simply, it looks solid, and its functionality is good.